
Here’s how to make a bow for wreaths, tree toppers, packages, and more! Don’t buy those expensive bows when you can easily make one yourself with just ribbon and wire!
UPDATE: Many have asked for a video tutorial for making the bow and I’ve just added one! Scroll down for step-by-step bow instructions AND a complete video tutorial. Make sure your volume is on!
I don’t know about you, but for whatever reason, no matter how hard I try to carefully store a wreath after the season, the next year, it doesn’t come out of storage looking quite as good as when it went in. So now, I just use one wreath for all seasons, which helps to keep it nice year-round and is a less expensive alternative versus buying multiple wreaths!
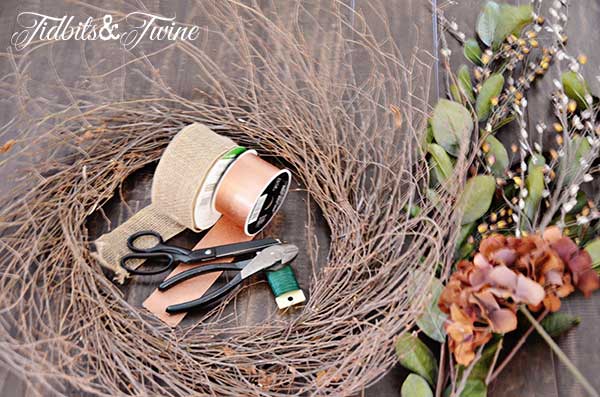
I purchased a bare twig wreath from a local craft store to use as the base (you could also use a grapevine wreath). On sale, it cost just under $14. For each season, I just wire on different accent pieces to create a new look. For fall, I picked up some faux berry stems and pussy willow branches (on sale for 50% off plus I used a 20% off coupon) and also used two different ribbons that I had on hand.
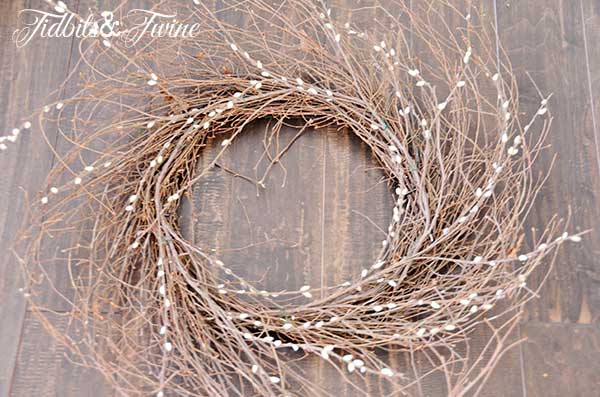
I first wired the pussy willow all the way around, making sure that I kept it facing the same direction as the twig wreath.
Next I wired the berry stems onto the wreath. I took a picture of this step to show you, but didn’t take the time to check my photos in between each step and afterward, realized that some of them were so blurry that I couldn’t share them! You’ll have to use your imagination as to what it looks like with the berry stems wired on top of the pussy willow.
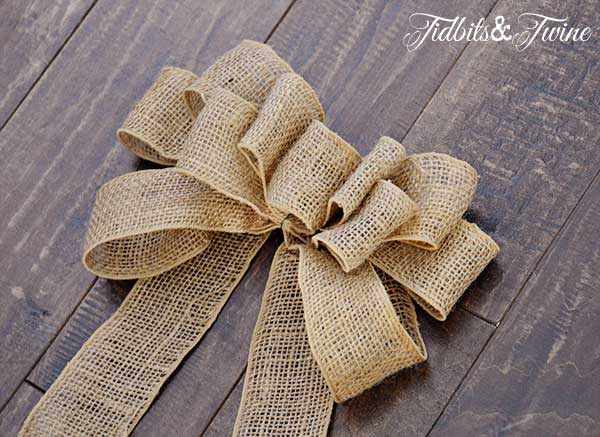
I then decided to add a wire burlap bow to the bottom center of the wreath. The next steps will show you how to make a bow for a wreath. This technique will work with any type of ribbon, although wire is preferable so that it will hold its shape. Looking for similar burlap ribbon? You can find it on Amazon HERE.
How to Easily Make a Bow for Wreaths and More!
Here’s how to make a bow for wreaths, tree toppers, packages, and more! Don’t buy those expensive bows when you can easily make one yourself with just ribbon and wire!
Materials
- Wired ribbon
- Wire
Tools
- Wire cuter
Instructions
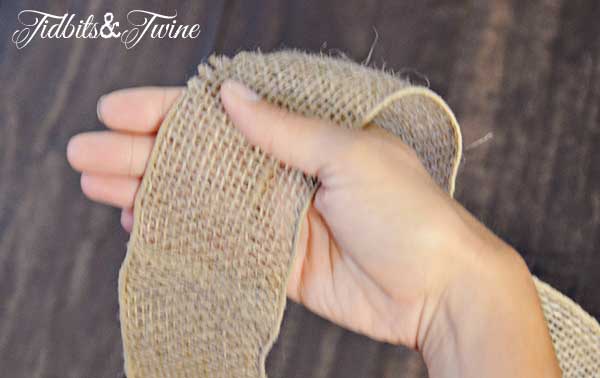
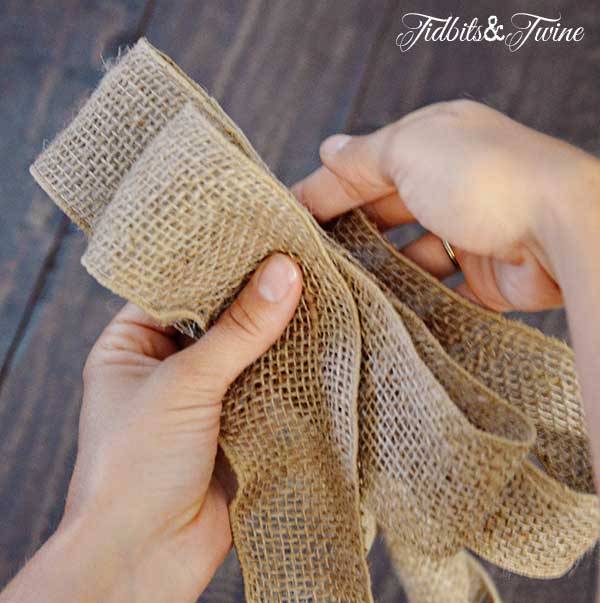
- Start with the Tail - Hold the ribbon in your hand and leave a tail long enough to work as one end of your bow plus the length you’ll need for the center loop. When in doubt, leave more! The tail should be in the front of your hand.

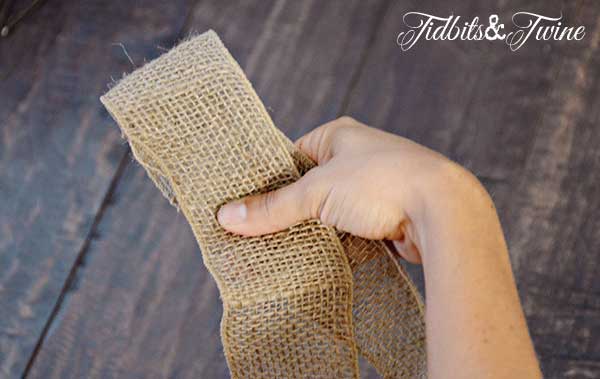
- Create 1st Loop - Fold a length of ribbon backward to create a loop and pinch with it your thumb. This loop will be the smallest (inside) loop on the left side of your bow. The tail of your bow will continue to hang down in front.

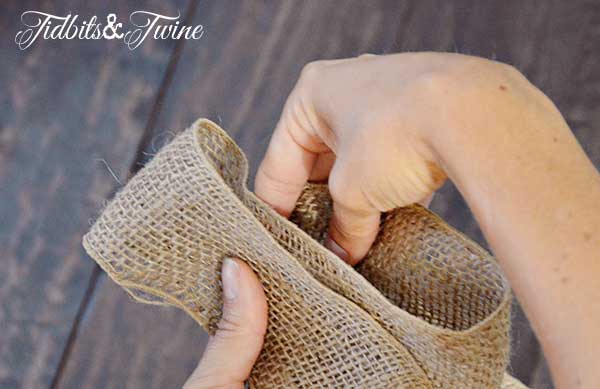
- Fold to Create Second Loop - Fold another loop backward on the other side that matches in size to the first loop. This will be your smallest (inside) loop on the right-side of your bow, so you want the two sides to be even. Each loop thereafter will get progressively bigger. Note: if your ribbon is one-sided, be sure to twist after each loop so that the good side always faces out.
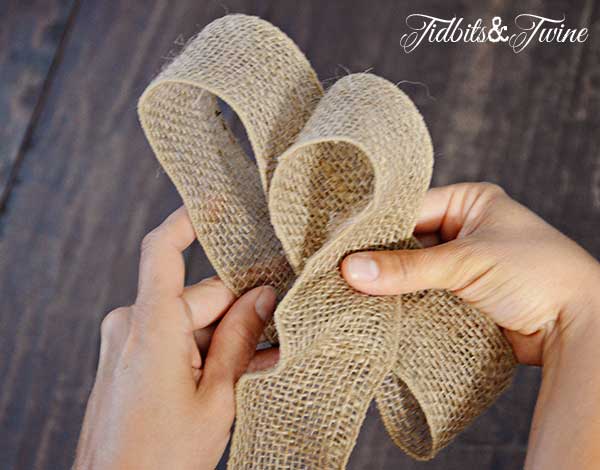
 You should now have two matching loops, one on the left and one on the right. The tail is still hanging down in the front.
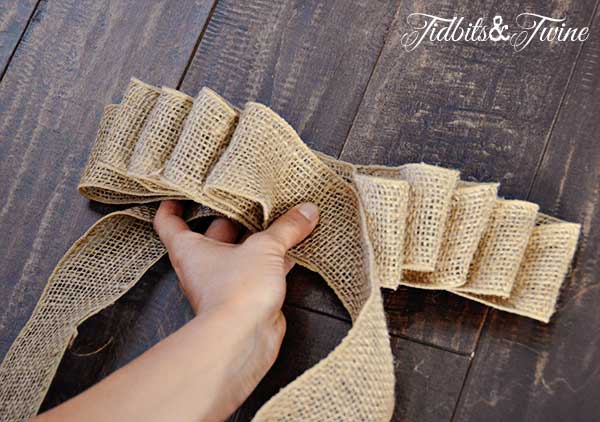
- Continue Creating Loops - Continue making loops on the back alternating from the left to the right. Remember that each loop should be a bit bigger than the one before it.


- Finish with an Odd Number - When you have reached your desired size, you are ready to finish it off! The number of loops you create and the size of the loops will depend on the size you want for your finished bow, but regardless, always use an odd number of loops on each side. Here you can see that I have five loops per side going from smallest to biggest and one tail of the bow is on the front and the other (still attached to the spool) is on the back.

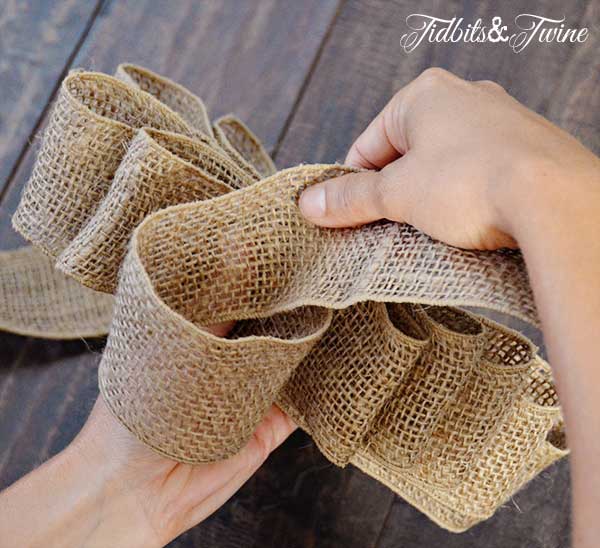
- Create Center Loop - This one was hard to photograph, so I’ll do my best to explain! In this step, you’ll be creating the center loop of your bow. Take the tail end that is on the front and create a backward loop with the tail end now going down over the top of the bow to the back.

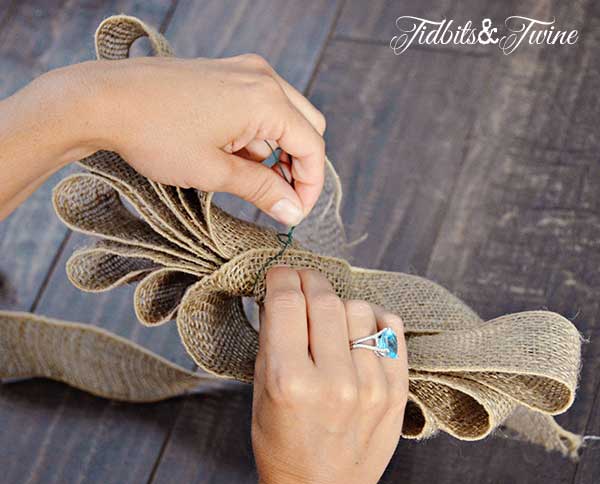
- Secure with Wire - To secure the bow, use a length of wire that is twisted around the back. Wire is ideal because it hold securely, but also allows you to move the loops around to spread out the bow when you’re ready to fluff it. A twist tie works, too!

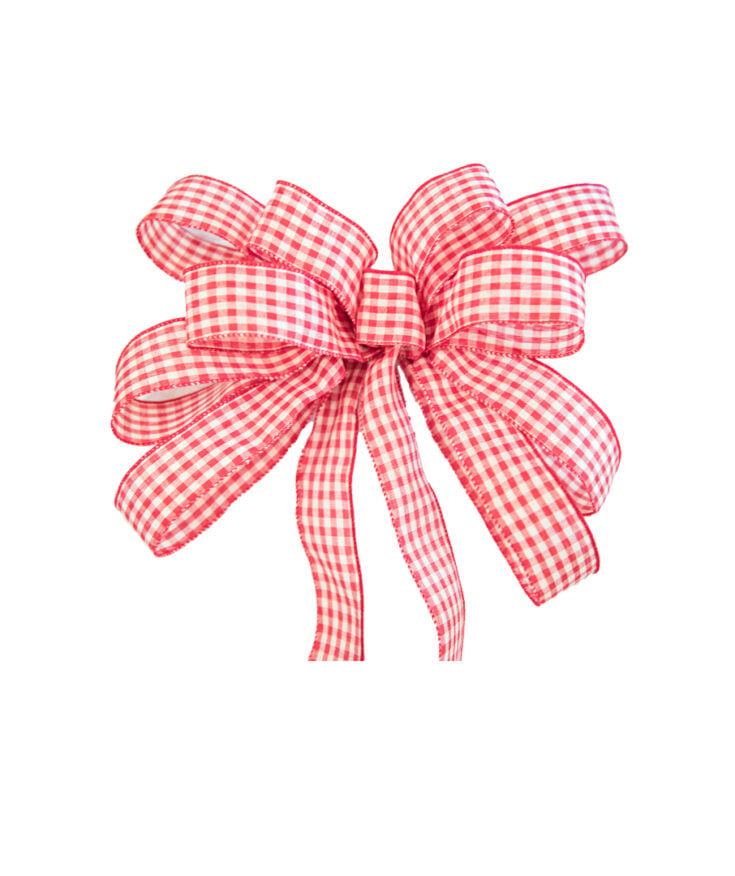
- Fluff and Finish - Now you’re ready to fluff! For this, all you need to do is pull the loops alternating up and down so that each one is visible. I tend to like the biggest loops on the back to come down toward the tail of the bow, as shown below.

 You should now have two matching loops, one on the left and one on the right. The tail is still hanging down in the front.
Notes
Use your bow for wreaths, tree toppers, packages, and more!
Need more help? Watch the tutorial here:
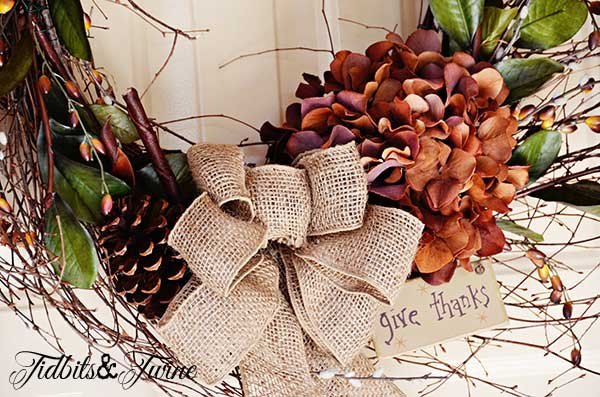
Whew! Now that the bow was made, I was ready to finish the wreath. I added the head of a faux hydrangea, some pinecones, and a small fall sign.
Everything is wired – not glued – so that for winter, spring and summer, I can just remove these elements and add new ones. I find that it’s much easier to store faux stems than entire wreaths, plus they are less expensive to buy.
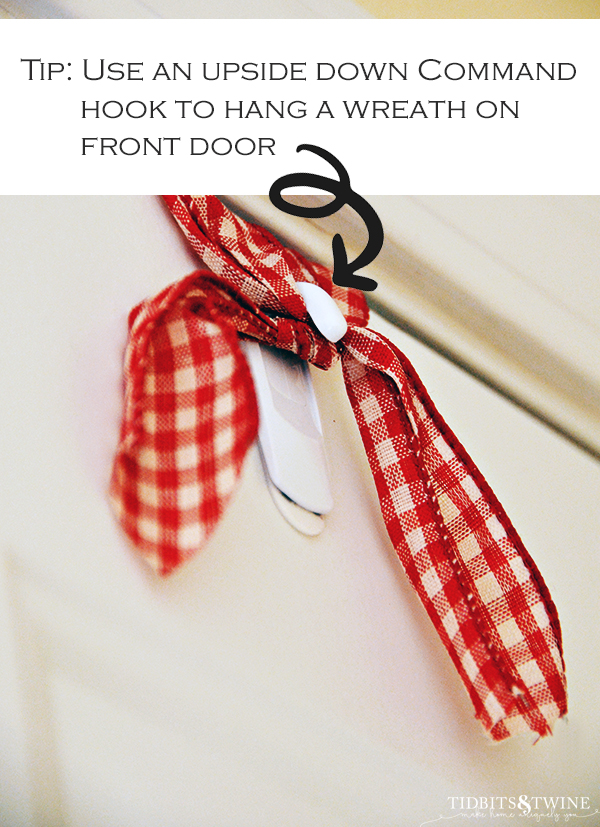
Tip: Here is a great and easy way to hang a wreath on the front door! Simply turn a Command hook upside down on the inside of the door to hold your wreath. I prefer this over a wreath hanger because the hangers always clanged against my door whenever we shut it, but now it is silent and the wreath is firmly in place!
More Decorating Tips
- Interior Design Style Quiz – What’s Your Home Decorating Style?
- Simple Fall Ideas for the Kitchen
- Easy Fall Decorating In the Family Room
- Learn How to Decorate a Mantel in 3 Simple Steps
- Marble Tile Bathroom – My Experience with Care and Maintenance 2 Years Later

Join the Community
Let’s keep in touch! Get exclusive artwork plus the latest news delivered directly to your Inbox!
Awesome post! Keep up the great work!
I had been struggles with a fancy bow.. you have a video to show? if so, just email me with your video, thank you
Hi Kim,
Thank so much for sharing – your wreath is stunning!!! I have been trying to replicate but am having trouble finding materials that look as nice as what you have, especially the greenery. Was that something you got at Michael’s also?
Hi Gina – So sorry for the delay in responding! Yes, I believe I found the greenery at Michaels as well. Actually, I have pretty good luck finding stems at Michaels that I like, but they can be pricey so I always wait for a sale or use a coupon. Good luck!
Comment
WONDERFUL to see I am doing it wrote . It never hurts to see how other people do thing . Thing you so much.
I love this wreath idea! I went to the local craft store and couldn’t find the faux stems or berries similar to yours. Where did you purchase these? Thanks for the inspiration!
Hi Marie – Thank you so much! I think I bought everything at Michaels, but this was my wreath from 2013 so I don’t know if they still carry the same items…although I really think I saw the berries on a recent trip there so they might still have them. Good luck with your search! :) Kim
Thanks for the reply. One more question if you habe time to reply. How many stems of the berries did you need to purchase? Thank you!!
Hi Marie – For this wreath, I think I ended up using two pussywillow stems and three stems of berries, but it really depends on what stems you use and how full you want your wreath.
Loving your work, how much did you use to tie the bow. Just wondering what length to purchase.
Hi Zahida – Oh dear I don’t remember!! I purchased a roll of ribbon from the craft store and so didn’t really pay attention to how much I was using. It depends on how many loops you add to your bow and how big you want it to be overall, but I *think* used used maybe 3-4′? So sorry I couldn’t be more specific!
Great wreath. I especially liked your idea of how you hang it. I have that same problem with it clanking, or the hanger keeps my door from closing tight. Thank for the great tip!
Shannon ~ bohemianjunktion.com
I make bows like that, but mine never turn out as pretty as yours! I need to perfect my technique! Pretty wreath too!
Beautiful! I love a good tutorial, and this one is perfect! The wreath is beautiful, and I love how you were able to get double seasons out of it.
Hugs …
That bow looks fabulous, you certainly make it look easy!
I love easy bows. This is great and I am pinning.
I made this beautiful wreath using your easy to follow instructions and it turned out great! I really loved the flexibility of changing out the stems and the ribbon on the hook, let me adjust the length so that I could still see out the peep hole. :-).
Hi Rikki – I’m so glad that it worked for you! It really is nice to be able to change things around for each season and I always end up using the stems on some other project so I feel like I’m getting my money’s worth. I’d love to see a picture of your wreath if you have one! :) Kim
Finally!!!!!!!! A bow that is easy to make, because of your great directions!!!! Thanks Stitches- n- Chips…
Yay! I’m so glad that you found the tutorial helpful! :) Kim