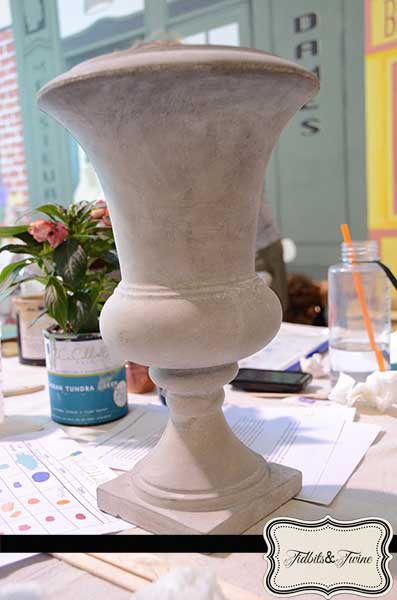
At long last I have finally finished painting my urns! I purchased two raw cement urns from HomeGoods for $19.99 so that I could bring them with me to my chalk painting class with CeCe Caldwell. The urns are about 15.5″ tall and have a very simple design, but I liked the shape and thought I could easily incorporate them into my home. Plus, urns are one of many of my favorite things, so I can never have too many!
The class held at Paris Flea Market was so much fun and I learned so many little tricks (Tidbit – Did you know that CeCe herself uses brown paper bags to buff pieces since it acts like a super fine grit sandpaper?!). After learning how to mix custom colors as well as learning how to lighten existing colors, we moved on to glazing. I was hooked! I love how easily glazing can give a piece a vintage look, plus allows you to add a different color for extra dimension. During class, I only had time to paint them with one coat of Vermont Slate and no time for glazing, so I was left to finish that on my own at home.
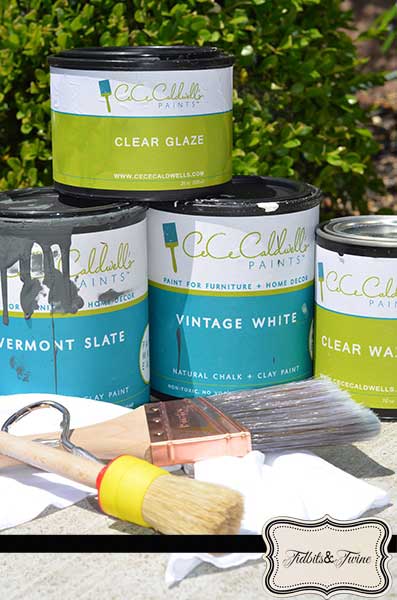
For this project, I used:
- Vermont Slate
- Vintage White
- Clear Wax
- Clear Glaze
- Purdy brush
- Wax brush
- 100% cotton, lint-free rag
Unfortunately, after my second coat of Vermont Slate, I accidentally bumped into one and broke it! My heart sank.
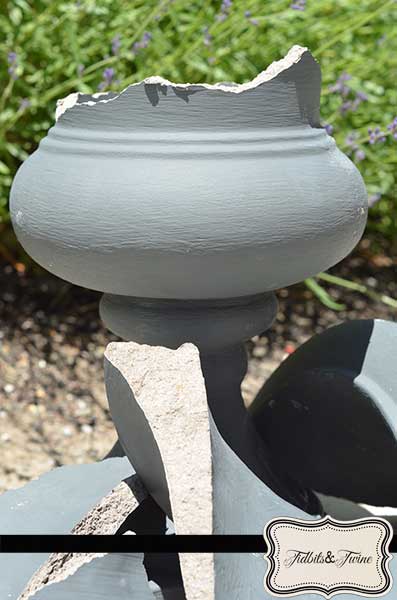
Luckily, while browsing the isles at HomeGoods on Mother’s Day, I came across one more urn! Once again I have a matching pair!
I first tried dry brushing the Vermont Slate with Antique White and then doing a Kansas City Wheat glaze over the top, but the dry brushed areas didn’t look “natural” to me (or maybe I just had poor technique). At any rate, I ended up repainting them with another coat of Vermont Slate and this time, I glazed them with Vintage White. For the glaze, I mixed approximately 1/2 cup of glaze with 2 teaspoons of Vintage White and 1 teaspoon of water. I also wet my paint brush prior to applying the glaze.
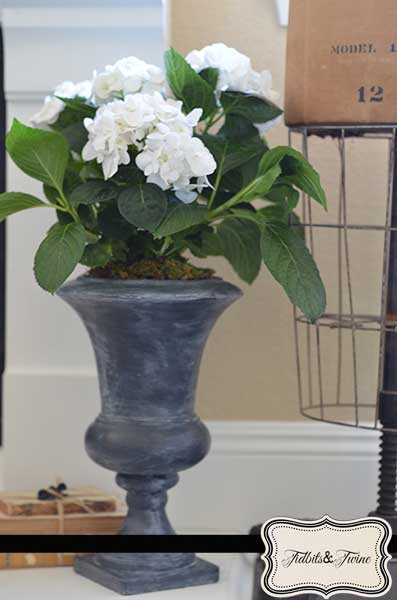
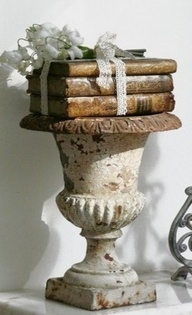
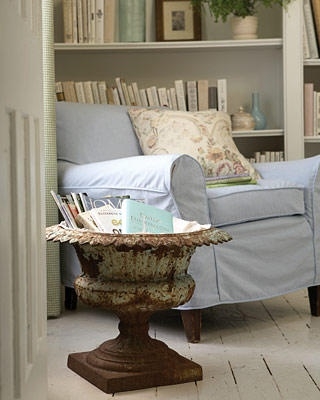
For now, I’m using my urns for to flank my fireplace with hydrangeas, but there are so many uses for urns that I’m sure I’ll end up doing something else with them at some point. I love that they can be used to hold magazines and books…
or cut flowers…

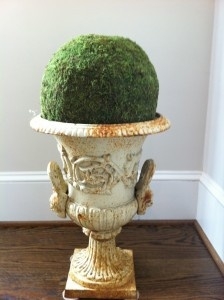
or even a simple moss arrangement

Join the Community
Let’s keep in touch! Get exclusive artwork plus the latest news delivered directly to your Inbox!
Your urns that has the “rust” look to it, did you do that or was that how you bought them? I love that look!!!