Isn’t it funny how sometimes things happen at just the right time such that it makes you think, “This was meant to be!” That is exactly what happened to me when Jenny, a sweet Facebook follower, contacted me and asked for my thoughts about what she should do on either side of her fireplace. I had been wanting to post a tutorial about a free online site that allows you to virtually decorate your home, and Jenny’s request gave me the perfect opportunity.
So today, let’s learn how to use Olioboard. Why? Because you can take a picture of a room in your house, and then virtually decorate it so you can see what works and what doesn’t! Most of us have a “problem” area somewhere in our home where we just can’t figure out what to do, and this will be an easy way for you to try out different styles, furniture placements, etc. And let me be honest with you….I sometimes use Photoshop when I’m doing a virtual makeover because of its limitless options for designing; however, I realize that most people probably don’t own Photoshop unless of course, you are in the design field. It’s also quite pricey and not very user-friendly, so not really the best virtual decorating option for most people. But you know what is? Olioboard! And no, this isn’t a sponsored post. They don’t even know I’m writing it {but if they read this and want to contact me, please do!}.
I’ll be using Jenny’s room as my example and stay tuned because at the end of this post, I’ll reveal how her virtual makeover turned out! And yowza! It turned out amazing, if I do say so myself. ;)
Okay, so here’s the picture that Jenny sent to me. She asked me for some ideas as to what she should do on either side of the fireplace. Great space, right?!

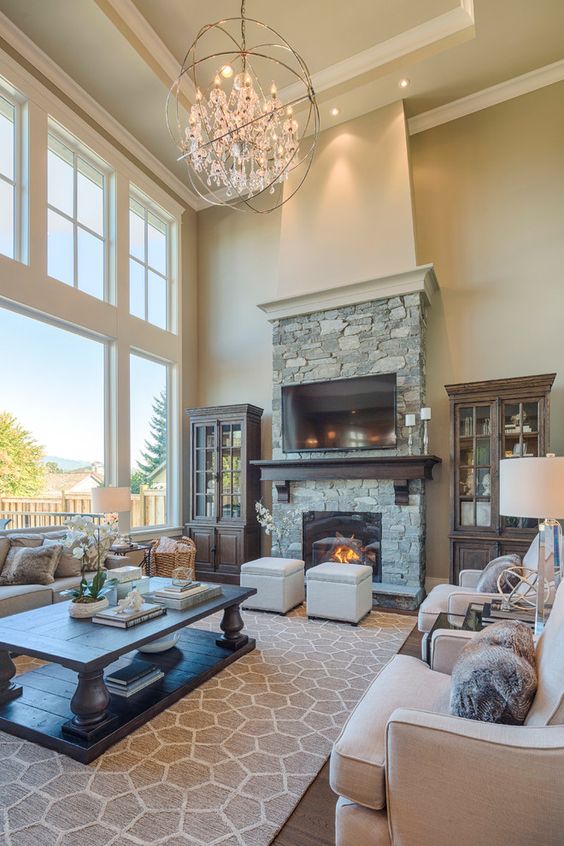
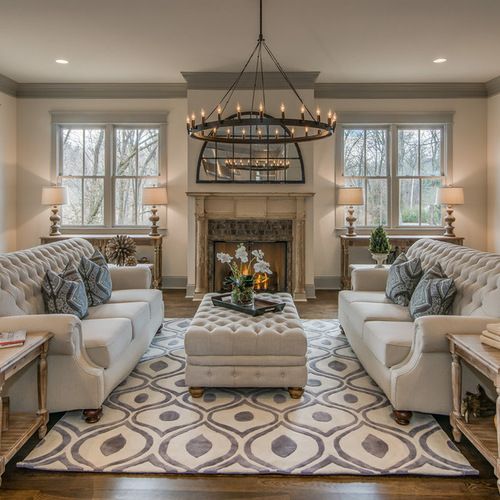
Thankfully, Jenny also gave me some inspiration that she’s Pinned to give me an idea as to her style. Clearly, the girl’s got great taste. :)

So here’s a step-by-step tutorial for making a virtual design of your own room using Jenny’s room as an example.
1. Go to www.olioboard.com. You will need to create an account for yourself, which is how the site saves all of your designs, so it’s a good thing!
2. Once you have your account and are logged in, click “Create” at the top.
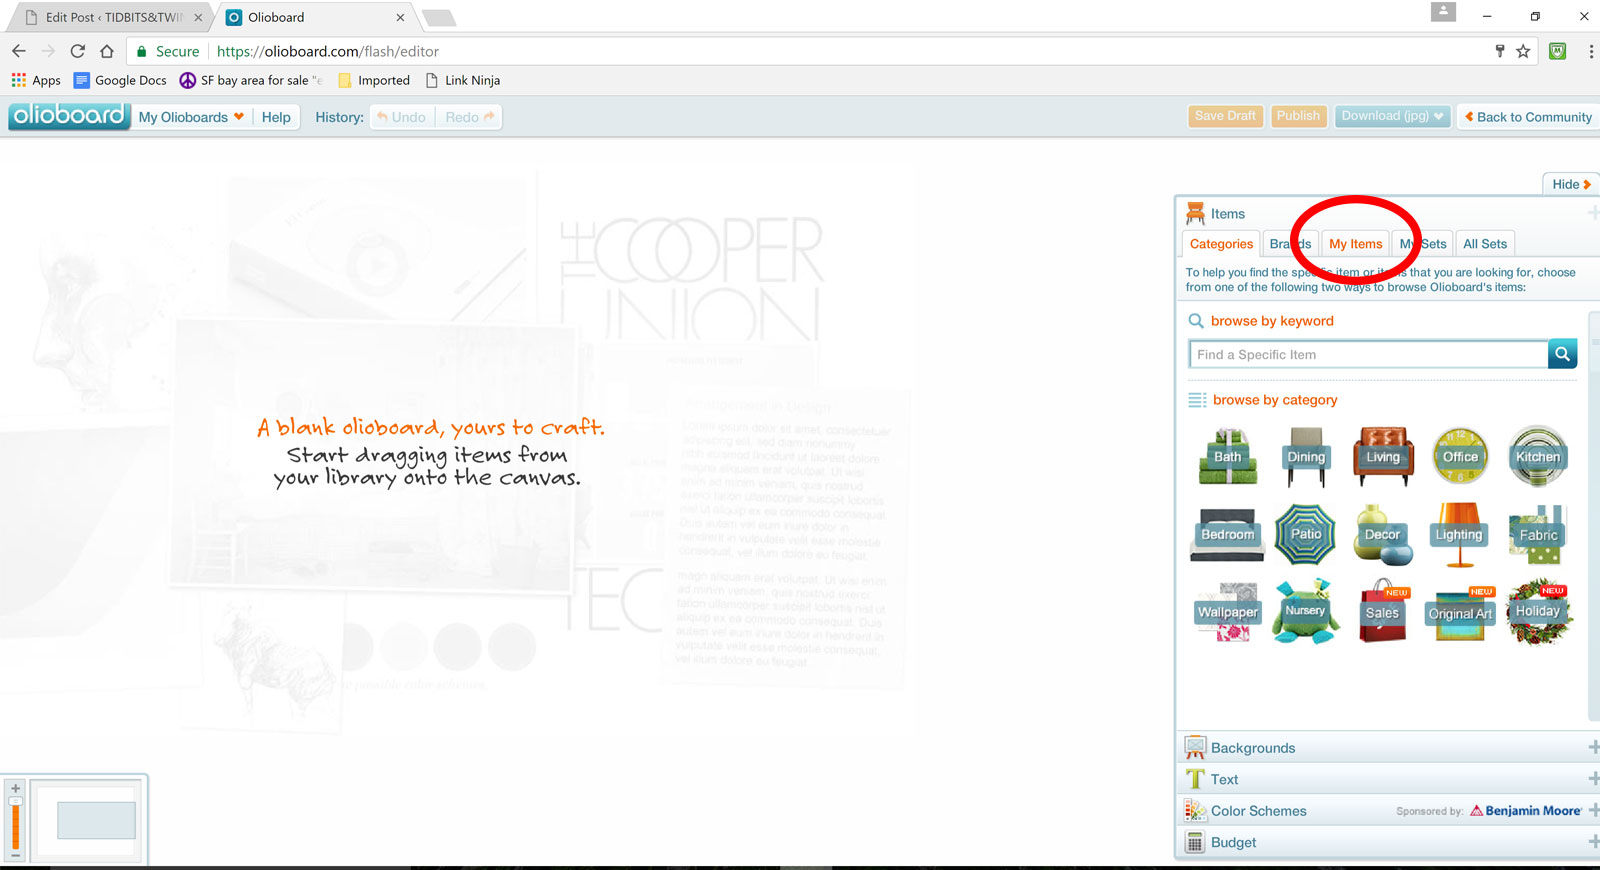
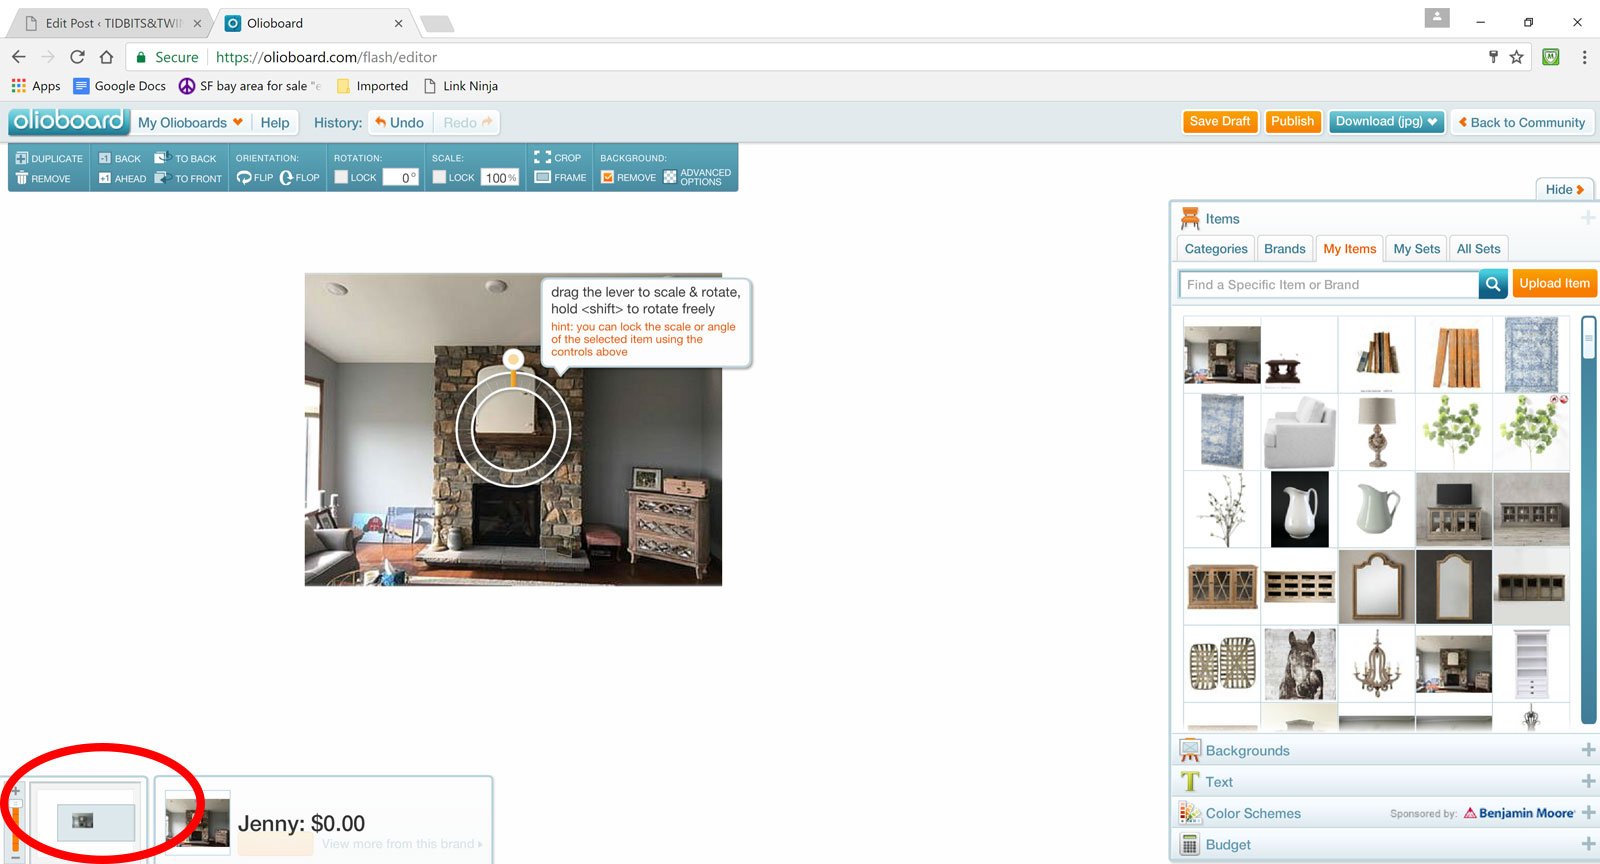
3. From there, click on the My Items tab on the right.
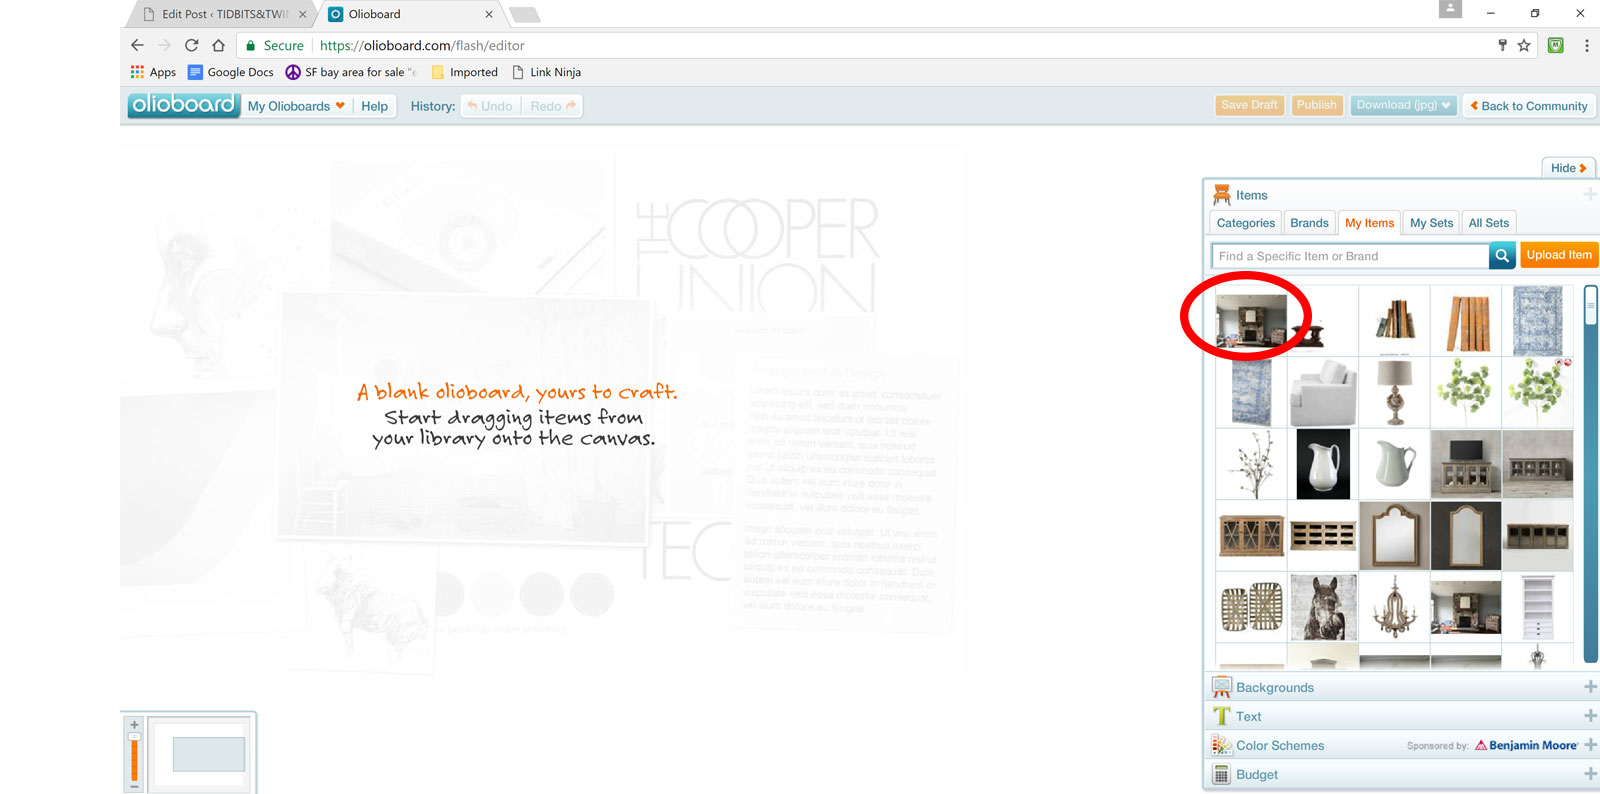
4. Click Upload Item and follow the onscreen instructions to navigate to the picture of your home and add it to the site. Once uploaded, your photo will appear in the top left of the My Items tab. Here you can see I added the picture of Jenny’s room. Why is this step important? Because this allows you to use YOUR room as the backdrop for the design.
5. Thankfully, from here on out it’s just drag and drop! Put your cursor over the picture you want, click and drag it to the white canvas on the left. In the lower left corner, you can scale your canvas so that it’s smaller and fully visible on screen. Then just size your photo to fit the canvas as best you can.
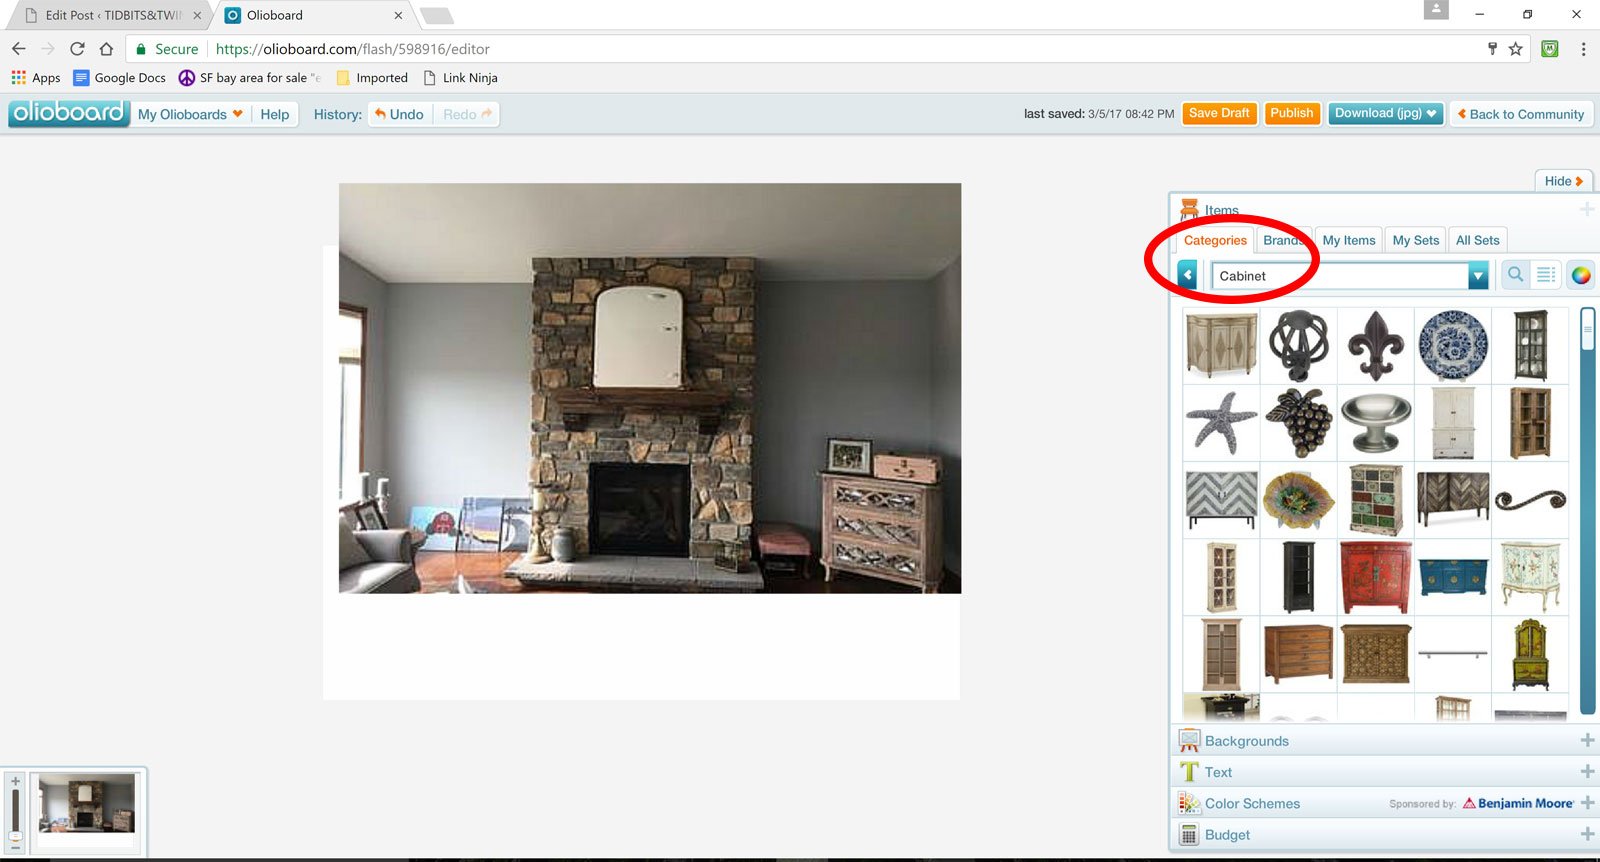
Once you have your room set as your background, you’re ready to start designing! Jenny asked me for what she should put on either side of her fireplace. As much as I love a tall cabinet, I didn’t think it was right for her room because tall cabinets would compete with her lovely fireplace. Instead, I opted for shorter cabinets. Here you can see I navigated to Cabinets from the Categories – Living Room – Bookcases – Cabinet. There are TONS of items already available on Olioboard, from furniture, to rugs, to decor, and even plants! But if you can’t find what you want, you can always add it. If you need to add an item from somewhere online, just save the picture and then follow the same steps you did to add your room as the background.
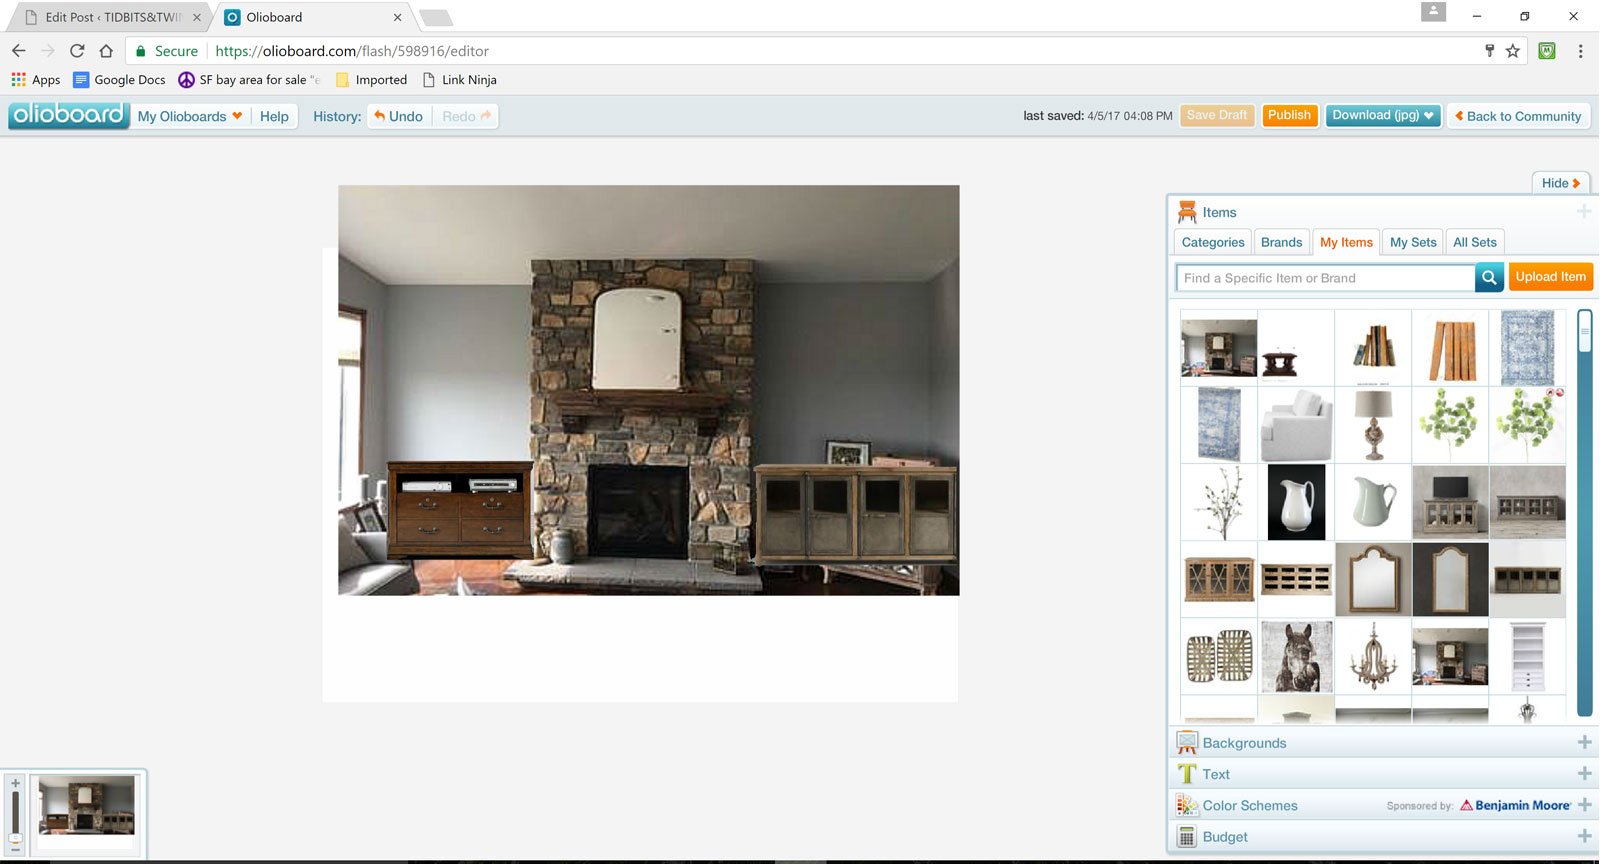
Now for the fun part! Let’s start trying out different furniture pieces in Jenny’s room! On the left side, I tried a dark cabinet closer to the color of her mantel. On the right, I tried a lighter wood tone. I like the lighter one better, but it’s not THE ONE just yet, but at least I’ve started to narrow down the color family. Again, everything is drag and drop. You can search by Category or you can look for a specific item.
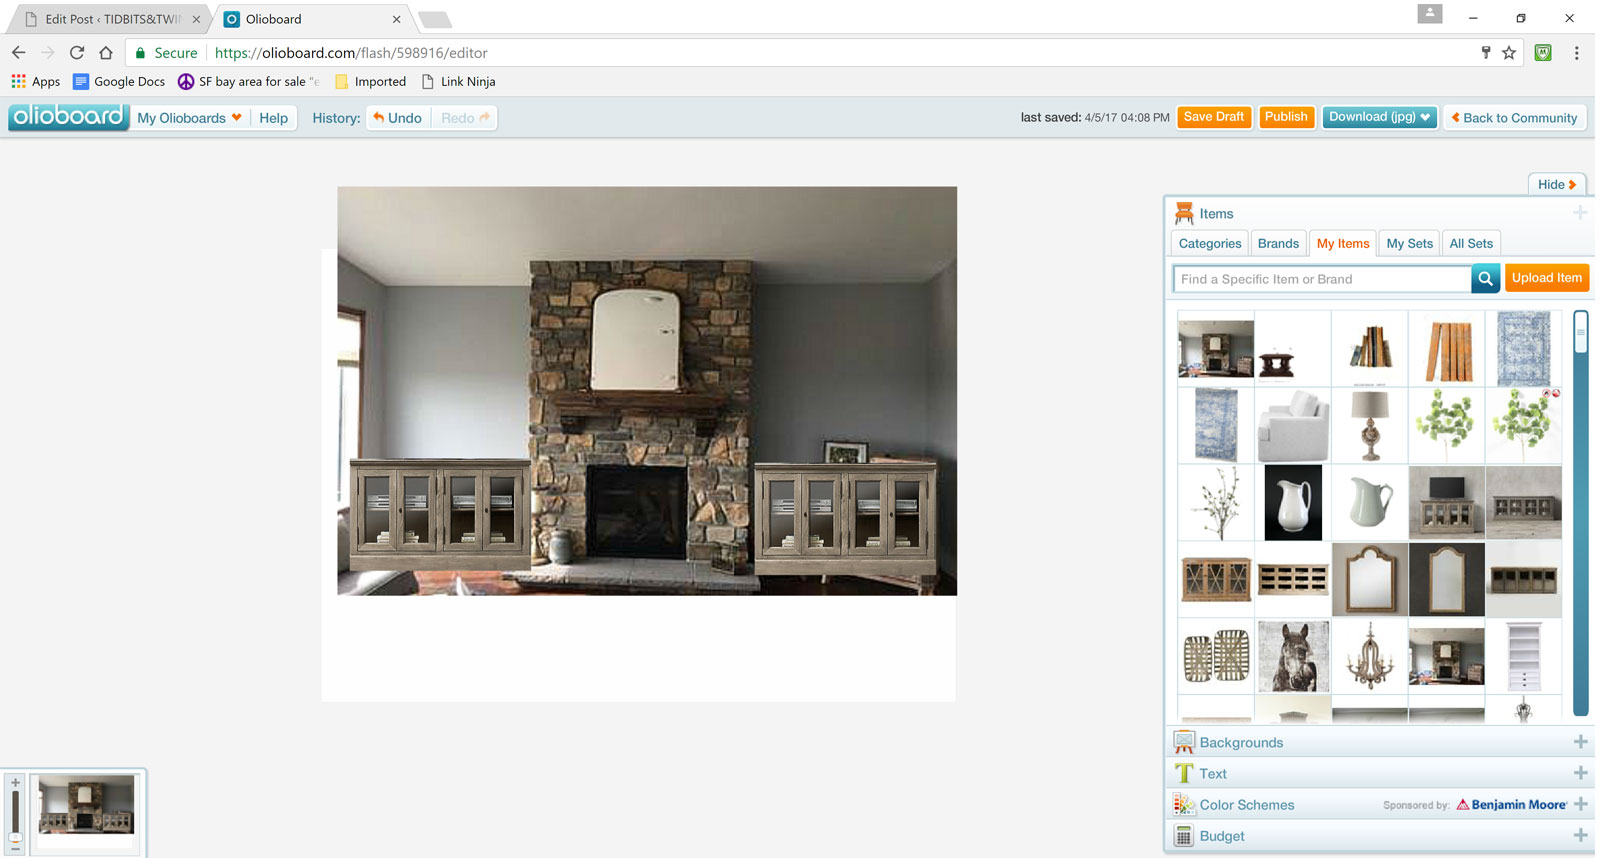
A few more tries and I finally settled on these beauties! These weren’t already available on the site, so I saved the picture online and added it just as I did when I added Jenny’s room.
I could have “hung” art above the consoles, but I opted to try some mirrors instead. Square? Round? Oval? It’s easy to try them out. I like the real estate that the rectangle takes up but the softness of the curved one adds…still, neither is THE ONE.
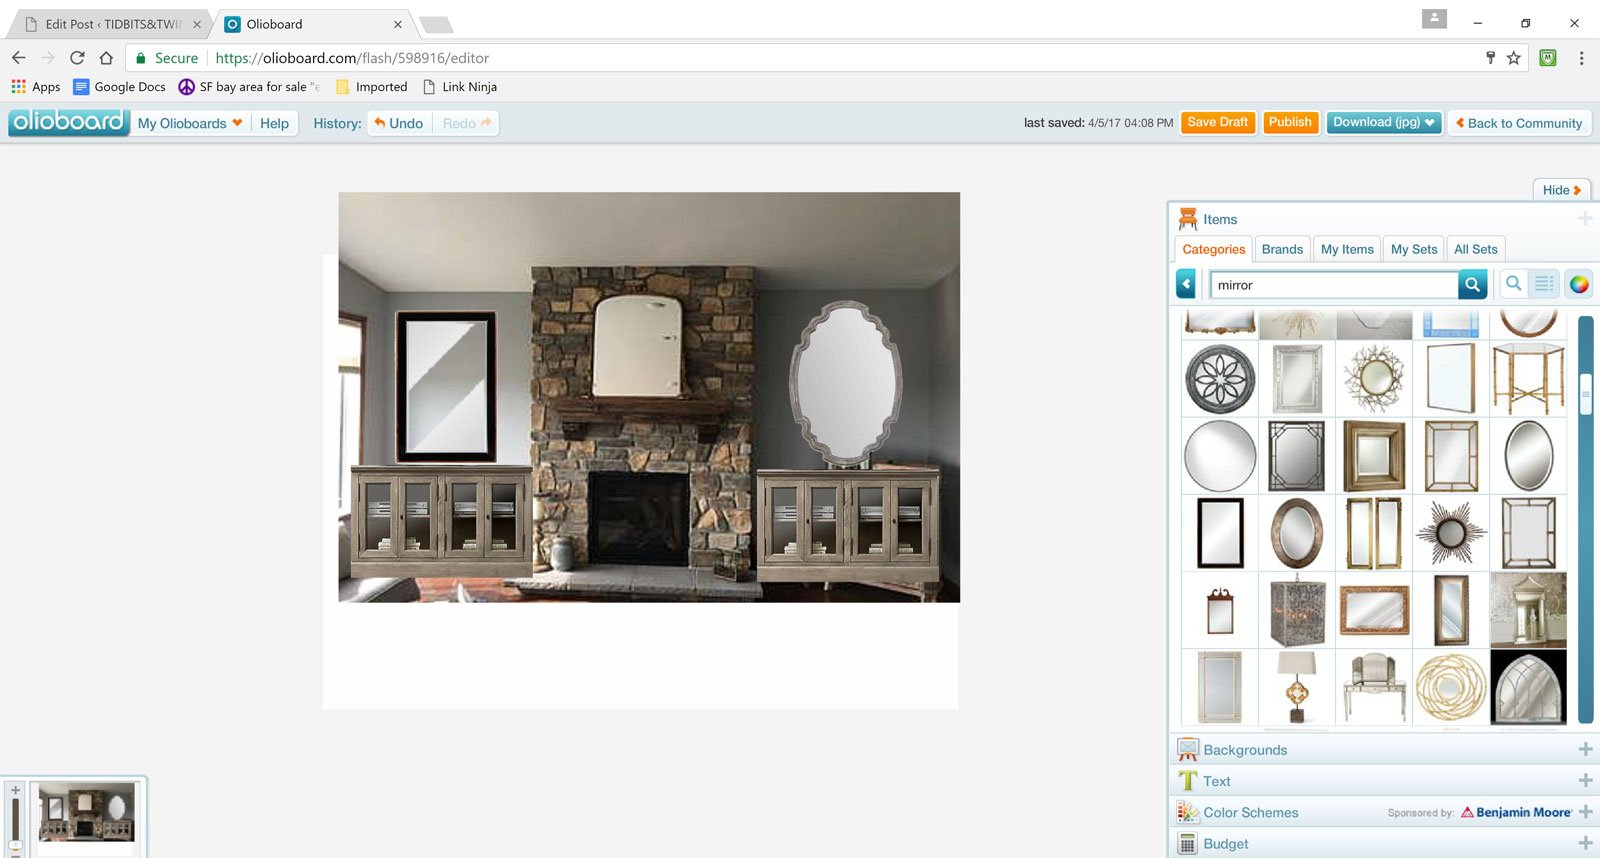
After trying out a few different options, I decided to get the best of both worlds with these wood-framed mirrors that are rectangular on the bottom but have a delicate curve on the top.
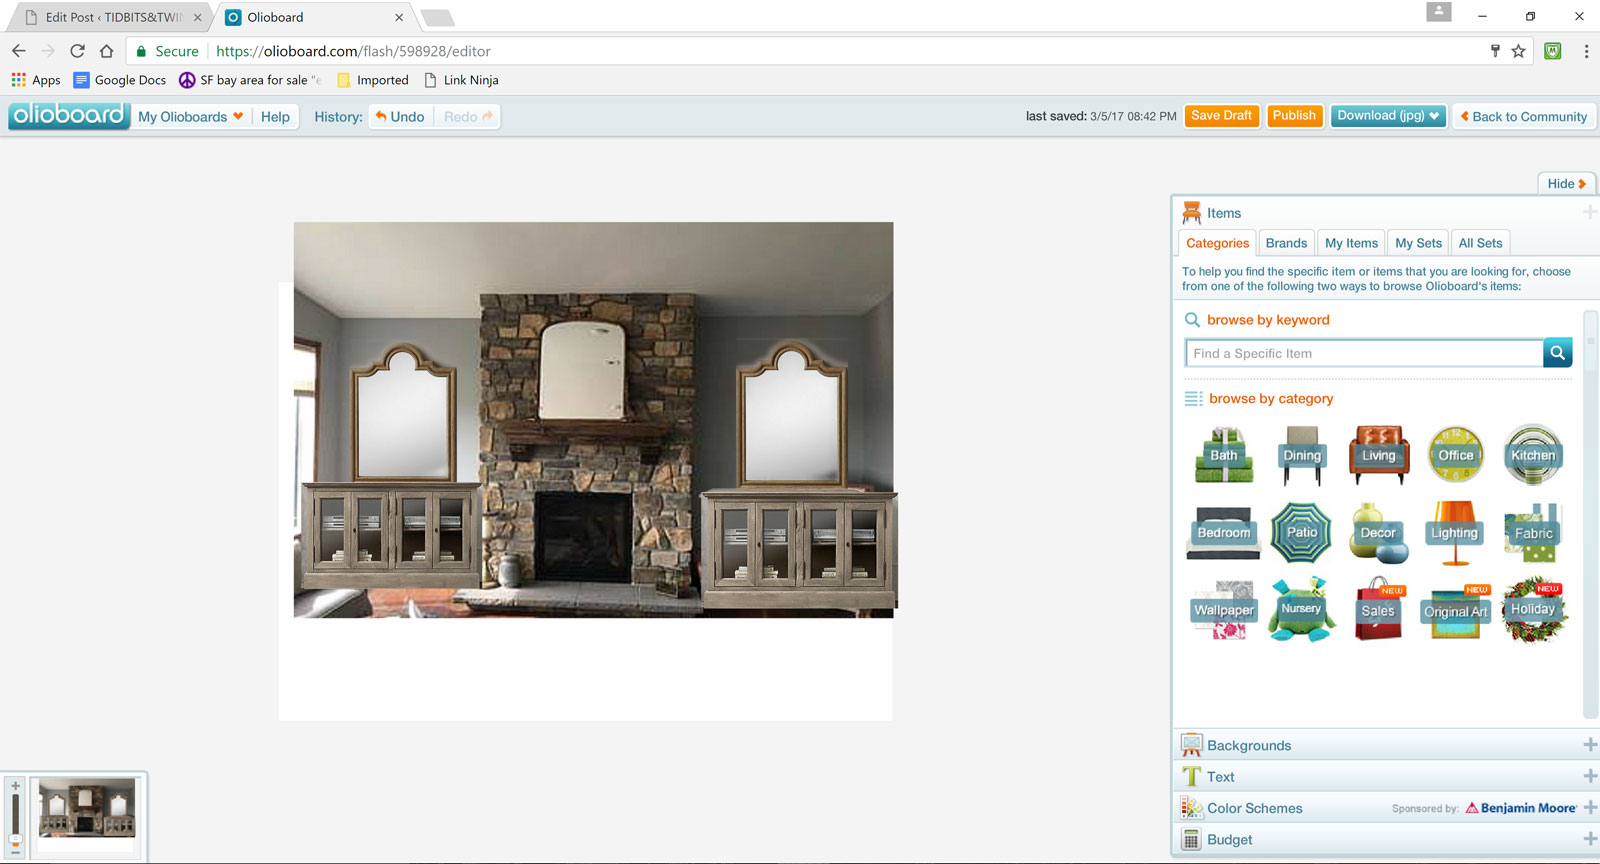
Technically, at this point, I’ve answered Jenny’s original question, which was what to put on either side of the fireplace. I could have sent her this photo, but I didn’t think she’d really get a sense of my vision for this room and I feared she would open it and think, “Hmmm…..it’s okay I guess.” Well, that wasn’t the reaction I was hoping for, so I decided to finish “decorating” this room.
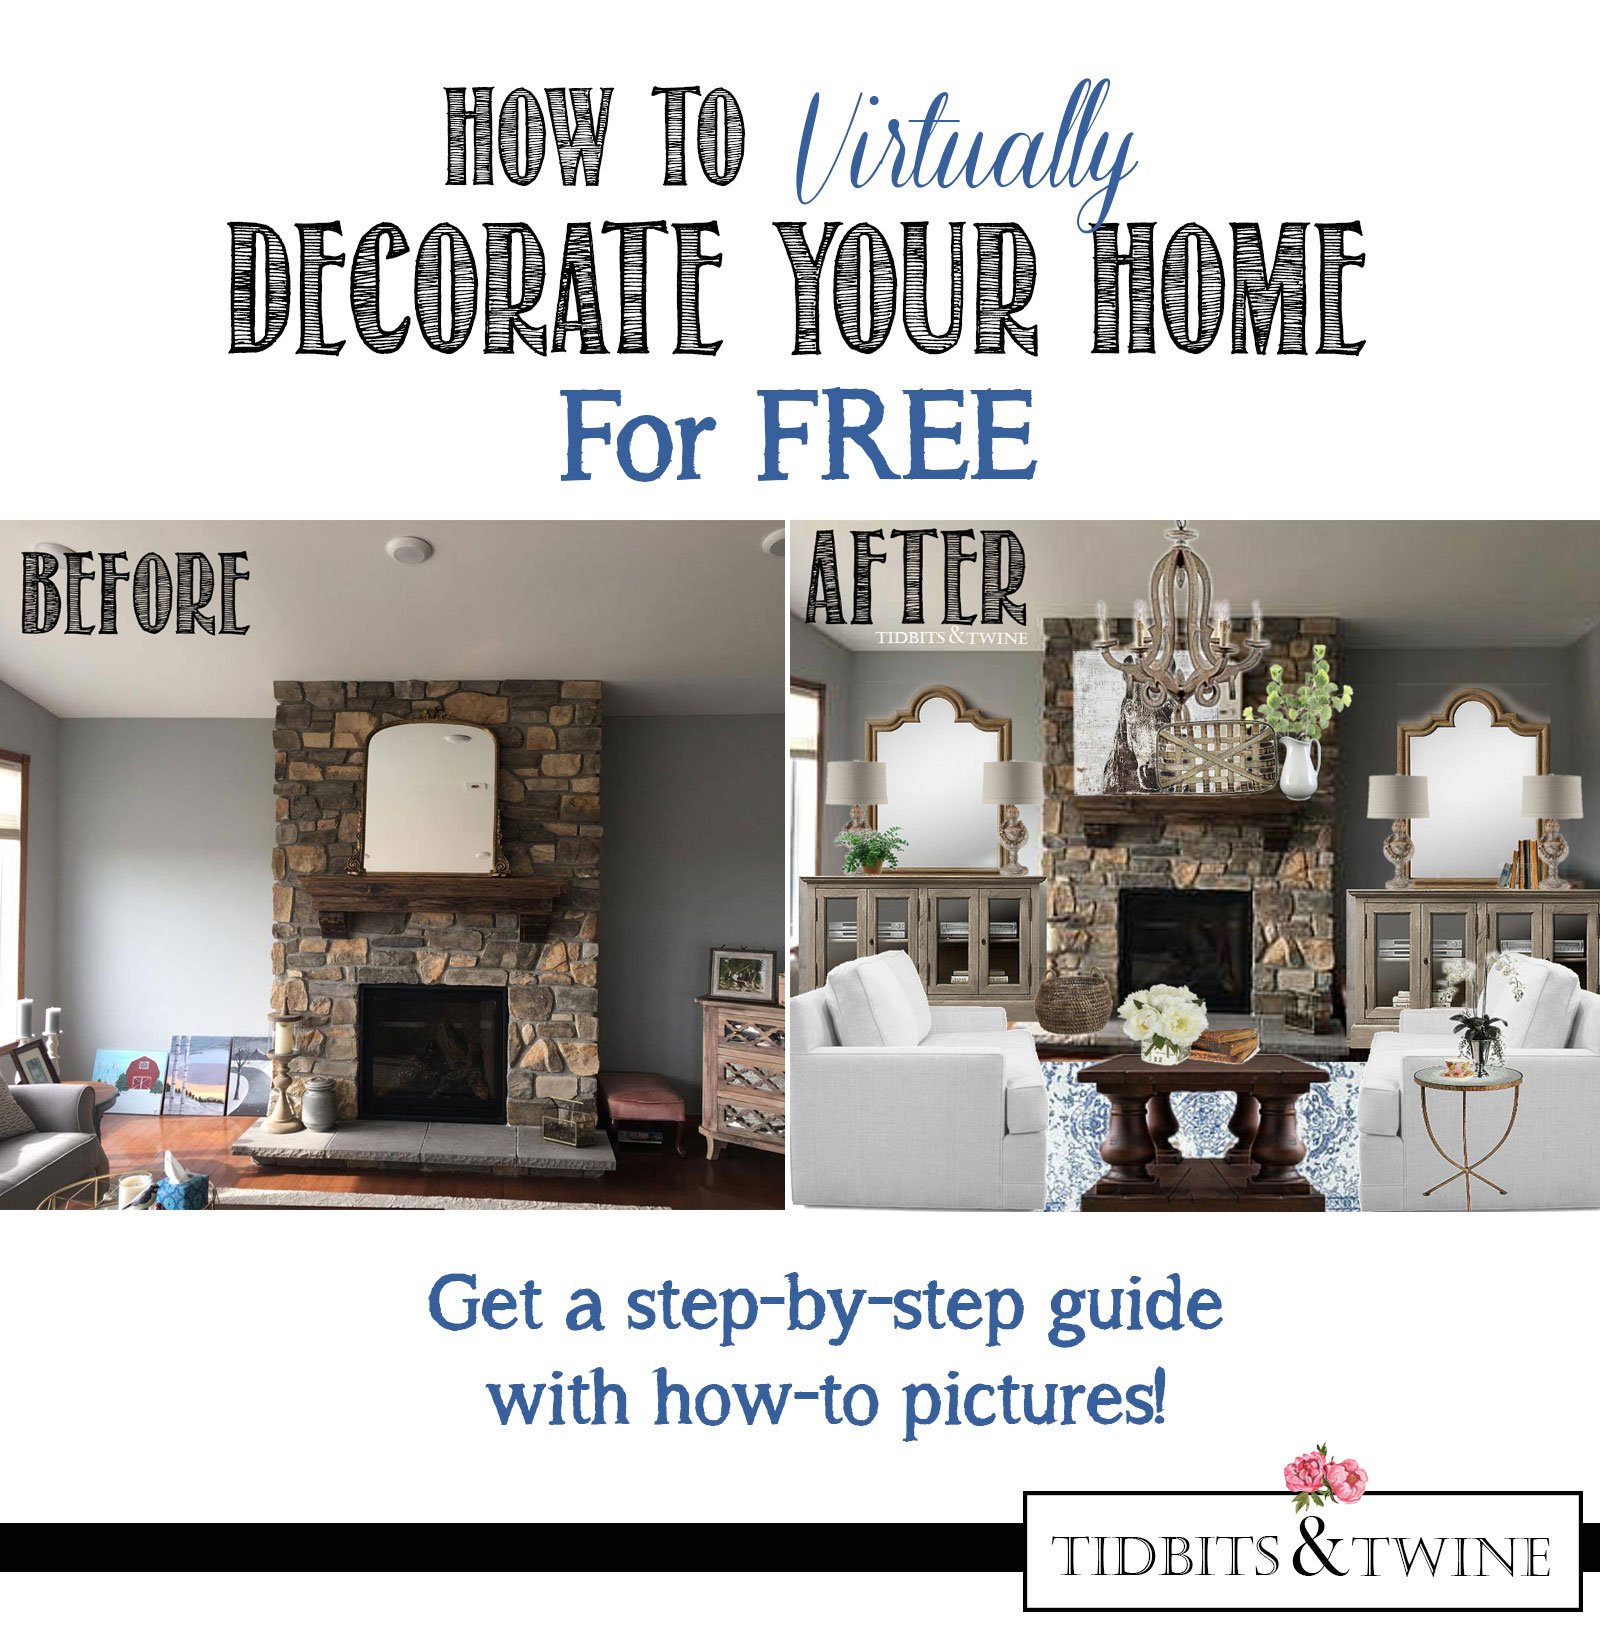
Are you ready for the transformation? Remember, this is Jenny’s BEFORE:
And here’s her AFTER!
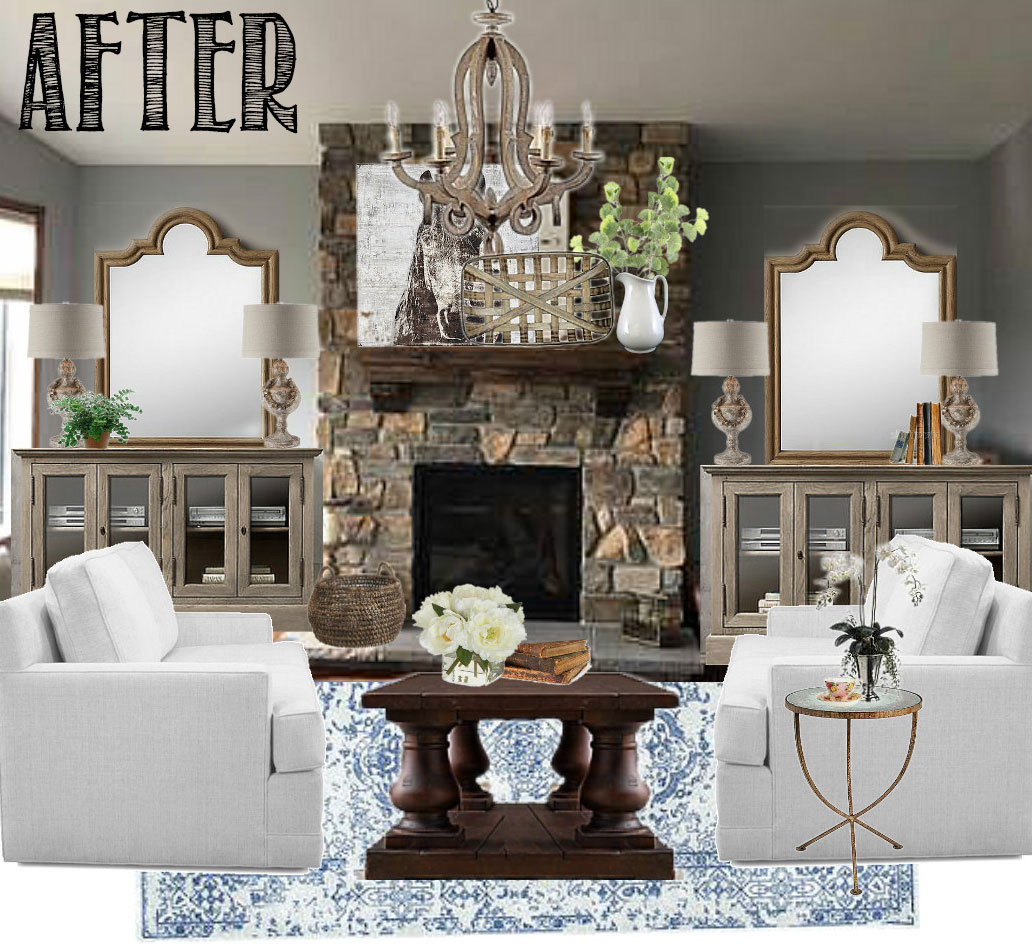
What do you think?? While this program doesn’t tell you whether something will fit in terms of size, it gives you a great idea as to what works and what doesn’t in your space and allows you to try things out before you make purchase decisions. So for example, if those particular cabinets don’t fit in Jenny’s room, she at least now has a vision in mind as to what she should look for!
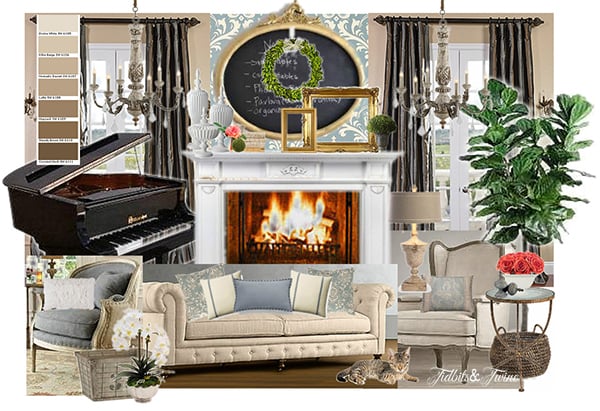
I hope you’ll give it a try with your own home and see how you can put your decorating skills to work for yourself. I sometimes get a little addicted…. And it’s not just for creating 3D rooms. You can also create Vision Boards {or Mood Boards} for yourself of what you WANT a space to look like. Then just save the image to your phone {or print it out} and bring it with you when you’re shopping to help keep you on track. Here’s one that I made for my living room some time ago.
So now I’d like your feedback. Would you be interested in having me make more of these BEFORE and AFTER designs using pictures of your homes that you send to me? Let me know via the Comments and if enough of you are interested, I’ll make it a regular feature on the site.

Like this post? Be sure to PIN it!
Join the Community
Let’s keep in touch! Get exclusive artwork plus the latest news delivered directly to your Inbox!
Cannot get the link to work. Can you please post it?
Yes! Post more of these that you create! And if your looking for more challenges I am happy to send pictures of my almost impossible living room!
Hi Sandy – I’m so sorry for the delay in responding to you! Your comment accidentally went to my spam folder. Yes, please feel free to email photos to me via my contact link! :) Kim
Great!! Thank YOU!
Sending a few pictures now :-)
I absolutely LOVE your style & would love if you could help me decorate our family room!!
Kim,
This is great. I’ll definitely be checking this out.
Thank you,
Karen
Yes! I like this and would like to see more!
What a great resource! Thank you for sharing!
Oh my…yes post more of these!! Thanks for letting us know about this and how it works!!
You have hit on a idea that everyone of us out here in blogland would enjoy.
So many sight don’t have actual application.
Thank you enjoyed how you did her fireplace wall
Good Luck in this venture.
Oh my gosh, YES!!!! I would love to see that. We have a long living room with a large bay at one end and a fireplace on an adjacent wall; oh and nine windows! I struggle with this room at least three times a year, trying to find a way to bring balance and just make the room feel welcoming. I’m hoping this software will solve some problems.
I’d happily ‘volunteer’ my room for this project. :)
What a great tutorial, Kim! I love your choices and the After gives Jenny some truly beautiful inspiration. Just as Pat Dowd said–I would love to see you do more of these–you will probably be inundated with requests!
Blessings,
Sindy
Gee Kim, no one answered your question! I’d LOVE to see you do more of these before and afters! What fun!
Hi Kim
I love what you did with Jenny’s room. I have the same situation however, I already have the dressers but never know what to put on them. Would mirrors work on mine as well if I have a large mirror on the other side of the room?
Thanks Kim
Hi Lisa,
It might depending on the size of the room and the types of mirrors. I say “might” because unless you’re creating a gallery of mirrors, sometimes multiples in one room can just look like too much. Have you tried artwork above the dressers?
Love this!
Quick question for you though – does the site allow you to scale?
I understand that the site will not tell you if a given item will fit in the room – would it resize the furniture to fit the image of the room you have uploaded? Or do you have to play around with that yourself?
Great question! The site doesn’t automatically scale items for you, but for any image you have selected, you can scale it, rotate it, flip it, crop, etc. So for example, if you drag a table into a room and the picture of the table is bigger than the picture of your room, just click on the table to select it, and then drag/pinch it to make it smaller. Does that answer your question??
What a great design. i love the use of the mirrors and the chests. Perfect.
Thank you, Marty!
I love this! I have wondered several times why there wasn’t a site like this and there is!! I have a fireplace I need to redo so I took a photo, printed it then cut out different overlays to see how it would look – this will be SOOOO much easier!!! Thank you for this post and the room is beautiful!!
Hi Robbyn! I hope you get a chance to try it and play around with designs for your home. I’ll admit, it’s a little addicting… :)