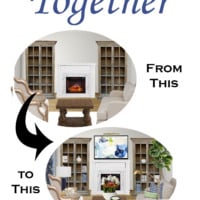
Okay, you’ve read about how to create a Design Plan {and if not, you can read about it HERE} and you have your furniture, your flooring, and your painted walls…and yet you don’t feel like your room is finished. Now what? Well, it’s time for the finishing touches. So let’s look at how to pull a room together for a finished look.
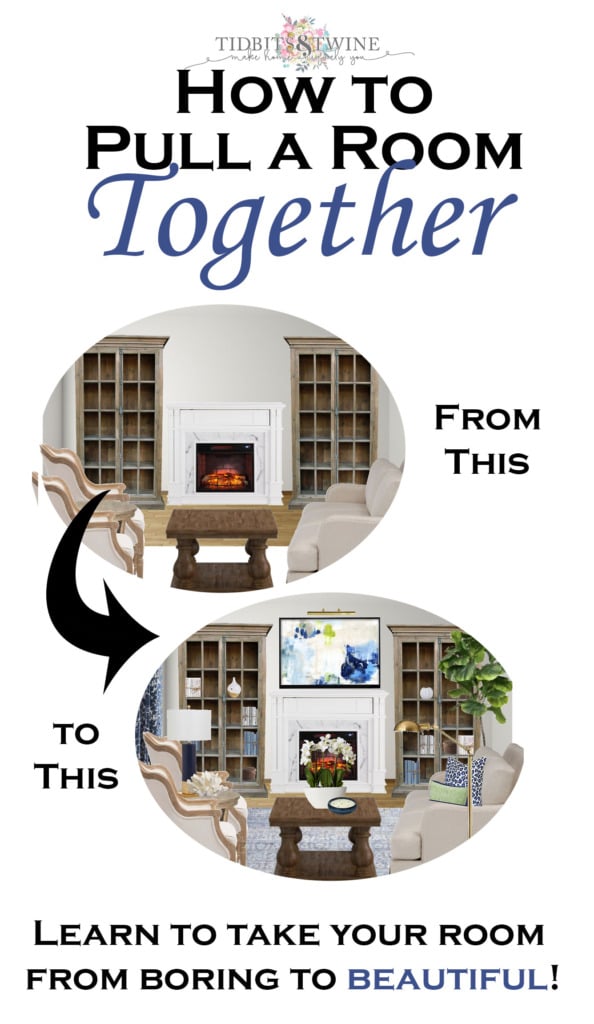
Today’s article basically breaks Step 4 of the Design Plan down into more manageable, bite-sized pieces. There’s A LOT of content about to come your way, so I thought throwing in a visual guide might help!
Example:
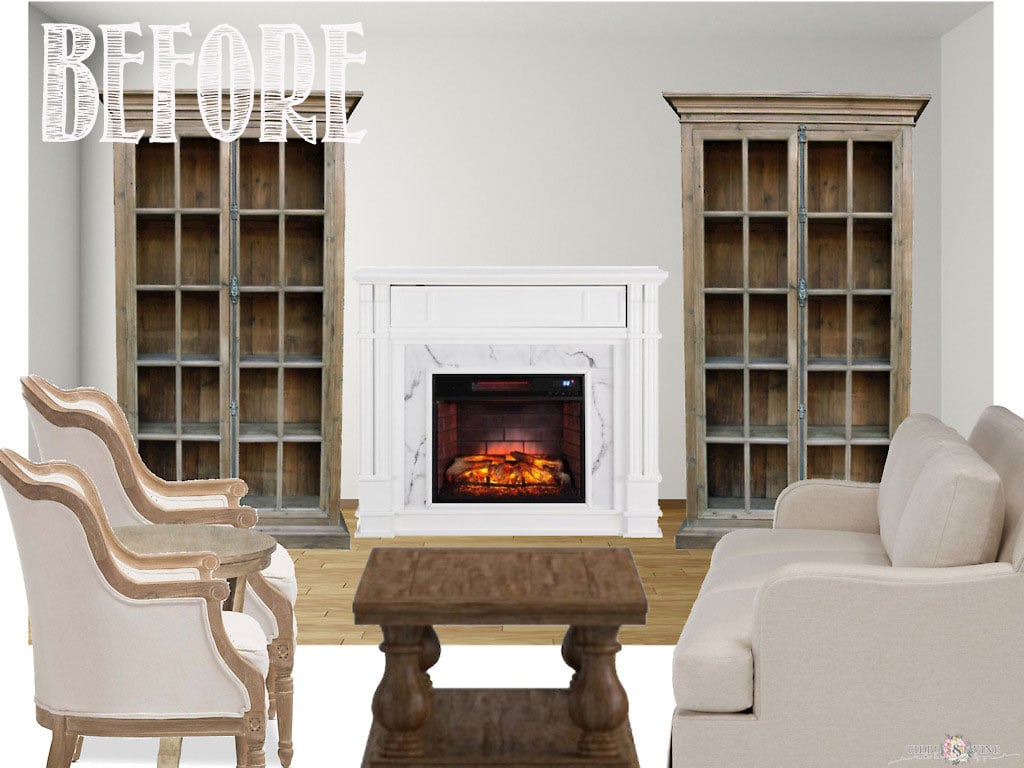
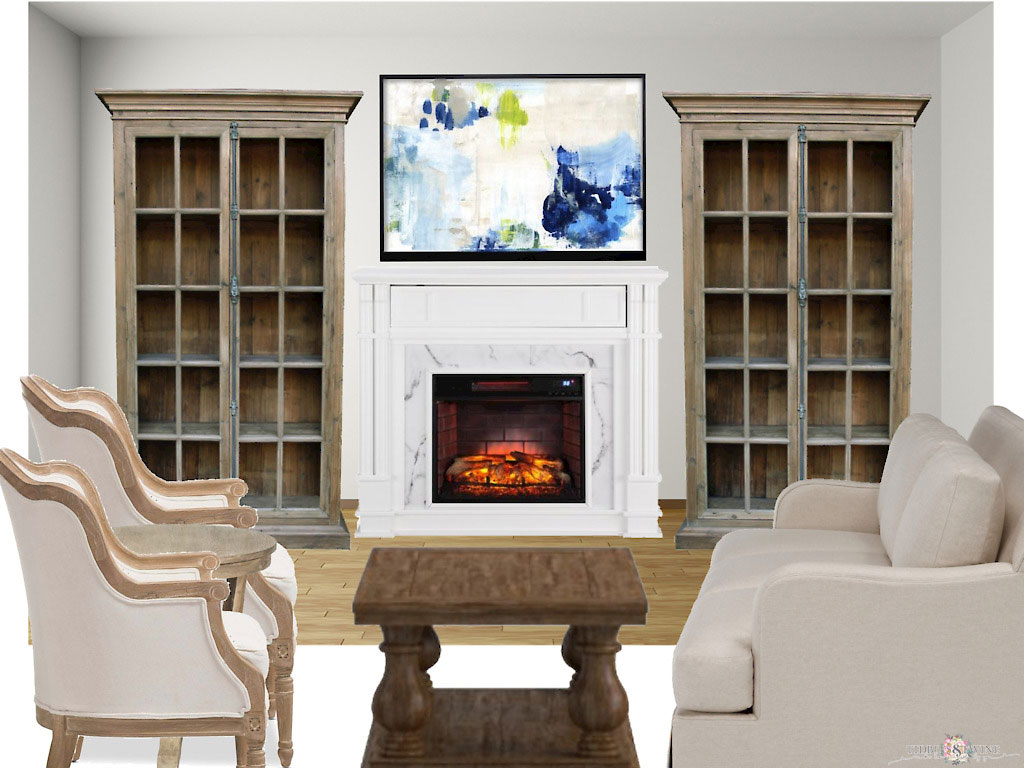
Let’s say this is your room. You have your furniture and your walls are painted, but you just feel the room isn’t complete. For this exercise, I’m assuming you stick with neutrals for your big-ticket items, so the room is currently neutral.
Note: This might not be your style but that’s okay! This is just an example. It works for any style and any room because it’s about the process, not the room. So stick with me!
Step 1: Always refer back to your inspiration piece
An Inspiration Piece is the first step in the Design Process and should be your guide as you pull your room together. If you don’t have an Inspiration Piece yet, that’s okay, there’s still time! Just select one that works with the items (furniture, wall color, etc.) you already own. As you move on to the following steps, it’s very important to refer back to your Inspiration to make sure you stay on the right track.
Read {this post} for full details on finding your Inspiration Piece.
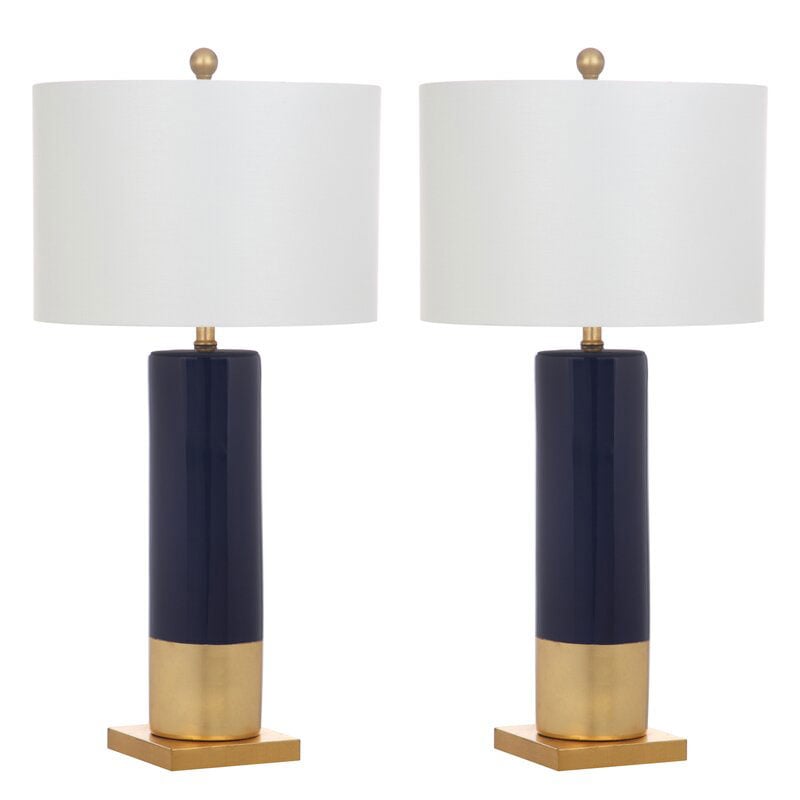
Example:
For this example, let’s say this lamp from Wayfair is your inspiration piece. It’s contemporary and sleek but the brass gives it a warm feel. The colors are a little bit beachy, but in an abstract way.
Step 2: Take a style cue from your furnishings
For those that struggle with mixing and matching, it’s easiest to take a cue from what you already own and stick with that style. So if your furniture is traditional, look for traditional accessories and patterns. If your style is contemporary, look for things with a more sleek design and reflective surfaces.
If you’re not sure what your style is, you might find these articles helpful:
If you’re comfortable mixing and matching styles, you can skip this step altogether.
Example:
The furnishings in the room are traditional, so I’m going to have to mix and match styles for this lamp to work. We can do this!
Step 3: Determine your focal point
Each room should have a focal point – an area to which your eye is drawn. A focal point helps ground the space because furniture is typically arranged around it so it helps to organize the room. A focal point could be an architechtural feature such as a window or a fireplace. In family rooms, the focal point is often the TV. If your room doesn’t have a noteworthy architectural feature or TV, you can create your own focal point with a dramatic piece of art, oversized mirror, etc.
The focal point of your room should be decorated such that it stands out when looking at the overall space. Keep this in mind when you move to Step 5 below.
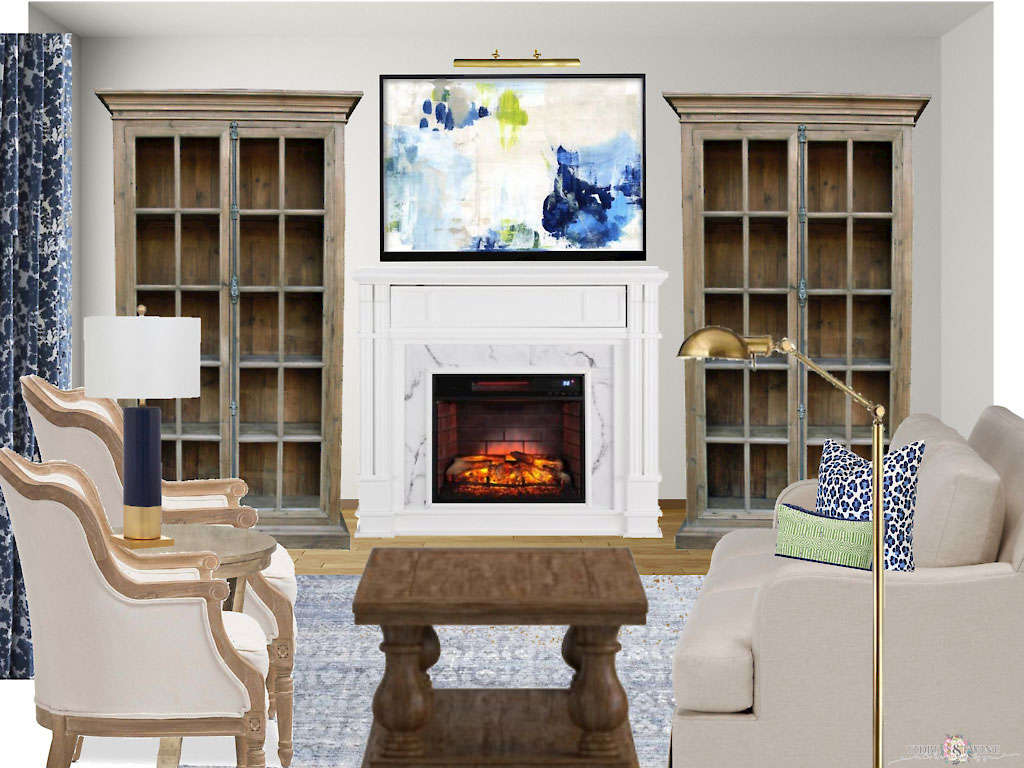
Example:
I don’t know what’s out the window of this room, so let’s make the fireplace the focal point. The two bookcases on either side are competing, so we’ll have to take that into consideration when decorating above the mantel. It’s fine for the focal point to be equal to or greater than something on either side of it, but never less than.

Step 4: Select a color palette
If your space already has a lot of color, you’ll need to narrow your palette a bit so that you can focus on certain shades to help bring a sense of cohesiveness into the space. If your space is mostly neutrals, the good news is that you are starting with unlimited options!
The 60-30-10 Rule
Regardless of whether your space has a lot of color or a little, an easy guideline is the 60-30-10 rule. 60% of your space should be your primary color, 30% a secondary color, and 10% an accent color. In many cases, your wall, furnishings, and floor will make up your 60%. You can then bring in another color that will take up about 30% of the room, and then a small accent for the last 10%.
Example
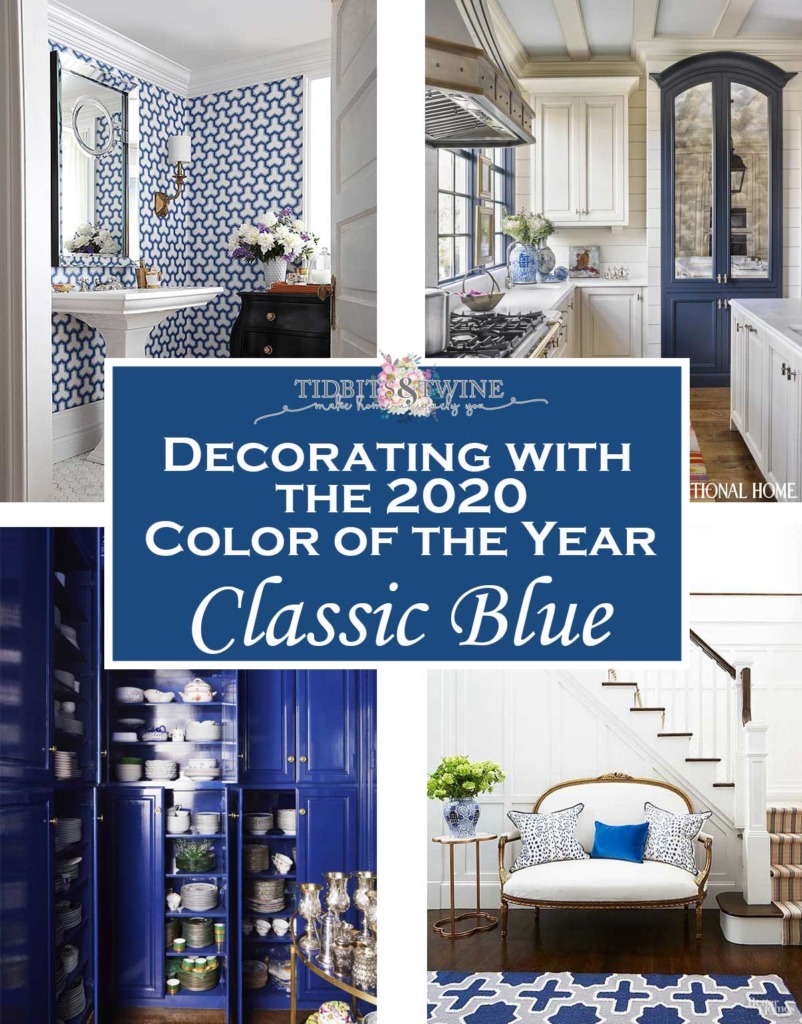
The room is already mostly beige, so that’s my 60%. I’m going to go with the 2020 Color of the Year, Classic Blue for my second color, and green for my accent.
Step 5: Add layers to your space
This is the step in which you really start to add items that will help pull your room together, but you need to have completed Steps 1-4 to know what style and color to focus on, as well as where to put your emphasis {the focal point}.
To make the decorating process easy, break the room down into layers such as those outlined below:
A. Emphasize the Focal Point
Start by decorating your focal point to ensure that it stands out in the room. If it’s a window, add a window treatment. If it’s a fireplace, decorate above it. If it’s a blank wall, find what you want to add to make it the focal point.
Example
In the example, the fireplace is the focal point so I started by decorating above it. I chose an abstract painting that incorporates all of the colors I want to use but also brings in the contemporary look of the Inspiration Piece.
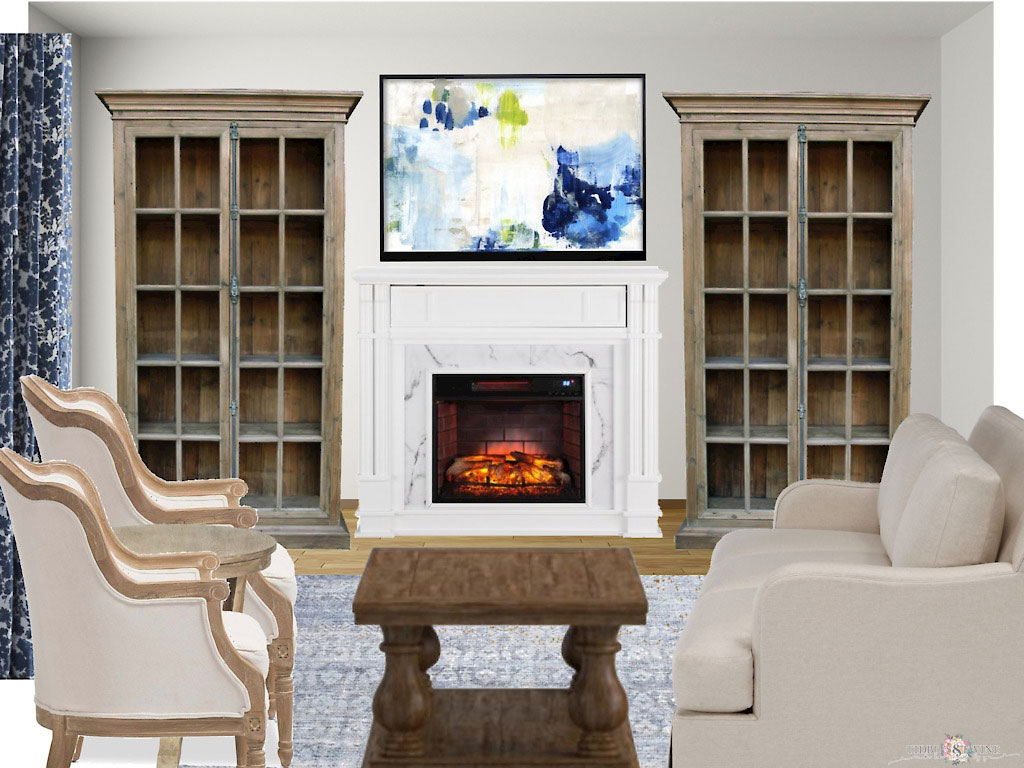
B. Rugs/Window Coverings
For tips on hanging curtains, read {this article}
Example:
I chose a traditional rug and curtain to complement the existing furniture using shades of blue and white.
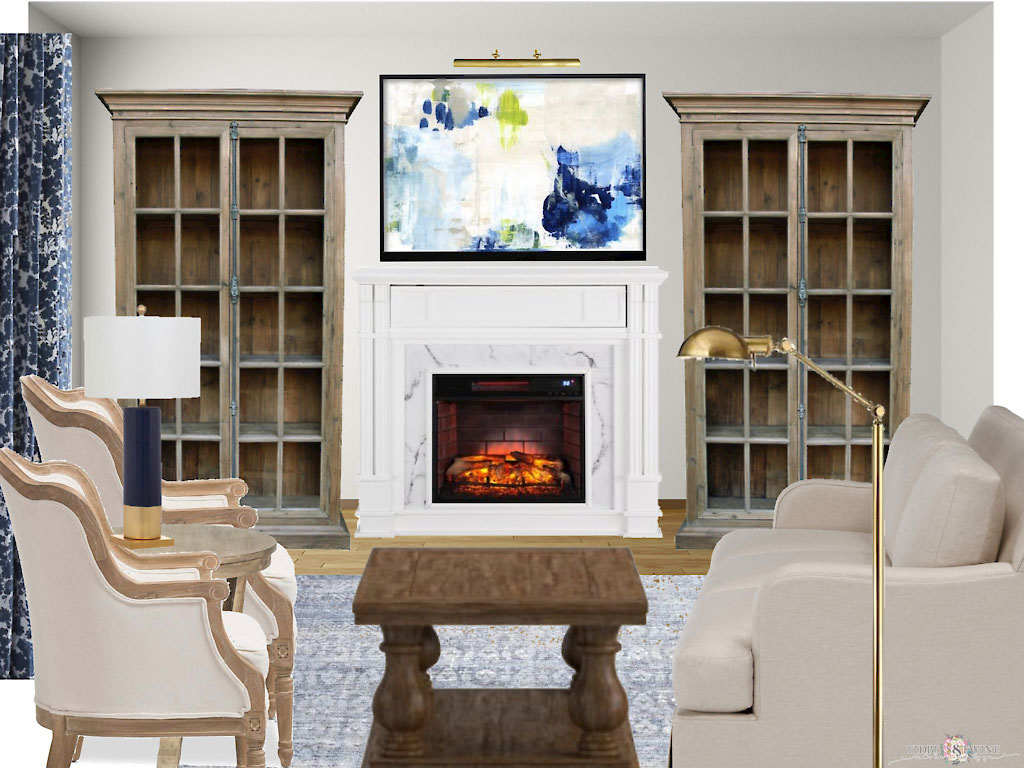
C. Lighting
In addition to overhead lighting, try to have at least one other light source, such as task lighting or an accent lamp.
Example
I can now add in my inspiration piece, along with other brass lighting elements to help tie all of the lighting together. A picture light and a floor lamp do the trick!
D. Pillows/Throws
Select items that coordinate with your color palette and fit with your Inspiration Piece.
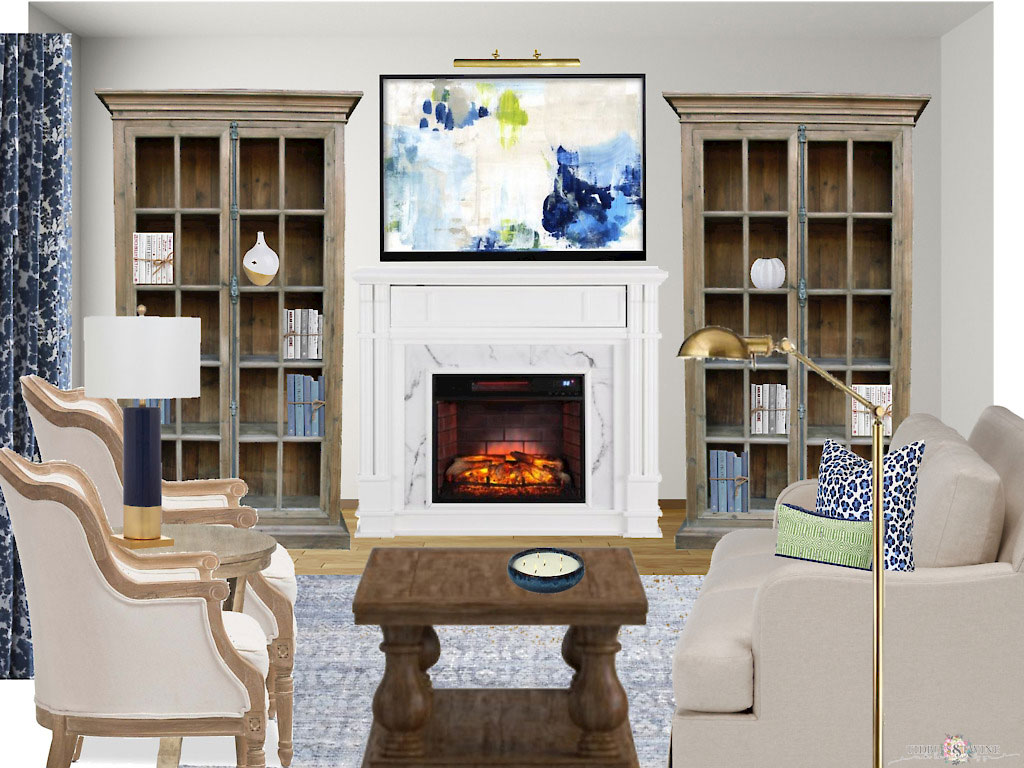
Example
E. Accessories/Personal Items
These are items that help bring the color scheme together and/or are your personal items. What’s the point of decorating if your space doesn’t reflect who you are? Personal items could include family photos, things you use, or just things you love, such as collections.
Example
I love books, so of course those had to be included. Also some vases for pops of white. This would be the time to include photos or collections or anything else precious to you.
F. Something Organic
Often this is a plant, but if you don’t have a green thumb, there are lots of realistic faux plants available now! Or you can try something else from nature, such as feathers, moss, seashells, branches, etc. The goal is to bring in an organic shape and texture.
Example
Since the third color in our scheme is green, plants are an easy organic item to add. Additionally, the room is lacking in texture a bit, so baskets and coral also work.
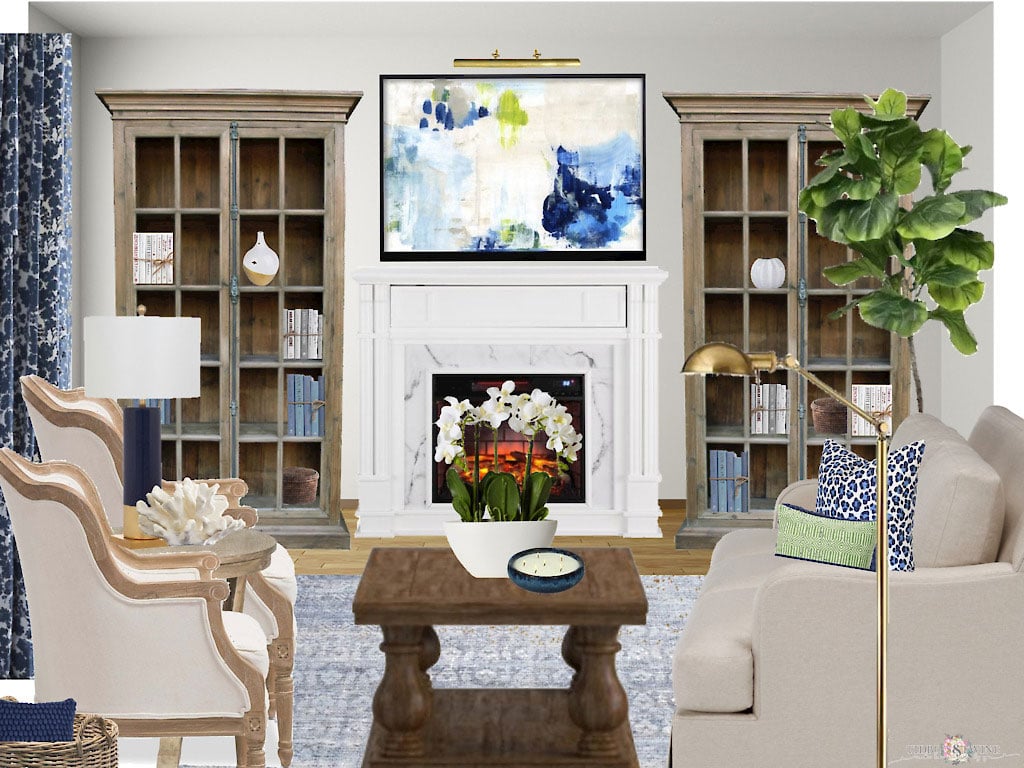
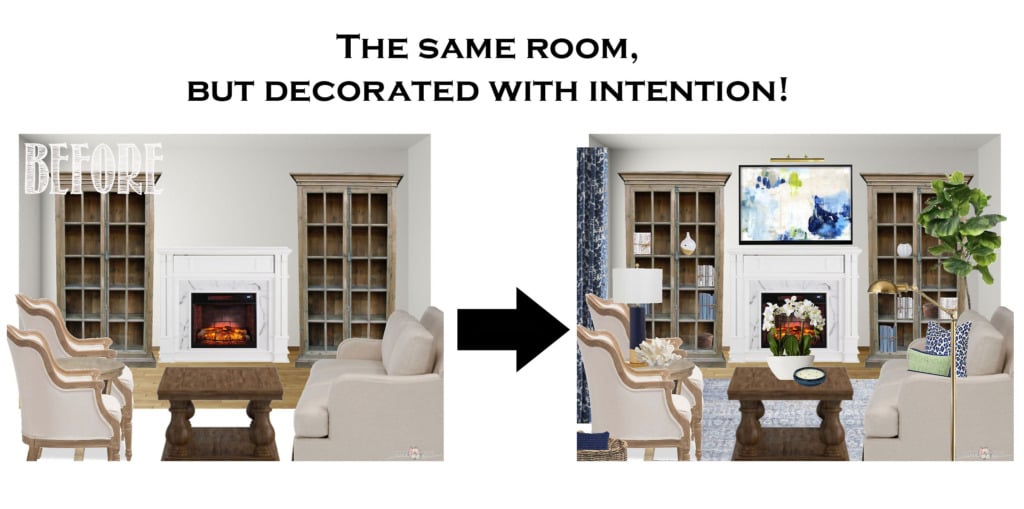
What I find so interesting is how much the organic items add to the room….personally, I think they make the most dramatic impact! And yet, so many people forget this step and that’s what can leave a room feeling flat.
I hope you enjoyed this article! Don’t forget to PIN it!

P.S. Do you want to make your own room design? I did this using the drag-and-drop program called Design Files!
Join the Community
Let’s keep in touch! Get exclusive artwork plus the latest news delivered directly to your Inbox!
This article is very helpful. Maybe folks read and don’t take the time to comment. You are very talented and I love your helpful posts. Keep being you!
Kim,
I always love reading your posts. They are very helpful and you go to a lot of trouble to make it easy for us to follow your ideas. I remember well this particular one and found it very good!
You just keep being you!
Jodie
I can’t wait to start on my family room next year your arrivals are just what I need to help me pull all my ideas together I often imagine the items I want but not the colour this 60/30/10 will help me so much
Wow! You are amazingly talented. This is the exact post I needed for my family room. Could you share the source for the art? Thank you so much!
Hi Cathy!
I should have made a note as to where I found it but didn’t and now I can’t quite recall….knowing me, it was probably either Art.com or ZGallerie.com. Sorry that I couldn’t be more help!
:) Kim
I’m currently Staging a house for sale. I was happy to come across your posts on Pinterest. I needed inspiration from a Traditional style sofa to make the room appear more modern and not so “old fashion”. Great article. I find myself reading your other posts and have saved them. Thank you.
Great post! Loved the step by step and the 60/30/10 rule! Helps those of us that don’t have the knack and need something more concrete to work towards. Thank you!
Hi Cathy! I’m so glad you enjoyed the post and the color rule! :) Kim
This will really help and you are right the organic items really are a game changer. Organic items is something i need to add to my rooms.
Hi Marlene – I’m so glad you liked the post and agree that organic items make a world of difference! :) Kim
This is a really great post. You’ve done an amazing job of breaking each step down. Great job.
Hi Marty! Thank you so much! This means a lot to me coming from you. Take care and stay healthy! :) Kim