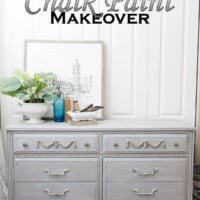
Yes, another dresser makeover! I’ve got a lot of free time on my hands these days and so lots of time to paint things. I purchased two different solid wood dressers off of Facebook marketplace. The first dresser I painted a soft bluish gray and blended two colors together on the drawer front. I sold that dresser within 10 minutes of posting it! This dresser I haven’t decided whether I want to keep or sell just yet. Either way, it turned out beautifully so here’s a full tutorial for my latest painted French dresser makeover.
Chalk Paint Dragged Technique
This is a paint technique that Annie Sloan details in her book Color Recipes for Painted Furniture and More. It’s basically the idea of painting over WET wax with diluted paint.
In looking at the piece she finished versus mine, she applied a lot more paint than I did….or wiped off less. I might try wiping less on another project, but for this dresser makeover, I love the subtle look.
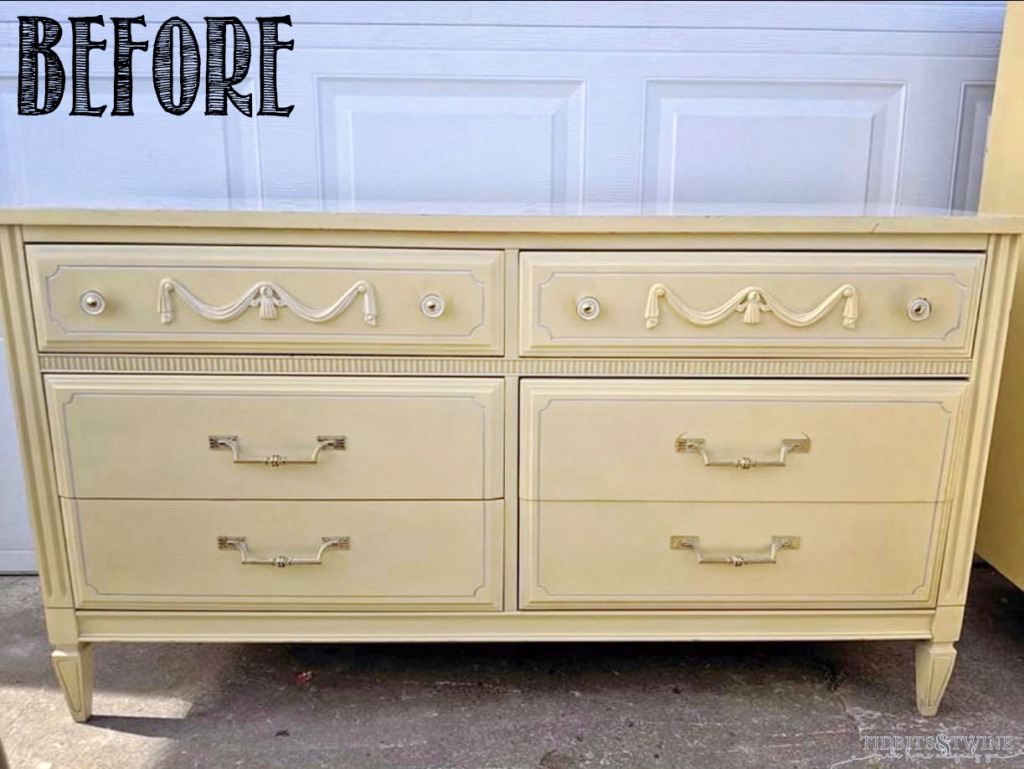
French Antique Dresser BEFORE
The dresser was actually in good shape overall. A few scratches and stains on its original finish, but otherwise ready to paint! I think I feel in love with in the second I saw the beautiful onlays on the drawers….
How to Create a Dragged Look
Supplies:
Some affiliate links for shopping convenience.
- Mineral Spirits
- Wood Putty or Bondo
- Dixie Belle Slick Stick (optional)
- Annie Sloan French Linen Chalk Paint
- Annie Sloan Old White Chalk Paint (the new formula)
- Annie Sloan Paris Grey Chalk Paint (the new formula)
- Annie Sloan Clear Wax
- Round Wax Brush
- Flat Paint Brush
- Misting Bottle
- Lint Free Rags
- Rub ‘n Buff – European Gold (optional)
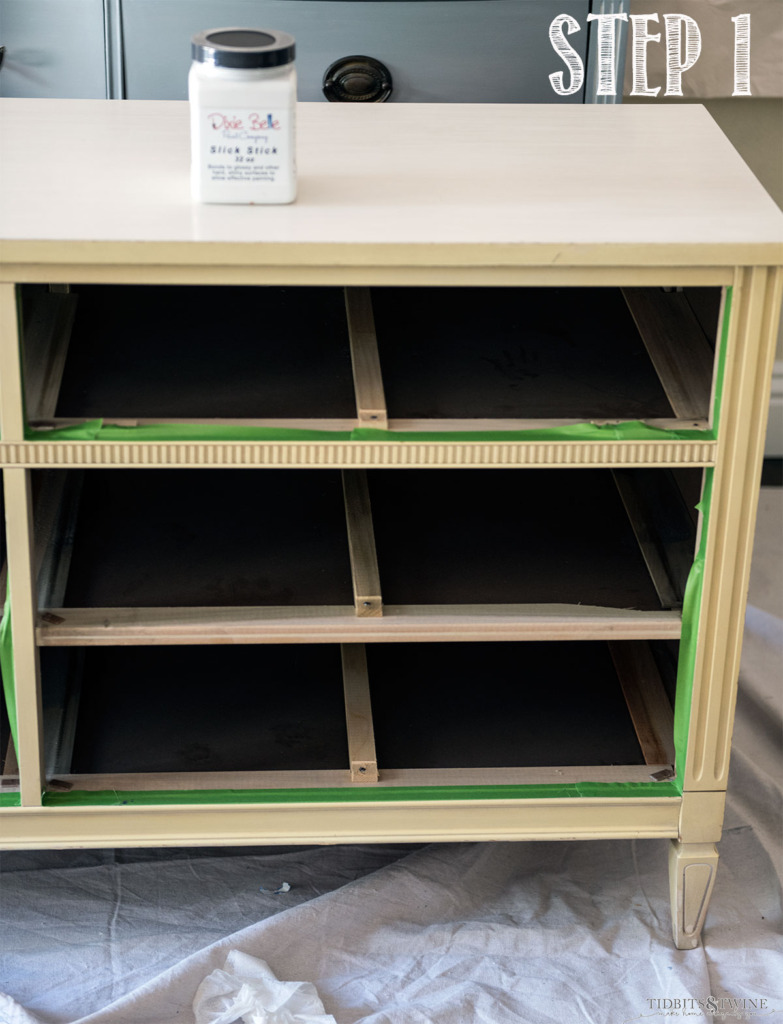
Step 1: Clean, Fill, Sand, Tape, Prime
– I used Mineral Spirits to thoroughly clean any residue off of the dresser.
– This piece really didn’t need any filling, but if yours does, then use Wood Putty to fill all of the chips, dents, and holes. Once filled, I use 150 grit sandpaper to sand down the excess filler. I use 220 grit on my final pass.
– If you have areas that you DON’T want to paint, use painter’s tape to seal them off. I strongly prefer FrogTape over any other brand because I think it does a better job at yielding sharp painted lines.
– Depending on your piece, you might need to prime. In this case, the dresser had a glossy finish on it so I used Dixie Belle Slick Stick to ensure the paint would adhere.
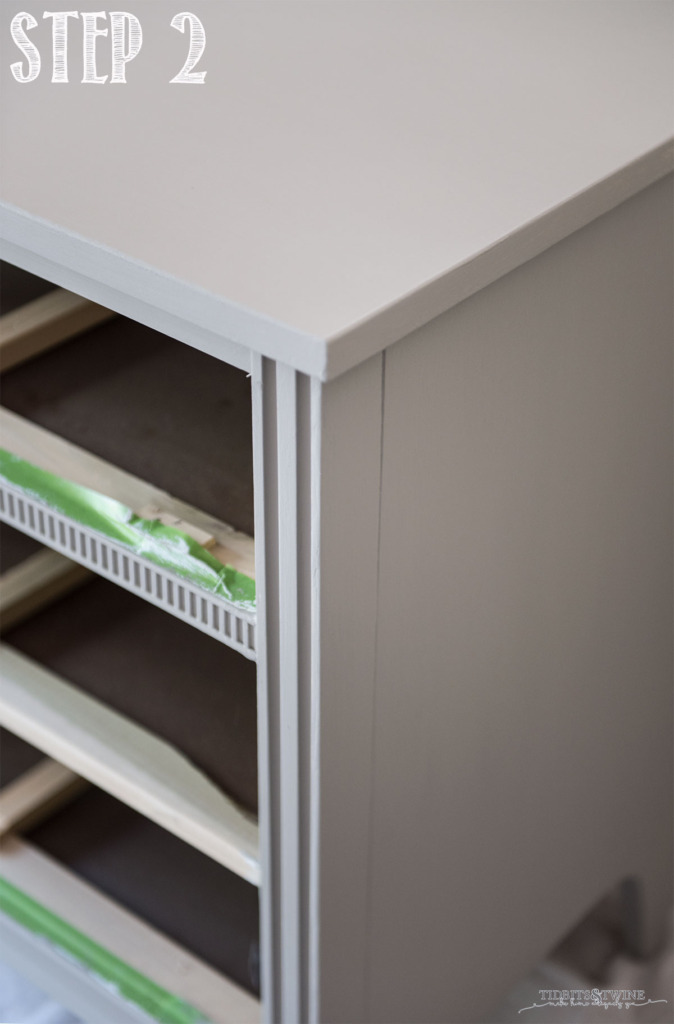
Step 2: Paint Base Color
I used Annie Sloan French Linen, which is a deep gray but on the brown side, not like a storm gray. Two coats gave it a nice even coverage.
I took the drawers out when I painted this dresser because there is a vertical divide down the center of the dresser. I wanted to paint the divide vertically and the drawers horizontally and so it was easier to paint the drawers separately. (For refernece, I left the drawers in place for the blended dresser since there wasn’t a divide.)
Pro Tip:
As you’re painting, keep a misting bottle handle to spray the paint if it starts to dry and drag on the brush. This is especially helpful when doing a large surface area, like the top, and you need to paint all the way across without stopping on the final pass.
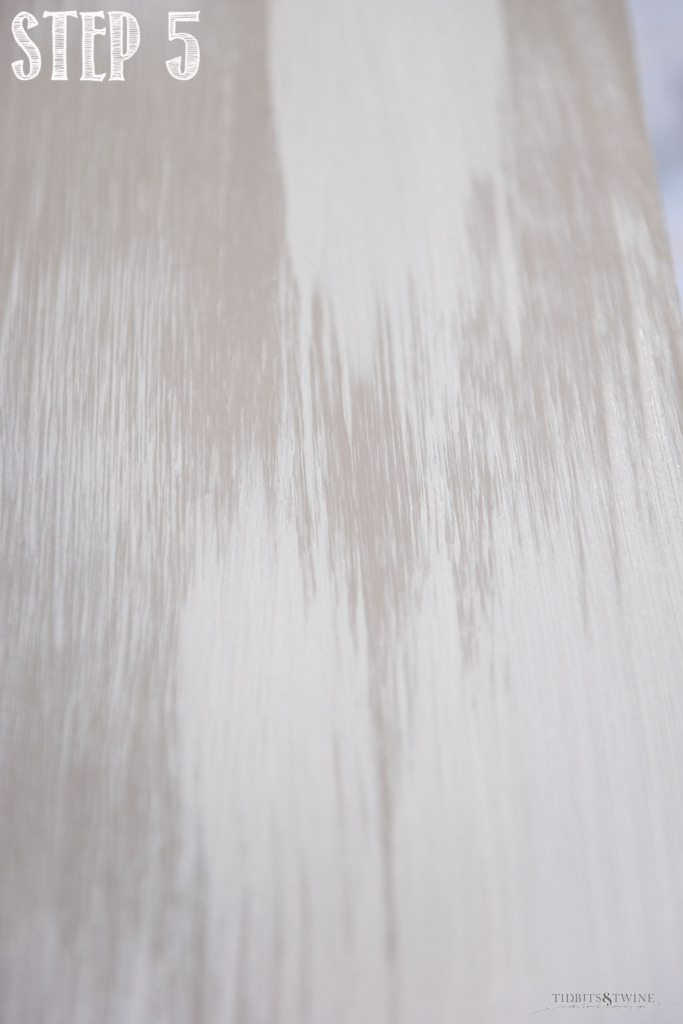
Step 3: Prepare Your Paint Mix
The next coat of paint is a 50/50 mix of Paris Grey and Old White. A little goes a long way so I used 4 oz. of each for this dresser and still had way too much! You can use a tupperware, cup, bucket, bowl, etc. to mix your paint. Once you mix the two paints together, dilute the mixture by adding water until the consistency is much like water.
Pro Tip:
- If you add too little water, your paint will stick the the surface and be hard to wipe off in Step 4. If that’s the case, add more water.
- If you add too much water, leave your mixture outside in the sun so that some water evaporates. You can also cover it and leave it in the refridgerator for a couple of hours.
Step 4: Wax
Using a stiff brush, apply a layer of clear way ONE SECTION AT A TIME. If you get too much on the piece and you can see bits of wax, just take a cloth and wipe it off.
You want the wax to still be wet for the next step.
Step 5: Paint Mixture
Using a flat brush, apply your 50/50 paint mixture to the wet wax area. You don’t need to section the piece completely. I found that I liked to paint more in the middle and not the edges. Only paint in one direction and one section at a time.
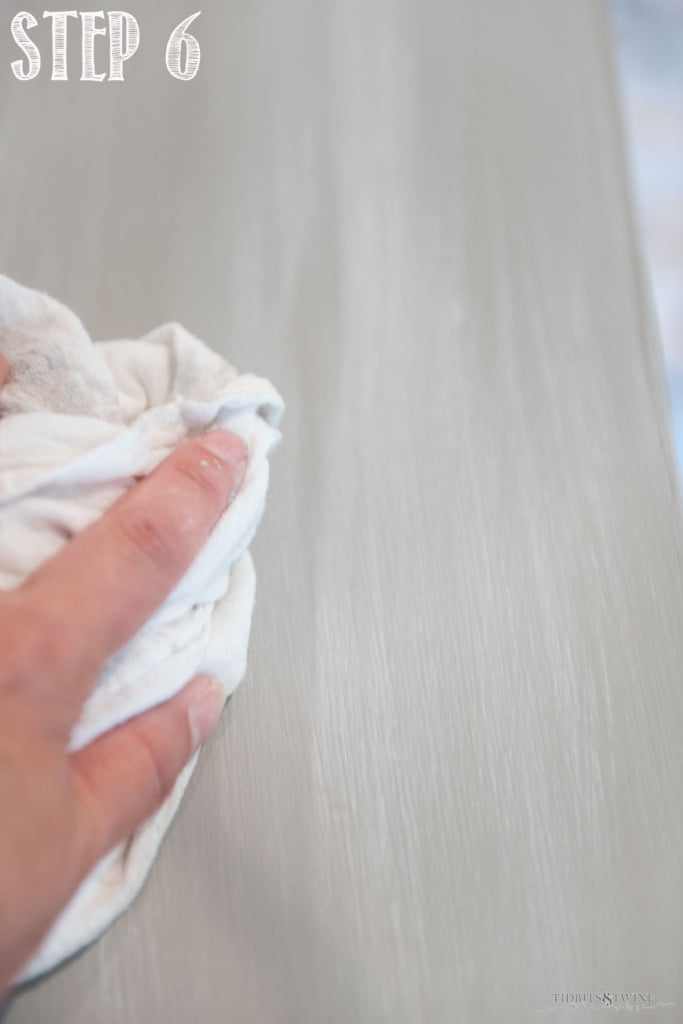
Step 6: Wipe
Using a clean, dry rag, wipe the paint mixture off. How much pressure you use and how much water was in your mixture will determine how much paint will rub back off.
Make sure to only go in the direction you want the “grain” to show.
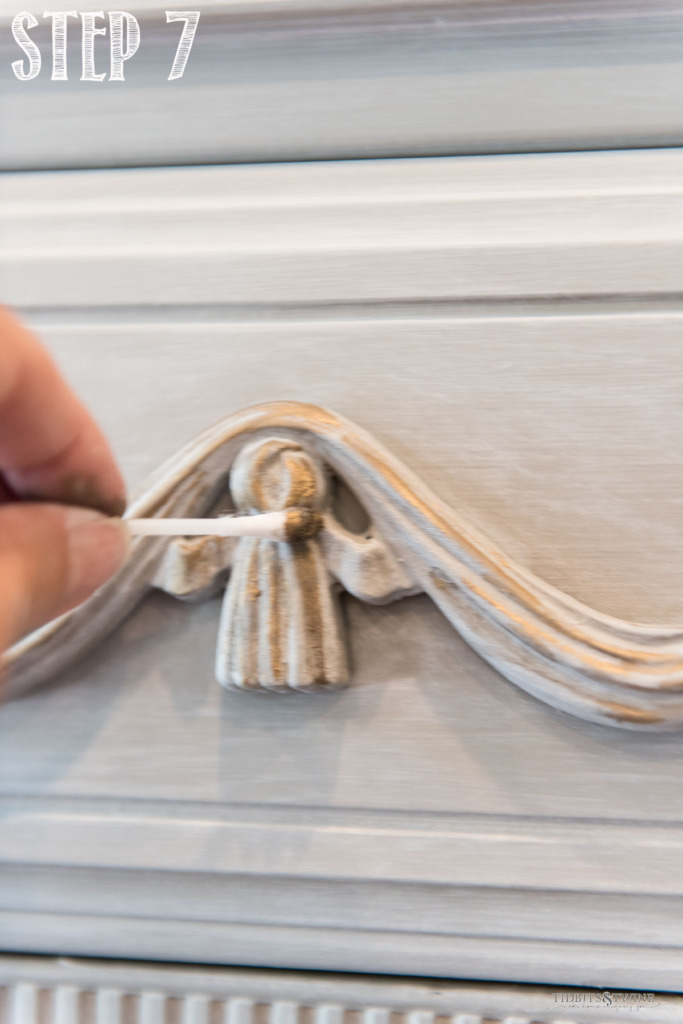
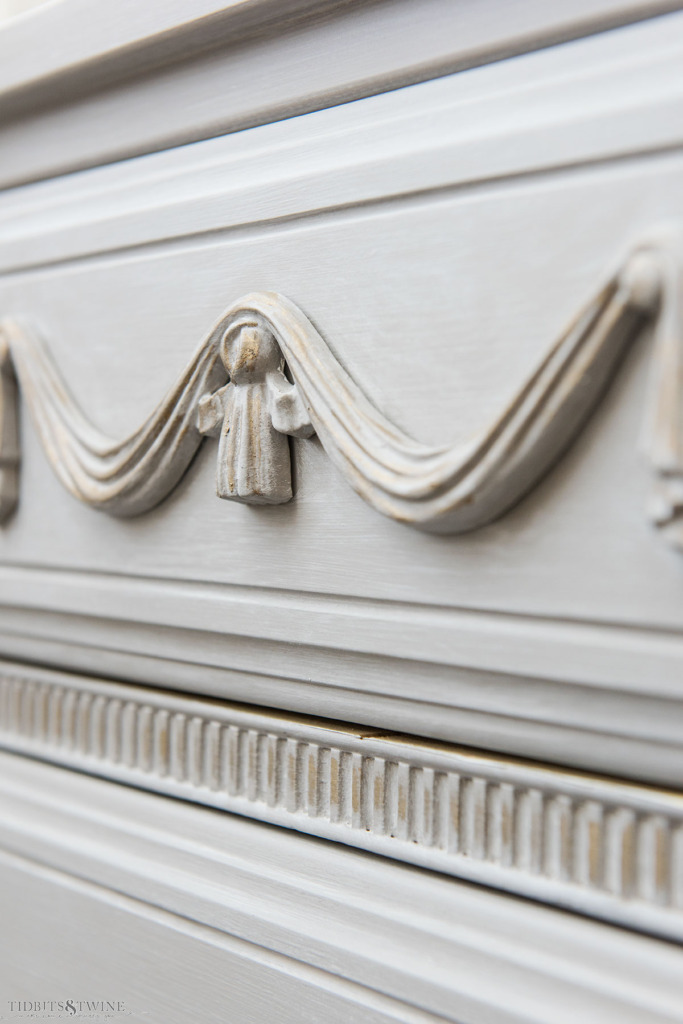
Step 7: Add Gold Details
I squeezed a dime-sized amount of Rub ‘n Buff European Gold onto a paper plate and applied it using a Q-Tip. A little goes a long way.
Step 7: Wax
Once the paint is dry, add a coat of Clear Wax to seal the entire piece. If this is something that will get a lot of wear on the top, consider using a top coat such as Dixie Belle Clear Coat or Dixie Belle Gator Hide.
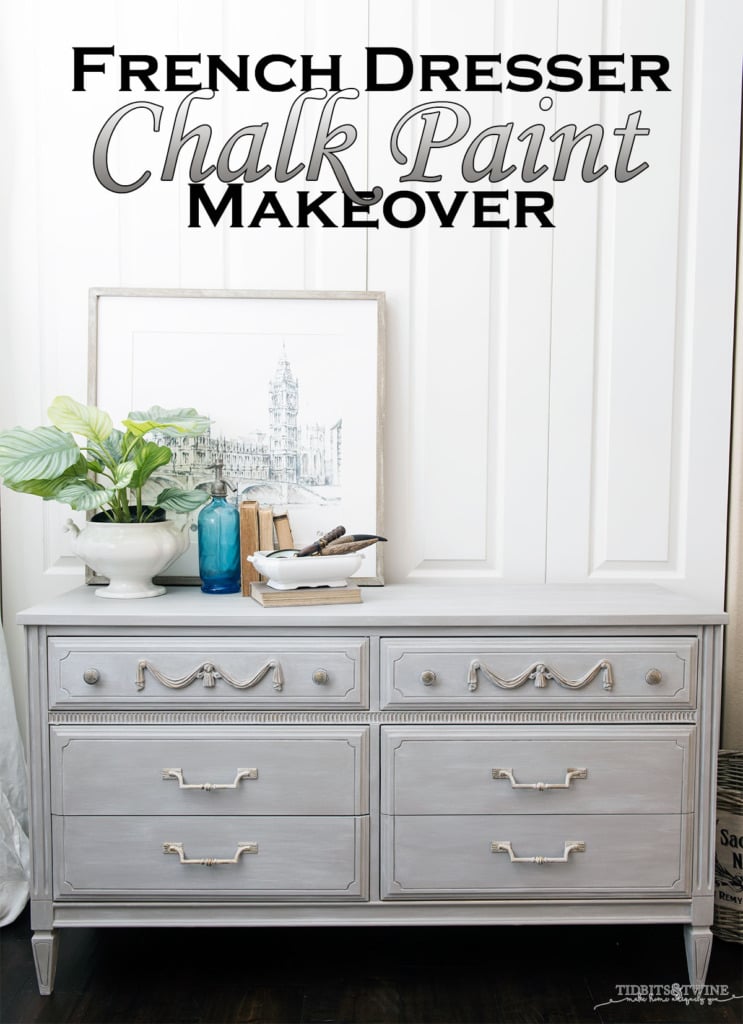
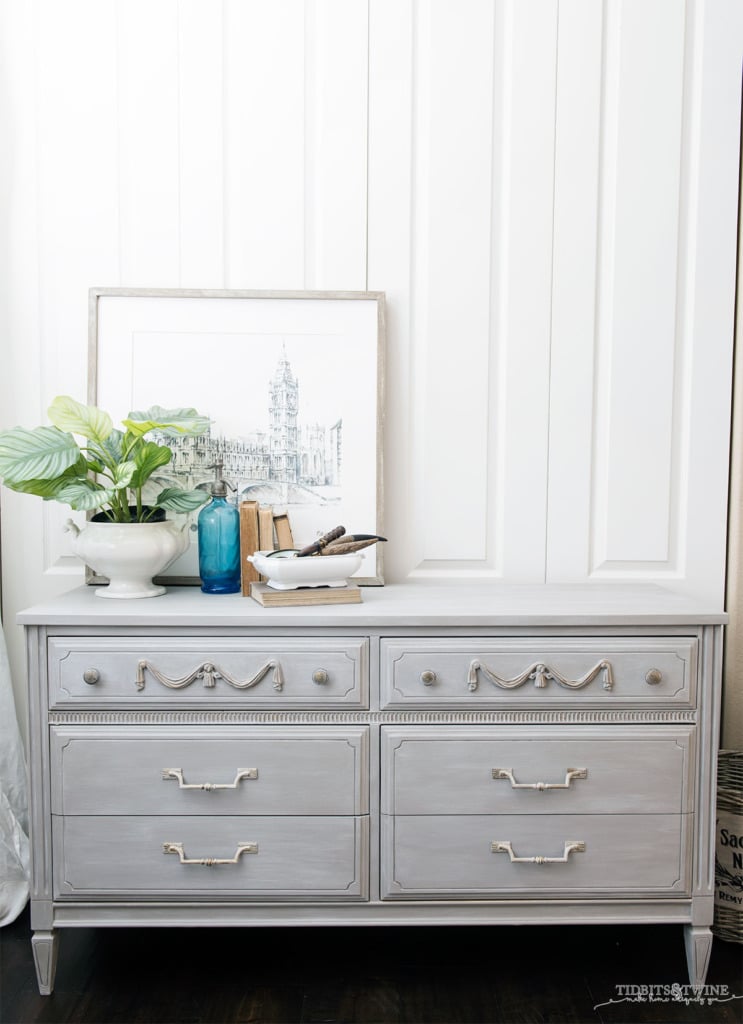
Painted French Dresser – AFTER
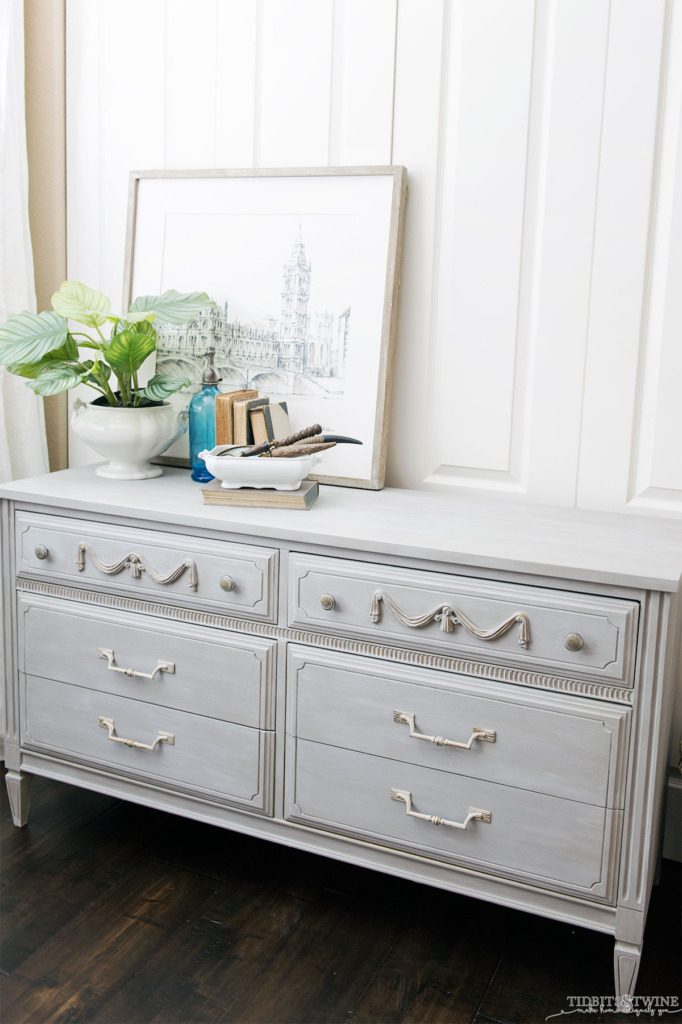
With its new neutral paint job, it’ll fit in with my house better (or someone else’s if I decide to sell it). What I love about the color French Linen is that although it is gray, it’s a warm brown-gray and so it looks beautiful with other wood tones, or in this case, it’s gold accents.
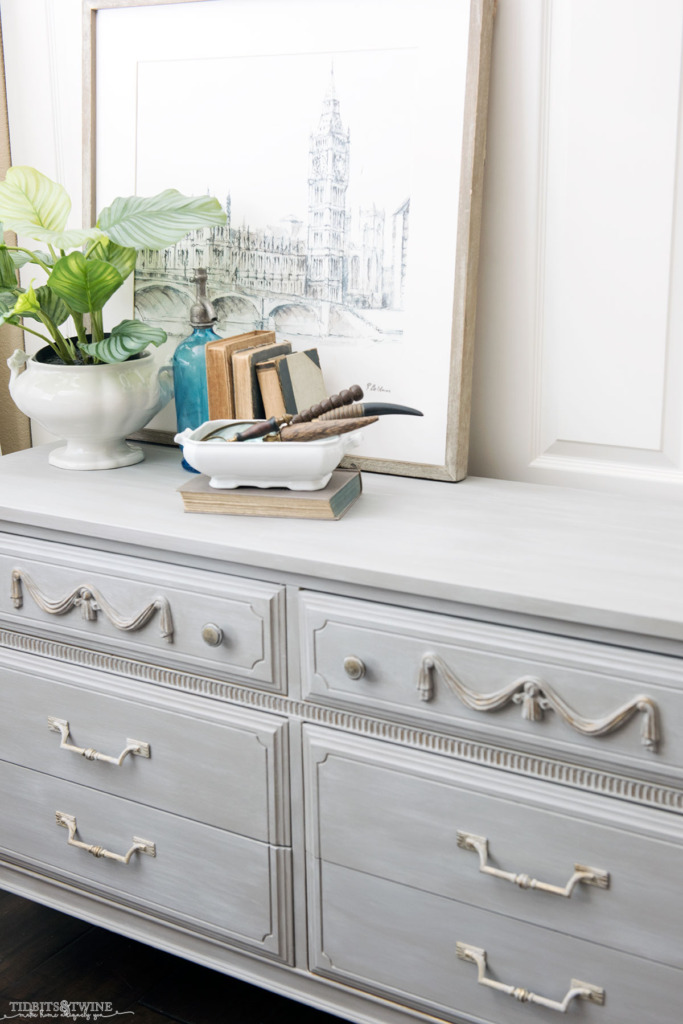
Below, you can better see the 50/50 paint mix. Again, I used a subtle amount but I am on the hunt for another piece of furniture that I can be heavier-handed with!

The Rub ‘n Buff is so easy to use for a worn glimmer of gold detailing. I chose European Gold which has more brown to it, but there are tons of shade options available!
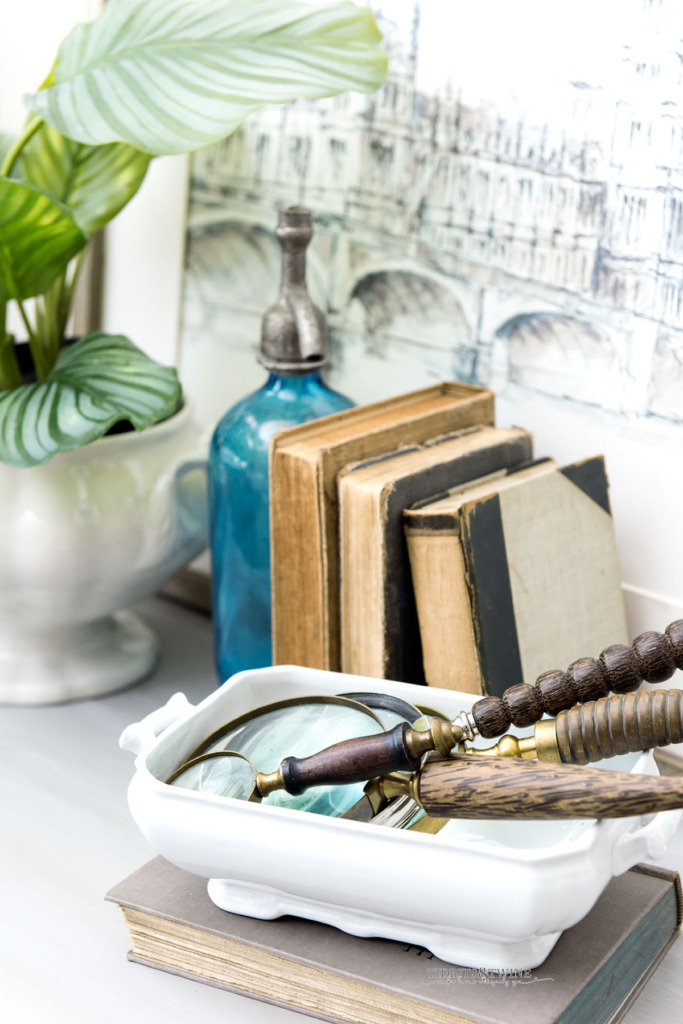
I love a good vignette so this was a great opportunity to put together something fun using ironstone, antique books, and my magnifying glass collection! And let’s talk about the plant….that is a faux plant from Pottery Barn and it was totally worth the price! It’s the absolute best faux plant I own.
I originally planned to replace all of the hardware, but then decided to keep the big drawer handles and just tone them down with a quick wash of the 50/50 paint mix. I did replace the knobs, though, but also gave them a paint wash.
This technique truly is super easy and give more depth and character to the piece than if I had simply painted it French Linen. Next time, I might add a bit more of the 50/50 and might try out some Dark Wax on it!


Join the Community
Let’s keep in touch! Get exclusive artwork plus the latest news delivered directly to your Inbox!
How cool and cool you got to paint this dresser. I really like the result, especially when comparing before and after, it is very clear that the difference is huge. I really hope that your advice will help. I have a similar dresser that needs updating for a long time. Therefore, I will try to do as you do.
Plain dresser turned into a beautiful example of your artistic talent.
Beyond gorgeous. Love your attention to detail