How to add ribbon loops to a Christmas tree for a decorative look! This is my easy method to fill unsightly gaps in the branches and add a pop of color. It’s easier than you might think!
Each year, I start thinking about what theme I want for my Christmas tree around September. Yes, I know that’s early but a girl needs time to shop! I love coming up with a color scheme and a decorating plan for the “pretty” tree I put up in our living room. (As opposed to our family tree which includes a hodge-podge of sentimental ornaments collected over the years.)
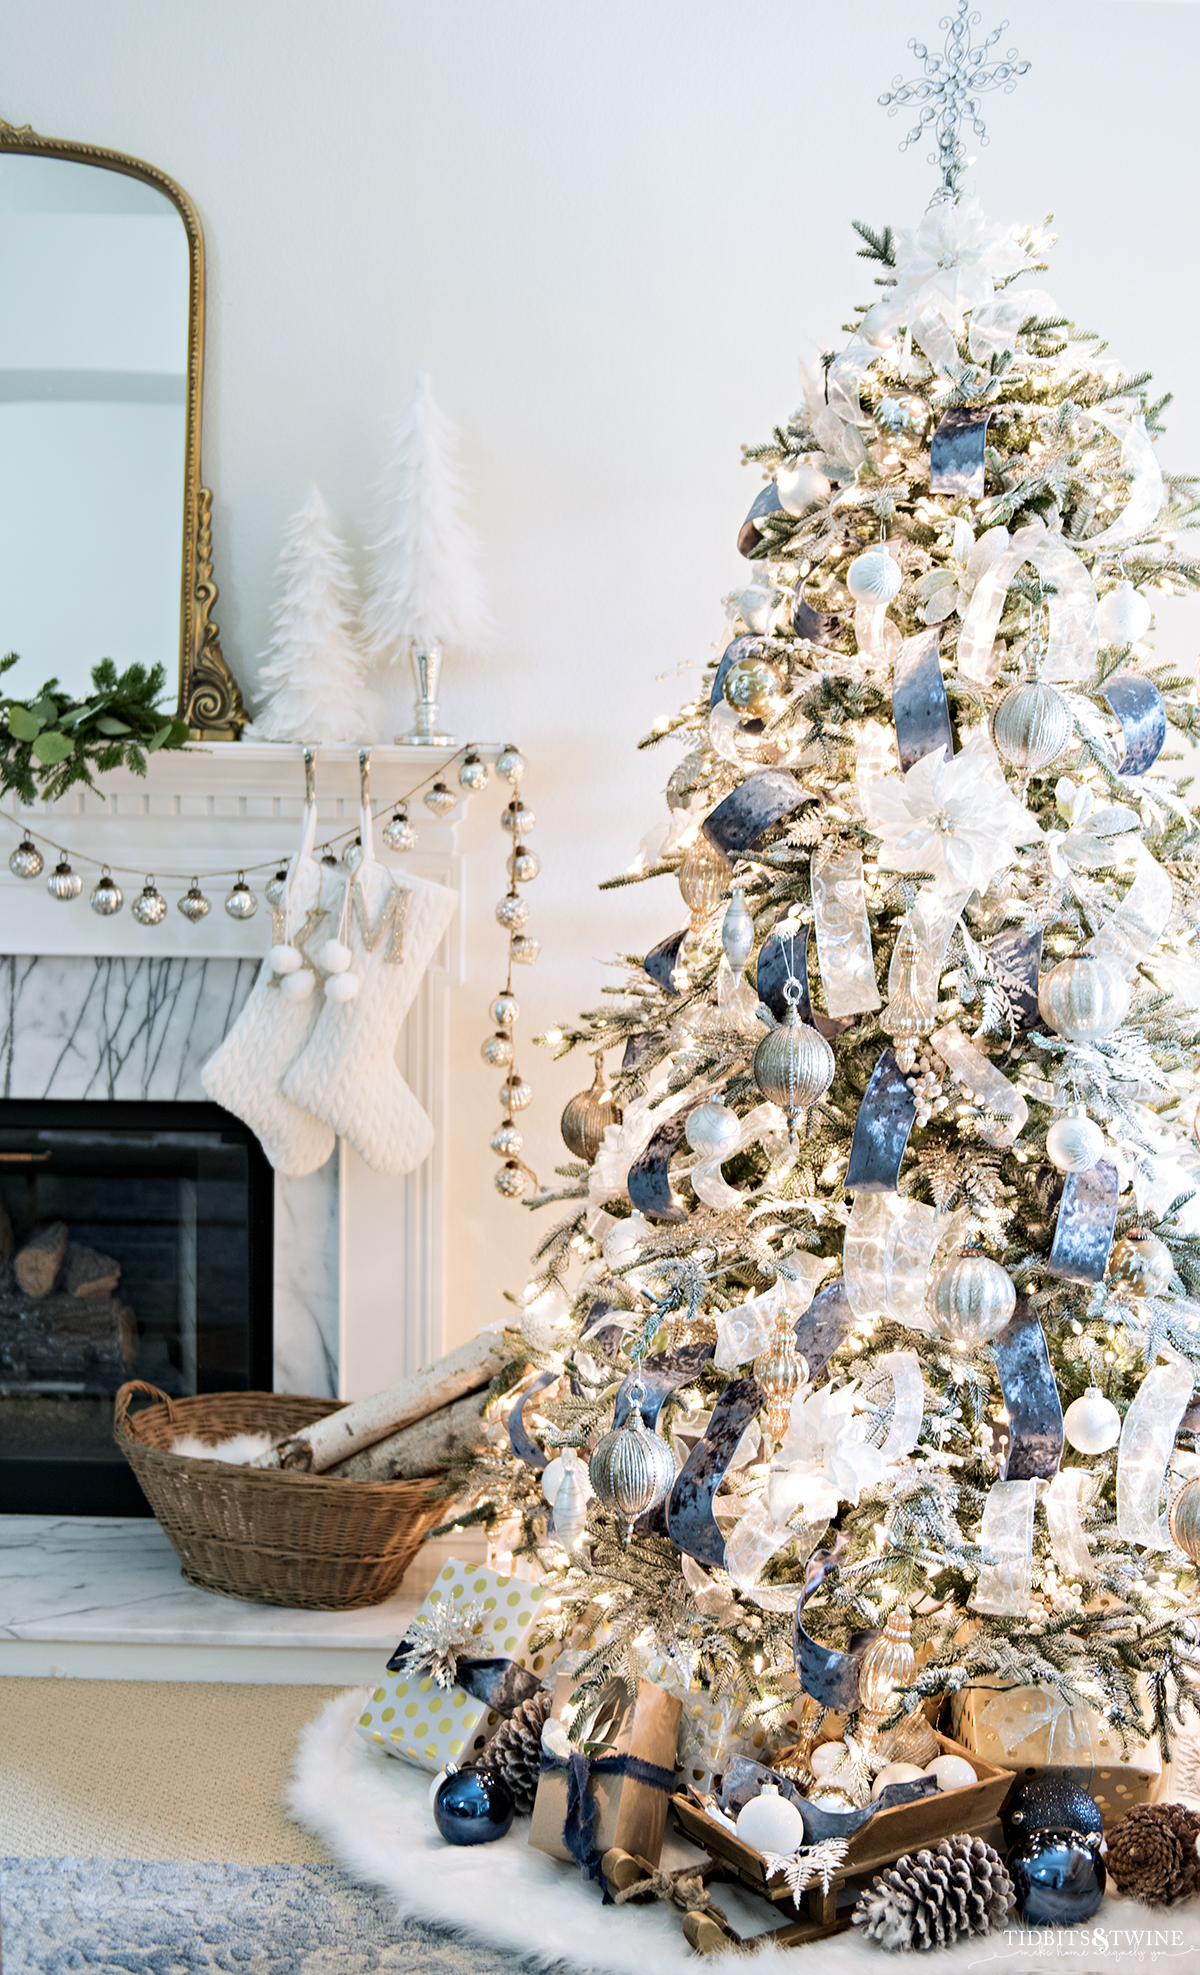
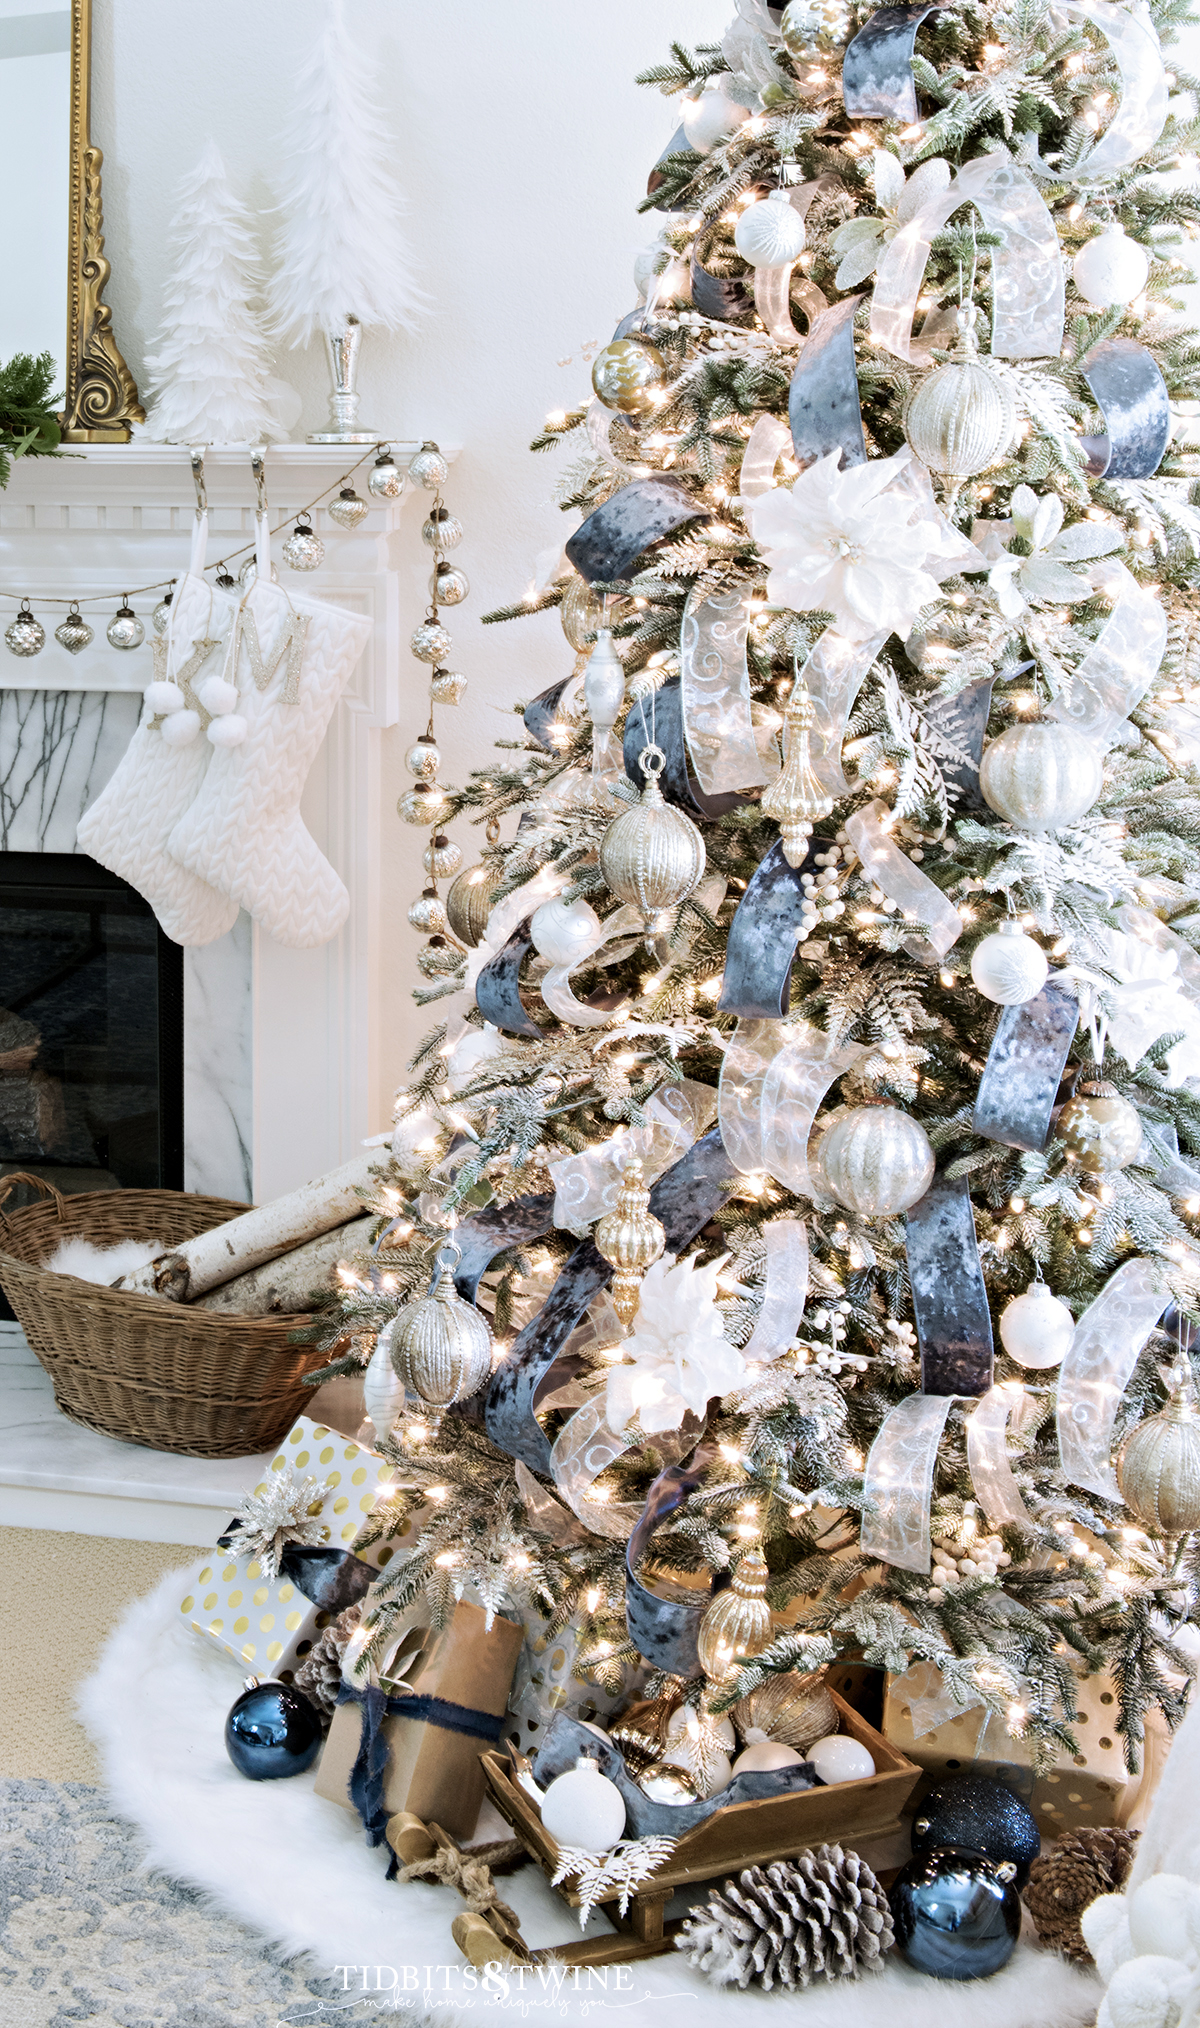
I try to reuse as many elements as I can year to year to 1) cut down on cost and 2) reduce storage needs! So this year, I decided to use my traditional gold, white, and silver ornaments and change up the look with ribbon loops!
If you’ve considered adding ribbon to your tree but haven’t actually taken the plunge because it seems difficult, let me assure you that my method is super easy.
So here are my step-by-step instructions for how to decorate this tree! I’ve included everything from set-up, to ribbon, and even the decor I stash underneath! You don’t have to use this color scheme to follow along. Simply pick your colors, pick your filler elements, and you’ll be off and running.
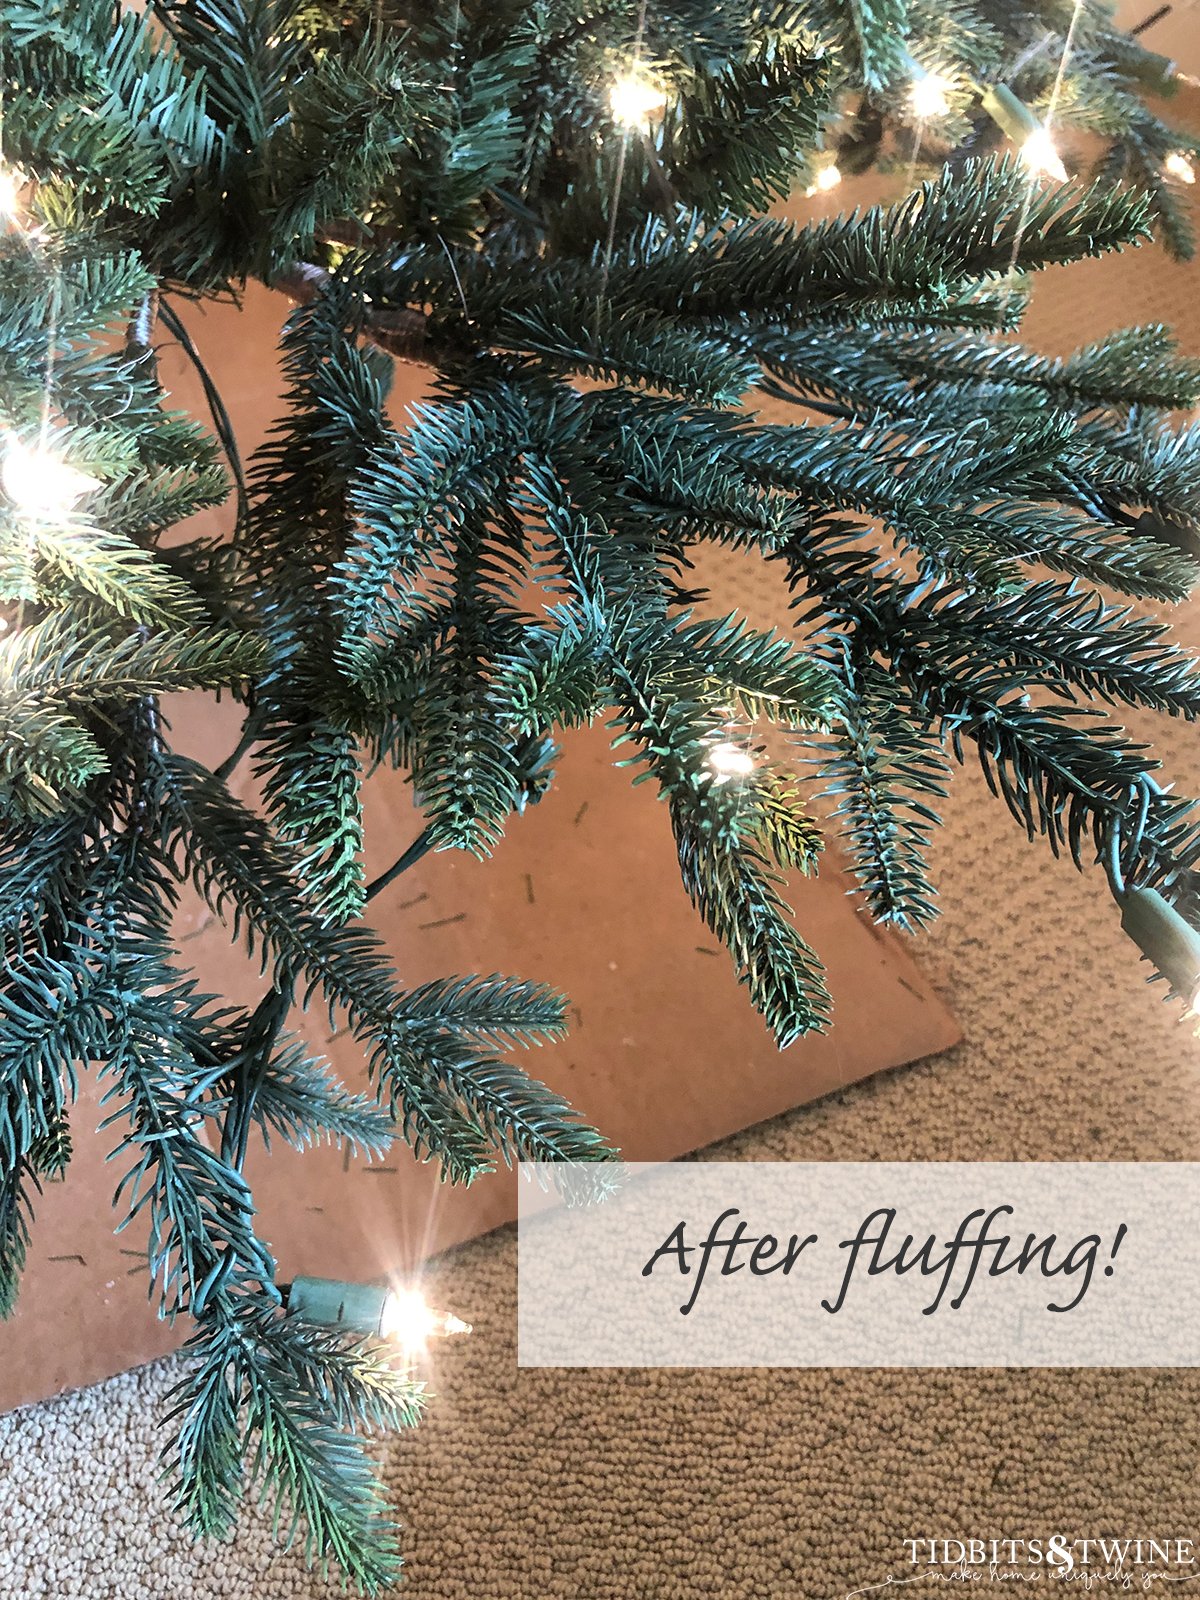
Step 1: Fluff Your Tree
If you have an artificial tree, don’t underestimate the importance of fluffing! Fluffing your tree simply means separating the branches and bending them into natural shapes. Believe it or not, I spend about an hour fluffing each of my artificial trees, going branch by branch.
Tip: The inside branches can be bent upward to make the tree appear fuller and cover the trunk.

I took the below photos before I flocked the tree because the tree has to be fluffed before flocking. Of course, flocking is optional but if you want to get the look, here’s my guide for How to Flock a Tree the Easy Way!

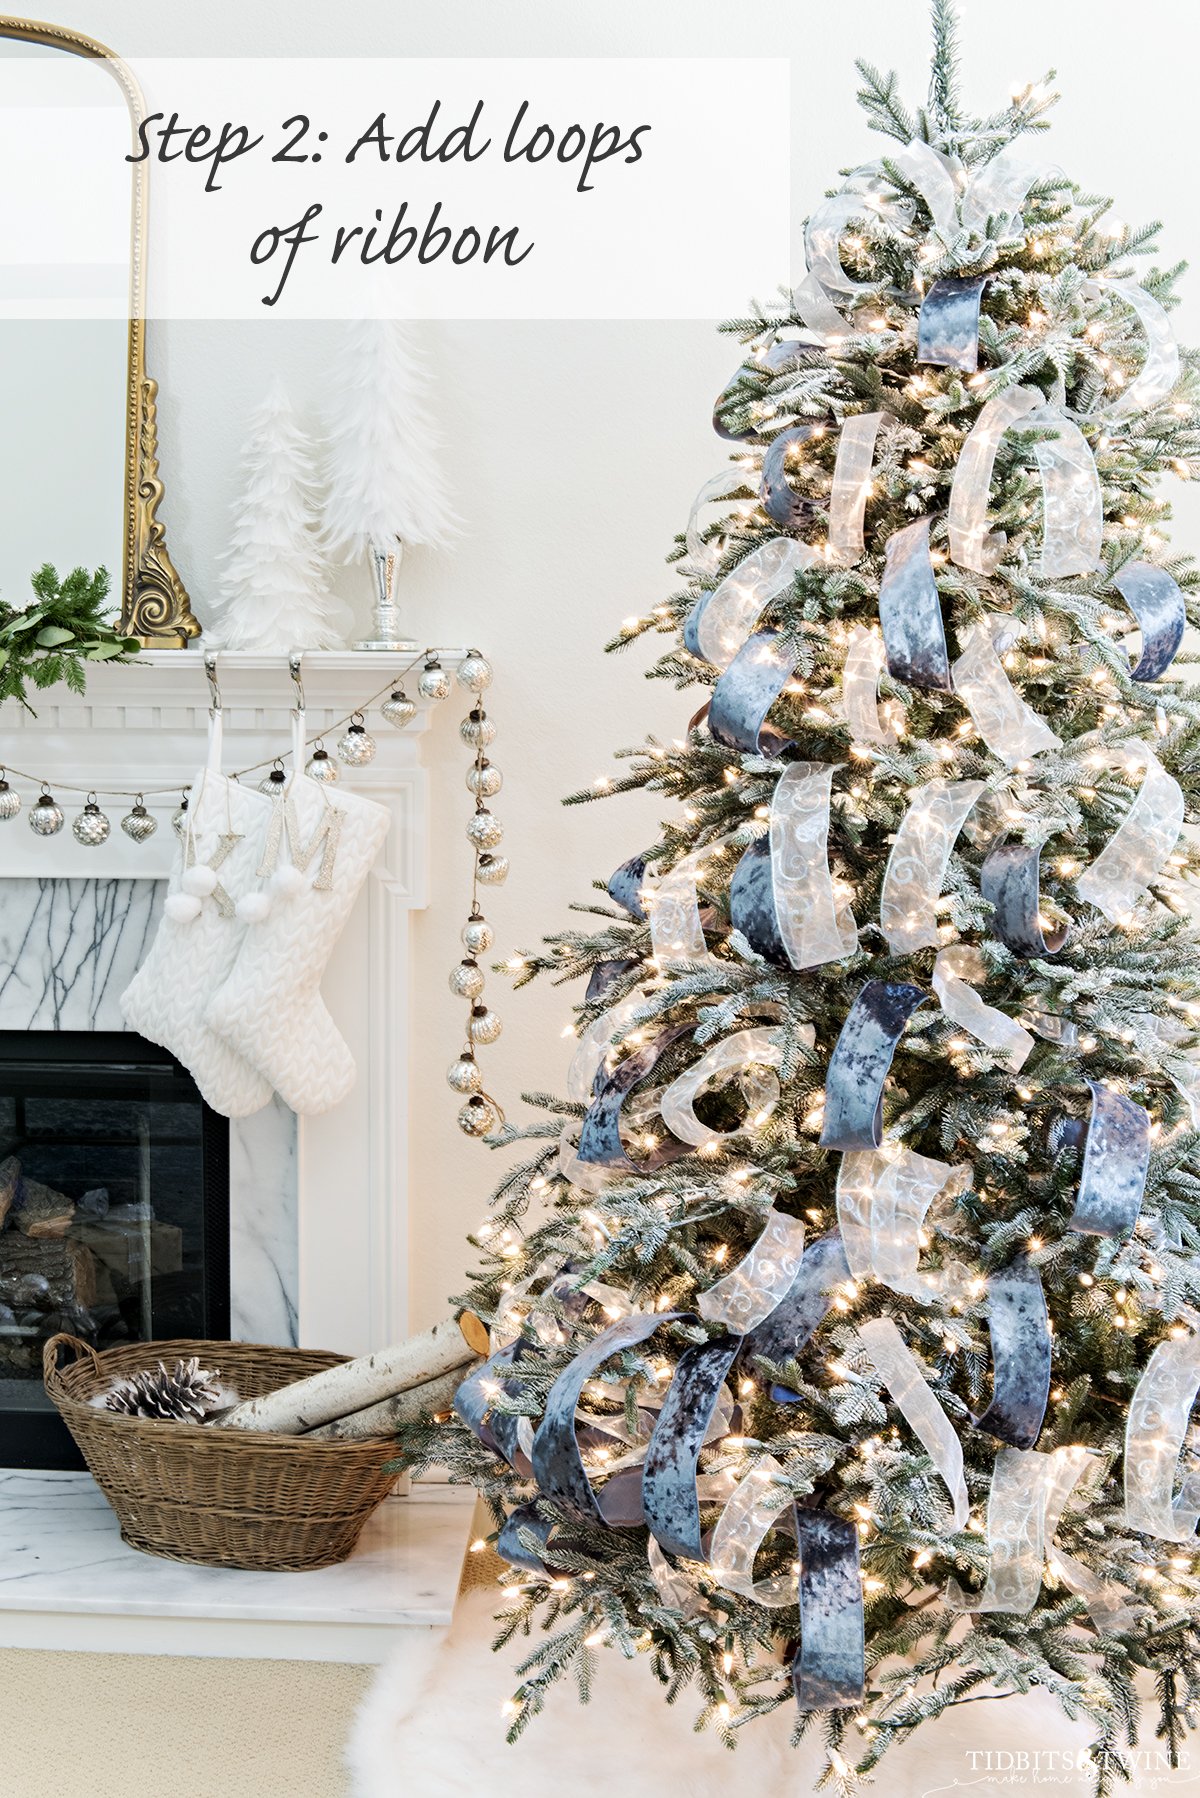
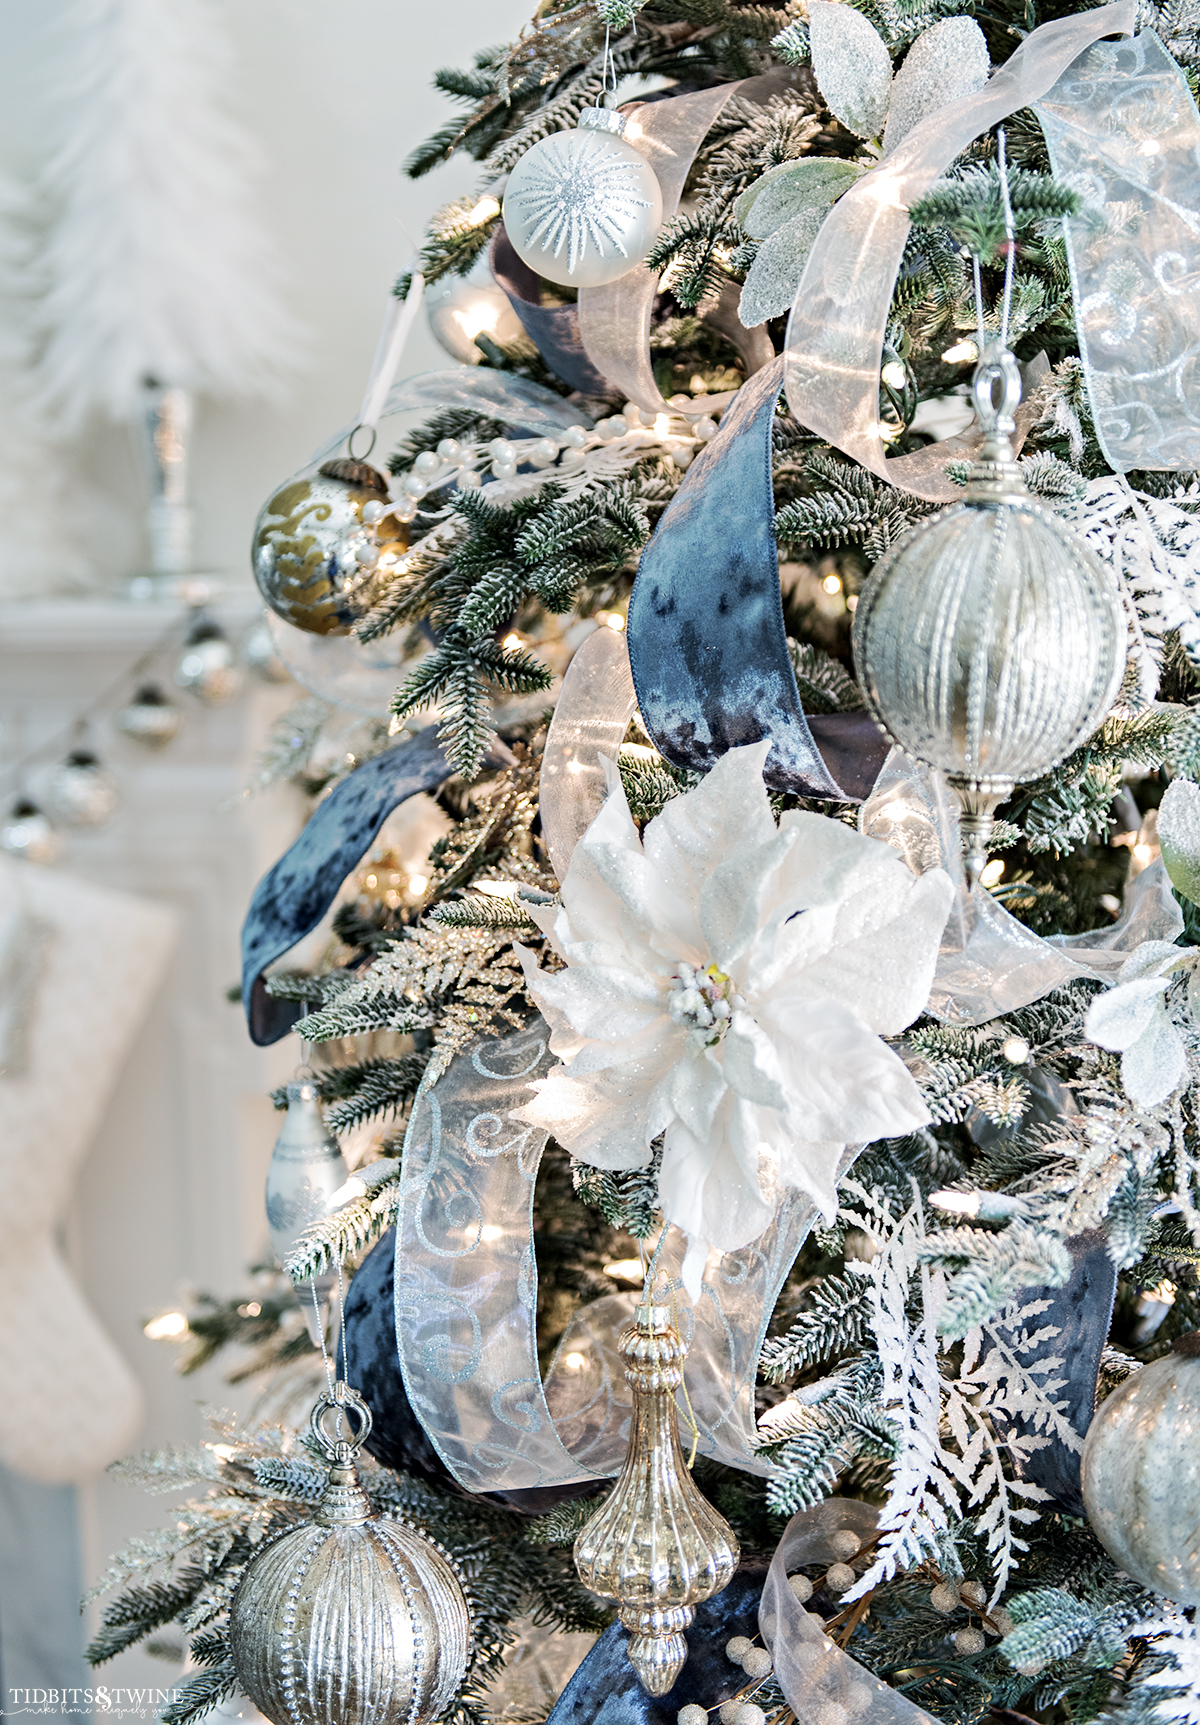
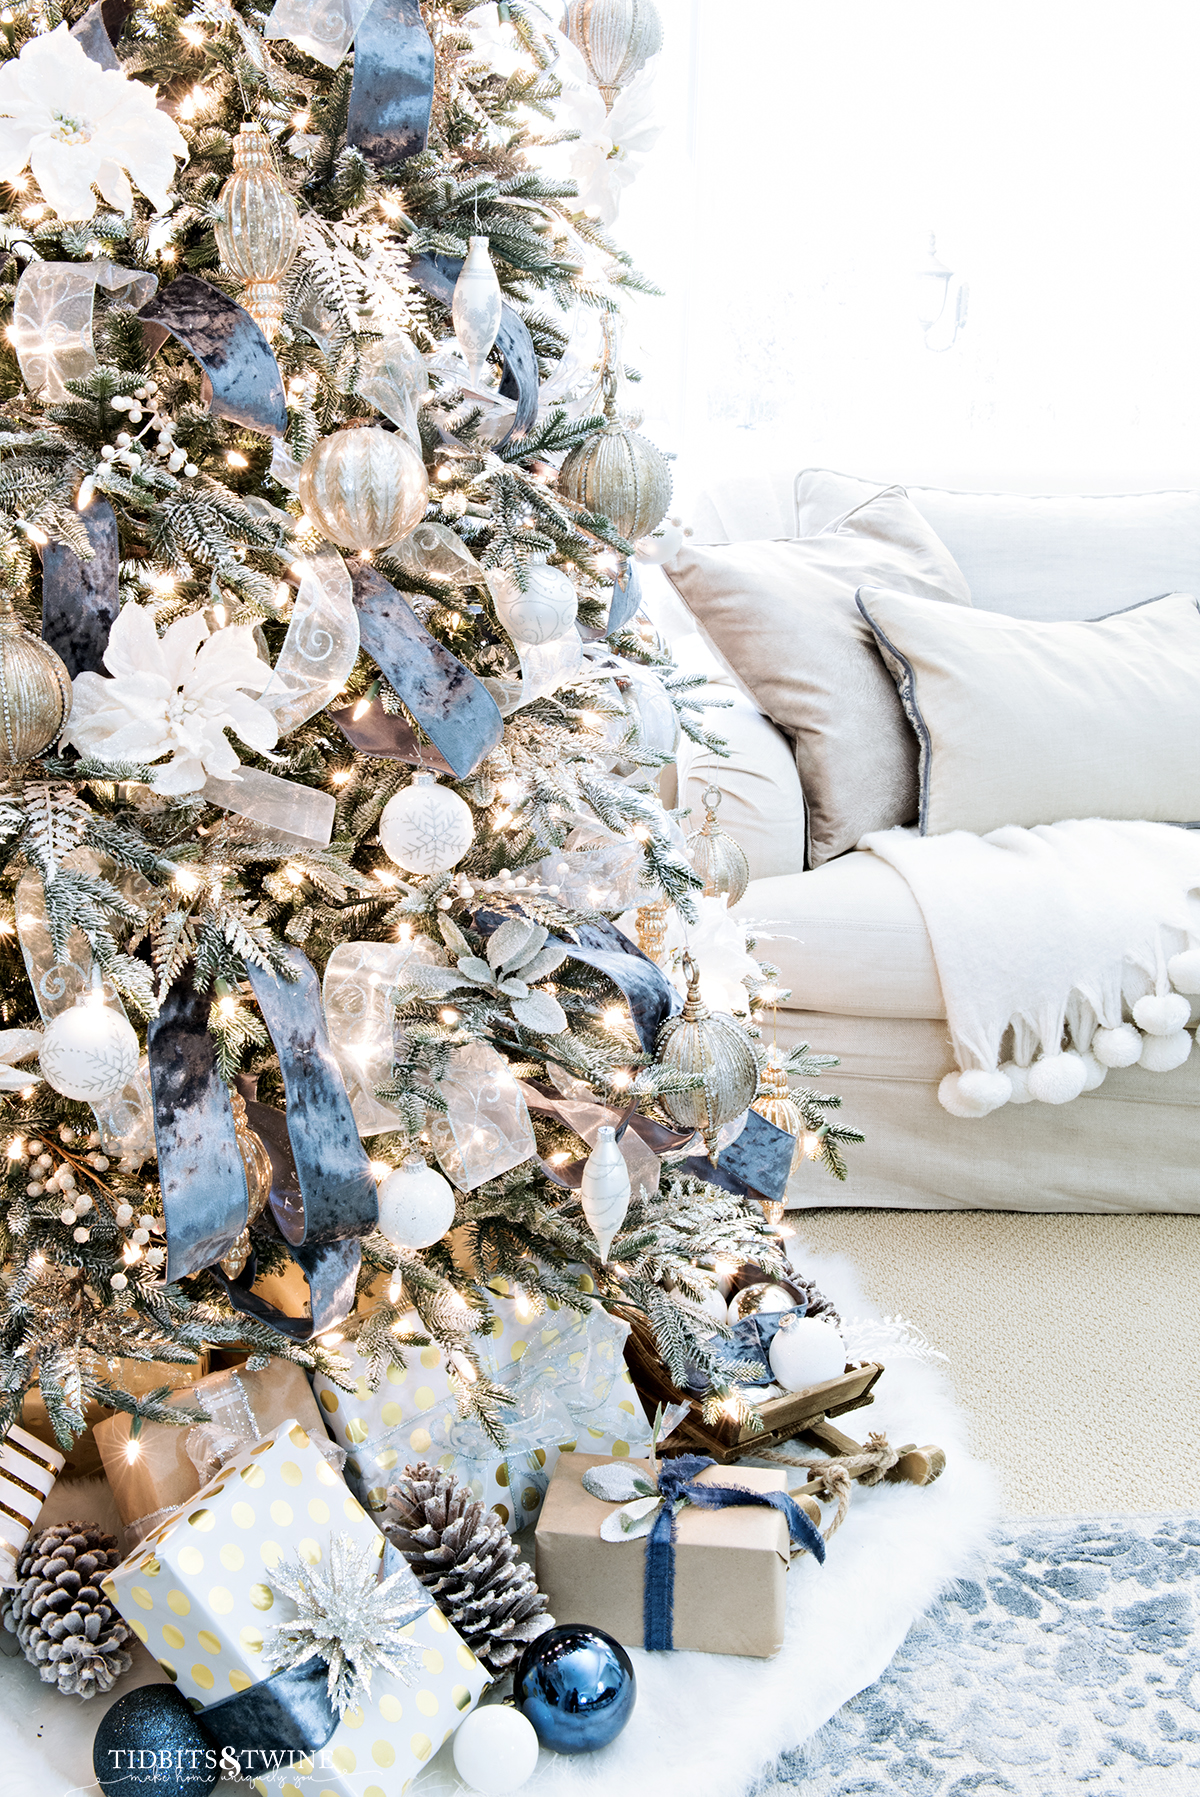
Step 2: Add Ribbon
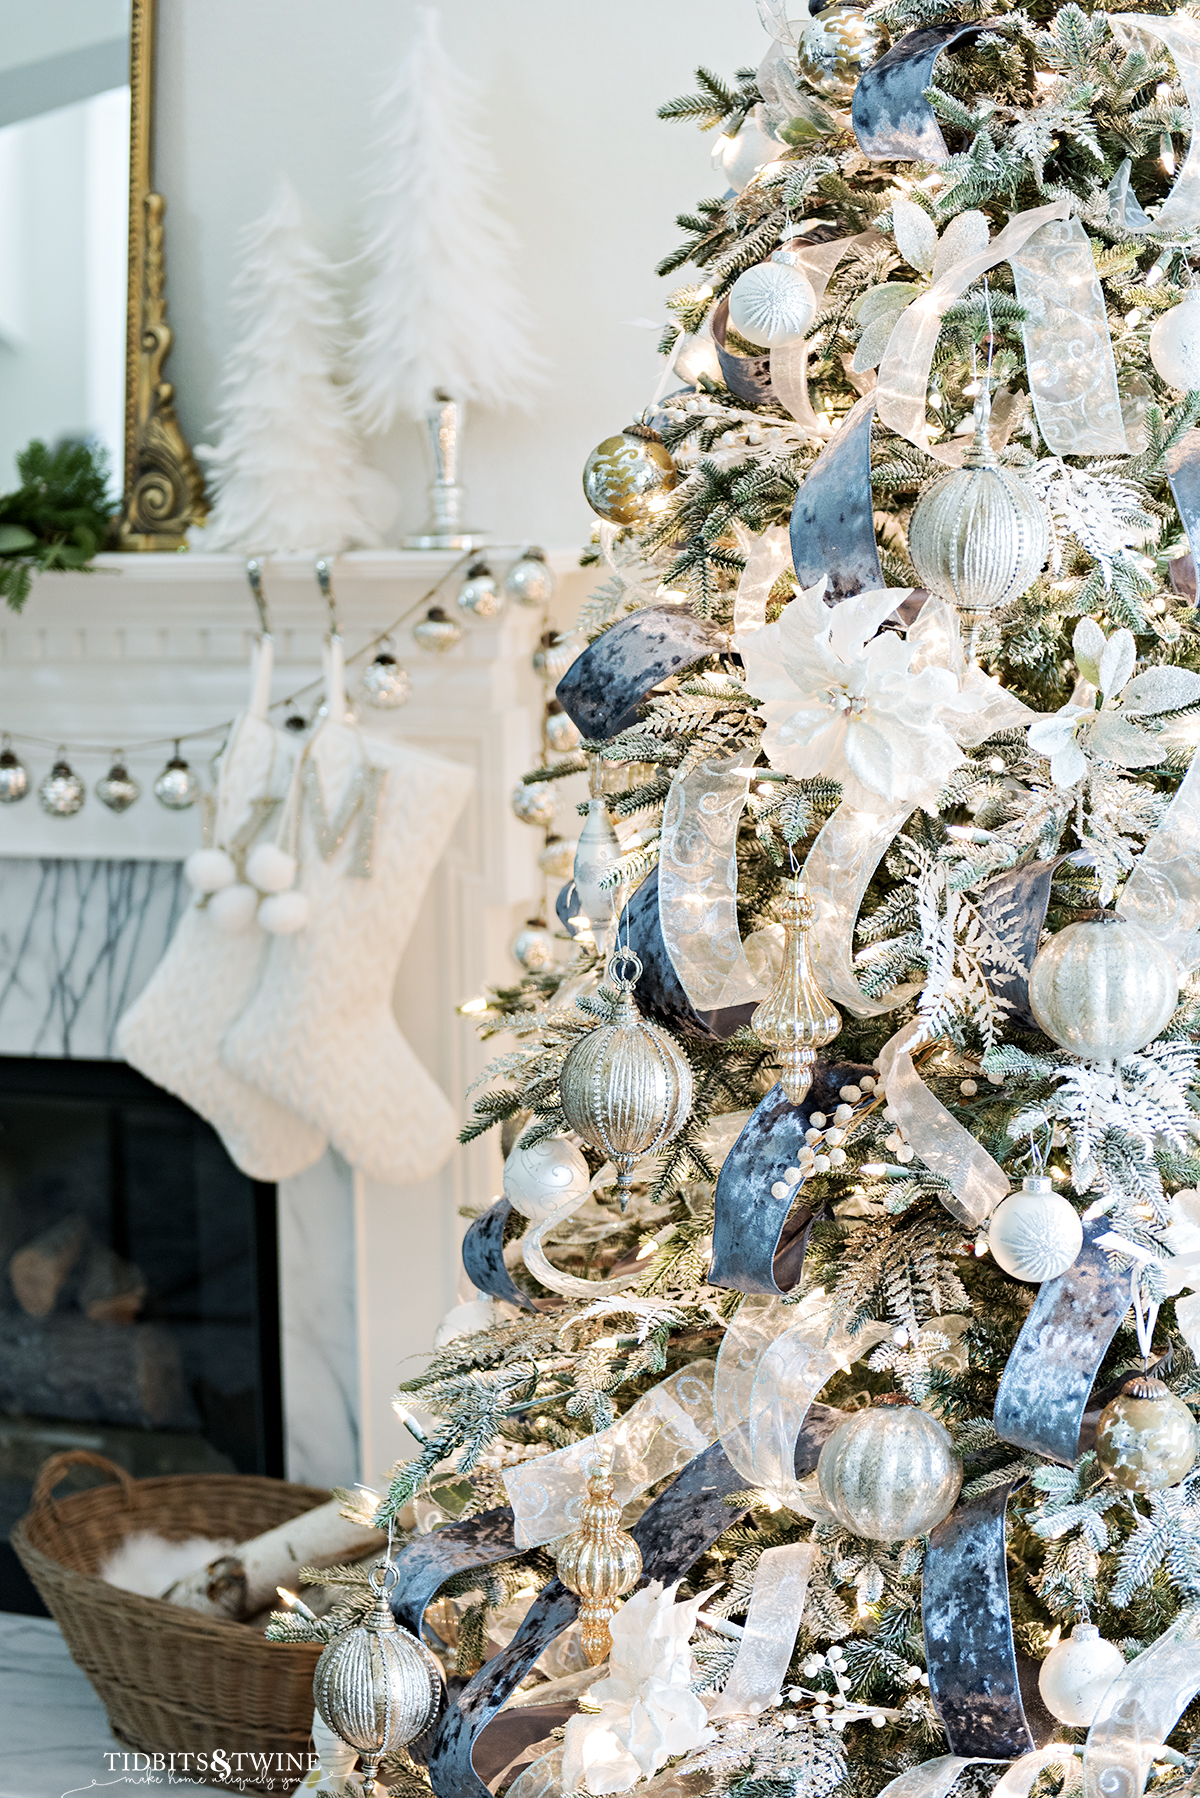
I love adding ribbon to my tree because it allows me to include a pop of color, even if my ornaments are the same year to year. Plus, ribbon gives a tree a very elegant look.
Last year my tree included criss-cross ribbon, but this year, I added ribbon loops. My tree has a lot of gaps, so my goal was to fill the gaps with ribbon!
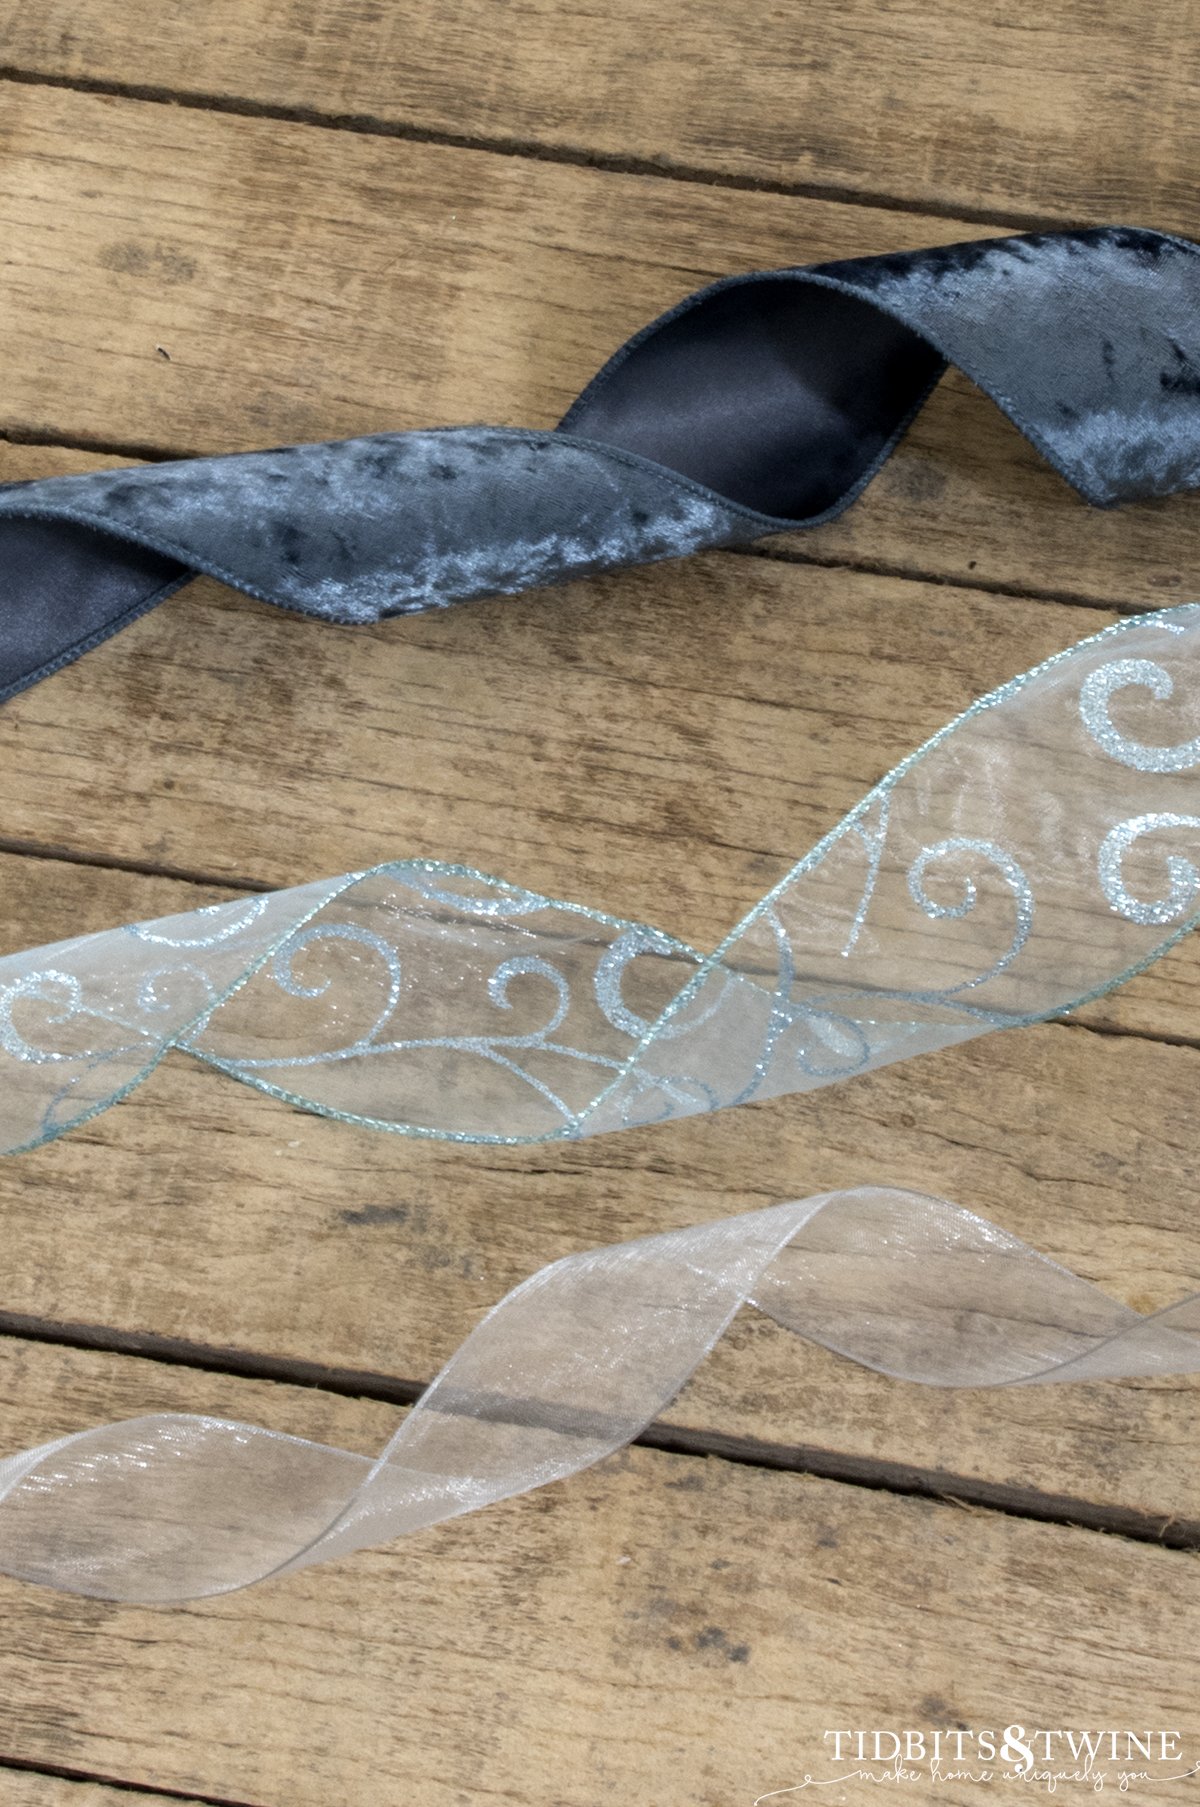
Best Ribbon for Christmas Trees
My widest ribbon was 2.5″ because that’s the widest I could find in the color I wanted; however, for your main ribbon, I suggest at least 3″ if not 4″ so that it really stands out. The other ribbons can range from 2″ – 3″.
The best ribbon to use is wired-edge ribbon so that it holds the shape you want to use.
How Much Ribbon to Use
For this tree, I used three different types of ribbon:
- 2.5″ Smokey Blue Velvet – 30 yards (you will need 10 rolls)
- 2.5″ Ice Blue Swirl Sheer – 25 yards (purchased on a 50 yard roll)
- 1.5″ Sheer Silver – 15 yards (similar to this)
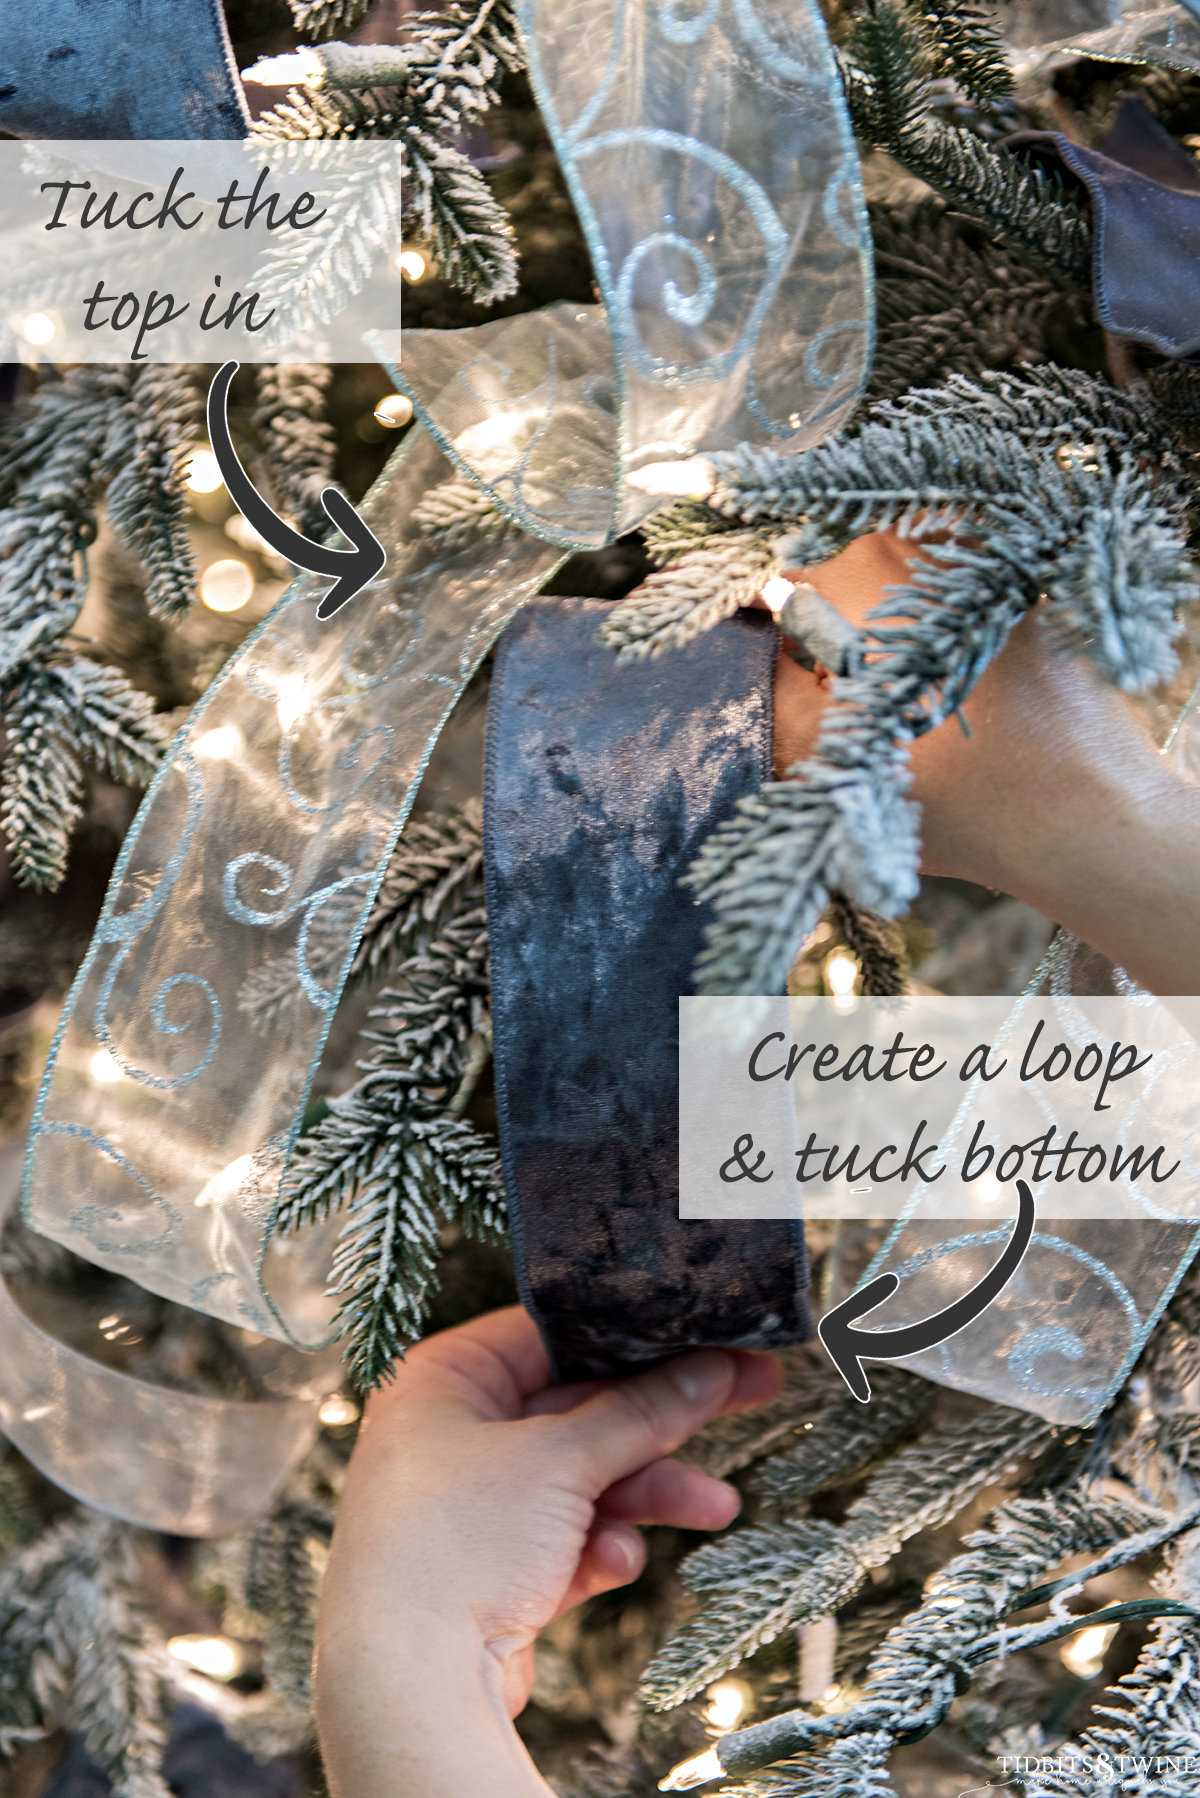
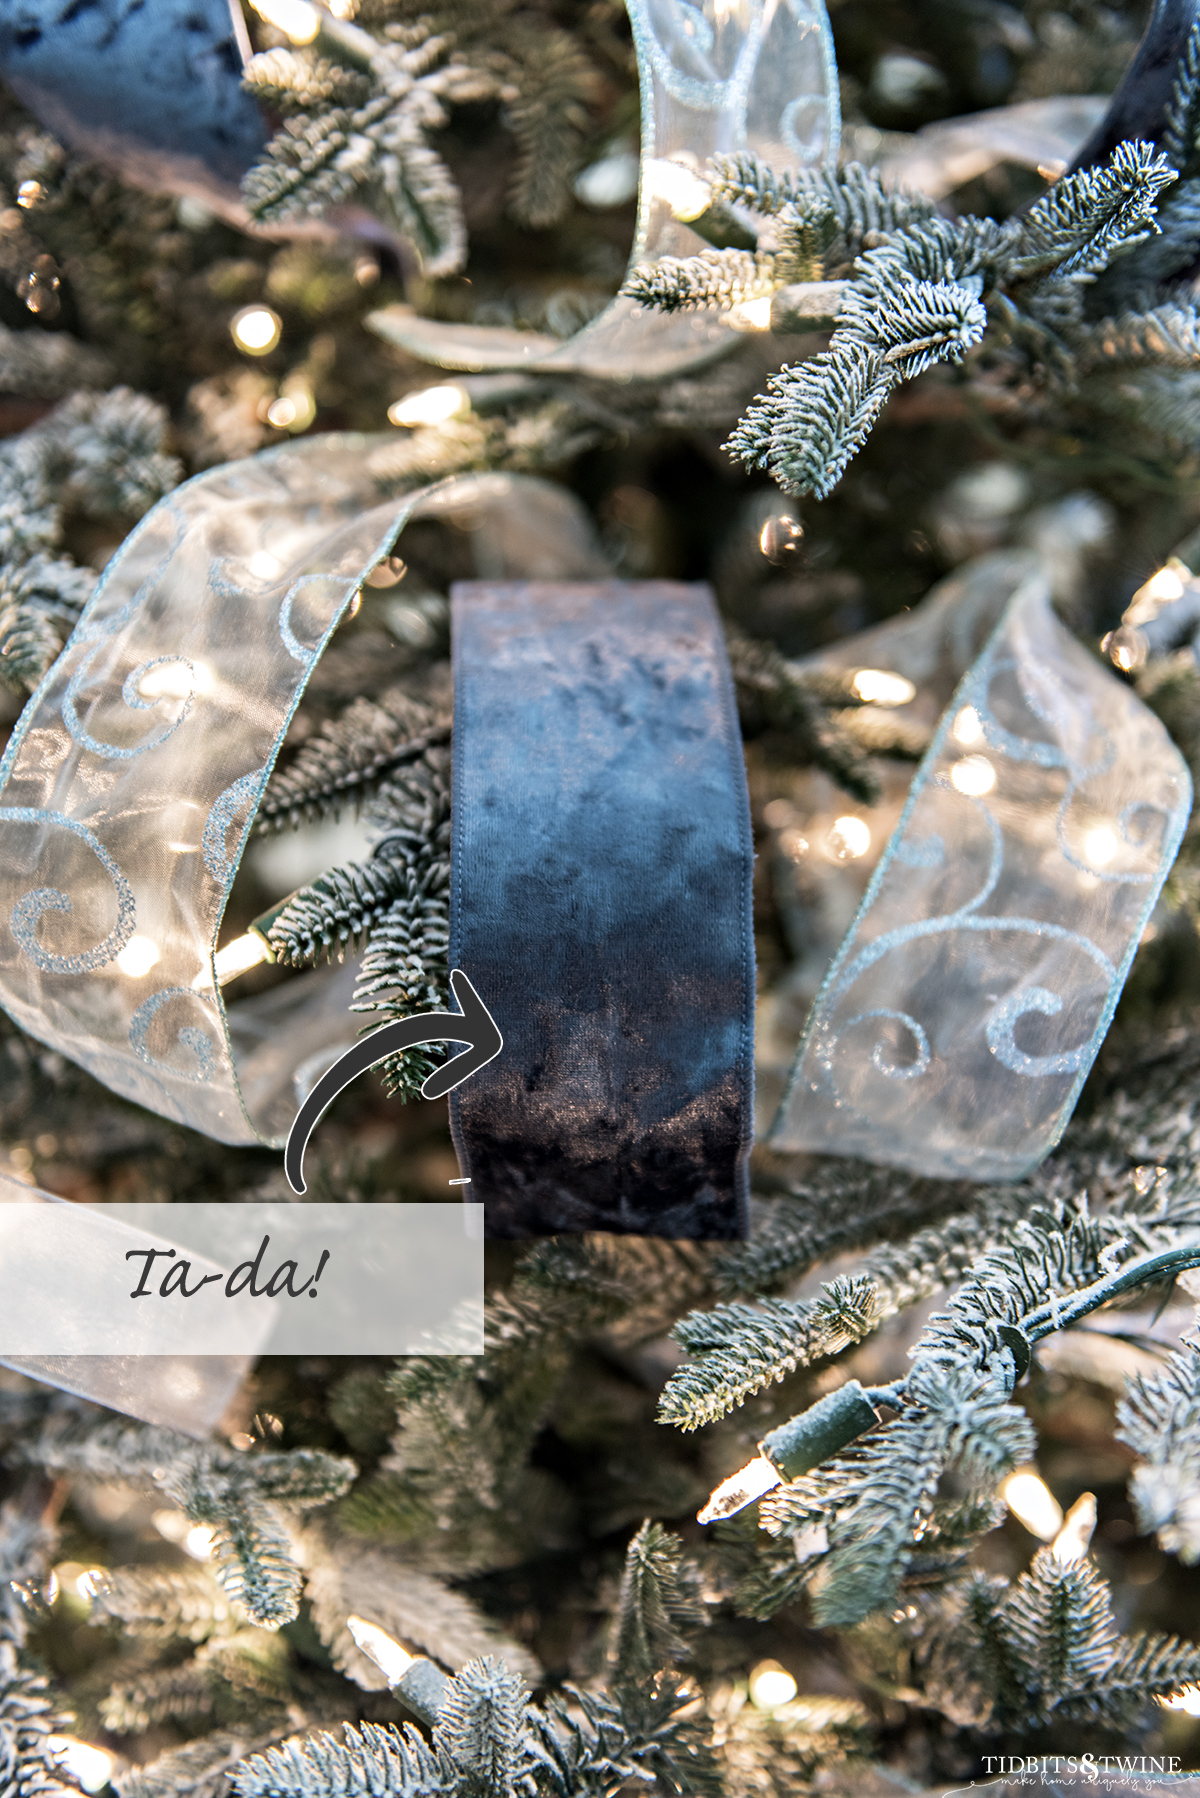
How to Create Ribbon Loops
The easiest method for adding loops of ribbon to your tree is to simply cut the ribbon into individual lengths to fill each gap. This is the trick that makes this so easy! No more weaving your ribbon in and out of the tree – just use individual pieces! Start with your biggest, main ribbon, and work your way down to the smallest one.
Simply tuck the free end of the ribbon into the tree where you want to start your loop. If it doesn’t stay, you can wrap it around a branch using the wired edge to hold it in place.

Next, pull the ribbon out to create a loop and then tuck it back into the tree. I only make 1 loop per cut section so that I have full control as to where to place them and can easily move them around later if need be.
My ribbon sections range from 6″ to 15″ each but the lengths will depend on the size of the areas you want to fill on your tree.
Tip: Don’t worry about making them vertical…using them at angles creates more interest!
As you move through the remainder of the steps, be sure to keep adjusting your ribbon loops as necessary to get the look you want!
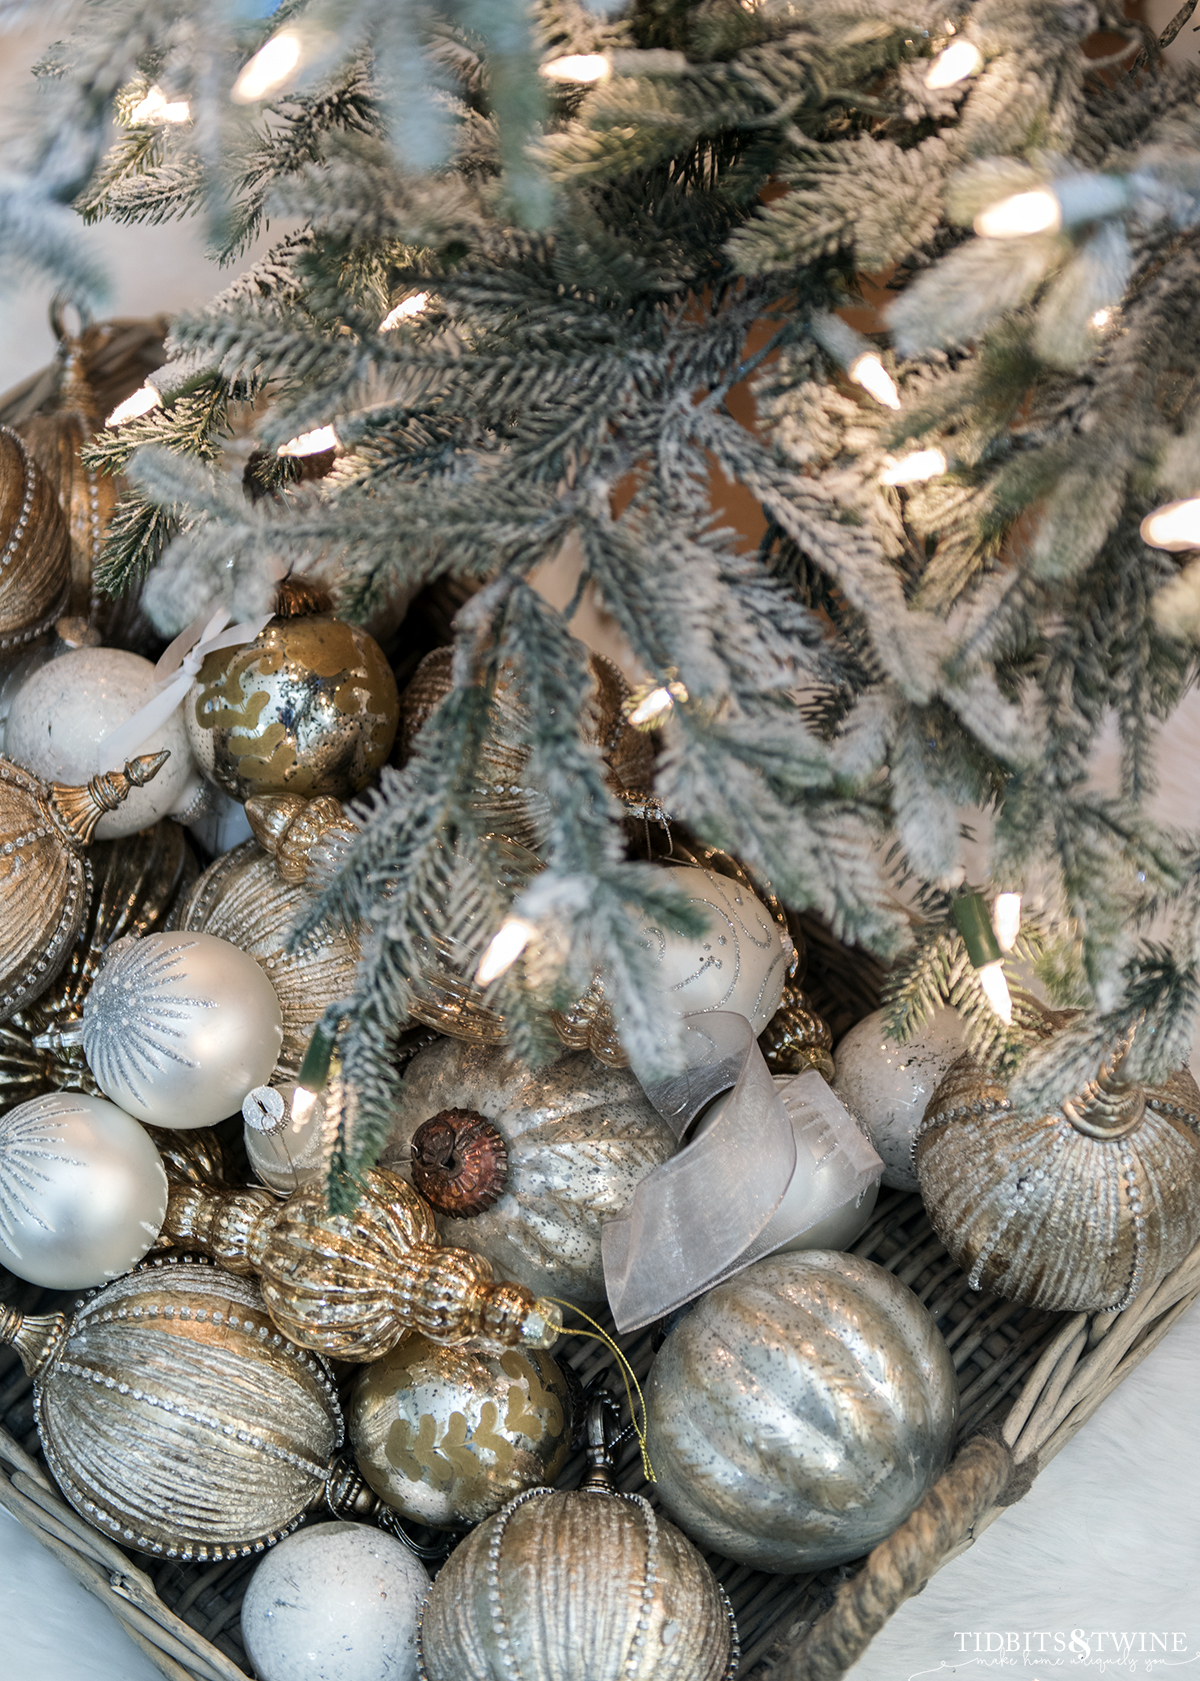
Step 3: Add Ornaments
Always start with your largest ornaments and work your way down to the smallest. Make sure that you evenly space the various types of ornaments throughout the tree. And if there isn’t quite enough room to hang one, consider tucking it into the tree and allowing it to sit on branches!

The secret to hanging ornaments is to make sure that they hang perfectly vertical!
Kim @Tidbits&Twine
I’ve collected my ornaments over a number of years and use them each year. Most came from Hobby Lobby, but a few are also from HomeGoods.
Step 4: Add Filler
I love adding bits of the unexpected to my trees, from feather boas to ferns and even snowy branches! This year, I used poinsettias, ferns, and berries, with just a couple of mistletoe bits. The poinsettias and berries came as individual holiday picks, but the ferns came as a larger bunch that I cut apart.
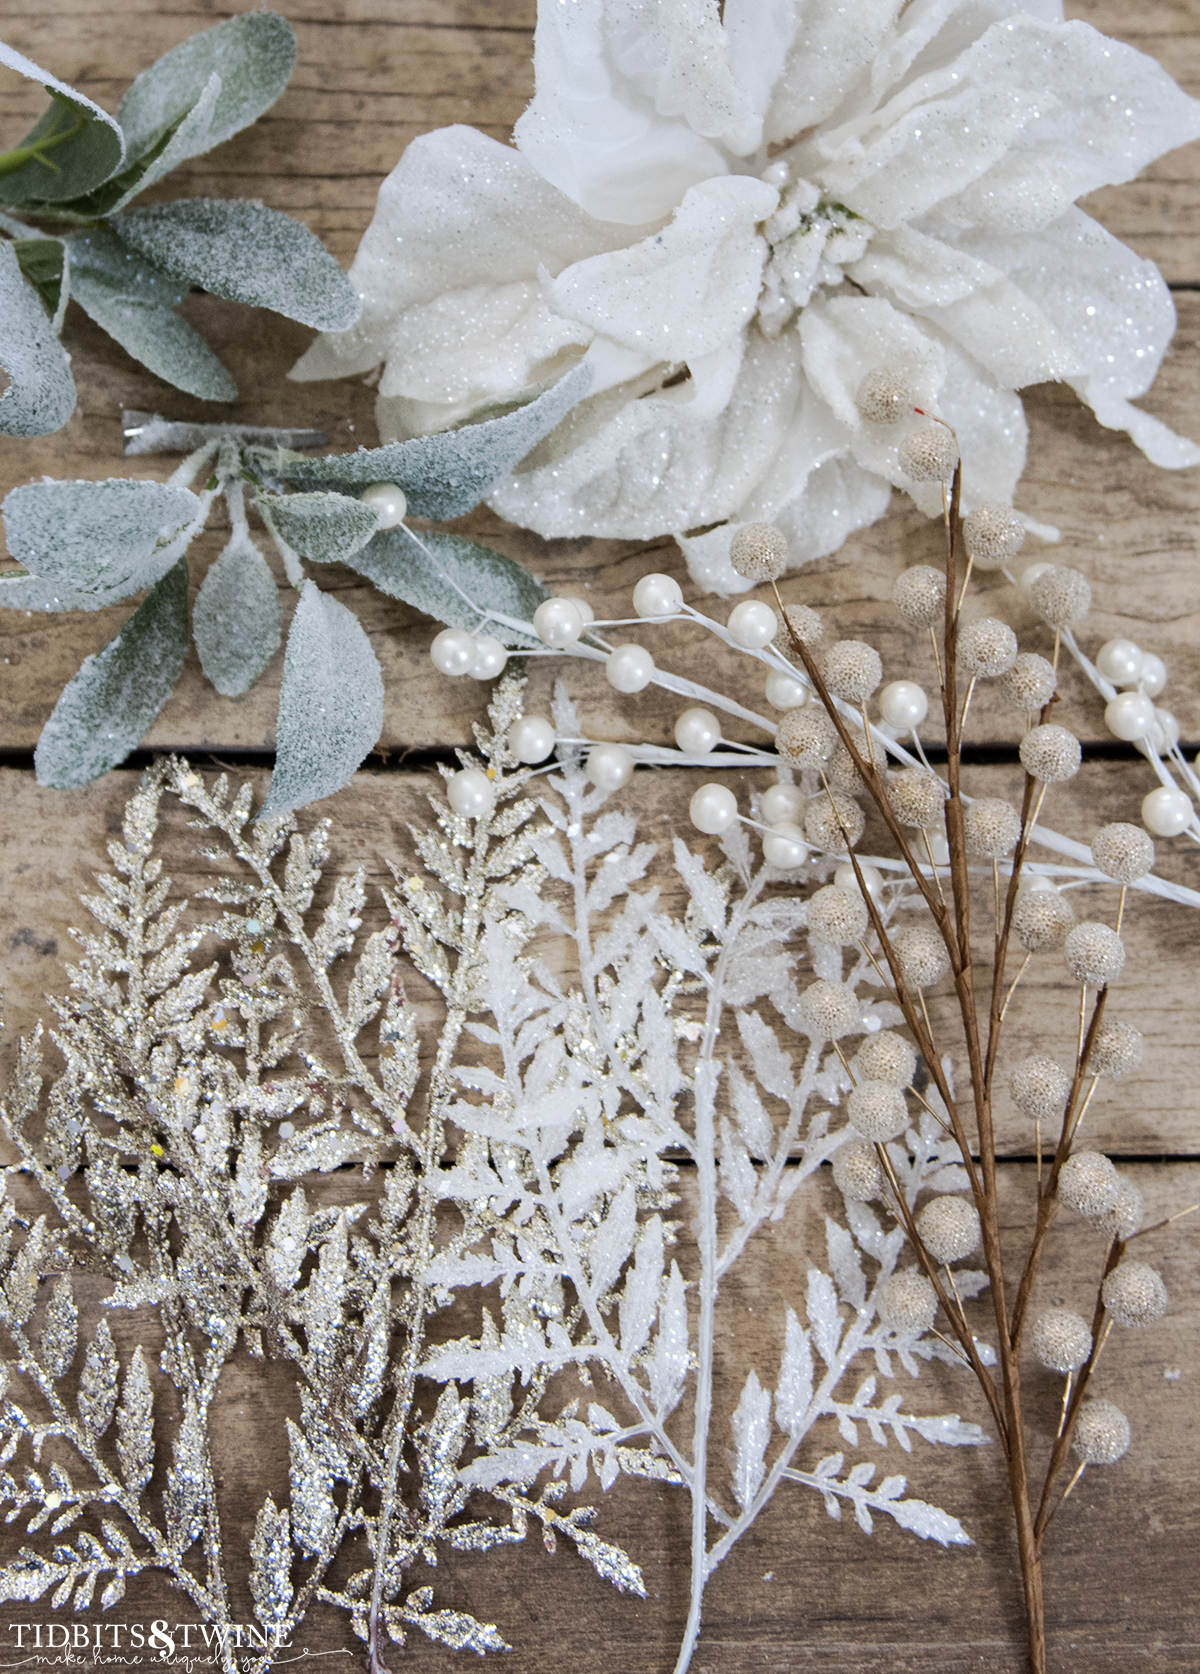
I started with the berry picks, some white and some gold, and simply placed them on top of branches. These are similar to the white ones I used. These are similar to the gold berries.
I then added fern stems, some white and some gold, and again, just placed them on top of branches.
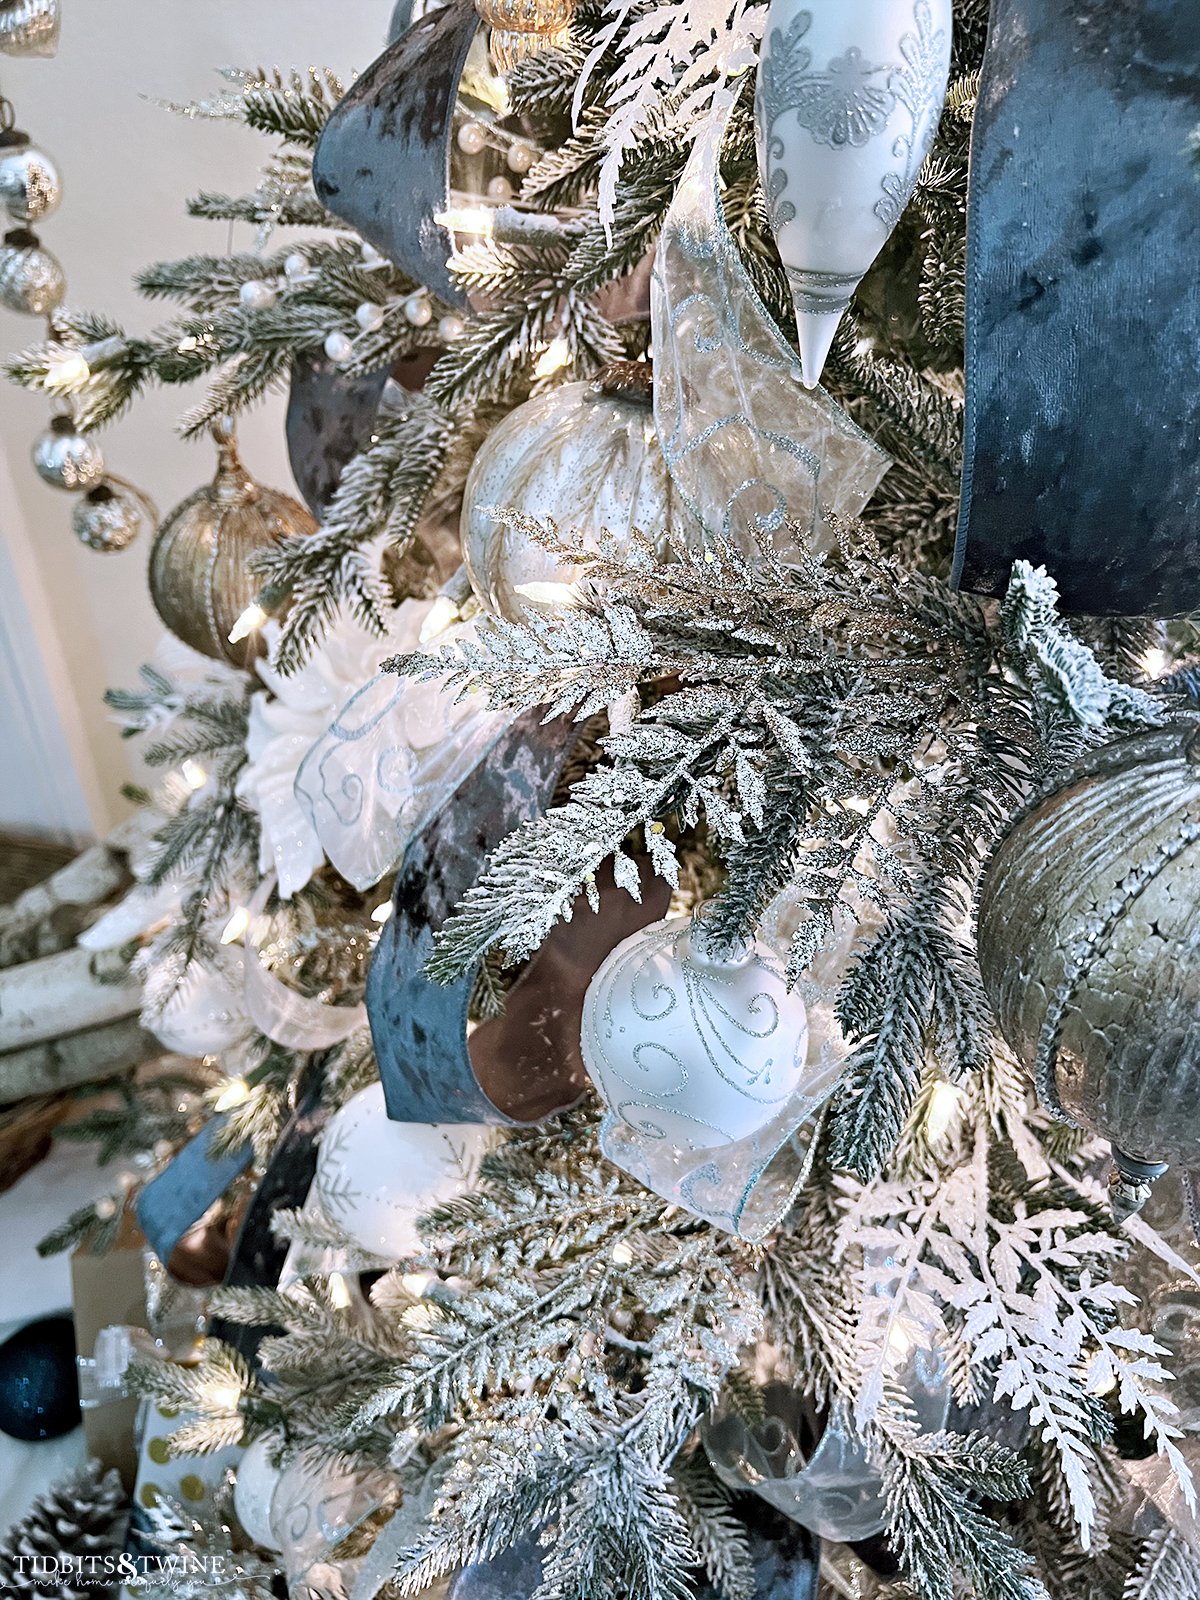
Finally, I added the white poinsettias. I used them to fill any remaining gaps and to cover the ends of any ribbon loops that were visible.
Filler Ideas for Christmas Trees
The options for what you can add to a tree (in addition to ornaments) are almost endless but I’ve listed a few of my favorites here:
- Snow branches
- Feathers
- Flowers (poinsettias and roses)
- Ferns
- Berries
- Bird nests or bird houses
- Glitter birds or butterflies
Step 5: Add Your Tree Topper
Sometimes I used a tree topper and sometimes I don’t! This year, I used a super simple silver and crystal topper.
You can also make a large bow out of your ribbon to use as a topper!

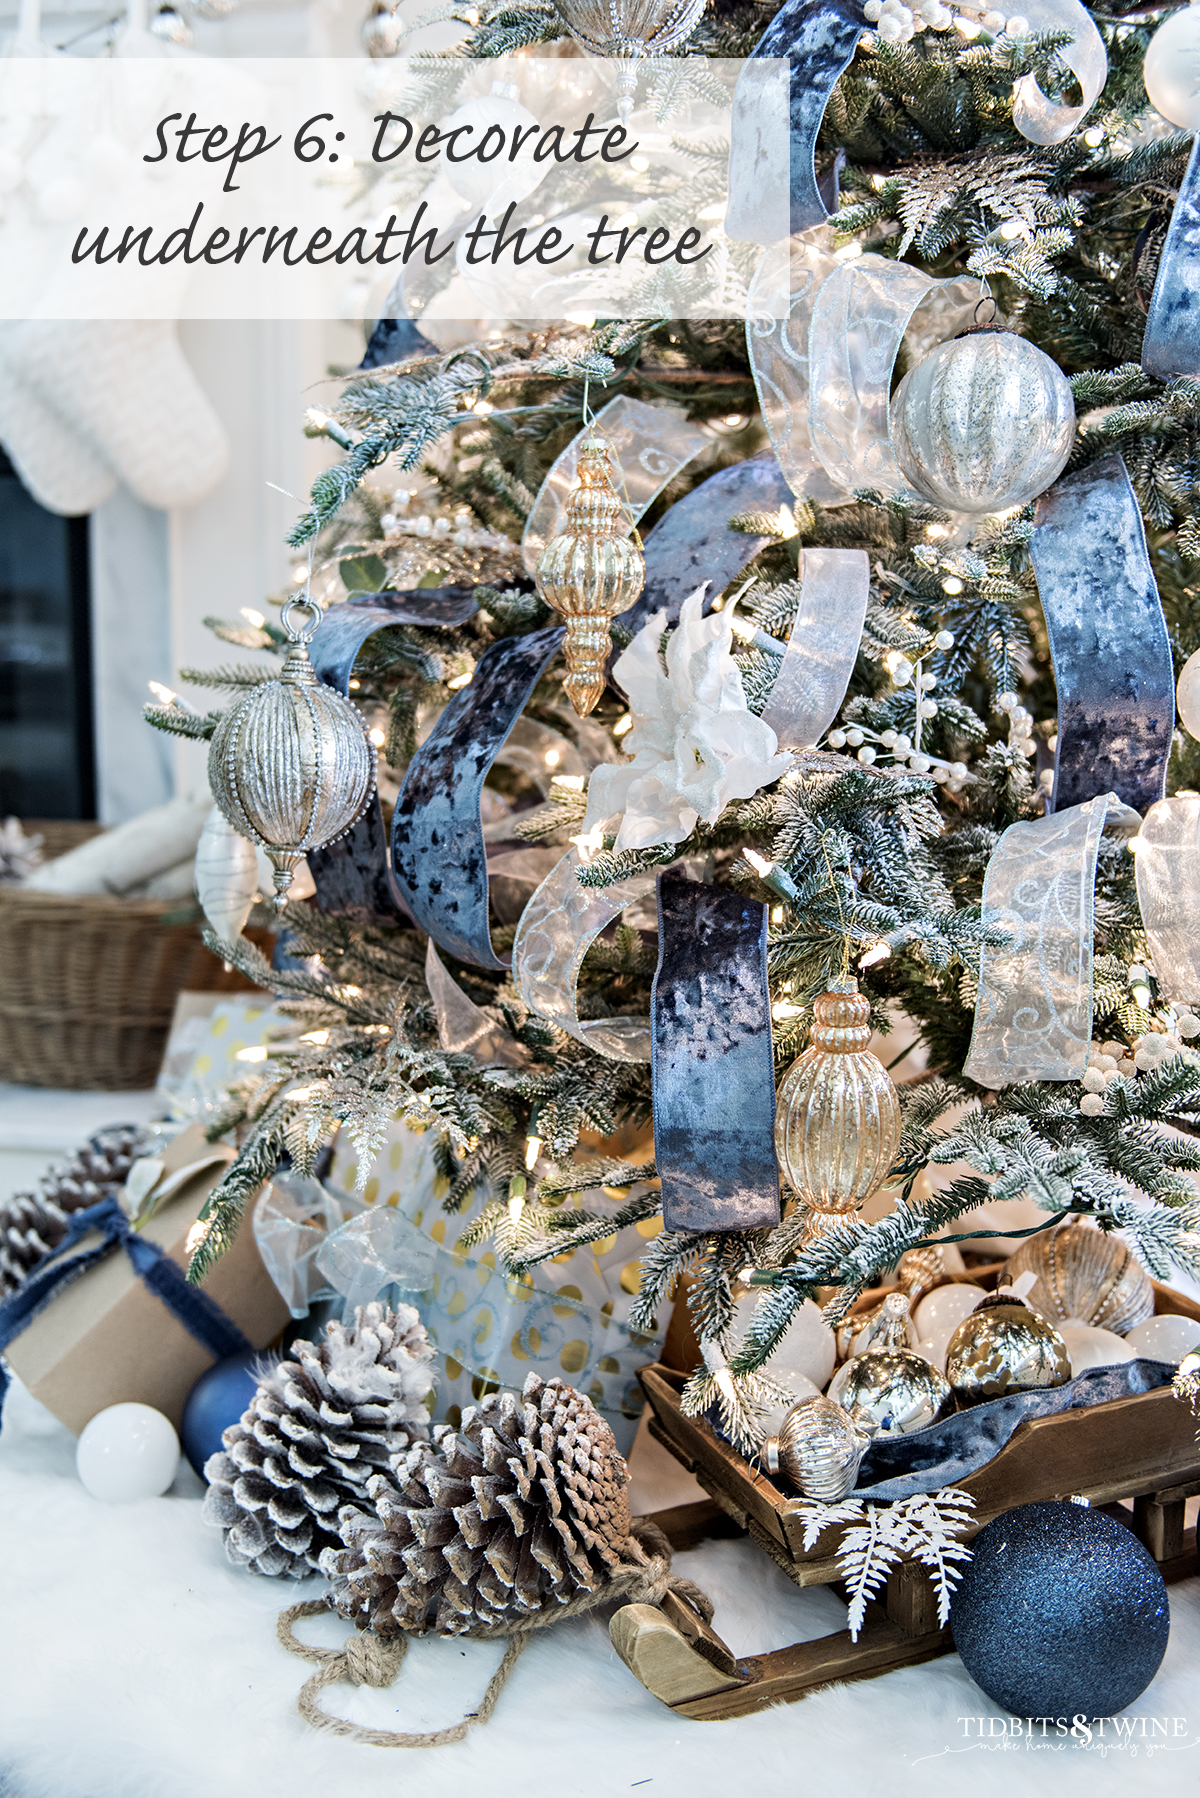
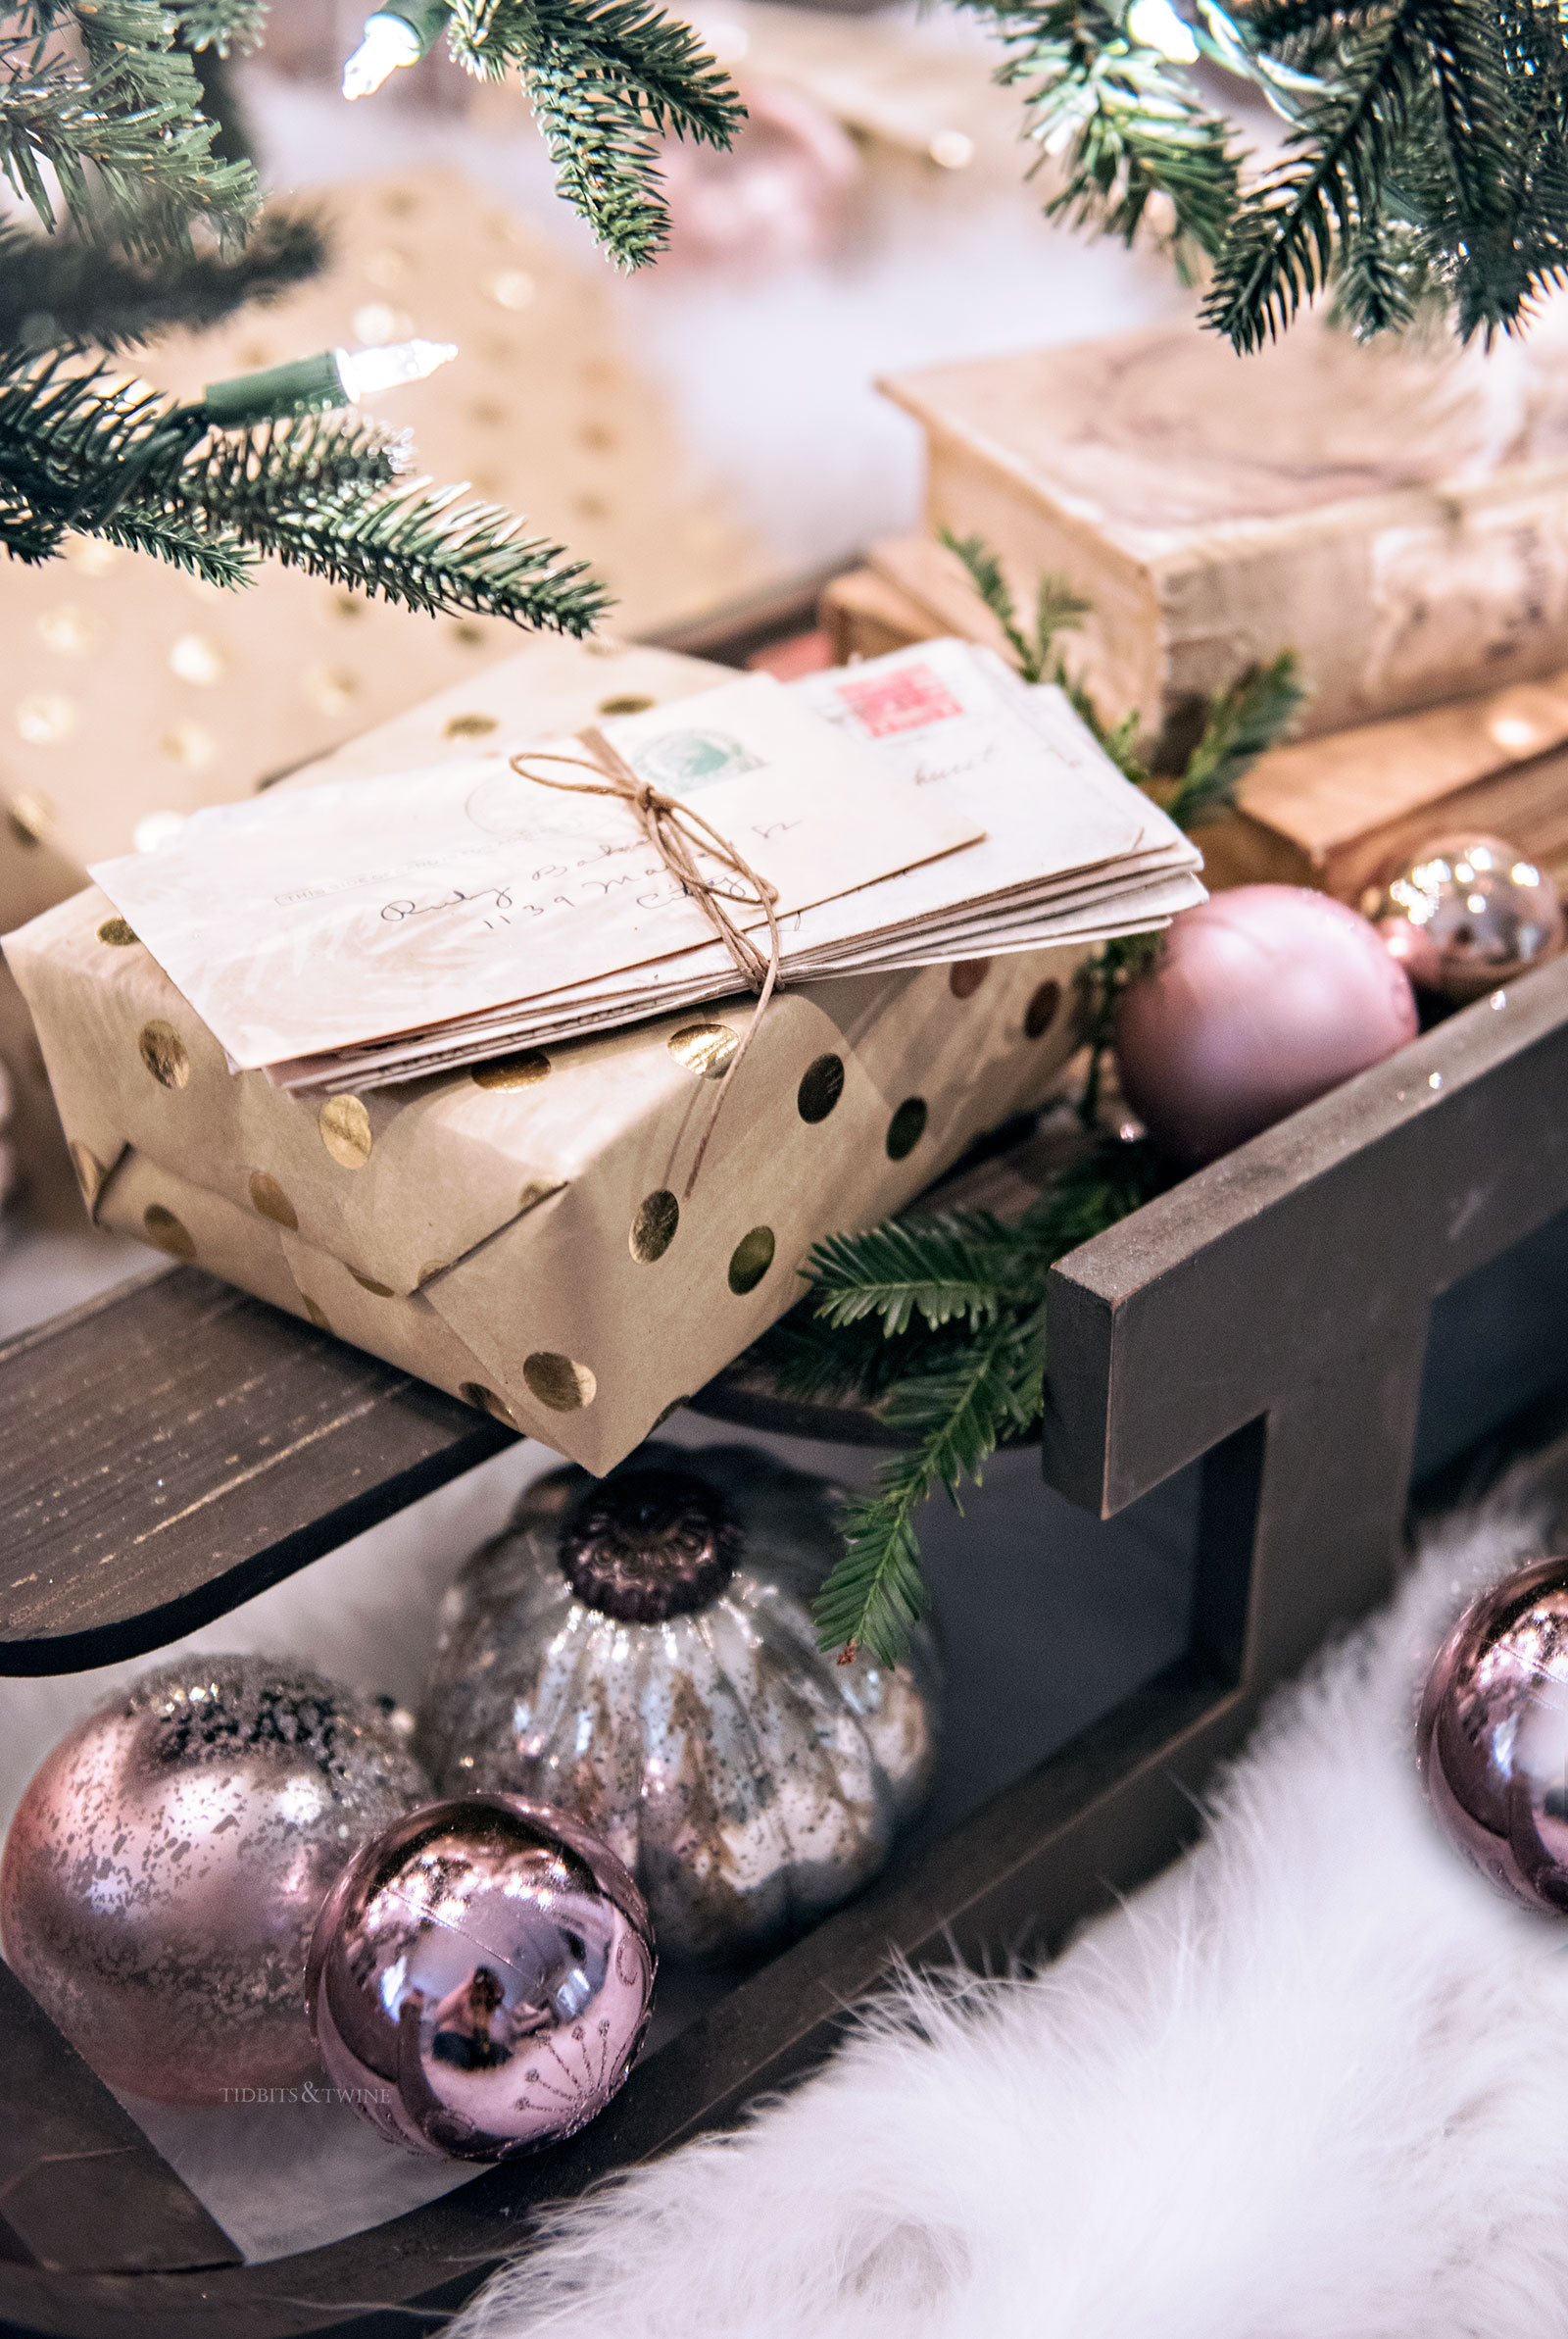
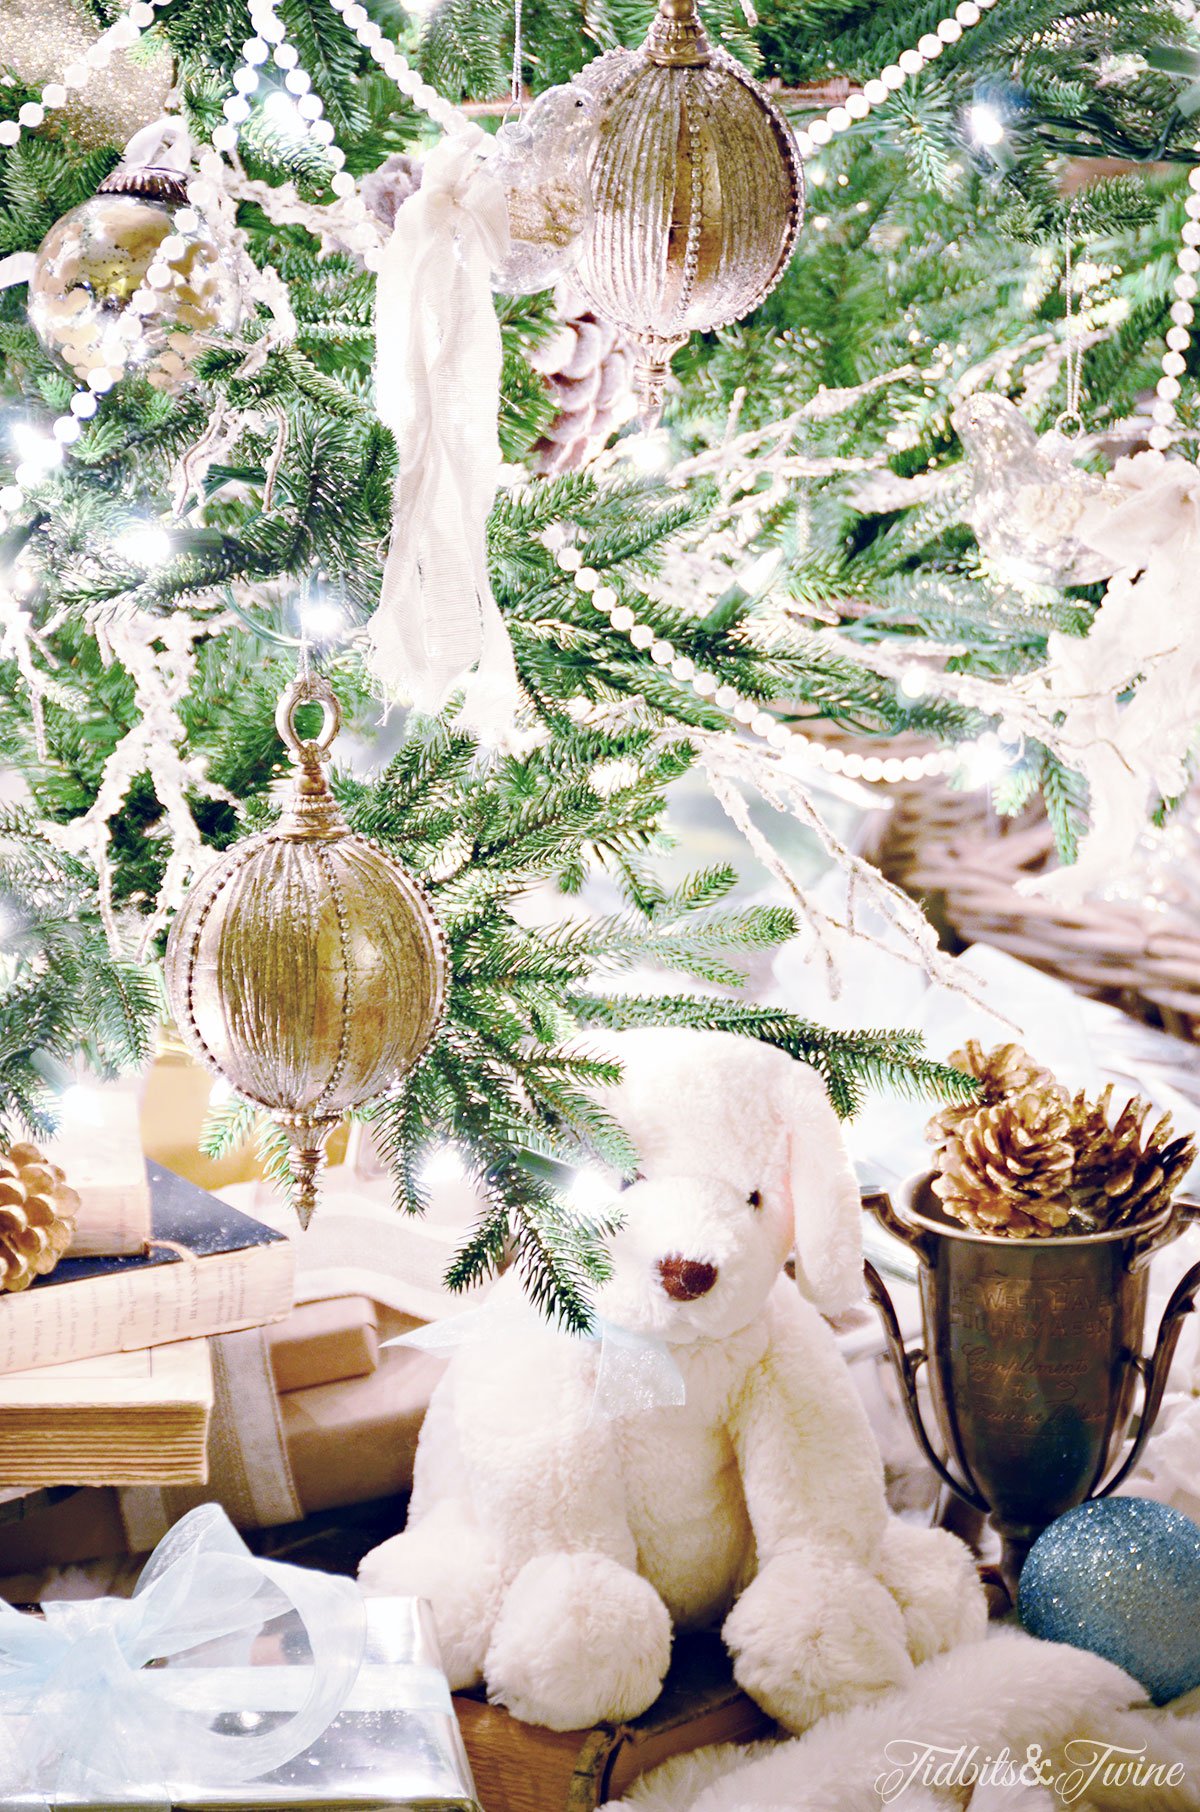
Step 6: Decorate Underneath
This is actually my favorite part of decorating the Christmas tree. I love to decorate underneath! Yes, I know this space is for presents, but before you have presents to put there, why not decorate?!
I love using sleighs or sleds, books, trophies, large pinecones, books, small ornaments, nutcrackers, etc.
So that’s my easy ribbon loop Christmas tree! I hope it gave you some ideas for your own tree. If you’re looking for more ideas, you can check out my criss-cross ribbon tree from last year.
More Christmas Decorating Ideas
- How to Flock a Christmas Tree the Easy Way
- Tidbits&Twine – A Peaceful Pink Christmas Bedroom
- My Christmas Living Room Tour: Soft Pinks
- DIY Christmas Ladder Advent Calendar
- Christmas Gift Guide with Everything You’ll Want

Join the Community
Let’s keep in touch! Get exclusive artwork plus the latest news delivered directly to your Inbox!
Beautiful! I’m adding ribbon to my tree like this this year. Perfect timing for this post. Byhanks, friend.
Hi Renae: Good luck with your decorating! I hope it turns out beautifully!
Hi Kim
I love your tree with the ribbons so I decided to try it and the tree came out beautifully. Everyone on Thanksgiving absolutely loved the look. Thank you for sharing.
Karen
Hi Karen – I’m so happy to hear that it worked for you and that everyone loved it!!
Gorgeous!! Definitely doing this. Thank you for sharing!
Merry, Merry Christmas!
Cheers, Sheila
Can I ask you where you purchased the beautiful blue/white embossed rug you show in the picture of the Christmas tree? I would love to see more of the rug and learn where I could purchase one. Thank you
Hi Kris!
I got that rug from HomeGoods maybe a couple of years ago…I’m not sure that that particular rug is still being made, but here’s the info: Safavieh Lana Collection Design: LNA789J
:) Kim