Once upon a time… about 11 years ago, I wrote a post about wanting to do something with our finished attic space. At the time, it was nothing more than glorified storage. Boxes, bins, the usual “we’ll deal with this later” situation. I even shared ideas and plans, fully believing that something magical might happen quickly. (It did not.)
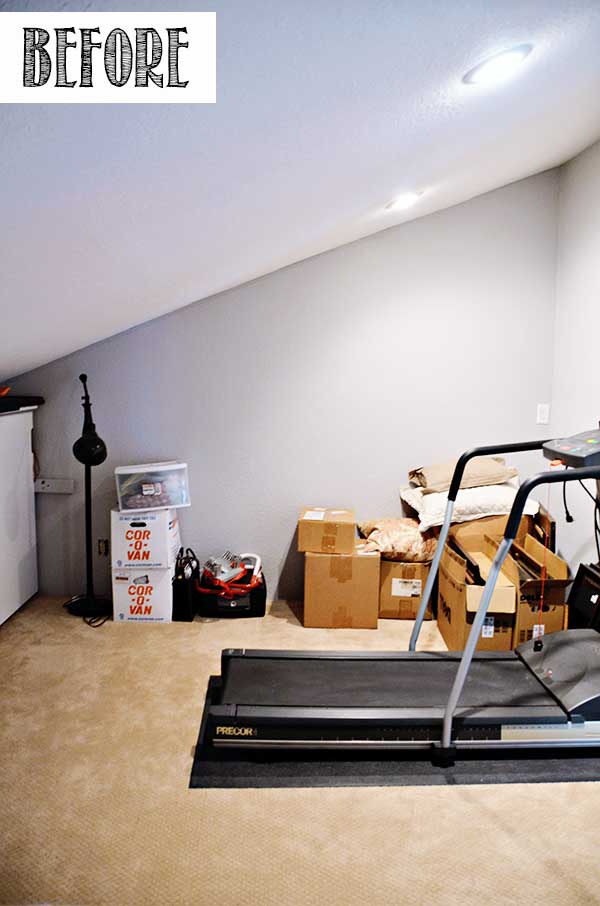
Not long after that post went live, my husband’s job shifted to 100% work from home, and that attic instantly became his office. Eventually, we built him a proper office in the garage. And just like that, the attic was up for grabs again. After more than a decade of thinking about this space in the background, I’ve finally decided to reclaim it…as my closet.
This is not a dramatic reveal. This is not a finished space. And honestly, knowing how long it took me to even start this project, it may be another 11 years before it’s truly done. But I’m excited about it, and that feels worth sharing.
The dream version
I did what we all do and asked ChatGPT for some inspiration. It gave me plenty of beautiful ideas… none with ceilings quite as sloped as mine, but still incredibly swoon-worthy.
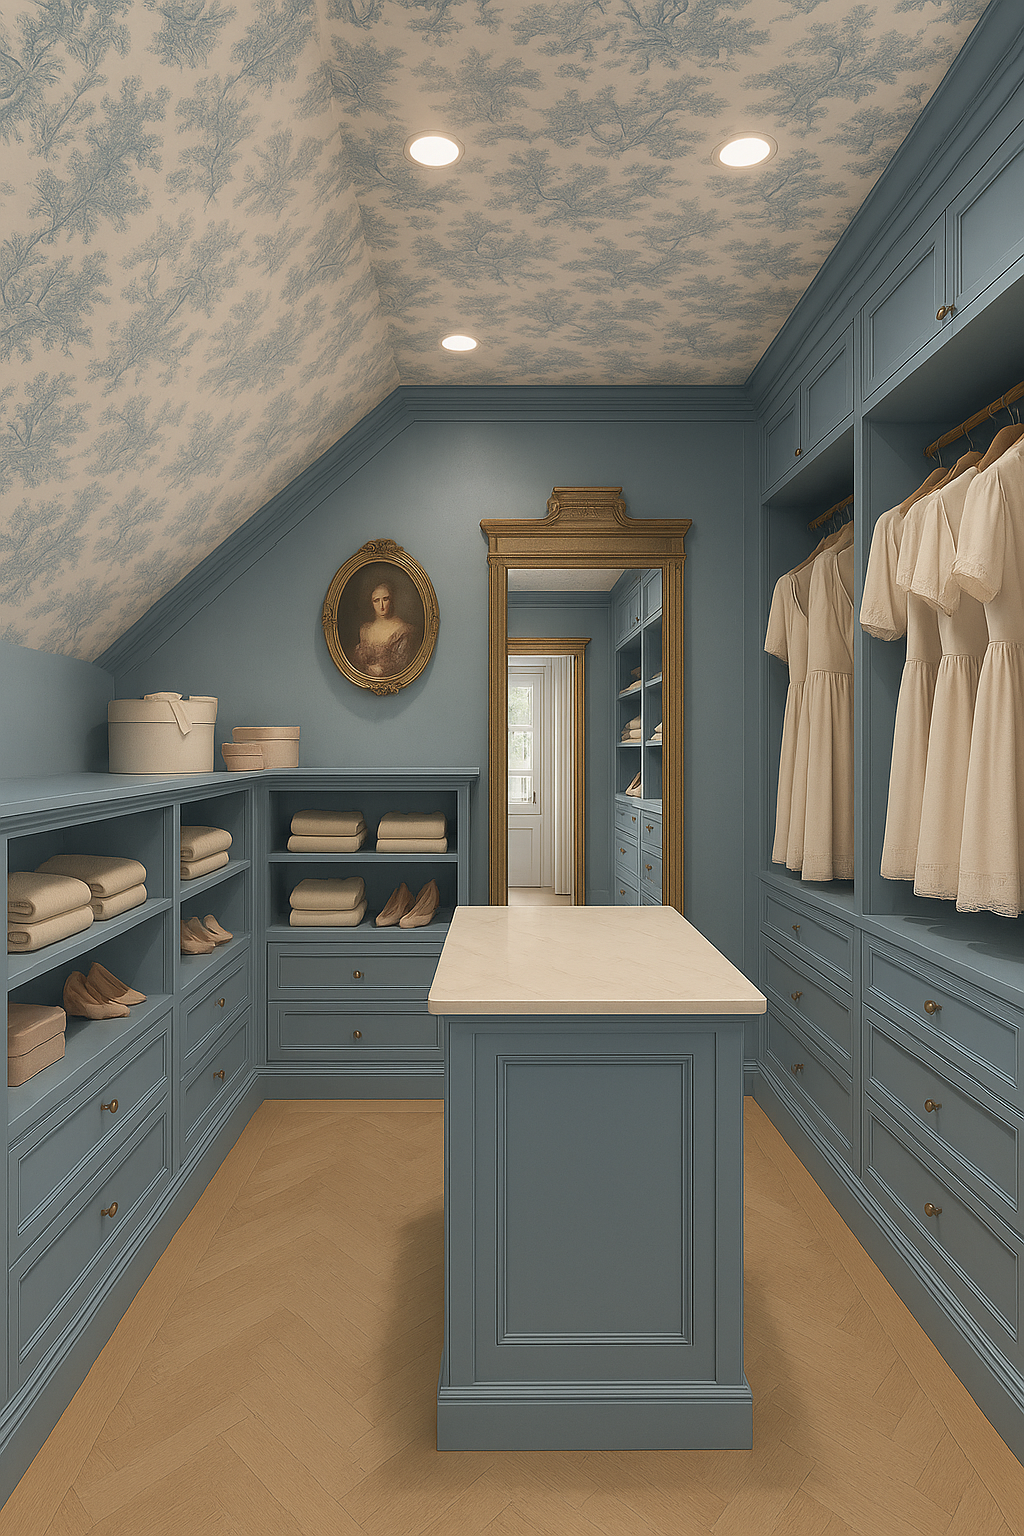
This image is my ultimate fantasy. Painted cabinetry. Built-ins that look like they’ve always been there. Trim everywhere. Feminine but not fussy. A proper moment.
But here’s the reality: where I live, painted cabinetry in a closet would likely be more of a negative than a positive when it comes time to sell. As much as I love that look, I’m trying to make choices that feel practical long-term, even if they aren’t my most romantic option.
The realistic plan (for now)
So instead, I landed on something much simpler and lighter. Clean. Neutral. Easy to live with. Easy to undo if needed.
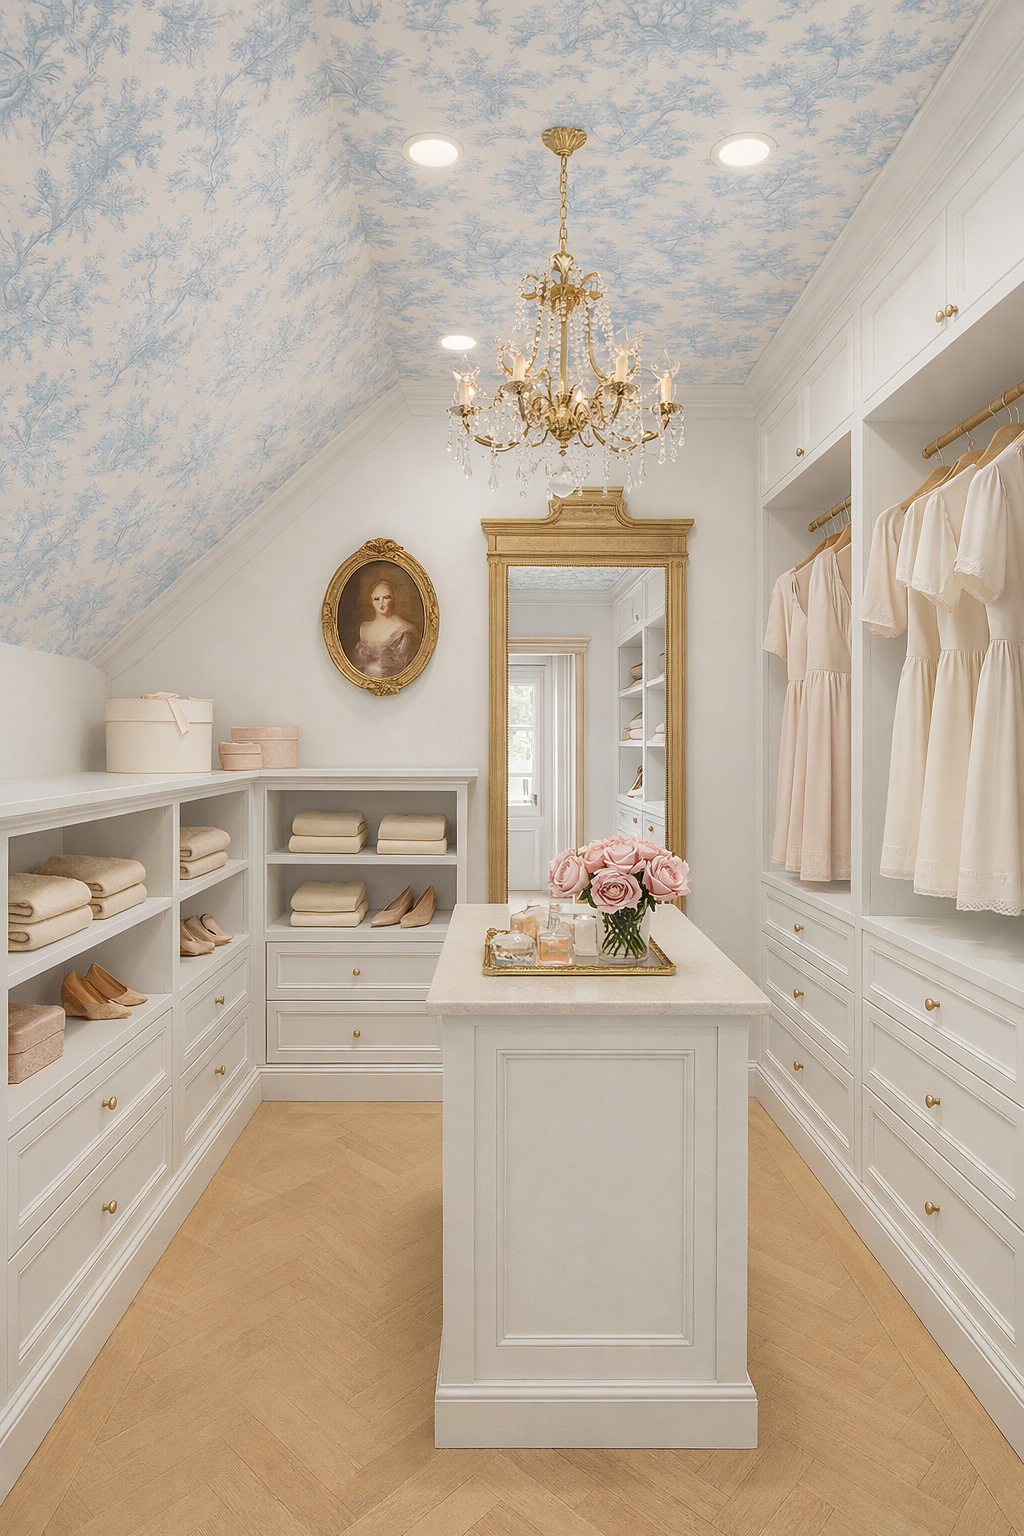
My long-term goal is to add trim so everything looks more built-in. But considering it took me over a decade to get to this point, I’m giving myself permission to live with “practical but not pretty” for a while. (Or a long while.)
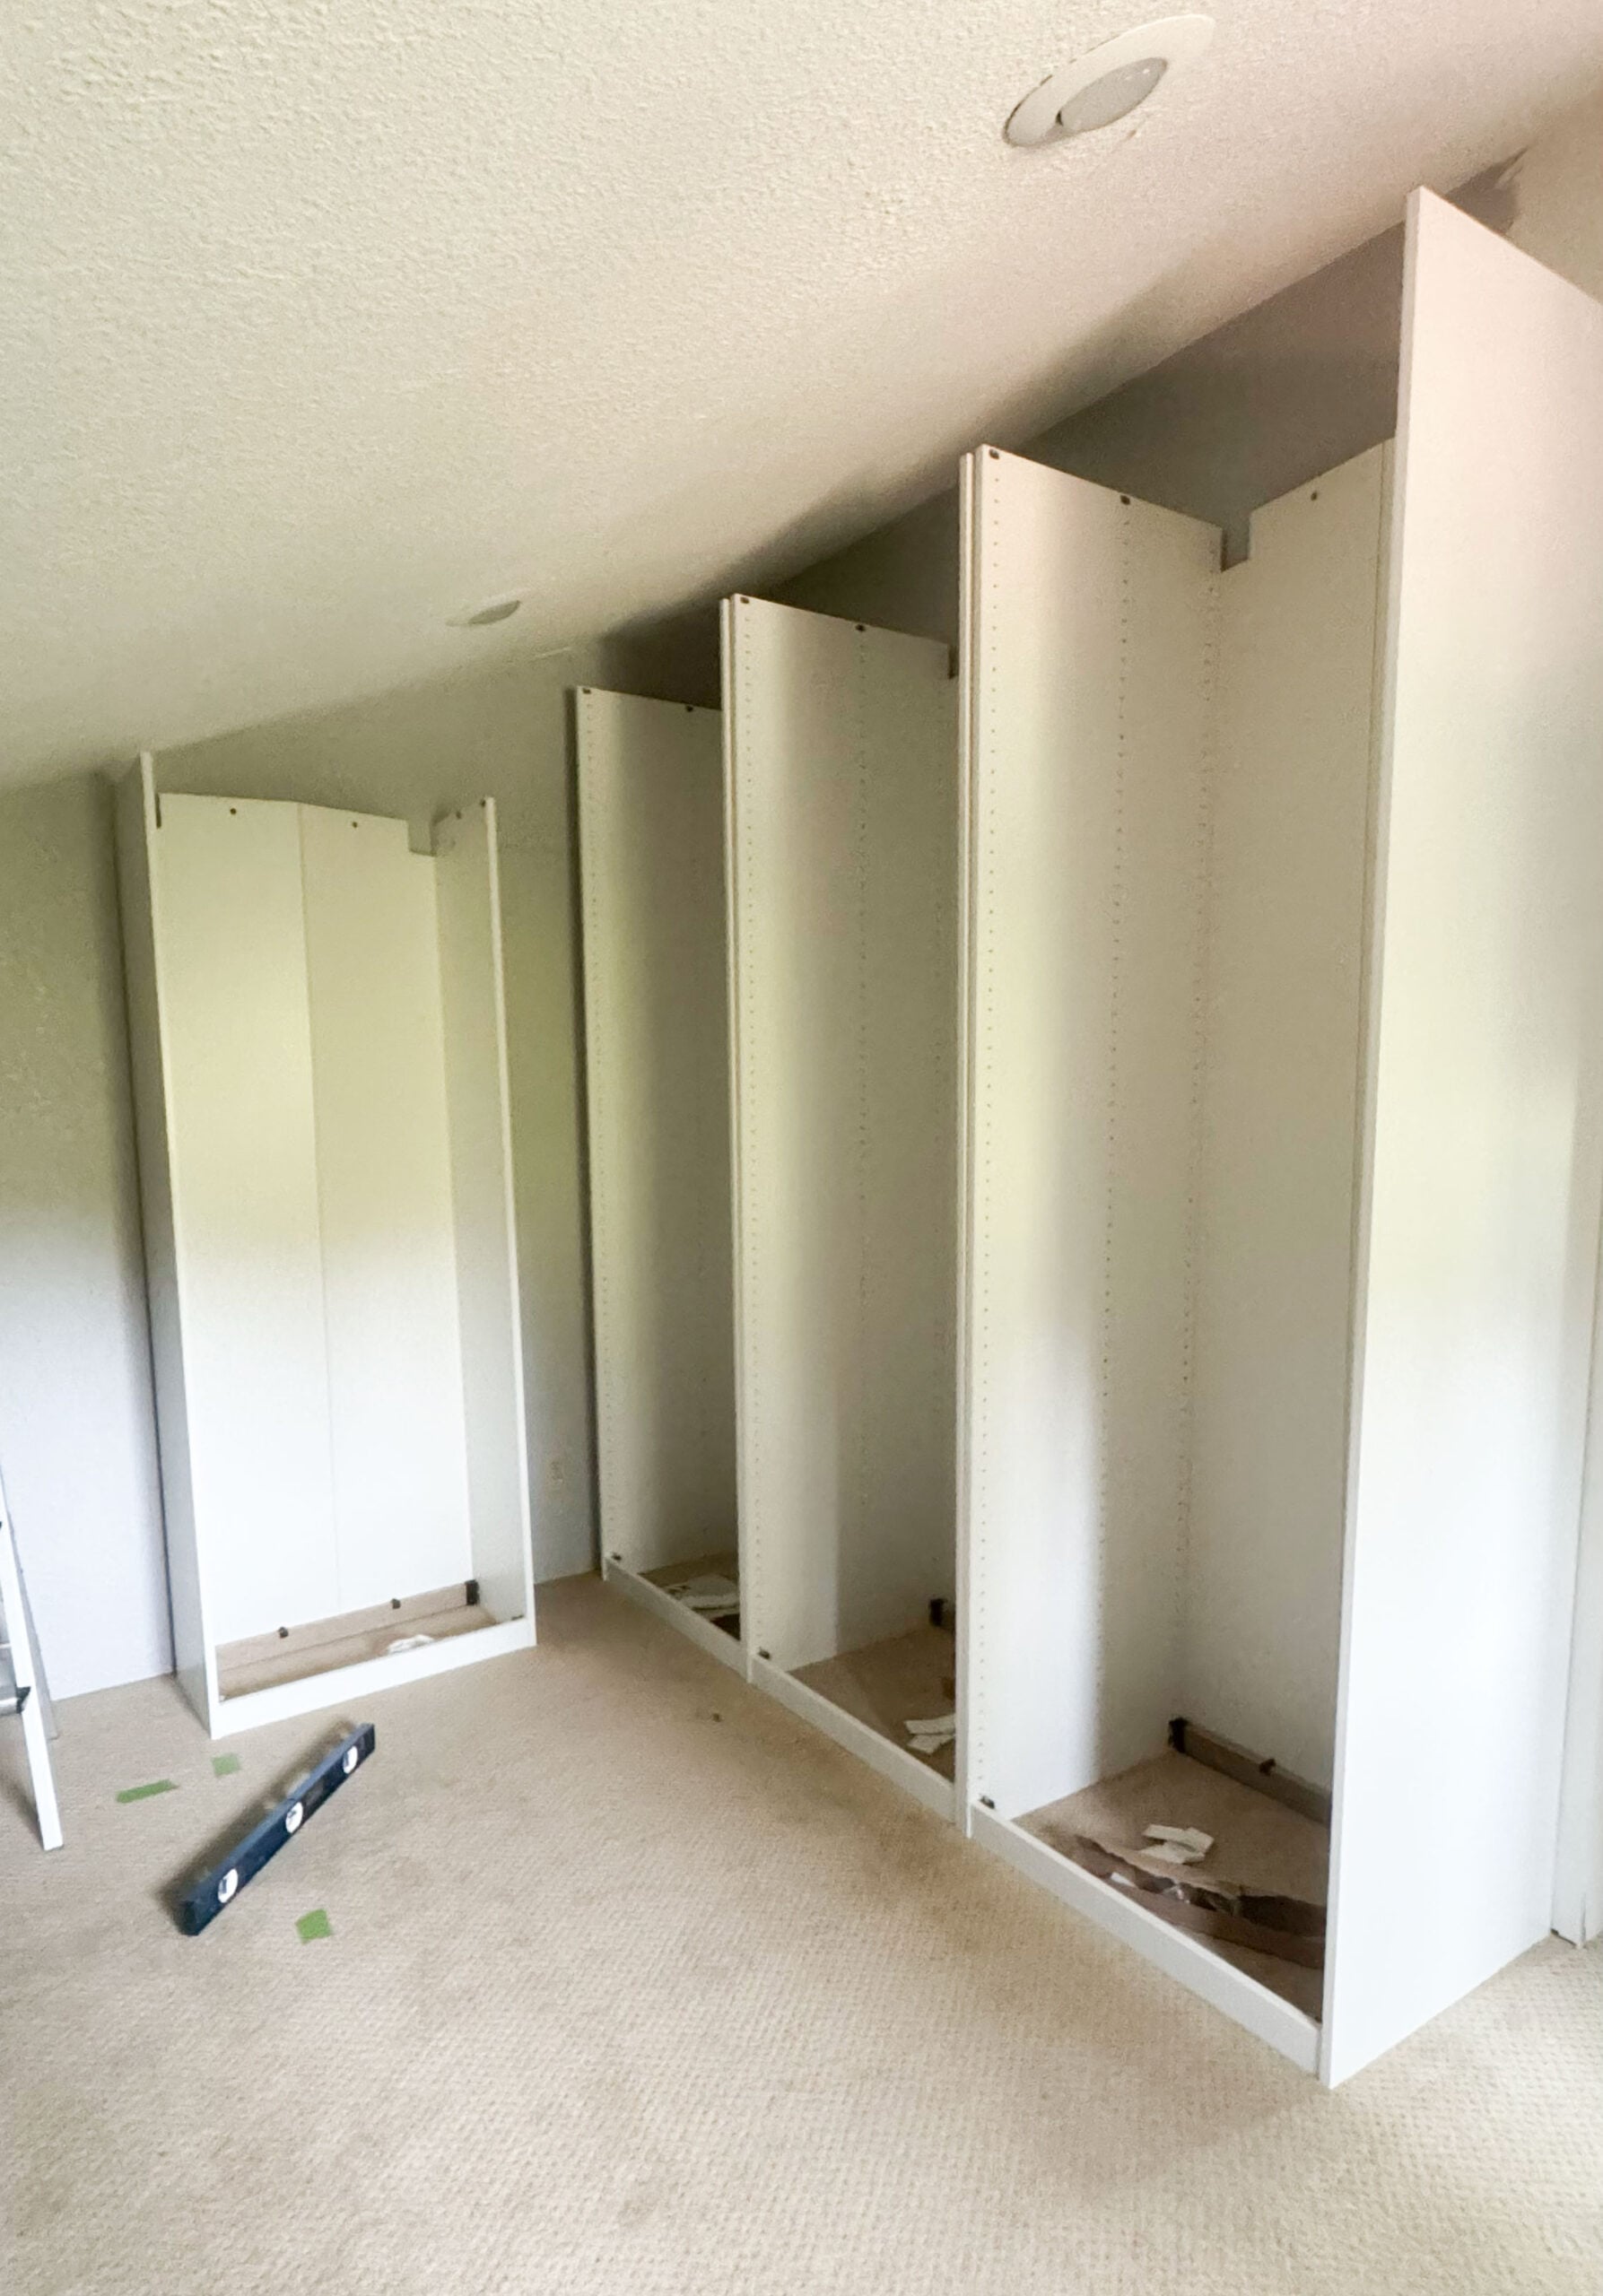
How I figured out the layout
Before I bought a single thing, I used IKEA’s PAX online planner, and it was incredibly helpful.
More than anything, it let me visualize the space and take an honest inventory of what I actually need, not what a perfect Pinterest or Instagram closet suggests I should want. I could see everything laid out at once and adjust it until it made sense for how I live.
The best part was that once the design was finished, it gave me a quick checkout option using my exact layout, and then told me exactly where every shelf, drawer, and rail needed to go to follow that plan. No guesswork. No standing there second-guessing spacing once the frames were up.
I went into the planning phase knowing a few things about myself:
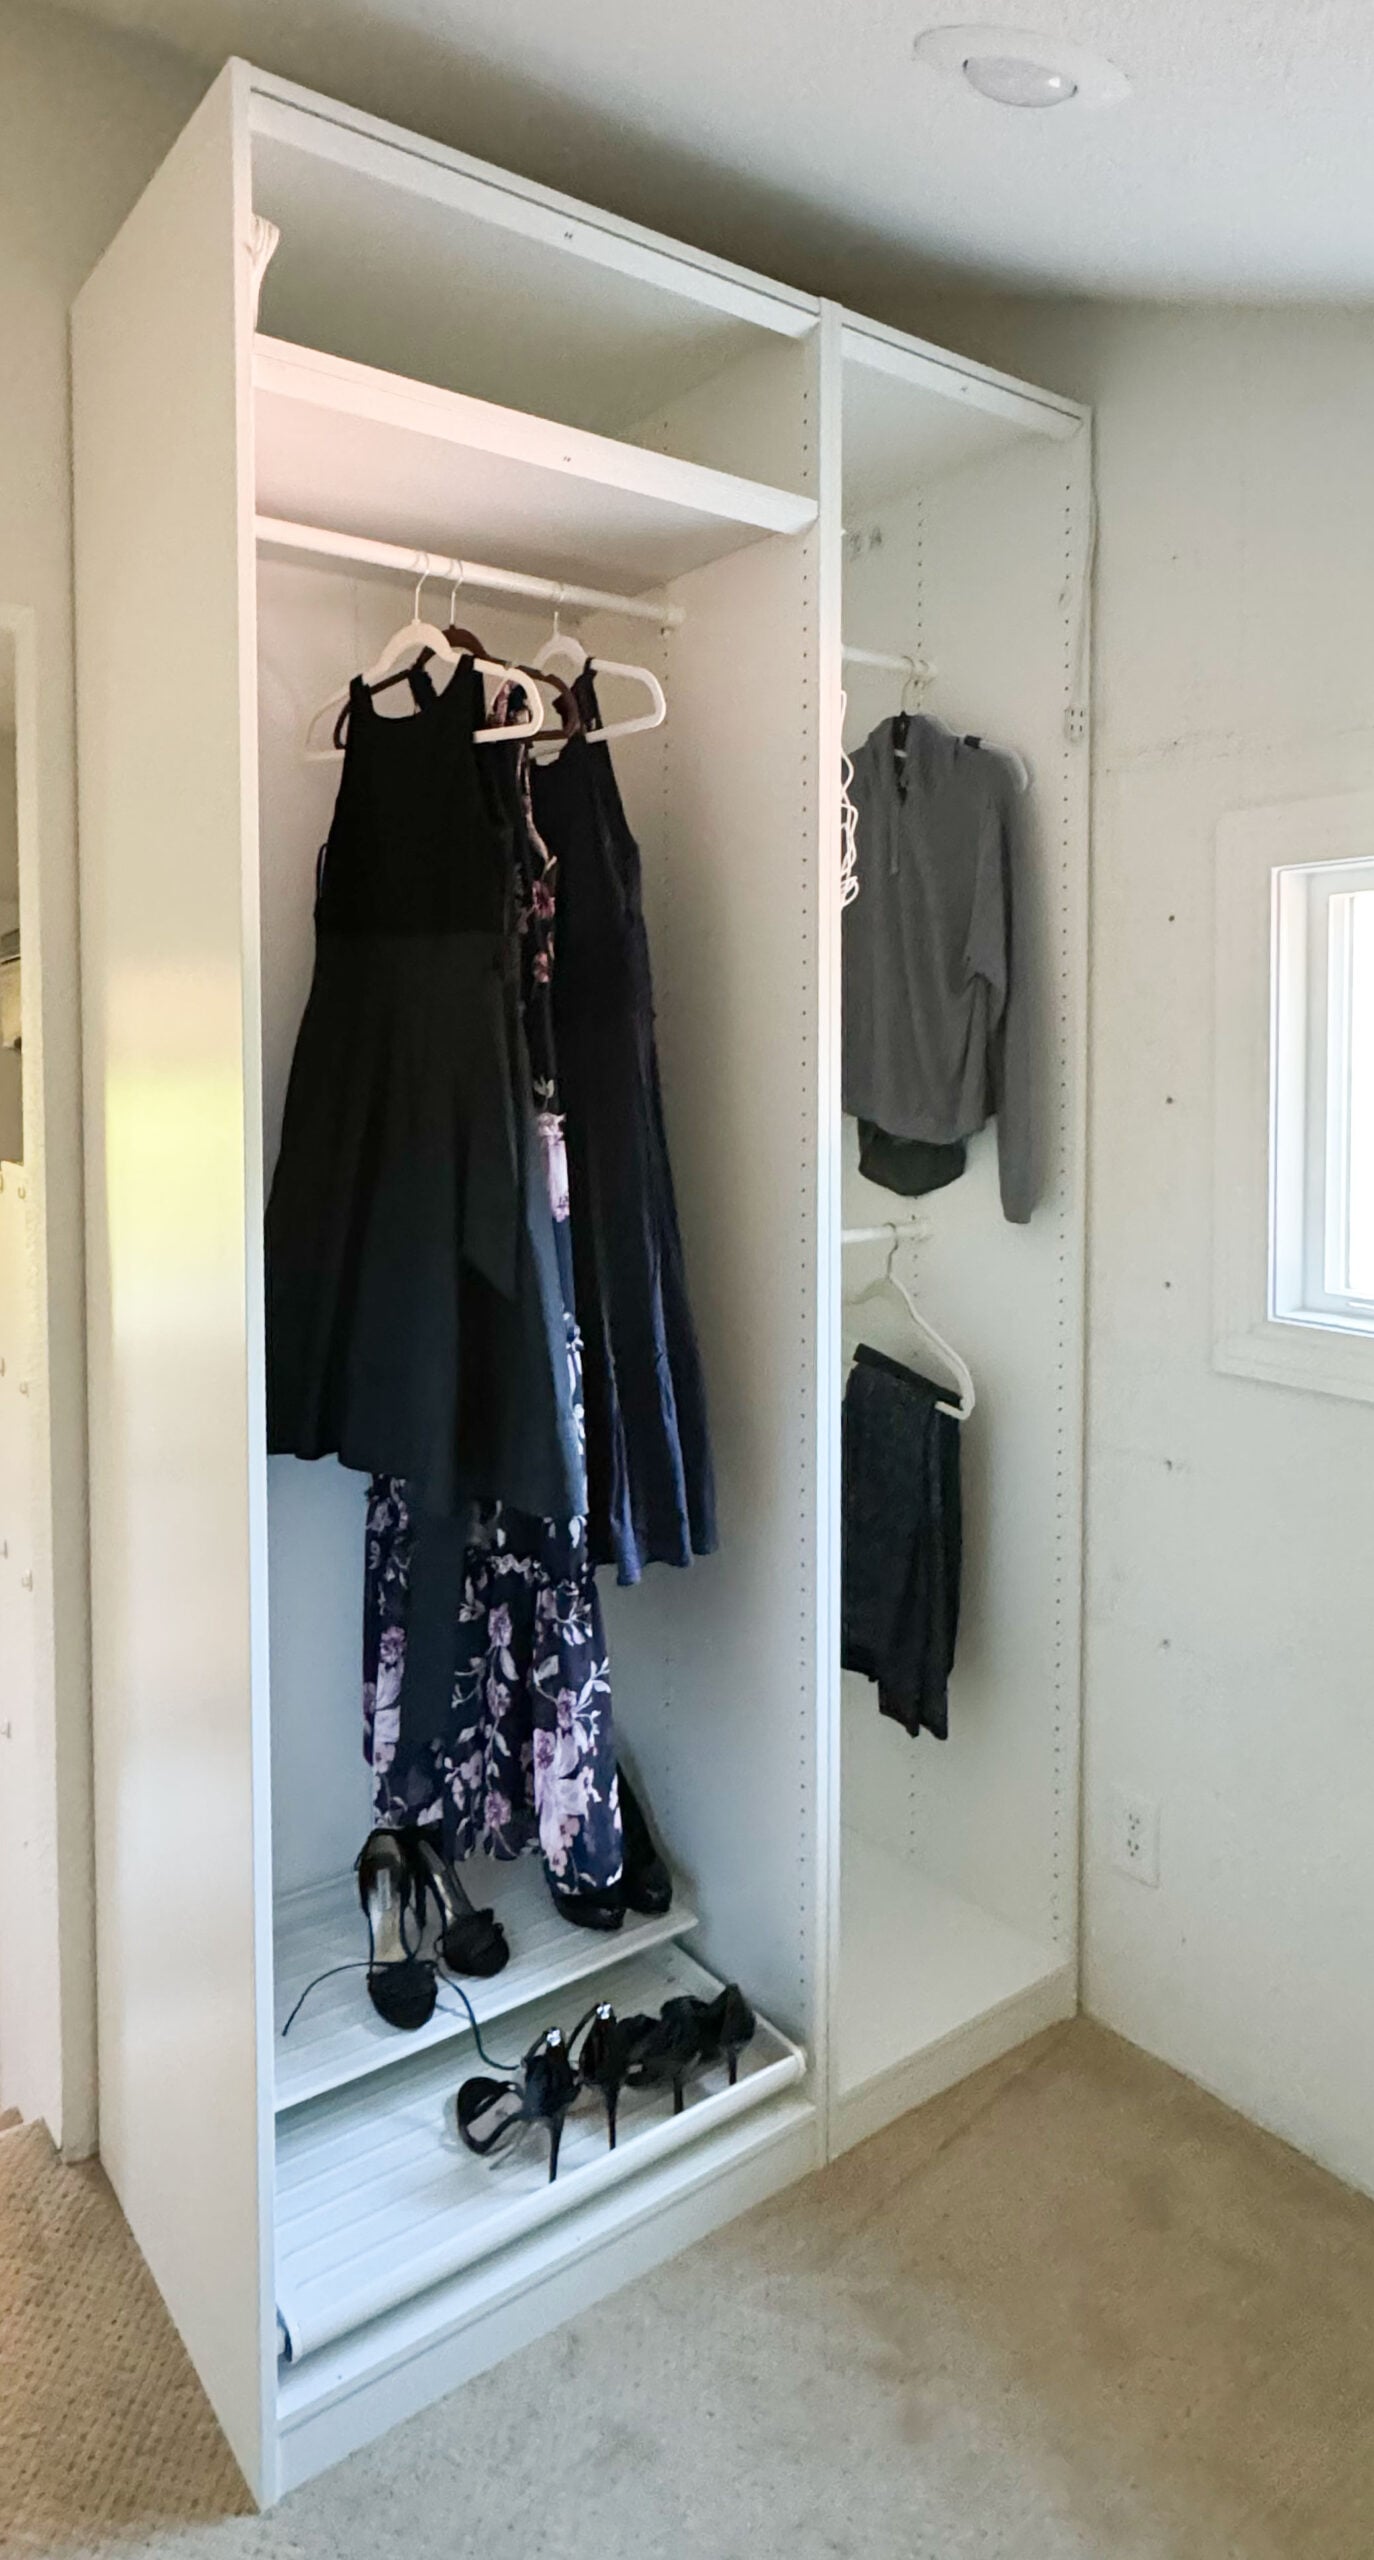
- I needed long hanging space. In the warmer months, I wear a summer dress almost every day, so that was non-negotiable.
- I wanted a few drawers, even though I do have some storage in the bathroom.
- I needed shelves for sweaters.
- And after that, I wanted as much hanging space as possible.
I was able to fit all of that onto one single wall, with the only exception being shoe storage, which I already knew I’d handle separately. Having that clarity before ordering made the actual install feel far less overwhelming.
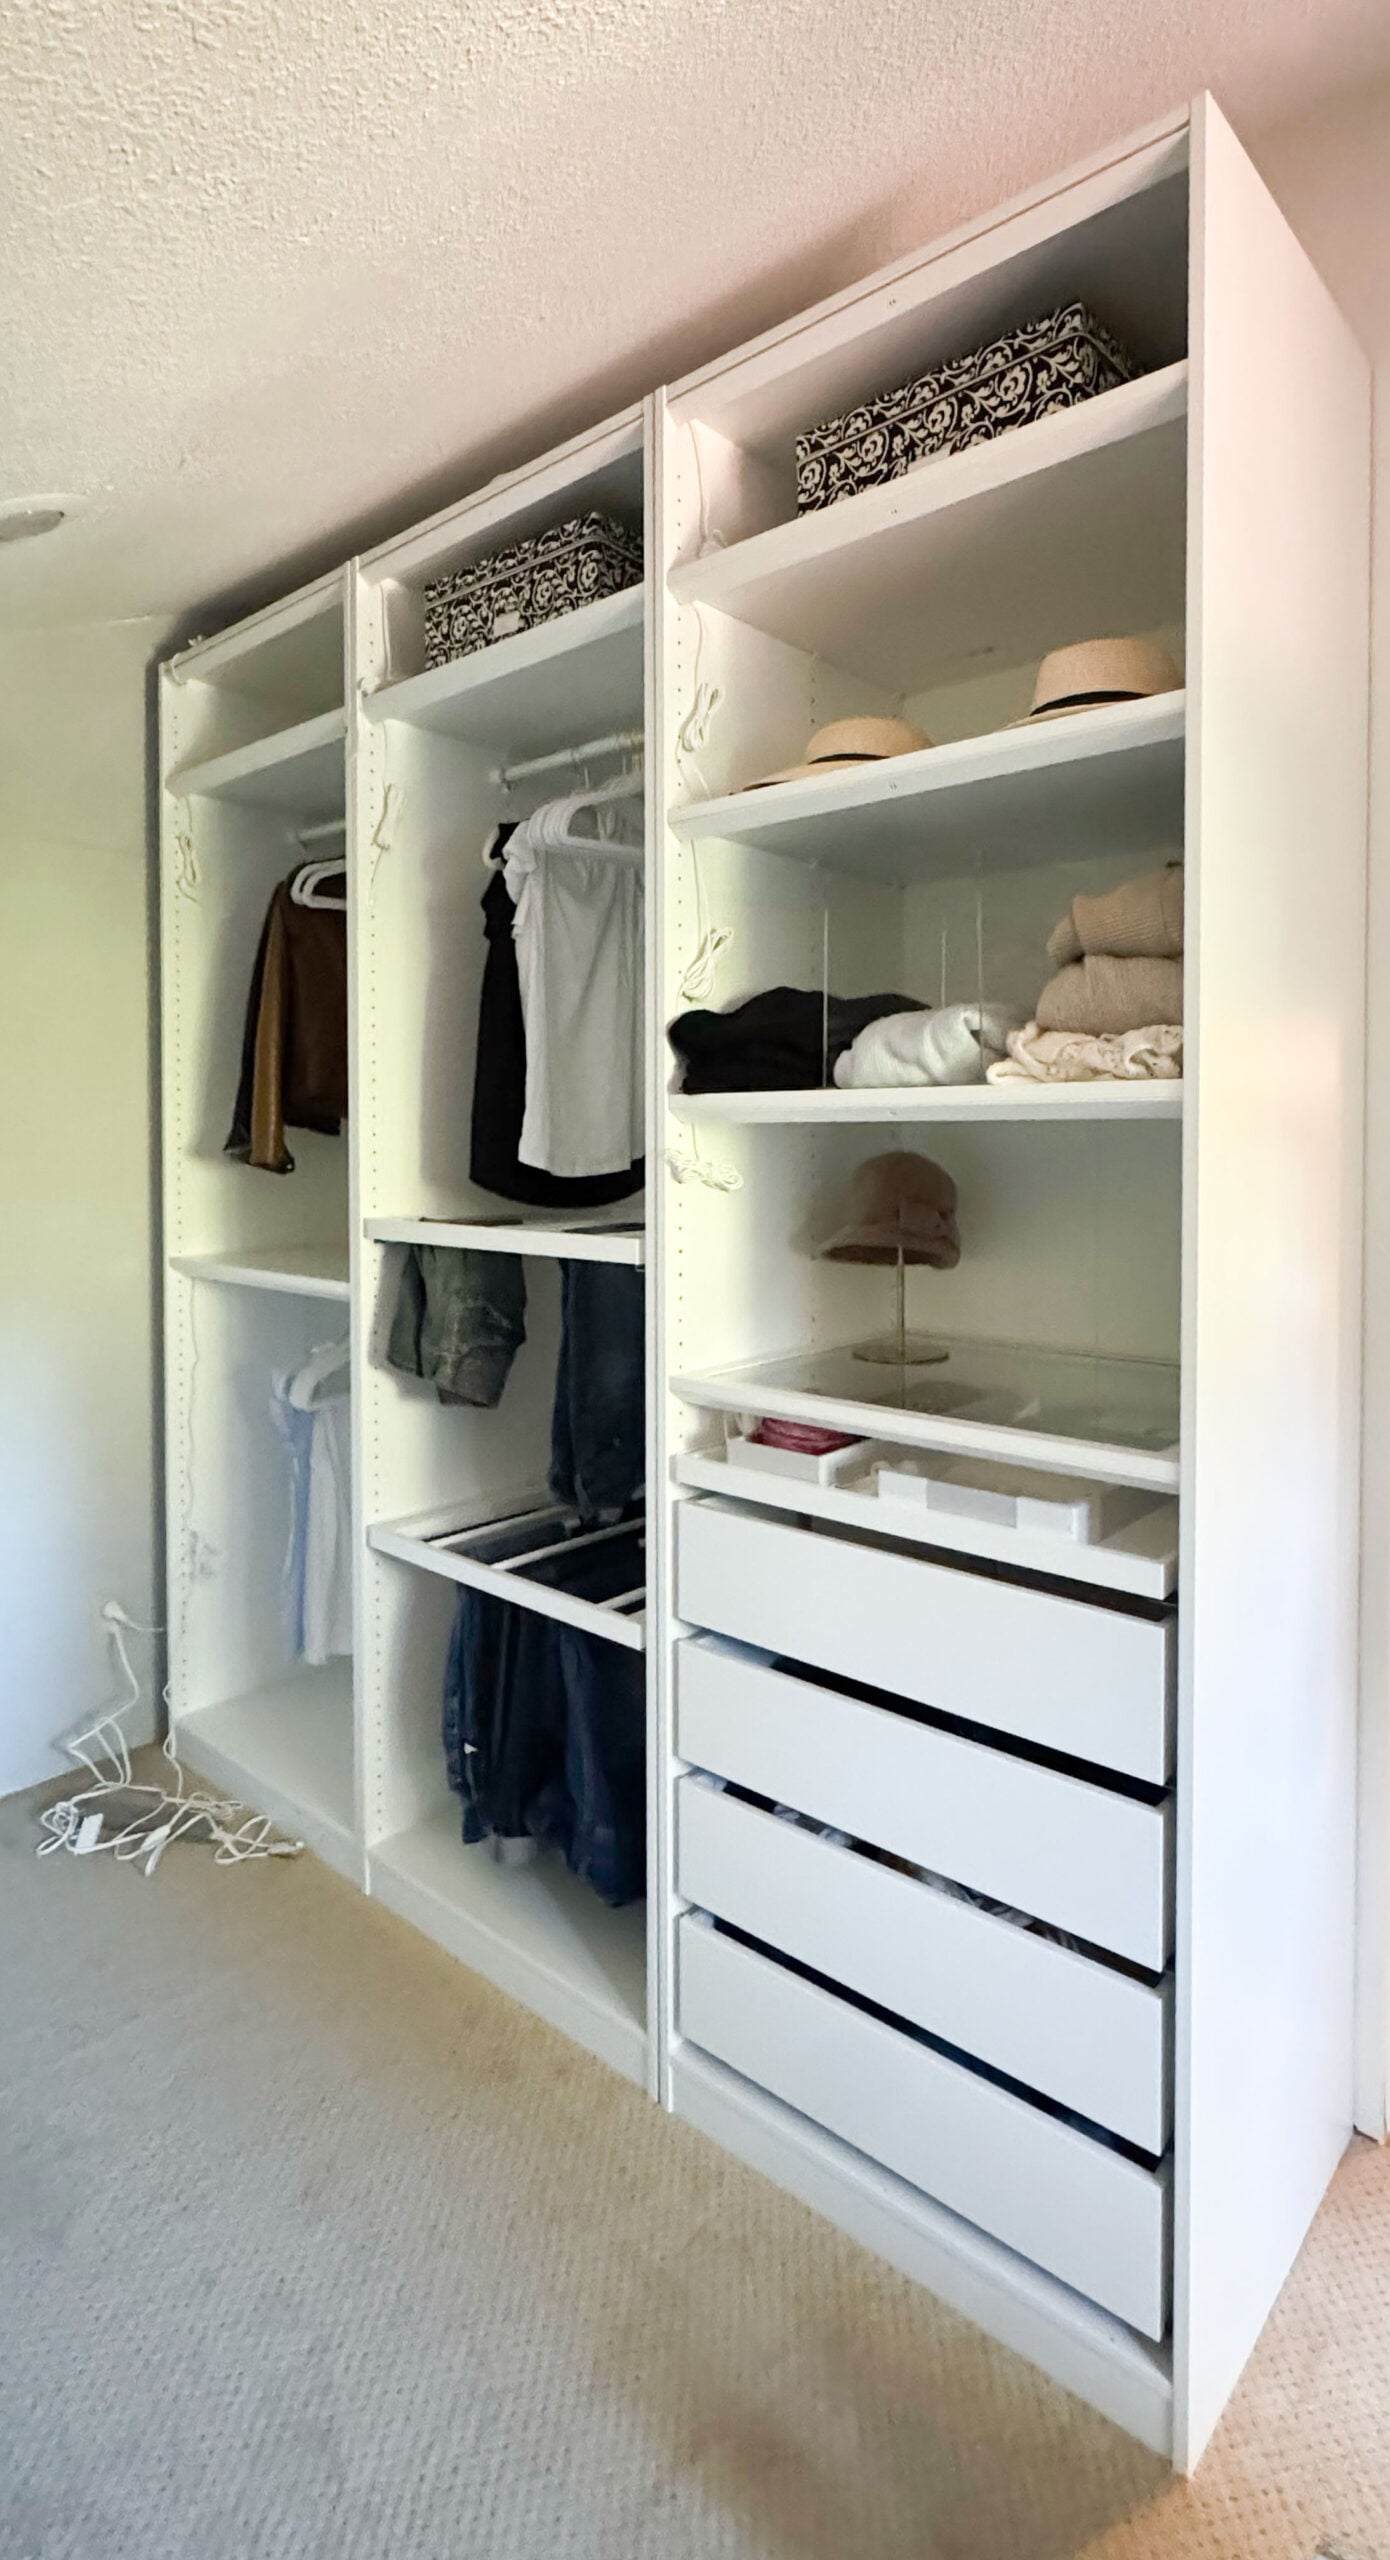
What actually happened this weekend
I spent the entire weekend assembling IKEA PAX units for the tall wall of the closet. This part is not glamorous, not tutorial-worthy, and definitely not groundbreaking… but it is progress.
Here’s where things stand:
- Two shelves arrived damaged, so they aren’t installed yet
- Lighting has been added, but it’s not hooked up
- Trim will come later, someday, when motivation strikes again
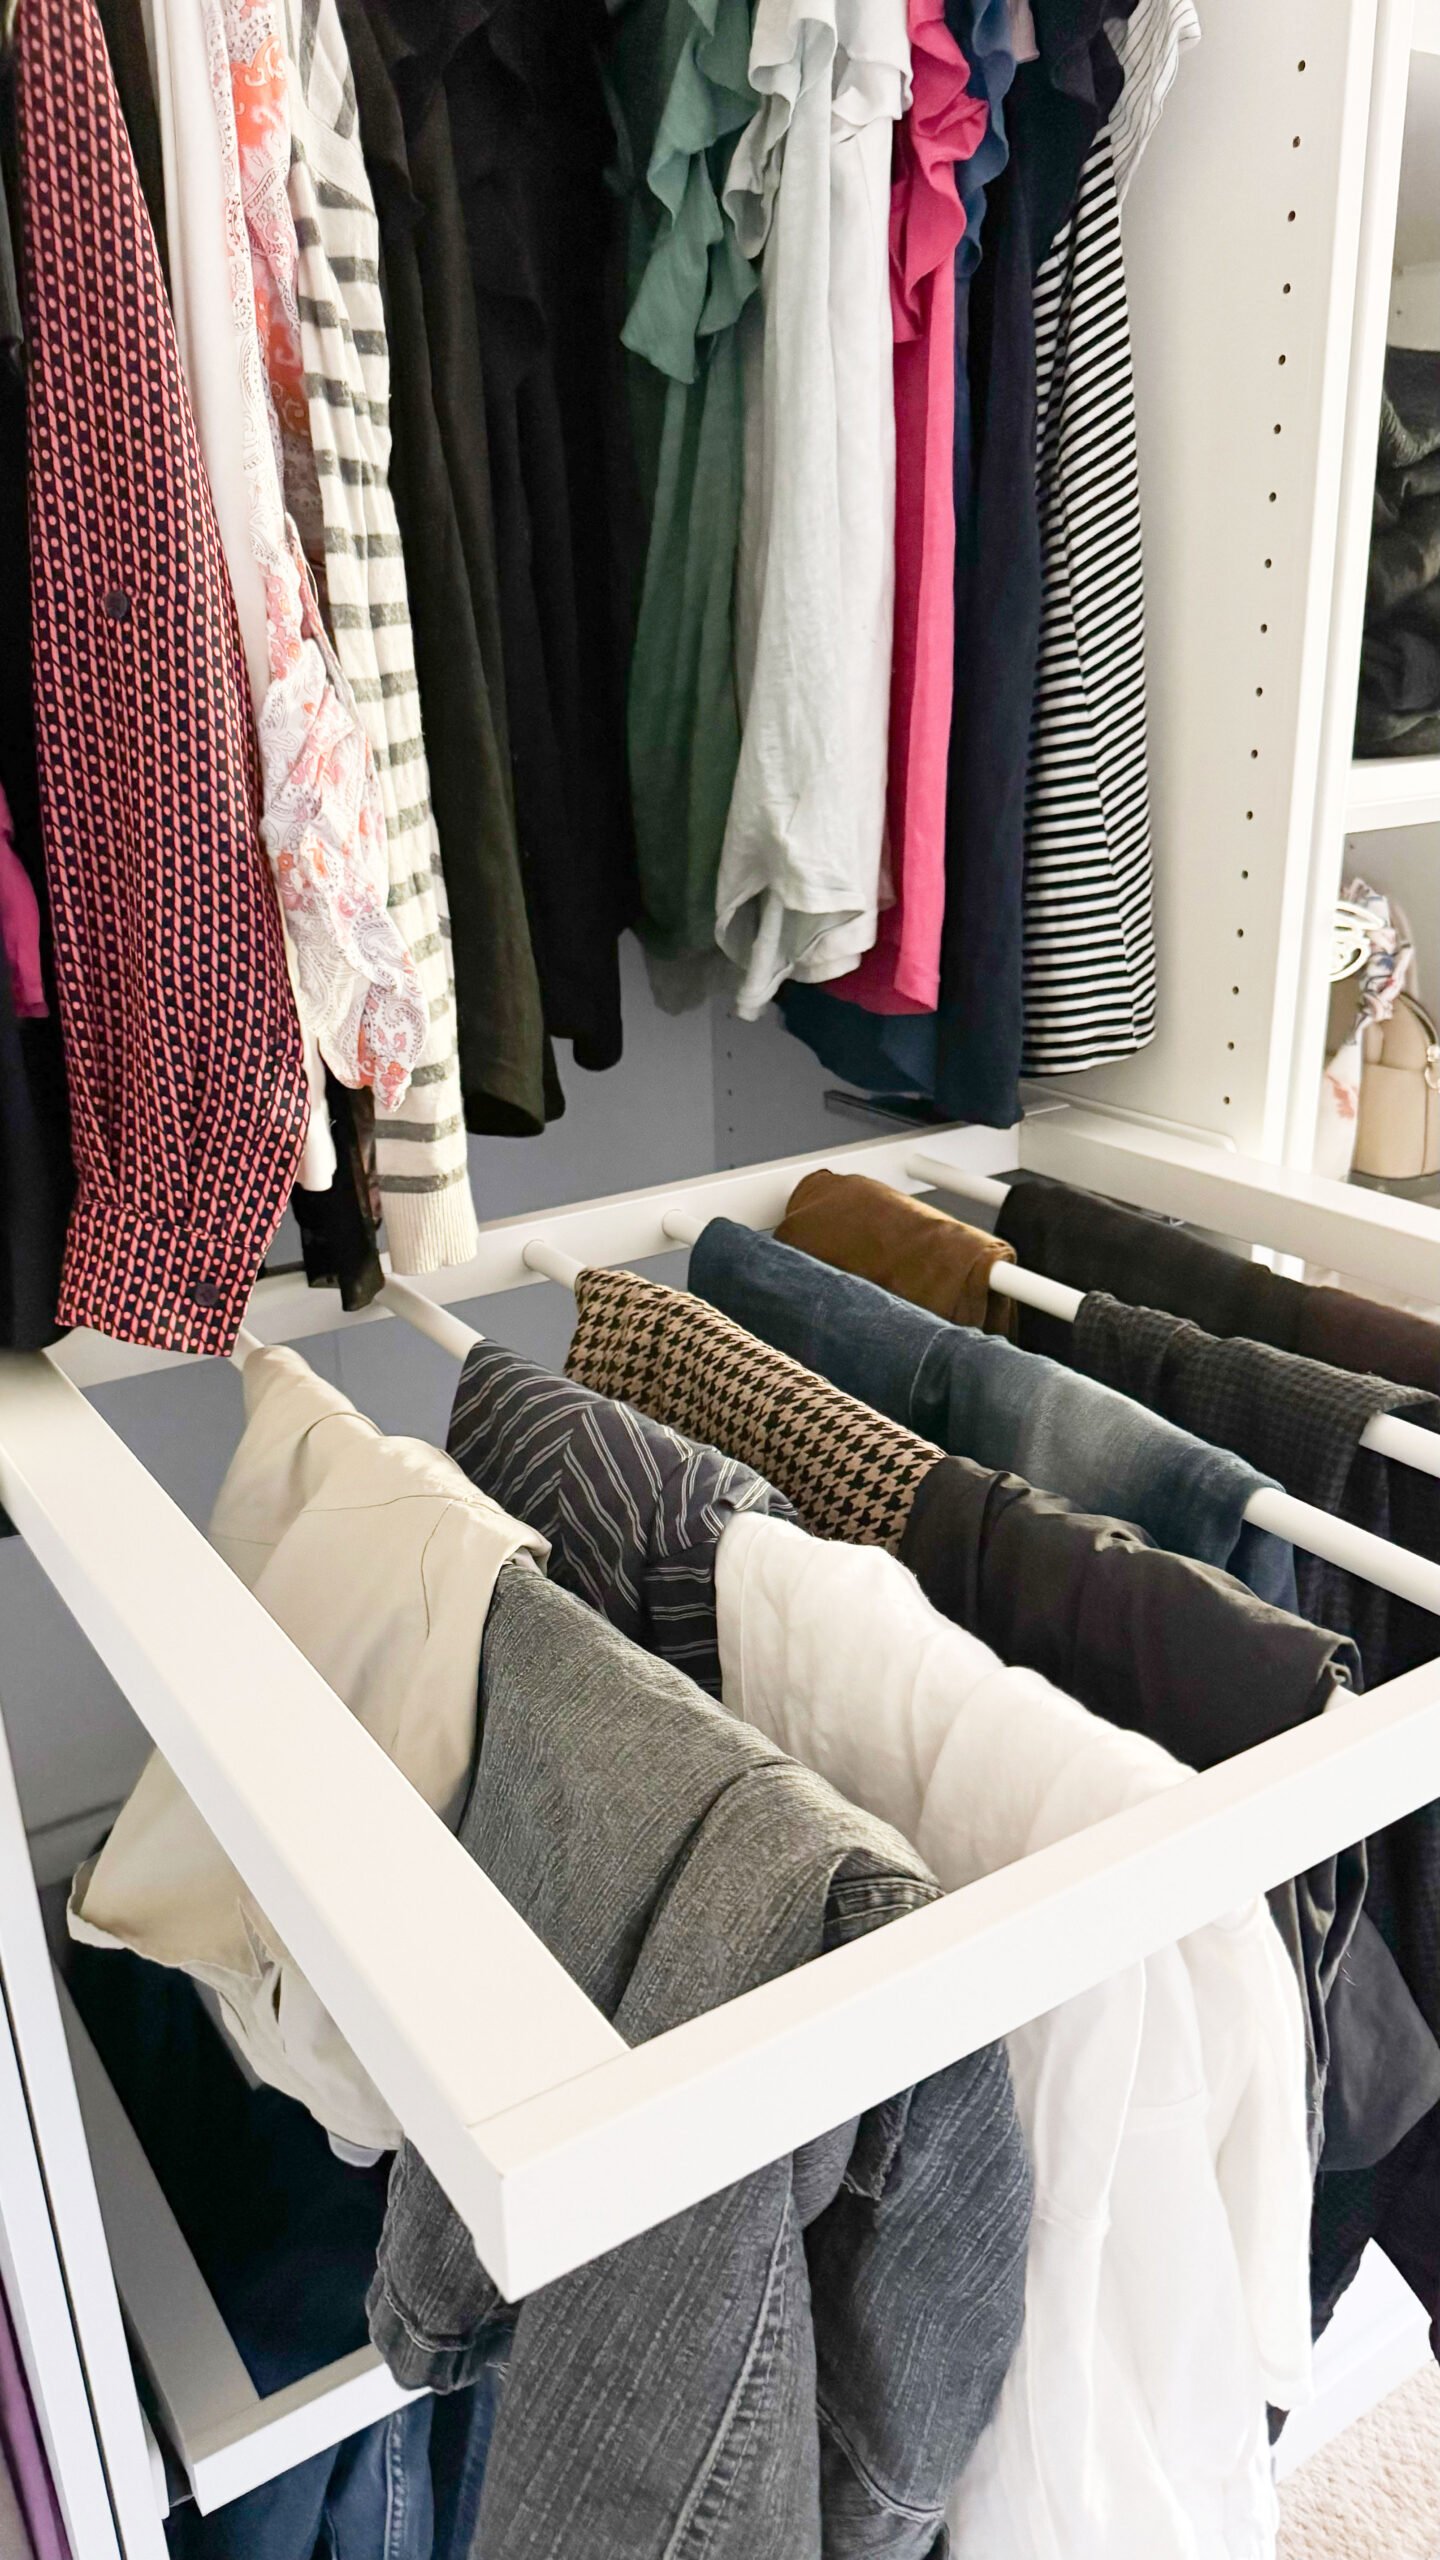
A quick PSA: skip the Pull-Out pant Hanger
I need to save you from this mistake.
I was so excited about the pull-out pant hanger. They felt smart. Organized. Like a grown-up closet decision. In reality? They’re a complete waste.
They hold fewer pairs than a regular clothing rail, and trying to hang pants without nudging another pair onto the floor is oddly frustrating. I’m returning both of them and replacing them with a standard rail instead. Learn from my mistake. Save your money.
How I’m thinking about storage overall
I’m much more of a home decor person than a clothing person, so this amount of hanging storage is more than enough for me. I don’t need endless racks or elaborate systems. What I do need is better shoe storage. You might have noticed I included it in my original plan, but I’ve since abandoned that idea.
Instead, I’m planning to use IKEA BESTÅ along the back wall and the left side of the closet. The top cubbies will hold shoes, and the bottom will be for general storage. I added legs so that someday, if I ever finish this project, baseboard can be added for a built-in look.
Simple. Functional. Nothing fancy. And luckily, IKEA has a BESTA planner too so I can see exactly how it will work in my space!
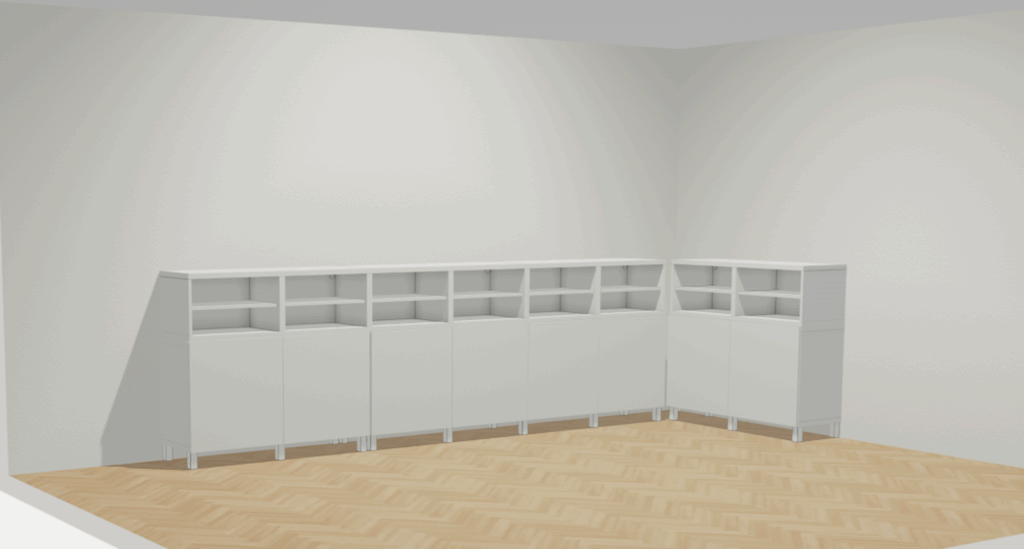
And if you look back, you’ll notice this plan mimics the left-hand side of my inspirational image that AI made for me!
Why I’m sharing this unfinished
I usually wait until spaces are done before showing them. But if I did that here, you might never see this project at all. Lol!
This isn’t about perfection or dramatic before-and-afters. It’s about finally doing something with a space I’ve been thinking about for over a decade, making practical choices, and allowing a room to come together over time.
And honestly? That feels very accurate for how homes really work…or at least I think so. Please tell me I’m not the only one!!!

DECORATING MADE EASY
Get my free 5-day decorating course and learn how to define your style, make better decisions, and create a home that feels like you.
After the course, you’ll receive my latest decorating tips, antique finds, and new posts.