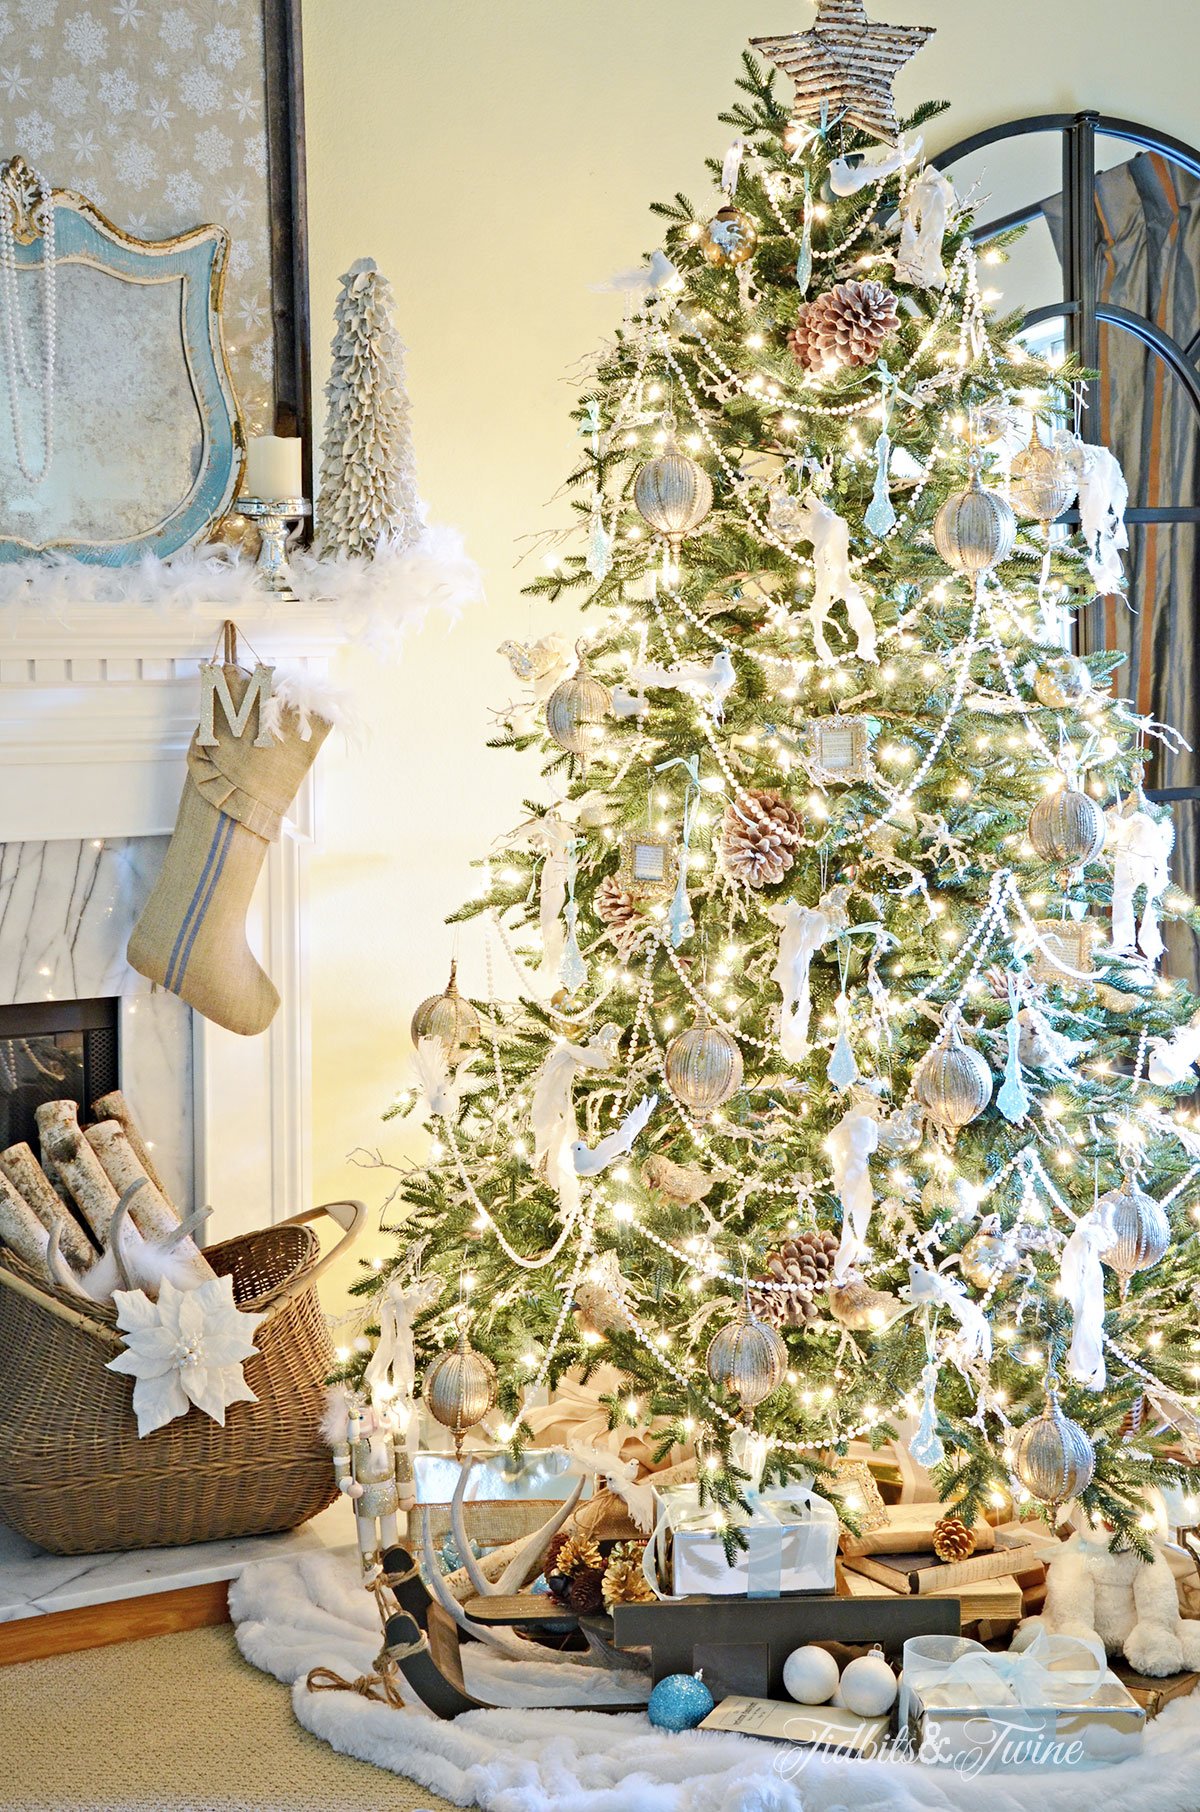
Last week, a lovely reader asked me to provide specifics on how I decorated my Christmas tree. If you’ve been following me for a while, you probably know that I love the layered look when it comes to decorating, but I had never realized until the reader mentioned it that my Christmas tree has a layered look, too!
So here’s my step-by-step process for decorating a Christmas tree.
Step 1. Lights
Now, my Balsam Hill tree came pre-lit, but normally, I have to put the lights on my tree and I have a very specific process.
- Start at the top and work your way down so that the end of your plug is at the bottom of the tree.
- When adding lights, think “Inside-Out” not “Around”. You want to wrap each branch with lights starting near the trunk and working your way out to the tips. Once a branch is covered, move to the inside of the next branch.
- Periodically as you’re putting on the lights, stand back and squint your eyes and look at the tree. By squinting your eyes, you block out the tree and can get a better view of the lights to make sure you’re not inadvertently leaving any unlit areas.
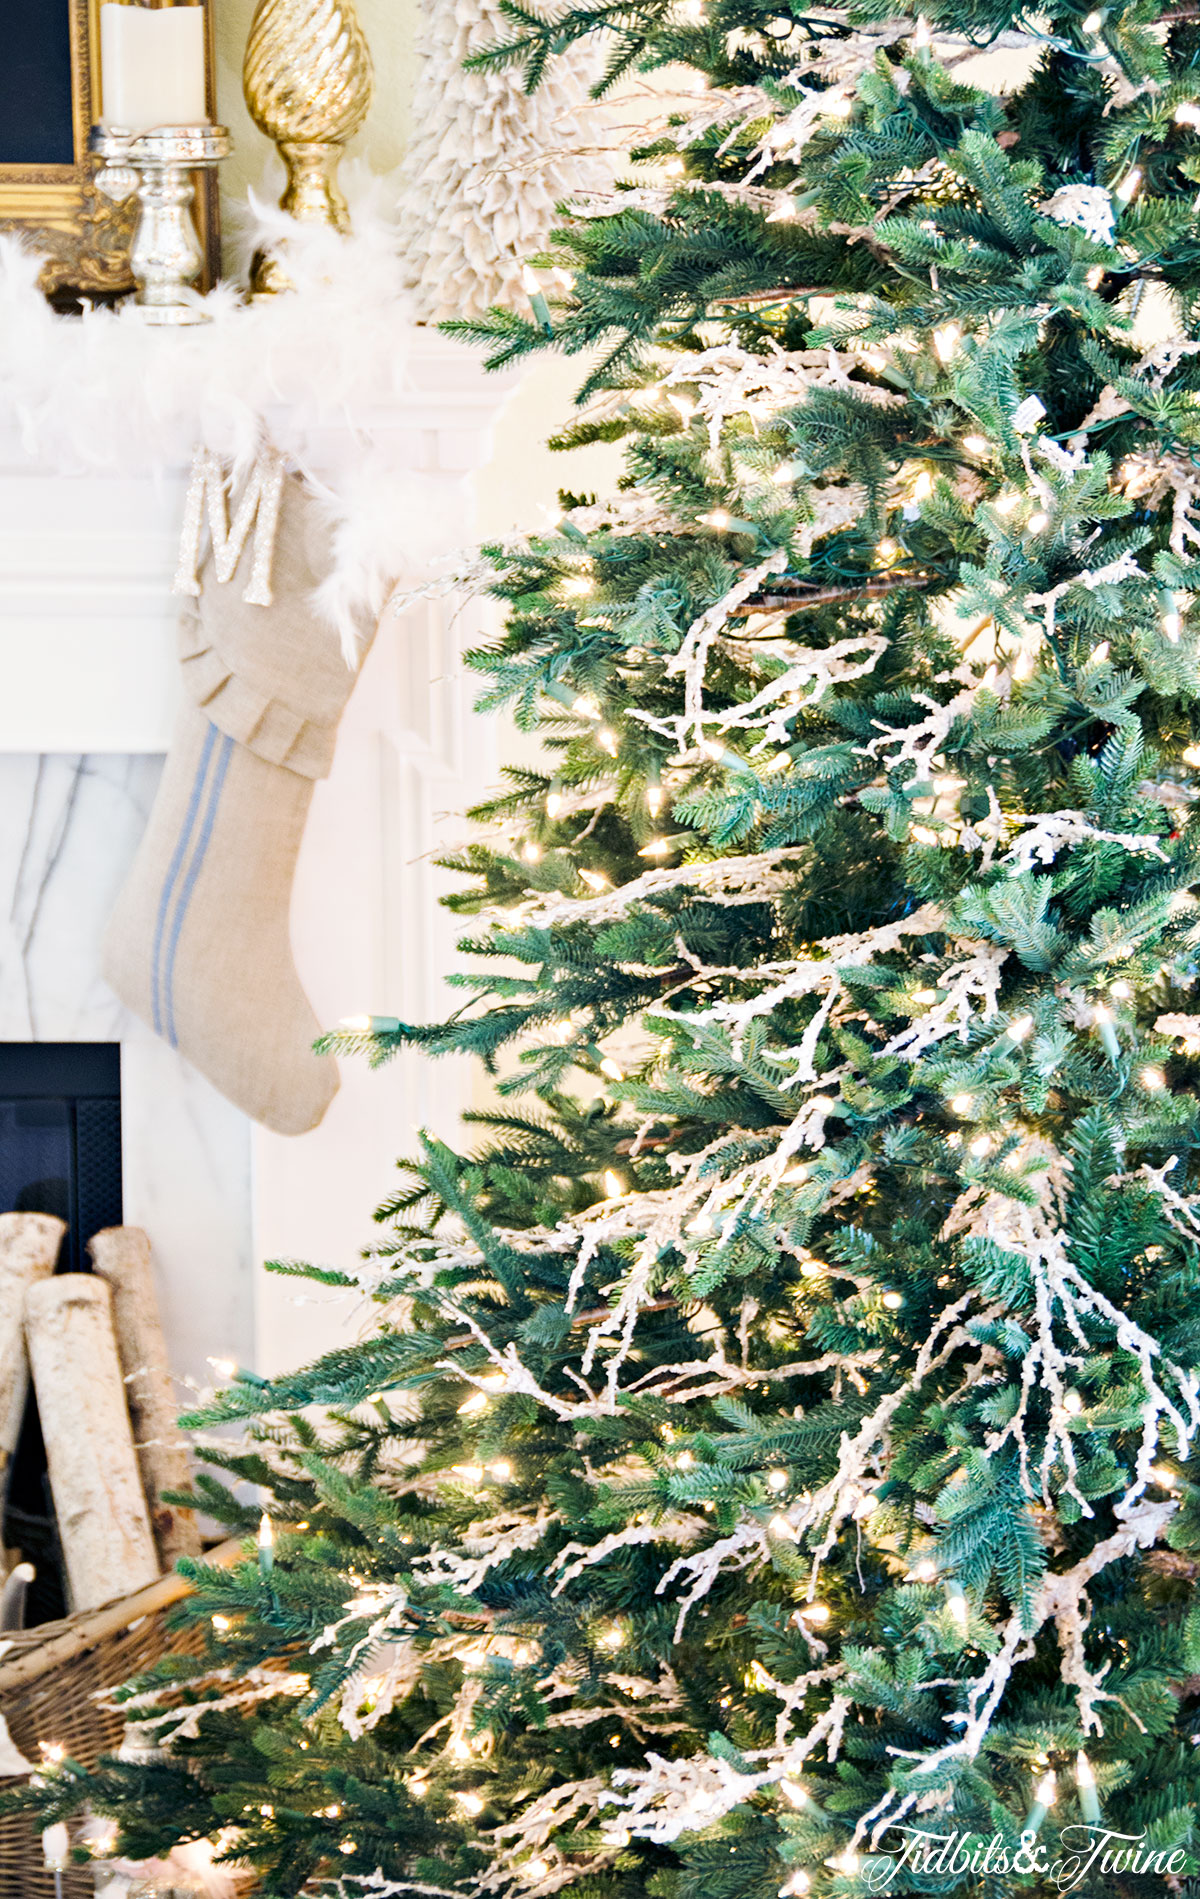
Step 2. Snow Branches
Since I wanted a French vintage look to my tree, I decided to soften up the look of the green with some snow-covered branches to give it a faux flocked look. I literally tucked the snow branches all throughout the tree {just laying them in} and then again, stood back and squinted so that I could better see if I had arranged them evenly in the tree.
2. Large Antique Gold Ball
I like to only work with one type of ornament at a time so that I can better ensure an even distribution of each type. I always start with the biggest ornament that needs the most space to hang, so for me, it was the large antique gold balls. I specifically placed these ornaments on the outer tips of the tree so that they would mimic the silhouette of the tree itself.
Tip: Be sure that your hanging ornaments have enough space to hang straight up and down {meaning that they don’t hit a branch and tilt to the side} for a cleaner look.
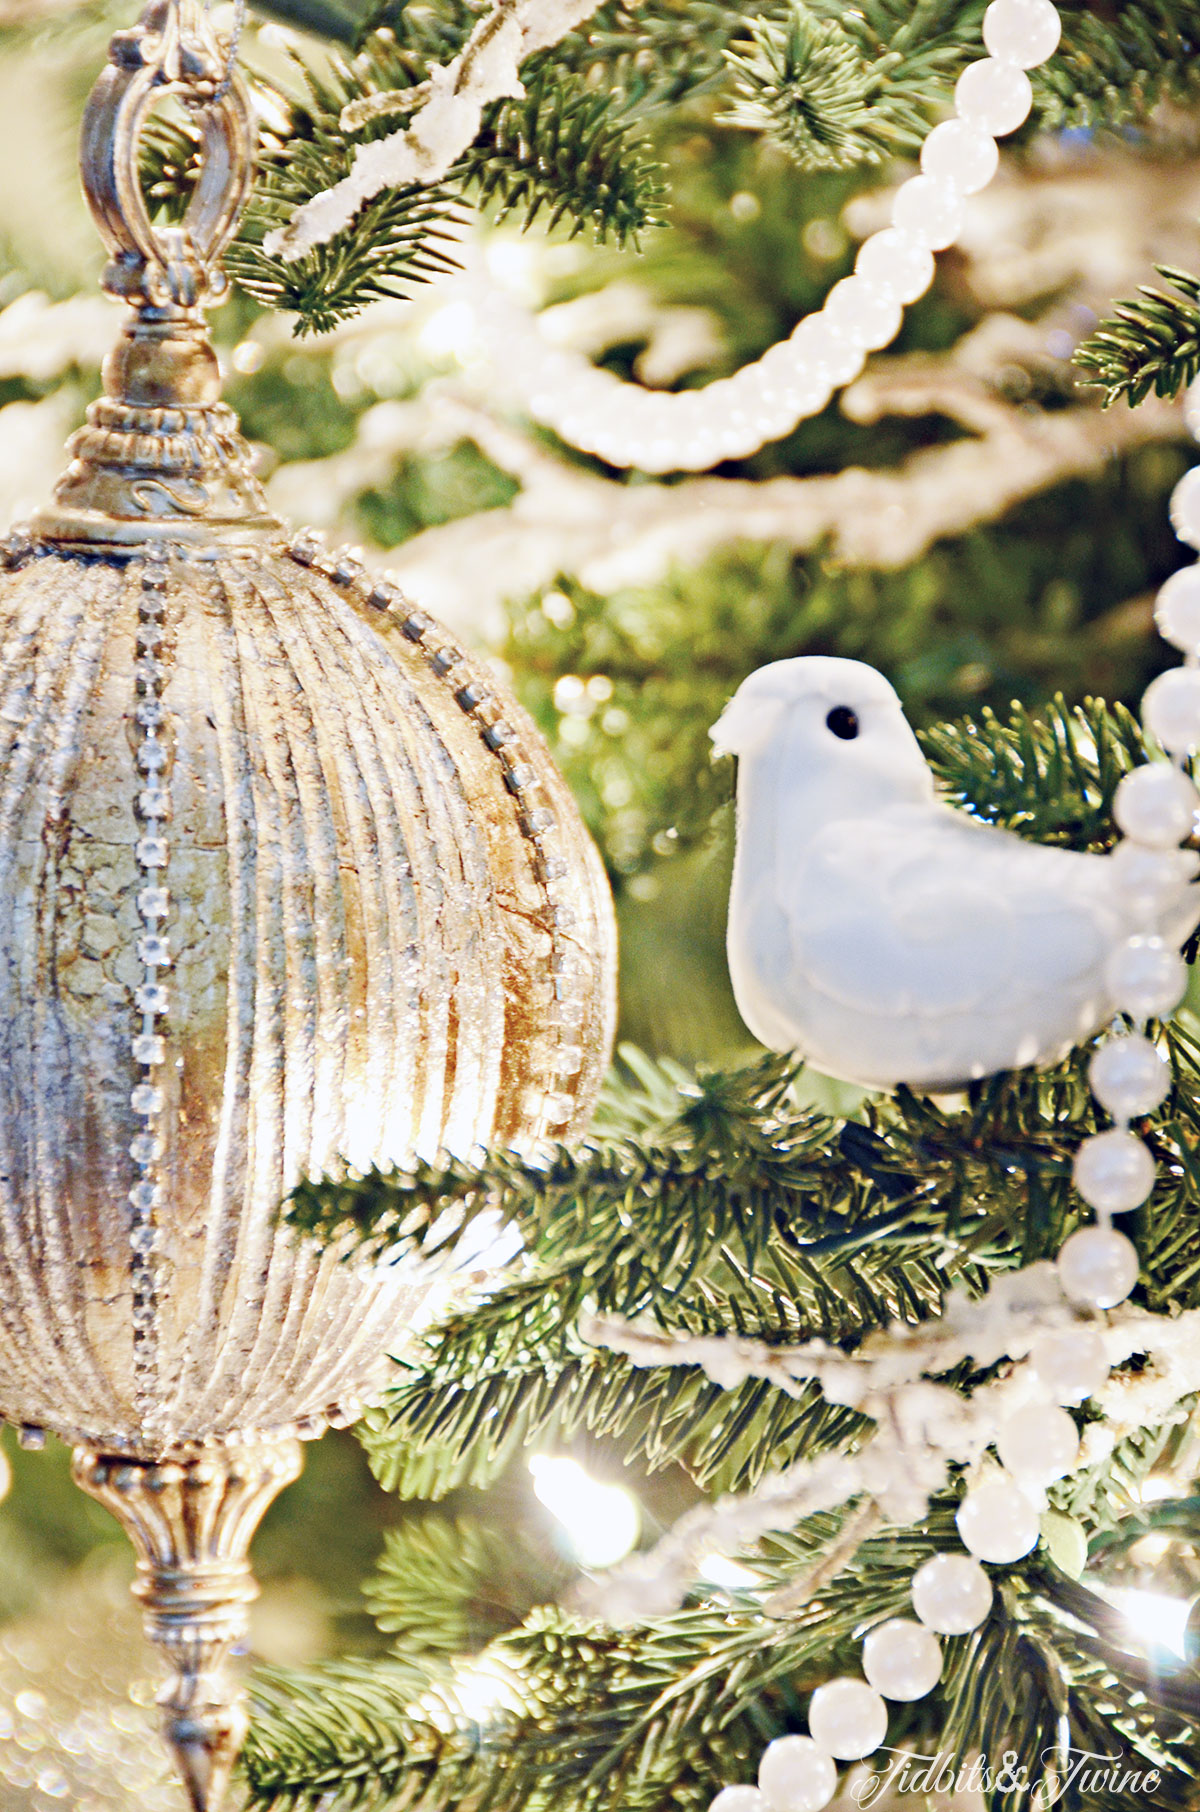
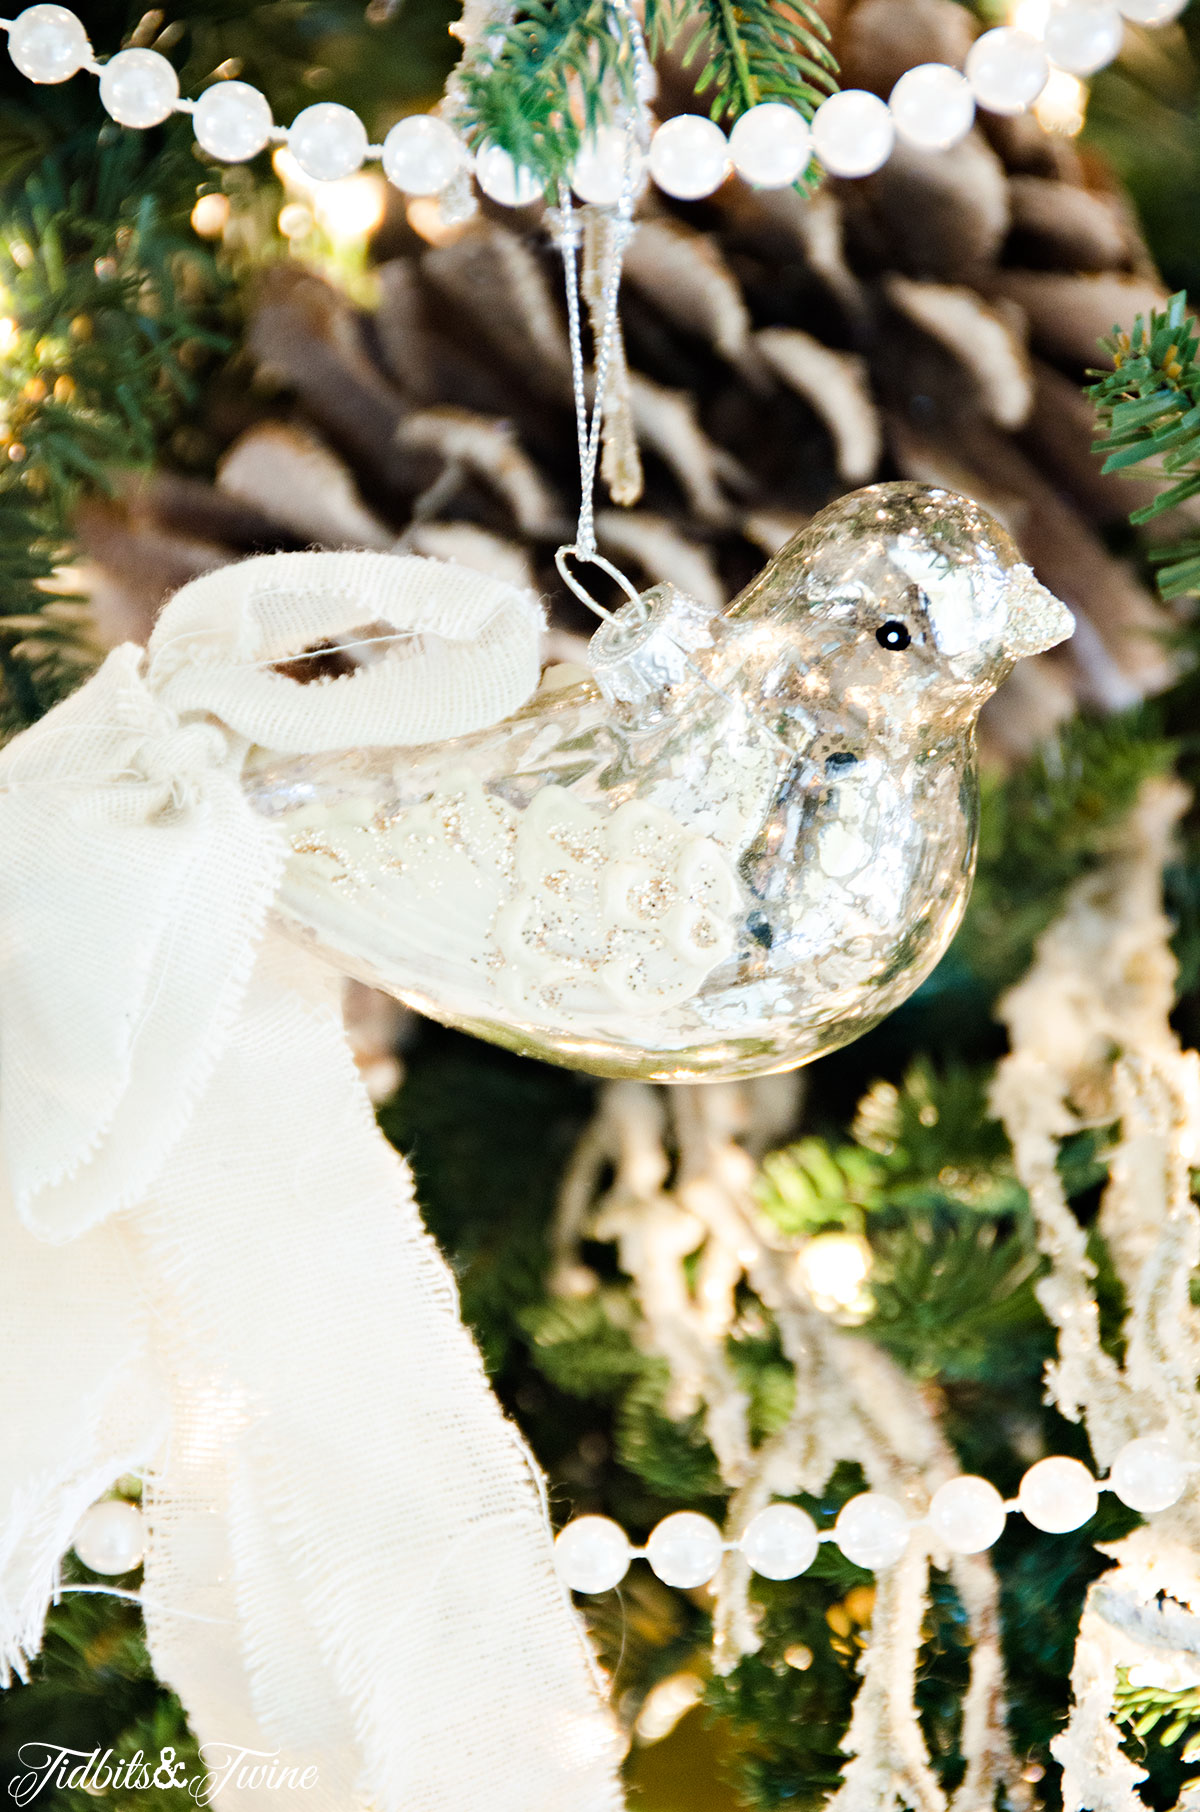
4. Mercury Glass Birds
I used two types of white ornaments on the tree – mercury glass birds with white shredded linen tails and pure white decorative birds. After the antique gold balls, I added the mercury glass birds next because their tails were long and needed space to hang.
5. White Decorative Birds
I added the white decorative birds next, making sure to distribute them evenly around the tree and to add a pop of white to any area that seemed a bit dark. As it happens, these aren’t even ornaments, but I thought they were pretty and so wanted to use them! These are actually birds that I found near the floral section of the craft store.
Tip: Always check the floral and wedding departments of craft stores, as they often have items that look beautiful on Christmas trees!

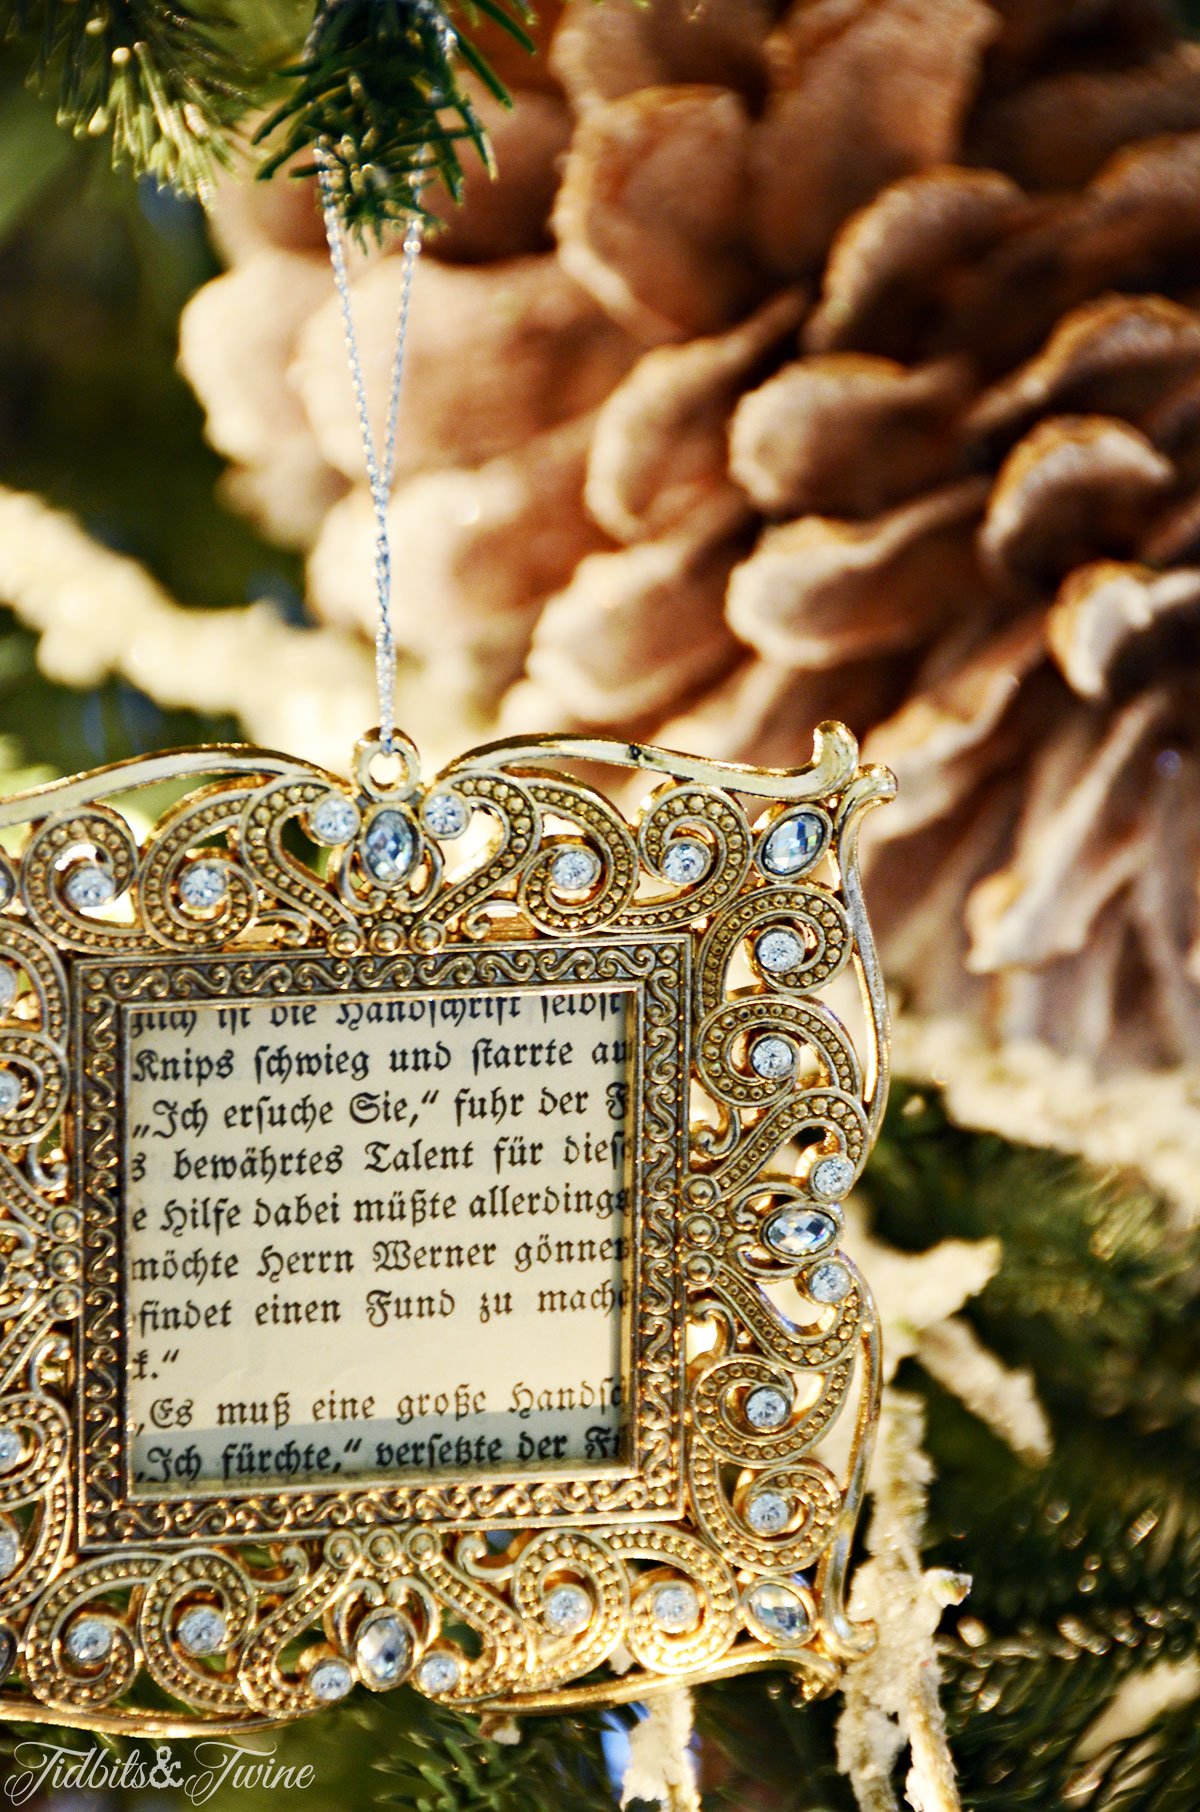
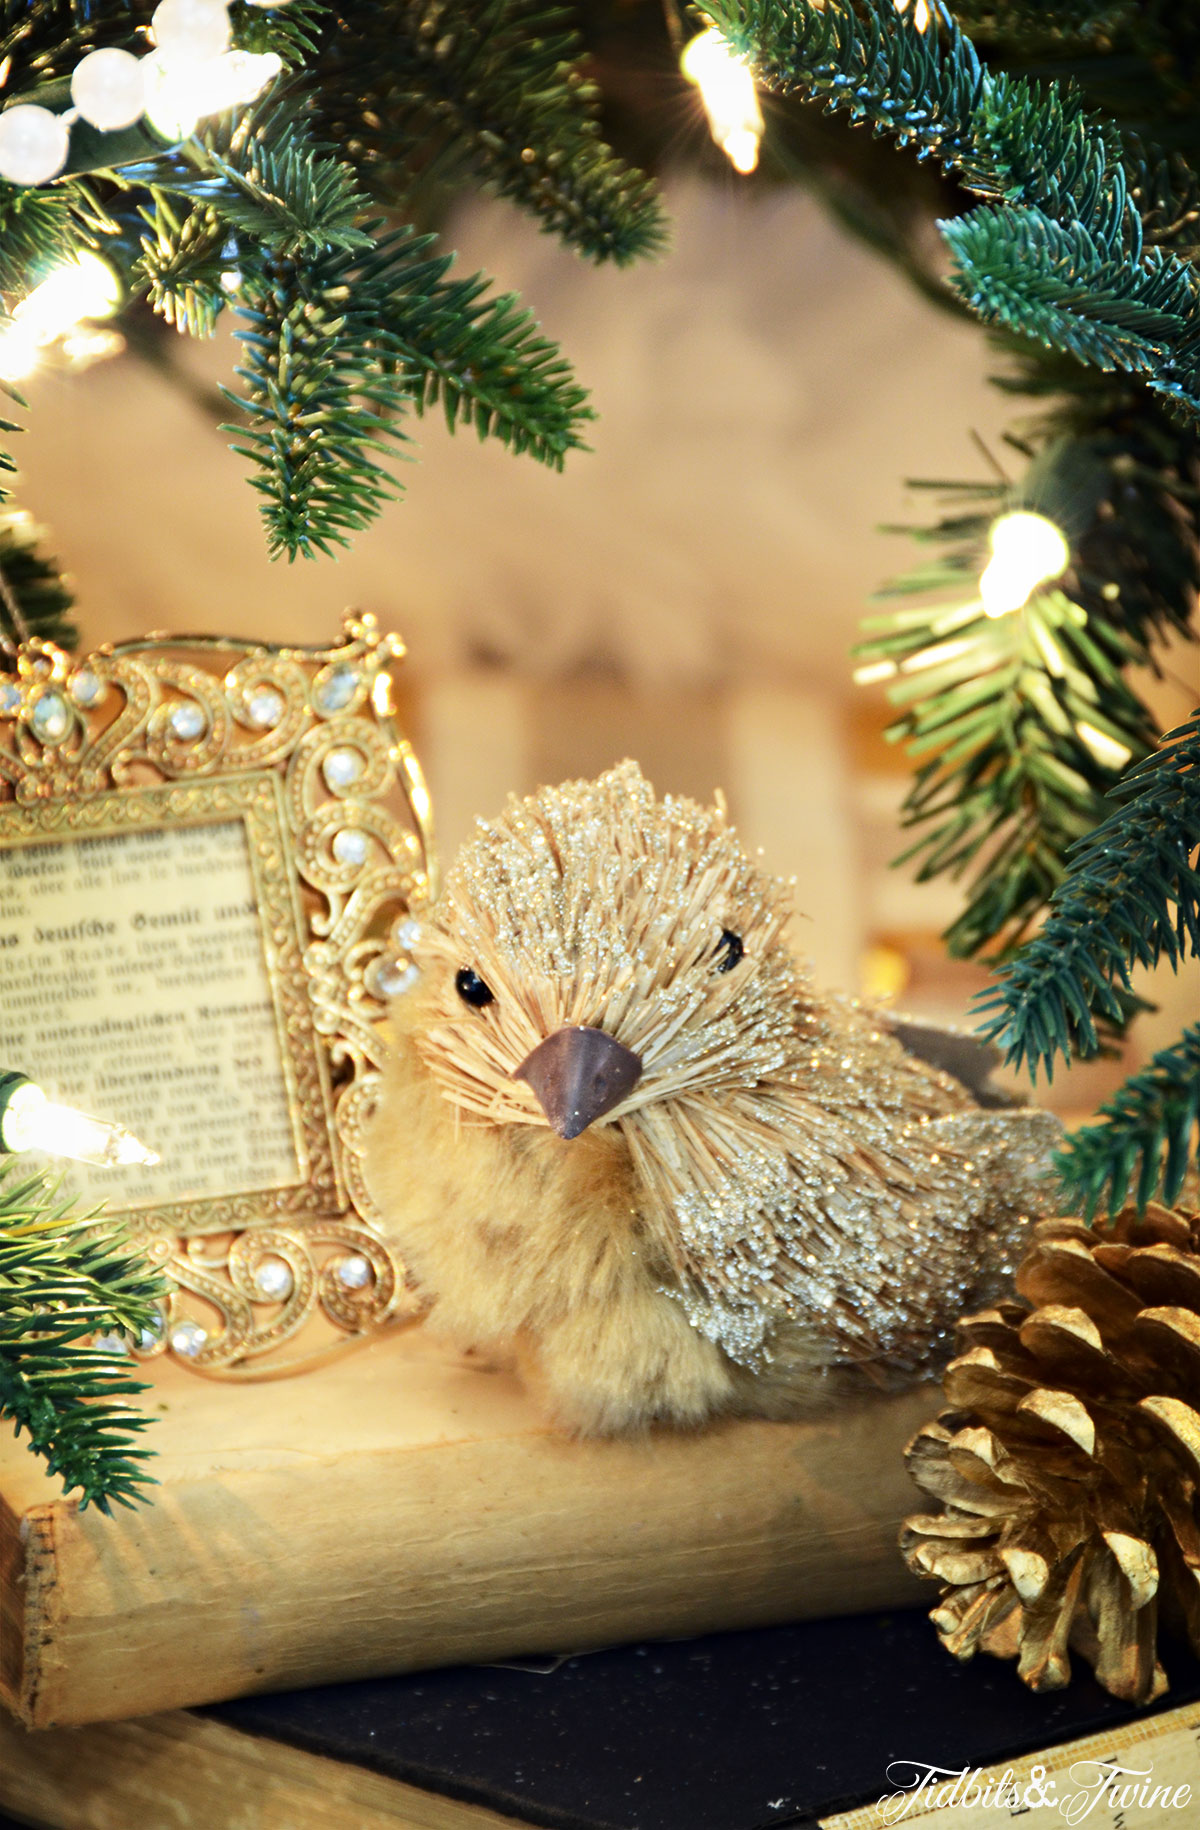
6. Gold Ornaments
To balance out all of the white, I added a few more gold-colored ornaments. I chose antique gold frames that I filled with French book pages, as well as a more rustic-looking gold bird. I sprinkled these around the tree wherever I felt there needed to be a bit more color to offset the white.
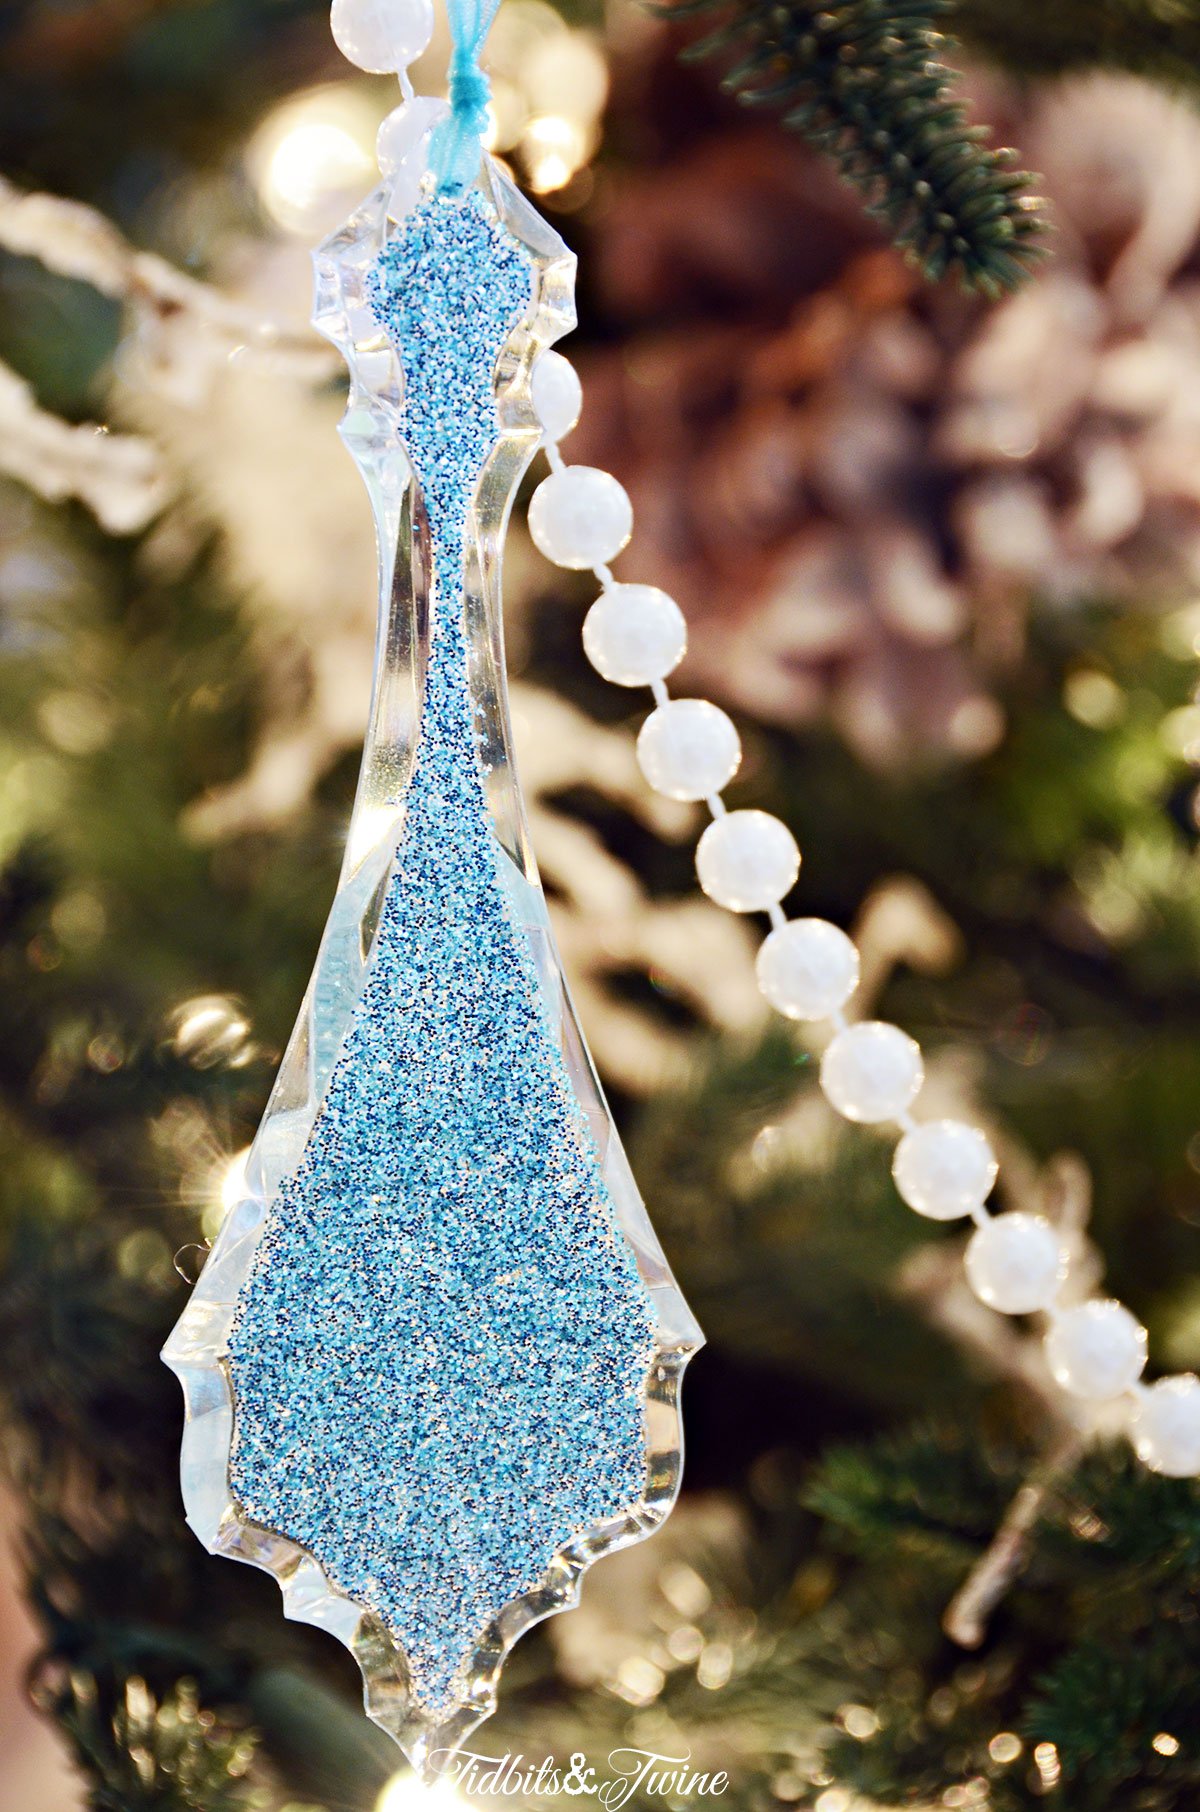
7. Tiffany Blue Accent Ornaments
Once all of the gold and white ornaments were only the tree, I added just a few bits of blue to the outer edges of the tree, again, making sure that I had evenly spaced them.
8. Tucked Ornaments
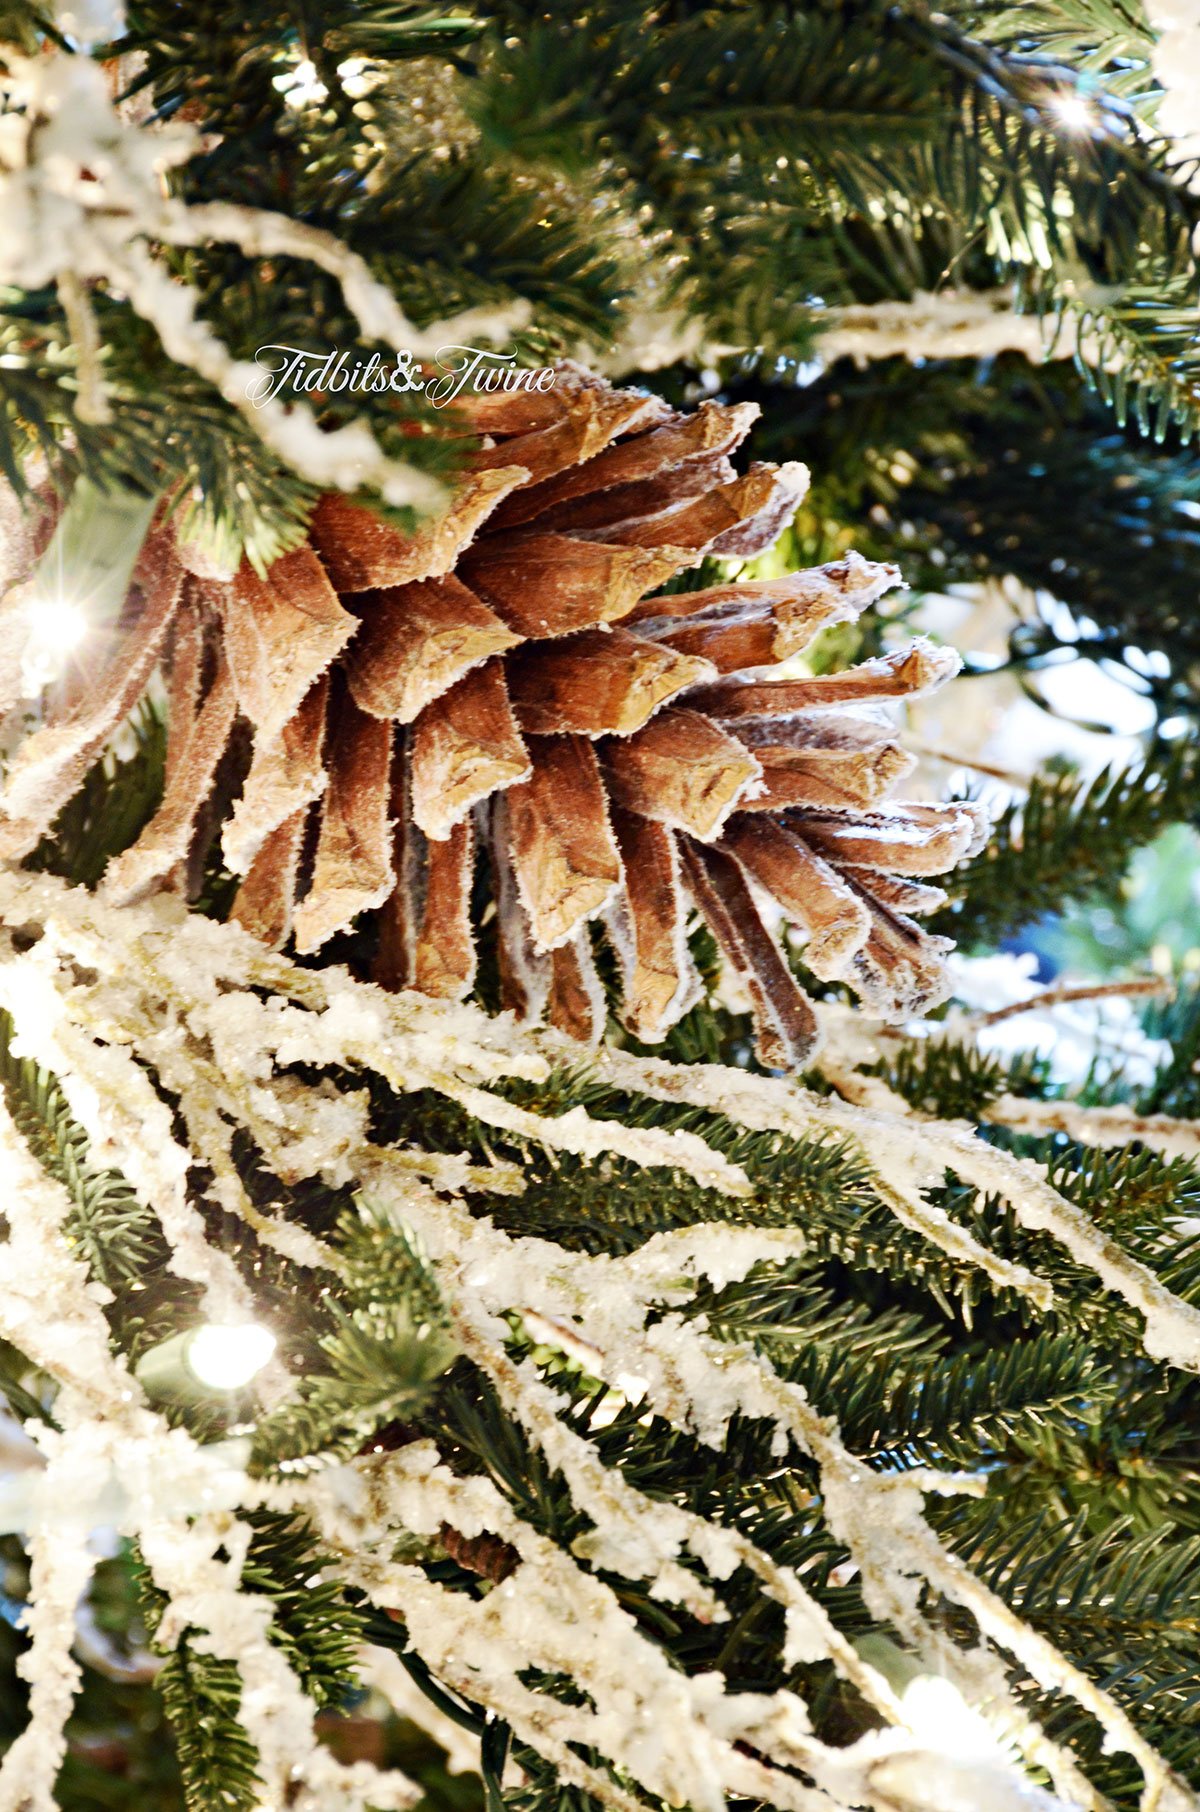
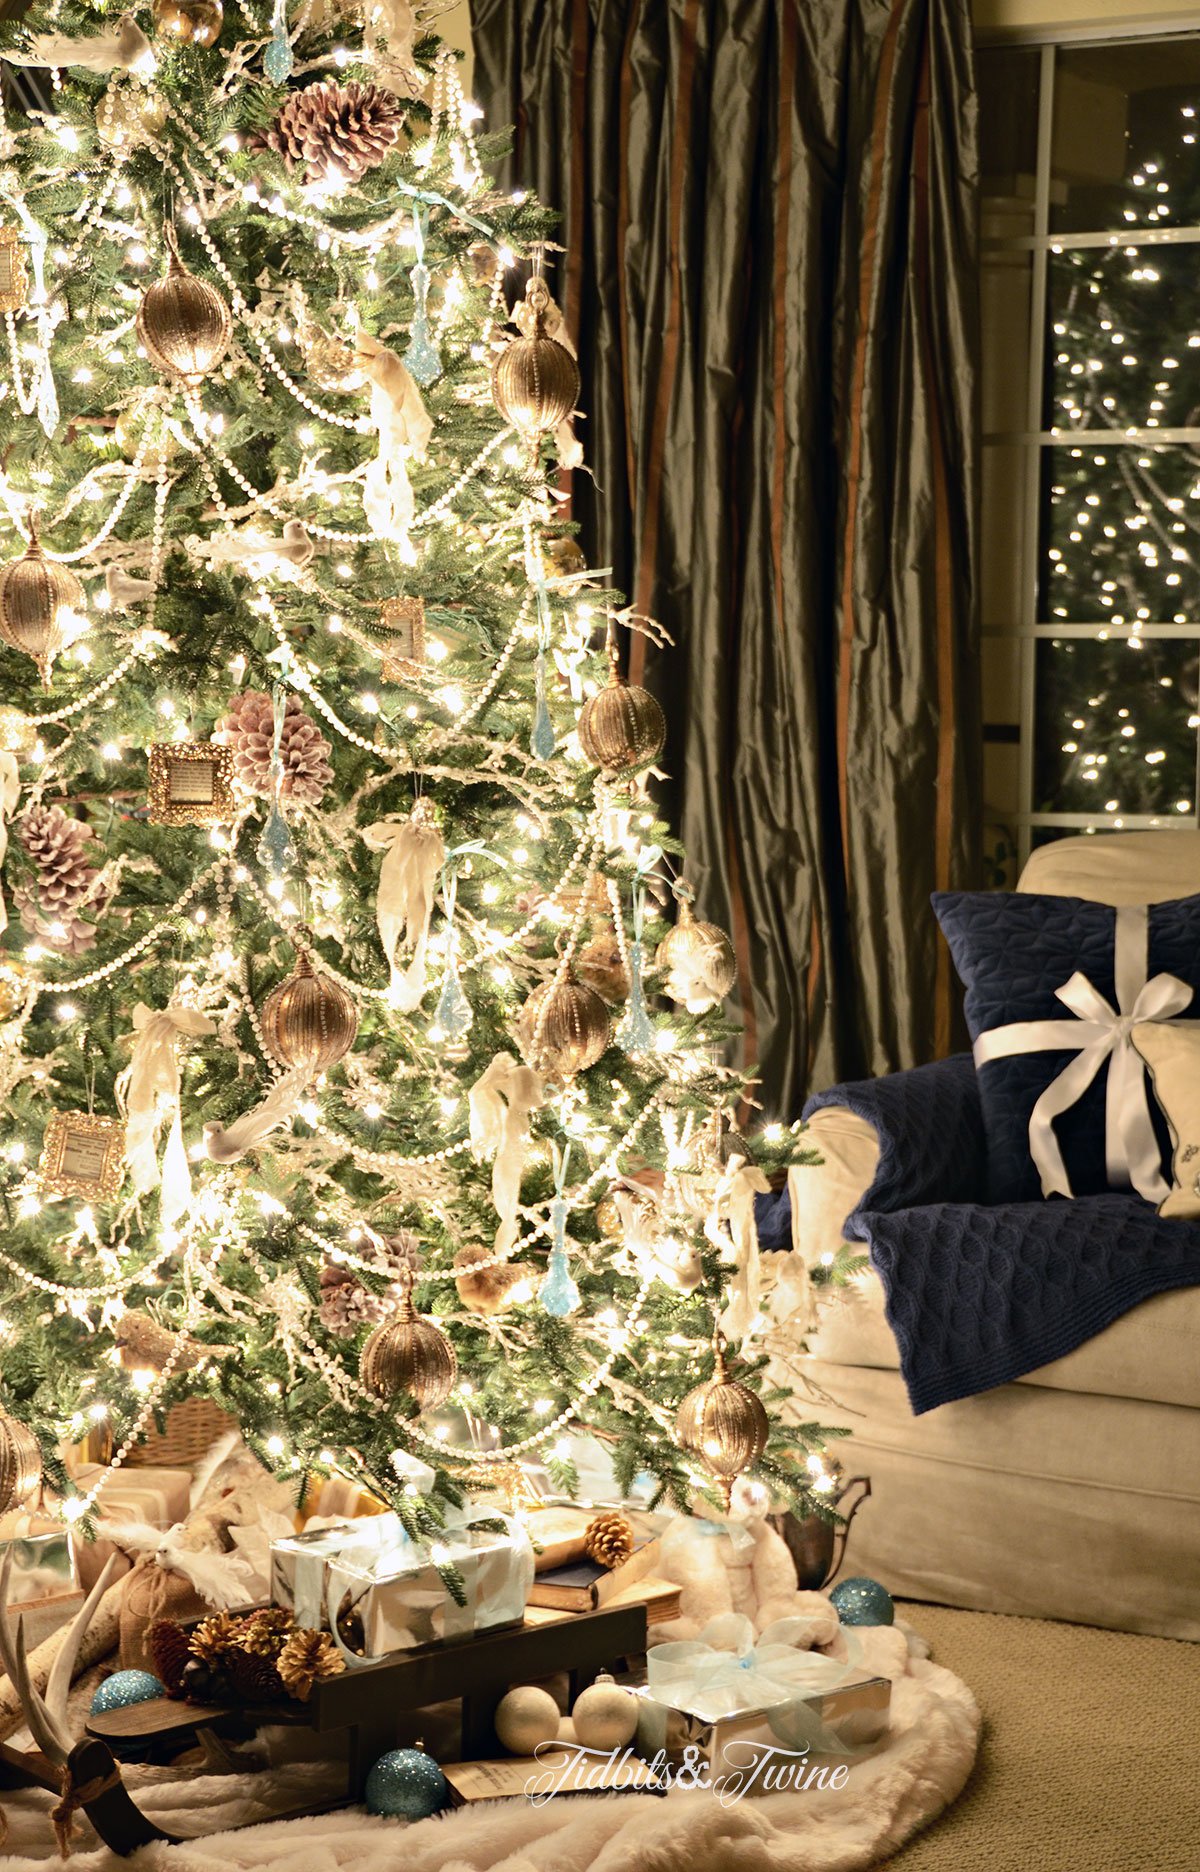
You’d think I’d be done by now, but no!!! Once all of my main ornaments were on the tree, I went back and looked for spaces that seemed empty. I didn’t need any more center-stage ornaments, so instead, I tucked additional ornaments deeper inside the brances of the tree. By tucking them in, they took up space without detracting from the main ornaments. I tucked in gold pinecones, large brown snowy pinecones, gold glittery balls, and even a few more rustic gold birds.
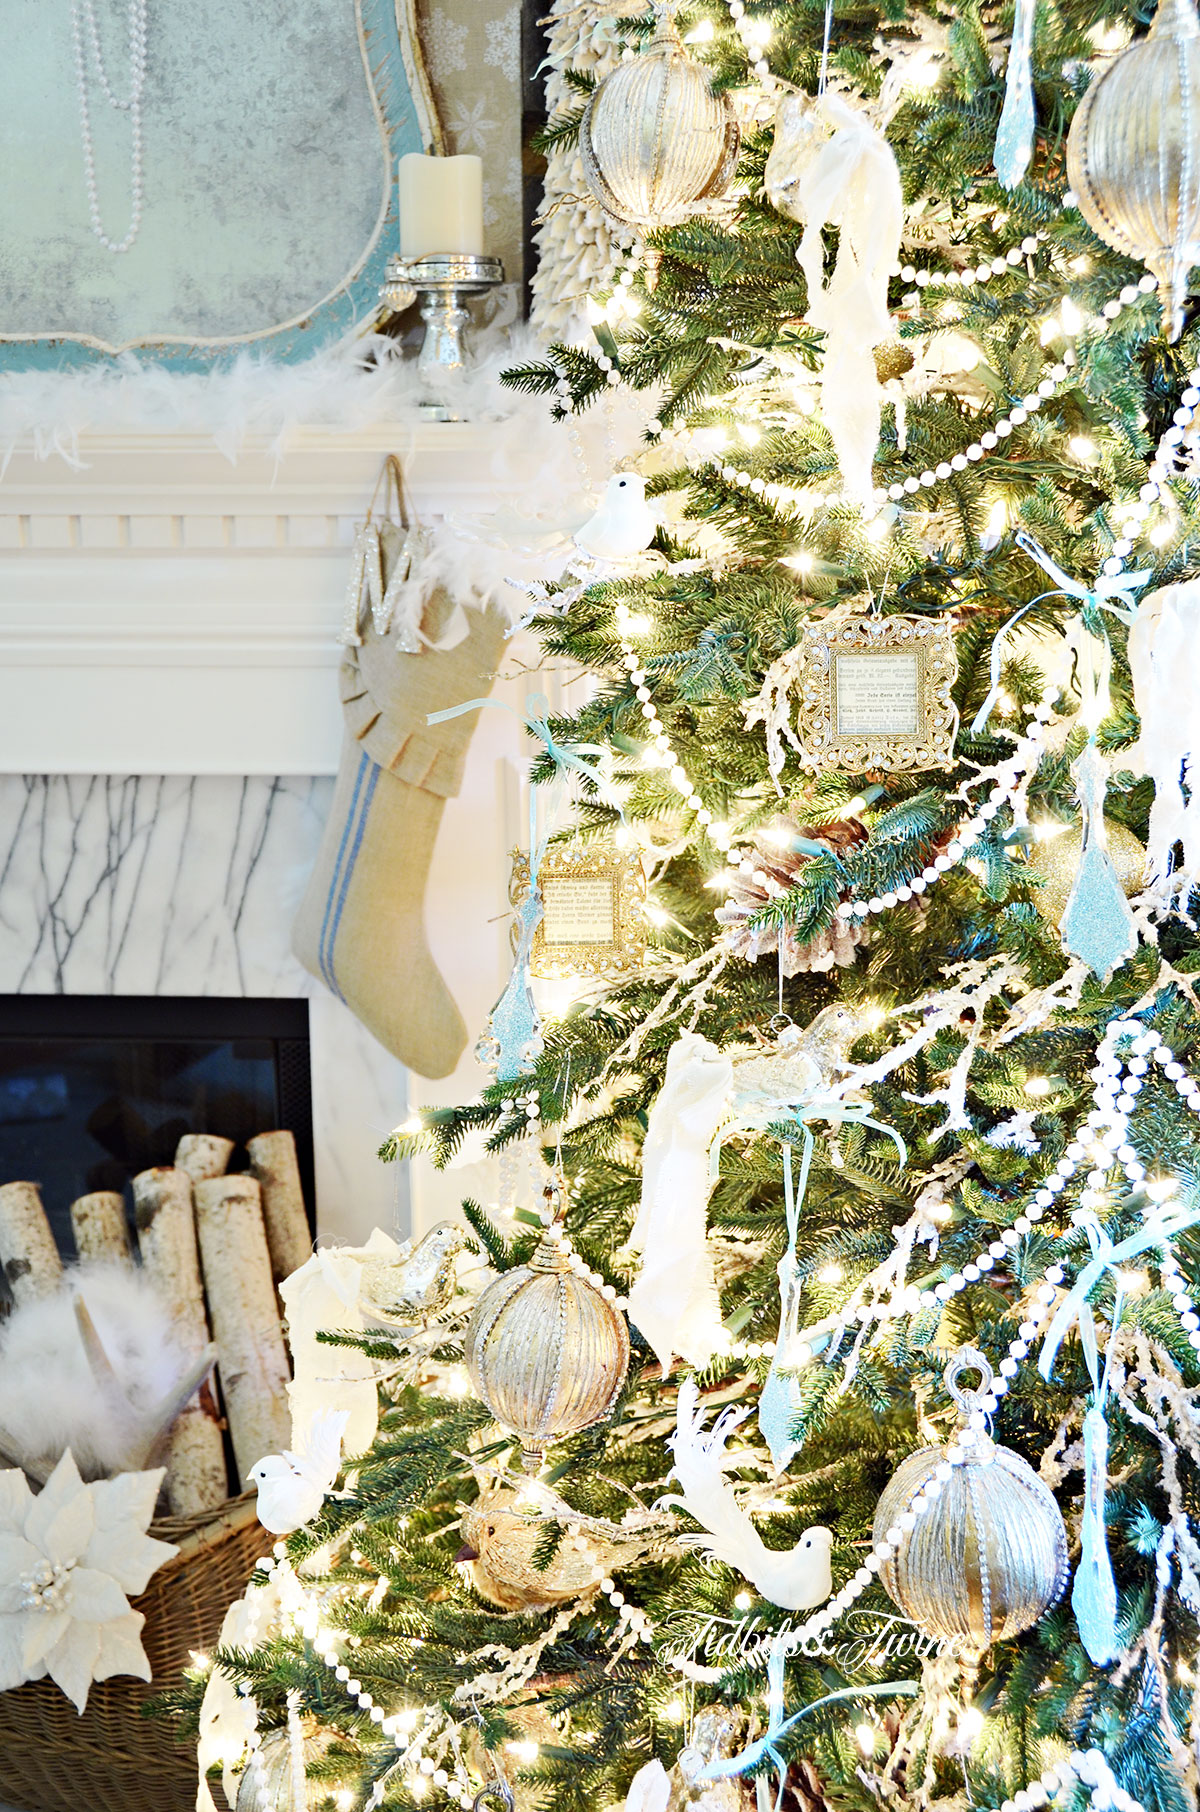
10. Pearl Garland
Once all of the ornaments were in pace, I added the pearl garland around the tree. The garland sits on the outside of the ornaments with one exception – any areas where it impeded an ornament from hanging properly, I pulled the ornament forward and the garland behind. And I might have added a few bit of garland under the tree too for added decoration… :)
Tip: The wedding section of a craft store carries more formal garland year-round, so don’t limit yourself to just what is available in the Christmas section. This pearl “garland” isn’t even garland – it’s Halloween flapper costume necklaces that I’ve draped on the branches.
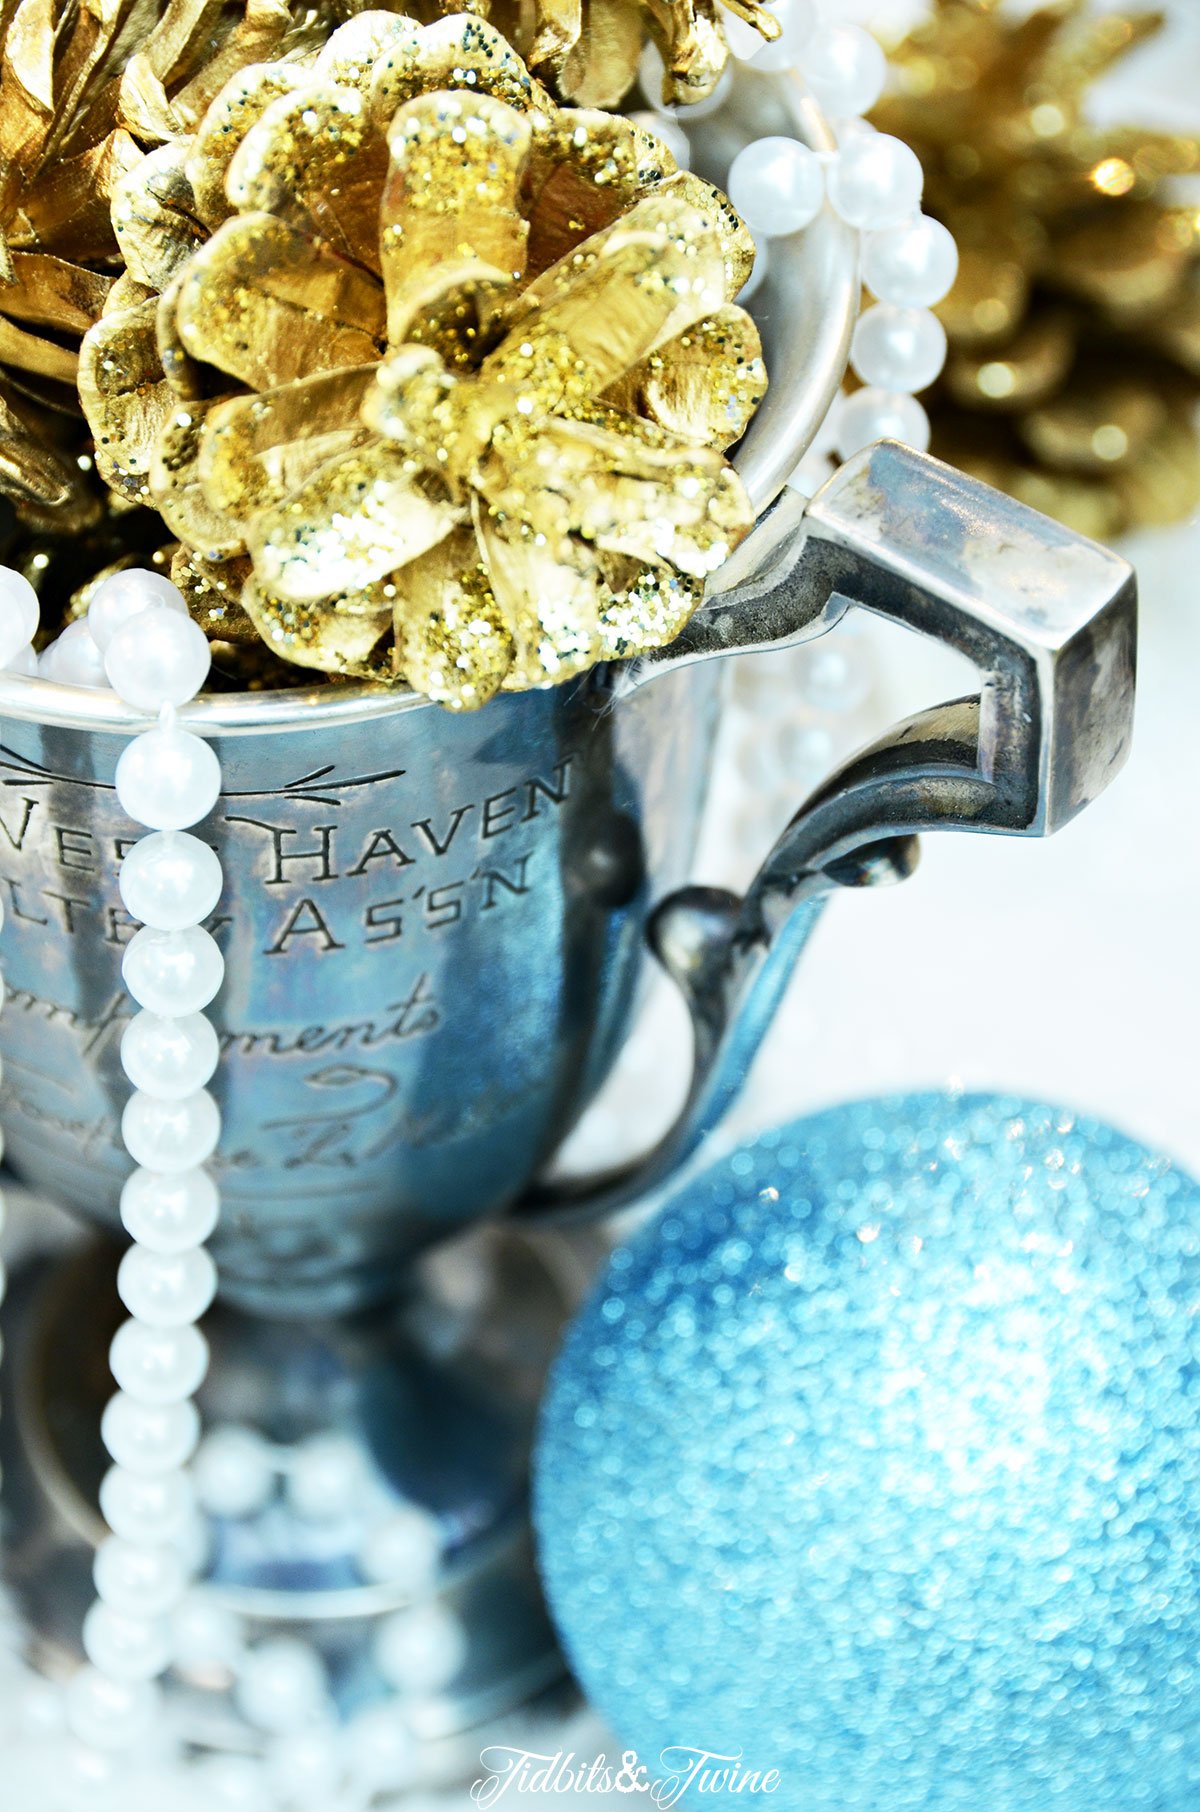
Once the tree was fully decorated, I moved on to decorating underneath! A faux fur throw acts as a tree skirt and then I added lots of goodies including a sled, nutcracker, teddy bear, birch logs, more ornaments {including additional blue ones}, a vintage trophy, and lots of tattered old books.

And that’s how I gave my Christmas tree a French vintage layered look! Thank you so much to the kind reader for asking the question! I always have to guess as to what you might like to read about so I appreciate your questions because they help me write posts that will be of more interest to you.

Hi Kim, I love all the layers. Your tree is just beautiful and I really like how you weave in some vintage items. Do you recall where you purchased your sled from?
Thanks so much,
Lee
Absolutely gorgeous! Wondering where you purchased the furry tree skirt, I think my dtr. would love it for her tree!
Thank you so much, Carol! The tree skirt is actually just a blanket. To me, tree skirts are never quite full enough so I often use blankets! Lol! But you can purchase faux fur tree skirts at Pottery Barn I believe.
:) Kim
Your tree is beautiful. Thank you for cool tips for decorating a Christmas tree ;) Merry Christmas :D
One word ~ WOW! I love your beautiful Christmas tree and appreciate how you walked us through each step of how you decorated it. Pinning and using your tips next year!
I would also like to know where the large snowy branches came from?
Tree is absolutely gorgeous!!!
Thank you, Tracy! I got them at Michaels. :) Kim
Thank you so much for doing this article Kim. I’m glad I could provide some inspiration and get some ideas in return too.
Merry Christmas!
Claudia
You’re welcome, Claudia! Thank you for the suggestion! Merry Christmas! :) Kim
Love your tree.
I am interested in snow branches. Do you recall where you got them? How many did you use? Did you deconstruct larger branches? Thank you. Ruth
Hi Ruth! I got them at Michaels and I think I used about 10. I clipped them to remove the long stems and then trimmed the branches into smaller pieces so that they fit nicely into the tree. I really only focused on putting them toward the outside since that’s the part that shows the most… :)
Great tutorial and gorgeous tree.