What a week this has been! I love working on this blog, posting pictures, writing articles and basically fluffing everything up to make it pretty. What I don’t enjoy is the backend technical stuff and it seems that’s all I’ve been dealing with this week! As you might have noticed, my site has been down more than it’s been up lately, which makes me sad. After more than three hours on the phone with my hosting company, though, it looks like my site is up and running again. Fingers crossed it stays this way! Now I can finally get back to the fun stuff.
So let’s talk kitchen cabinets!
When I was cleaning up the kitchen last night I started thinking about the makeover we did when we first moved into the house some years back. So today I wanted to share with you one of my favorite kitchen updates that is small but makes a huge impact – trim and molding!
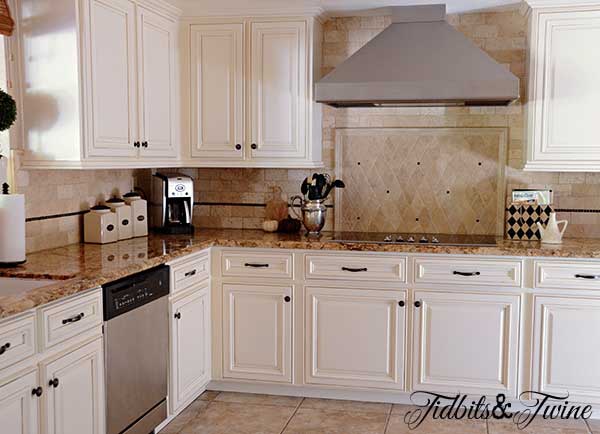
We have 1980’s pink oak, builder-grade cabinets. (Yes, they really are pinkish. Yuck.) The previous owners had painted the cabinets already, but they used two different colors and so when we moved in, I wanted to repaint them to be just one color. Now there’s no way I could have painted the cabinets myself – way beyond my skill set – so I hired a painter/woodworker for the project. He suggested that I add crown molding to the top of the cabinets and trim to the bottom to update them. I can’t believe how much these two details changed the look of the cabinets! They now not only look updated, but also custom.
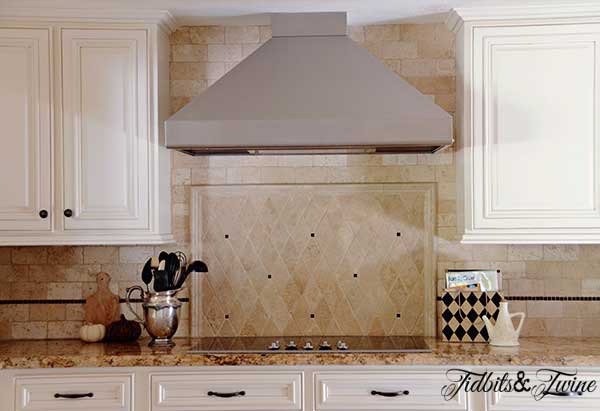
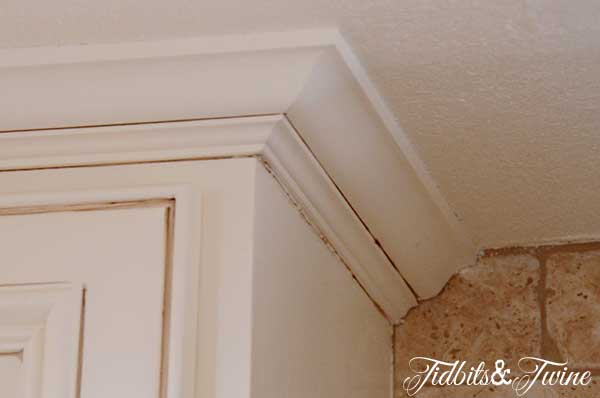
My kitchen has drop ceilings (under 8′) so I didn’t have a lot of space to add crown. We had to use a smaller piece in order for it to fit, but can you imagine what an impact crown would have if you have taller ceilings that can handle a larger, more dramatic piece?
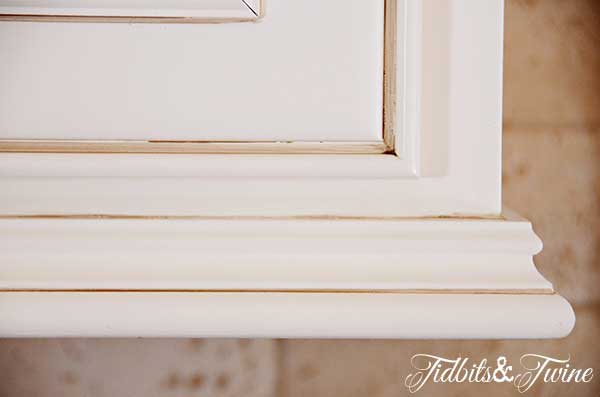
If I remember correctly, the trim around the bottom of the upper cabinets is actually two different pieces put together to create the right shape and angle. It’s a small amount of trim so it doesn’t hang too low or take up much visual space between the cabinets and counters, but adds a lot of character. What’s also nice about this trim piece is that if you add under cabinet lighting, the lighting fixtures will be hidden.
I should mention that we didn’t update the 80’s cabinets solely with paint and trim. We also replaced the doors to reflect a raised panel style and changed the hinges from the exposed type to the European hinges. But I can’t imagine if we had gone through the painting process and not added the trim pieces because they are now my favorite part!
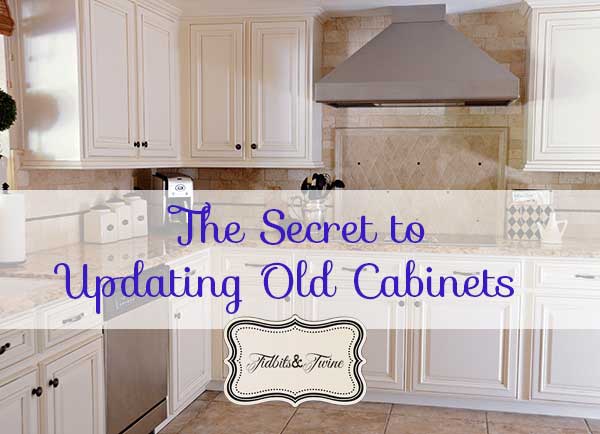
Painted kitchen cabinets are still quite popular and so if you’re thinking about painting yours, consider adding some molding and trim to give it a more custom and contemporary look.

Join the Community
Let’s keep in touch! Get exclusive artwork plus the latest news delivered directly to your Inbox!

Great information!! Thank you!
I like the antique caramel color. Could you please tell me what you used?
Thank you
can you share if you did a gel stain on these?
Any chance you recall the color you choose to paint them?? Love it!
Cabinets look lovely. We wish to add trim to the bottom of our upper cabinets. But how?? Glued? Nailed? Please help! Thanks.
Hi Lois – I believe our trim was glued to the bottom. Good luck with your project!
Just a thought – a before and after pic would be wonderful if you have one!!
Hi Karissa – I wish I did! We updated the kitchen long before I started blogging so it never occurred to me to take a picture of the Before. :)
I love your cabinets. Did you add trim to the actual cabinet doors or only around the base of the cabinets?
Hi Jaime – Thank you so much! We only added trim to the base, not the door. We did replace the doors, though, as the originals were very modern looking. I will try to look up and see if I can find the brand/name of the doors we selected just for reference.
Your kitchen cabinets looks lovely. I wonder if your going to add more color to it aside from white. I think you can add green r blue at the border of your cabinet doors. Well its up to you but your kitchen still looks good.
Thank you so much!