



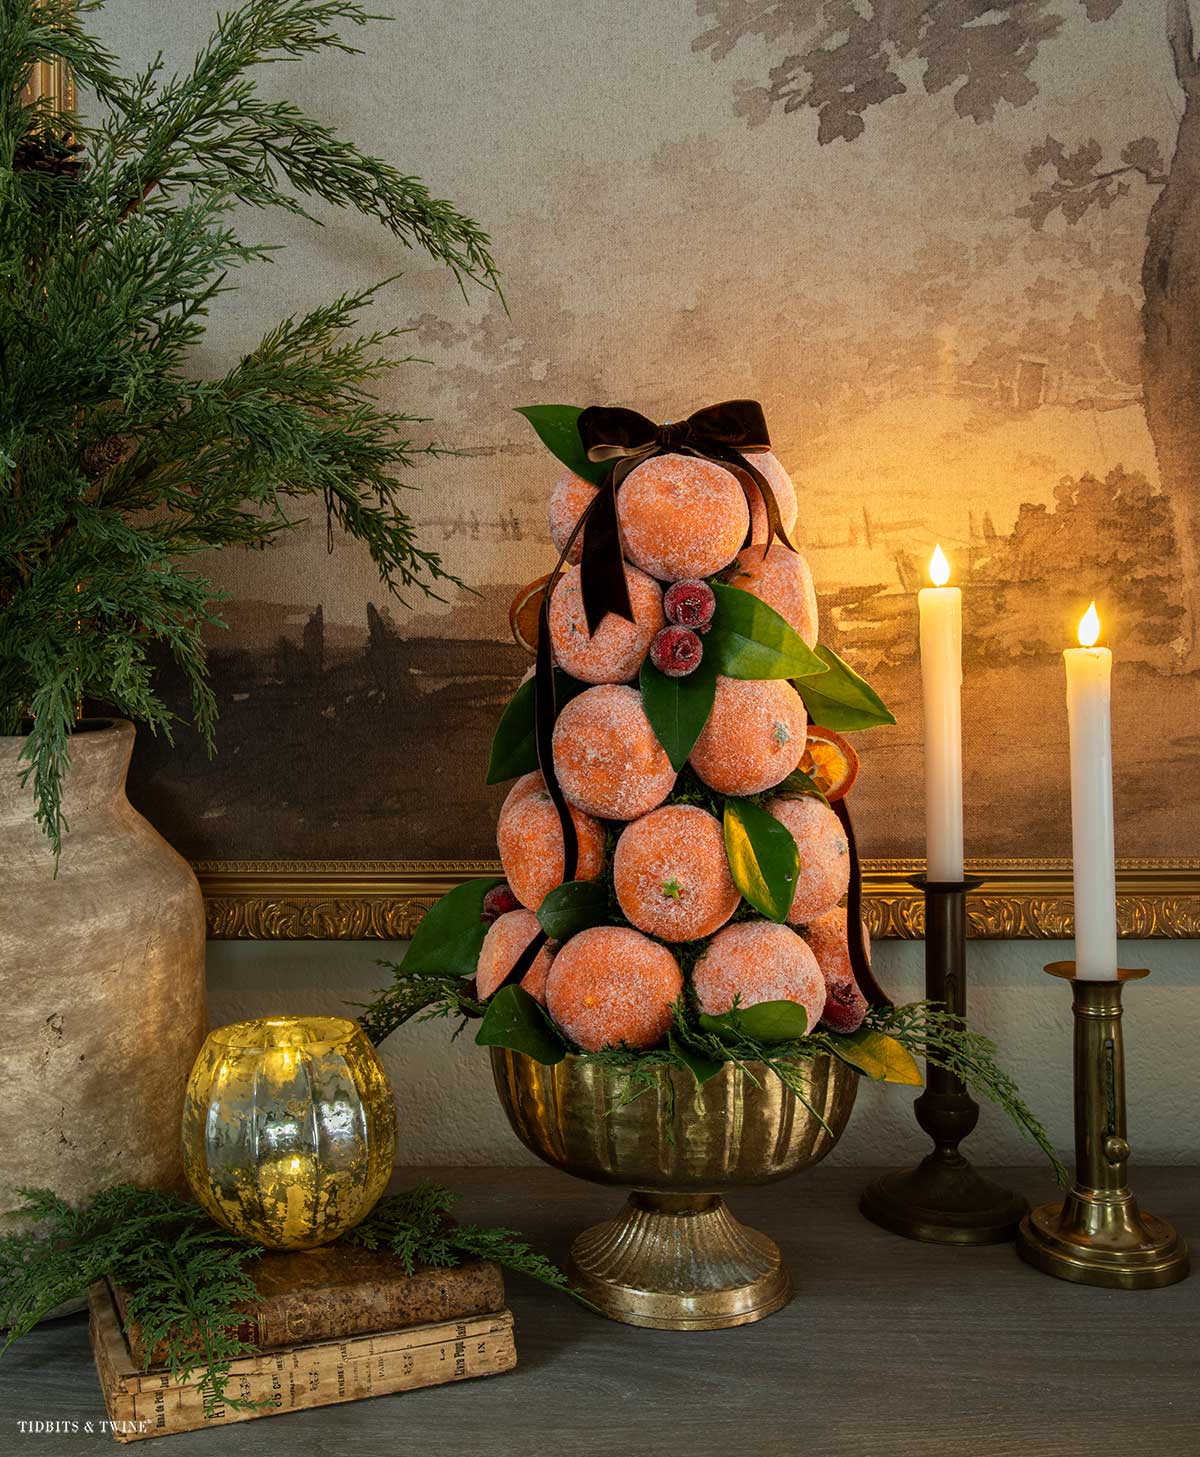
When McGee & Co.’s new holiday catalog arrived, one thing immediately caught my eye: a tangerine topiary!
I’ve been decorating with dried citrus slices for the past few years, so I thought a sugared tangerine topiary would be a fun addition to my Christmas decorations. That is, until I saw the price tag.
As much as I loved it, I wasn’t quite ready to spend that much on a fruit topiary. So I decided to try making my own using artificial tangerines.
Today, I’m sharing how I made my DIY sugared tangerine topiary, including the materials I used, step-by-step instructions, and a few lessons learned along the way.
A Little History Behind Fruit Topiaries
Although fruit topiaries are often associated with traditional Christmas decorating, the idea of stacking fruit into decorative pyramids has been around for centuries.
Originating in Europe, elaborate pyramids of fresh fruit, small cakes, and sweets became popular on banquet tables and eventually found their way into wealthy colonial American households.
Unlike today’s artificial versions, the original arrangements were edible and intended to be enjoyed by guests.
Fruit pyramids later became associated with Christmas decorating at Colonial Williamsburg, although historically they were used throughout the year.
You can read more about this tradition in Colonial Williamsburg’s history of dessert pyramids.
While these arrangements are sometimes called pomander topiaries, they’re technically different. Traditional pomanders are scented objects, often made from oranges studded with cloves. This project is closer to a decorative fruit pyramid.
My version uses artificial tangerines so I can enjoy it year after year!
Supplies for a DIY Sugared Tangerine Topiary
The amount of fruit you’ll need depends on your cone size and the diameter of your artificial tangerines. Remember that the fruit will add quite a bit of width to the finished arrangement!
Supplies:
- Artificial mini tangerines or oranges
- Foam cone
- Brown acrylic craft paint (optional)
- Paintbrush and cloth or paper towel
- Matte Mod Podge
- Epsom salt
- Small fine-mesh strainer or sifter
- Wooden skewers or toothpicks
- Shallow bowl or tray
- Moss
- Decorative compote, urn, or pedestal
Optional finishing touches:
- Waxleaf privet or artificial citrus leaves
- Sugared berries
- Dried orange slices
- Evergreen sprigs
- Velvet ribbon
What’s the Best Material for Making Sugared Fruit?
Before making my topiary, I wanted to find a material that would recreate the appearance of sugared fruit sold in holiday decorating collections.
I purchased three different materials to compare, and each has a slightly different appearance.
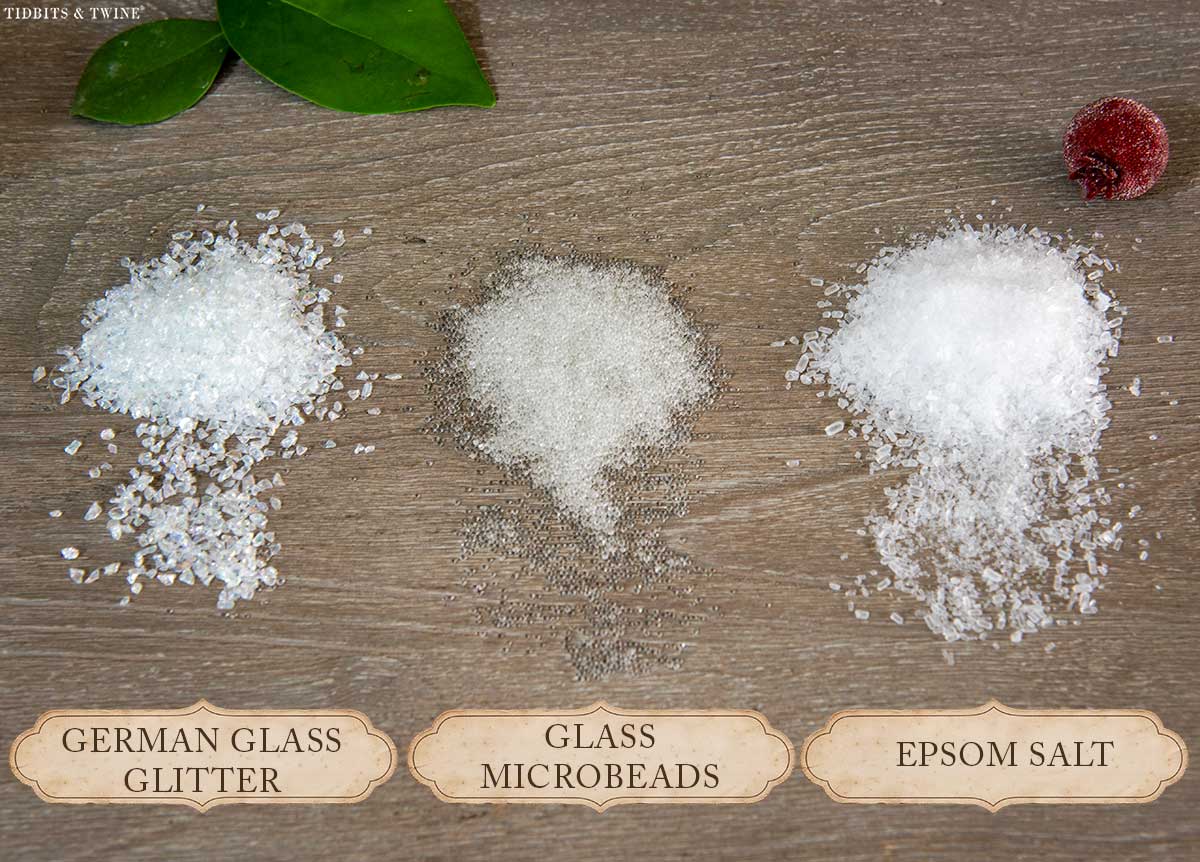
Epsom Salt: Best for a Matte, Sugared Finish
This is what I ultimately chose for my topiary.
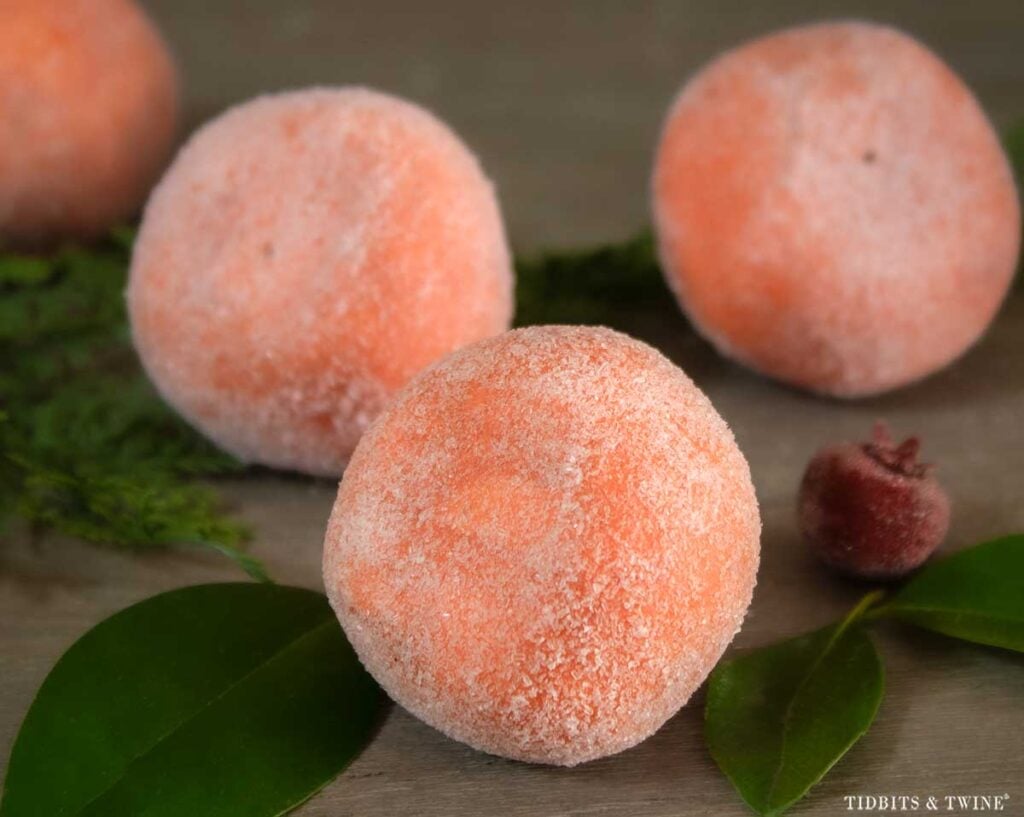
Epsom salt has translucent crystals that create a frosted appearance without looking overly sparkly.
I wanted my tangerines to resemble fruit coated in actual sugar rather than glitter, and Epsom salt gave me that more matte, old-fashioned look.
The amount you apply also makes a difference. A generous coating creates a heavily frosted appearance like mine, while a lighter dusting allows more of the original fruit color to show through.
Best for: A traditional, matte, frosted appearance.
Fine Glass Microbeads: Best for a Subtle Shimmer
If you’re trying to recreate the finish commonly seen on store-bought sugared fruit, fine glass microbeads are another option.
I purchased approximately 1 mm glass beads marketed as weighted filler for stuffed animals.
Unlike glitter, these beads are rounded rather than flat. They catch the light differently and create a more even, softly shimmering appearance.
Because the beads are translucent, they’re also a good option if you want more of the fruit’s underlying color and painted details to remain visible.
Best for: A softly shimmering sugar coating similar to decorative fruit sold in stores.
German Glass Glitter: Not My Favorite for Sugared Fruit
I also purchased clear German glass glitter, thinking it might create a beautiful frosted finish.
But after seeing the material, I wasn’t sold on using it for this project.
The pieces are flat and irregularly shaped, which creates a glittered appearance rather than something resembling individual sugar crystals.
It’s beautiful for certain Christmas decorations, but it wasn’t the look I wanted on my tangerines.
My recommendation: Choose Epsom salt for a matte, traditional finish or fine glass microbeads for a little shimmer.
How to Make a Sugared Tangerine Topiary
Step 1: Paint the Artificial Tangerines
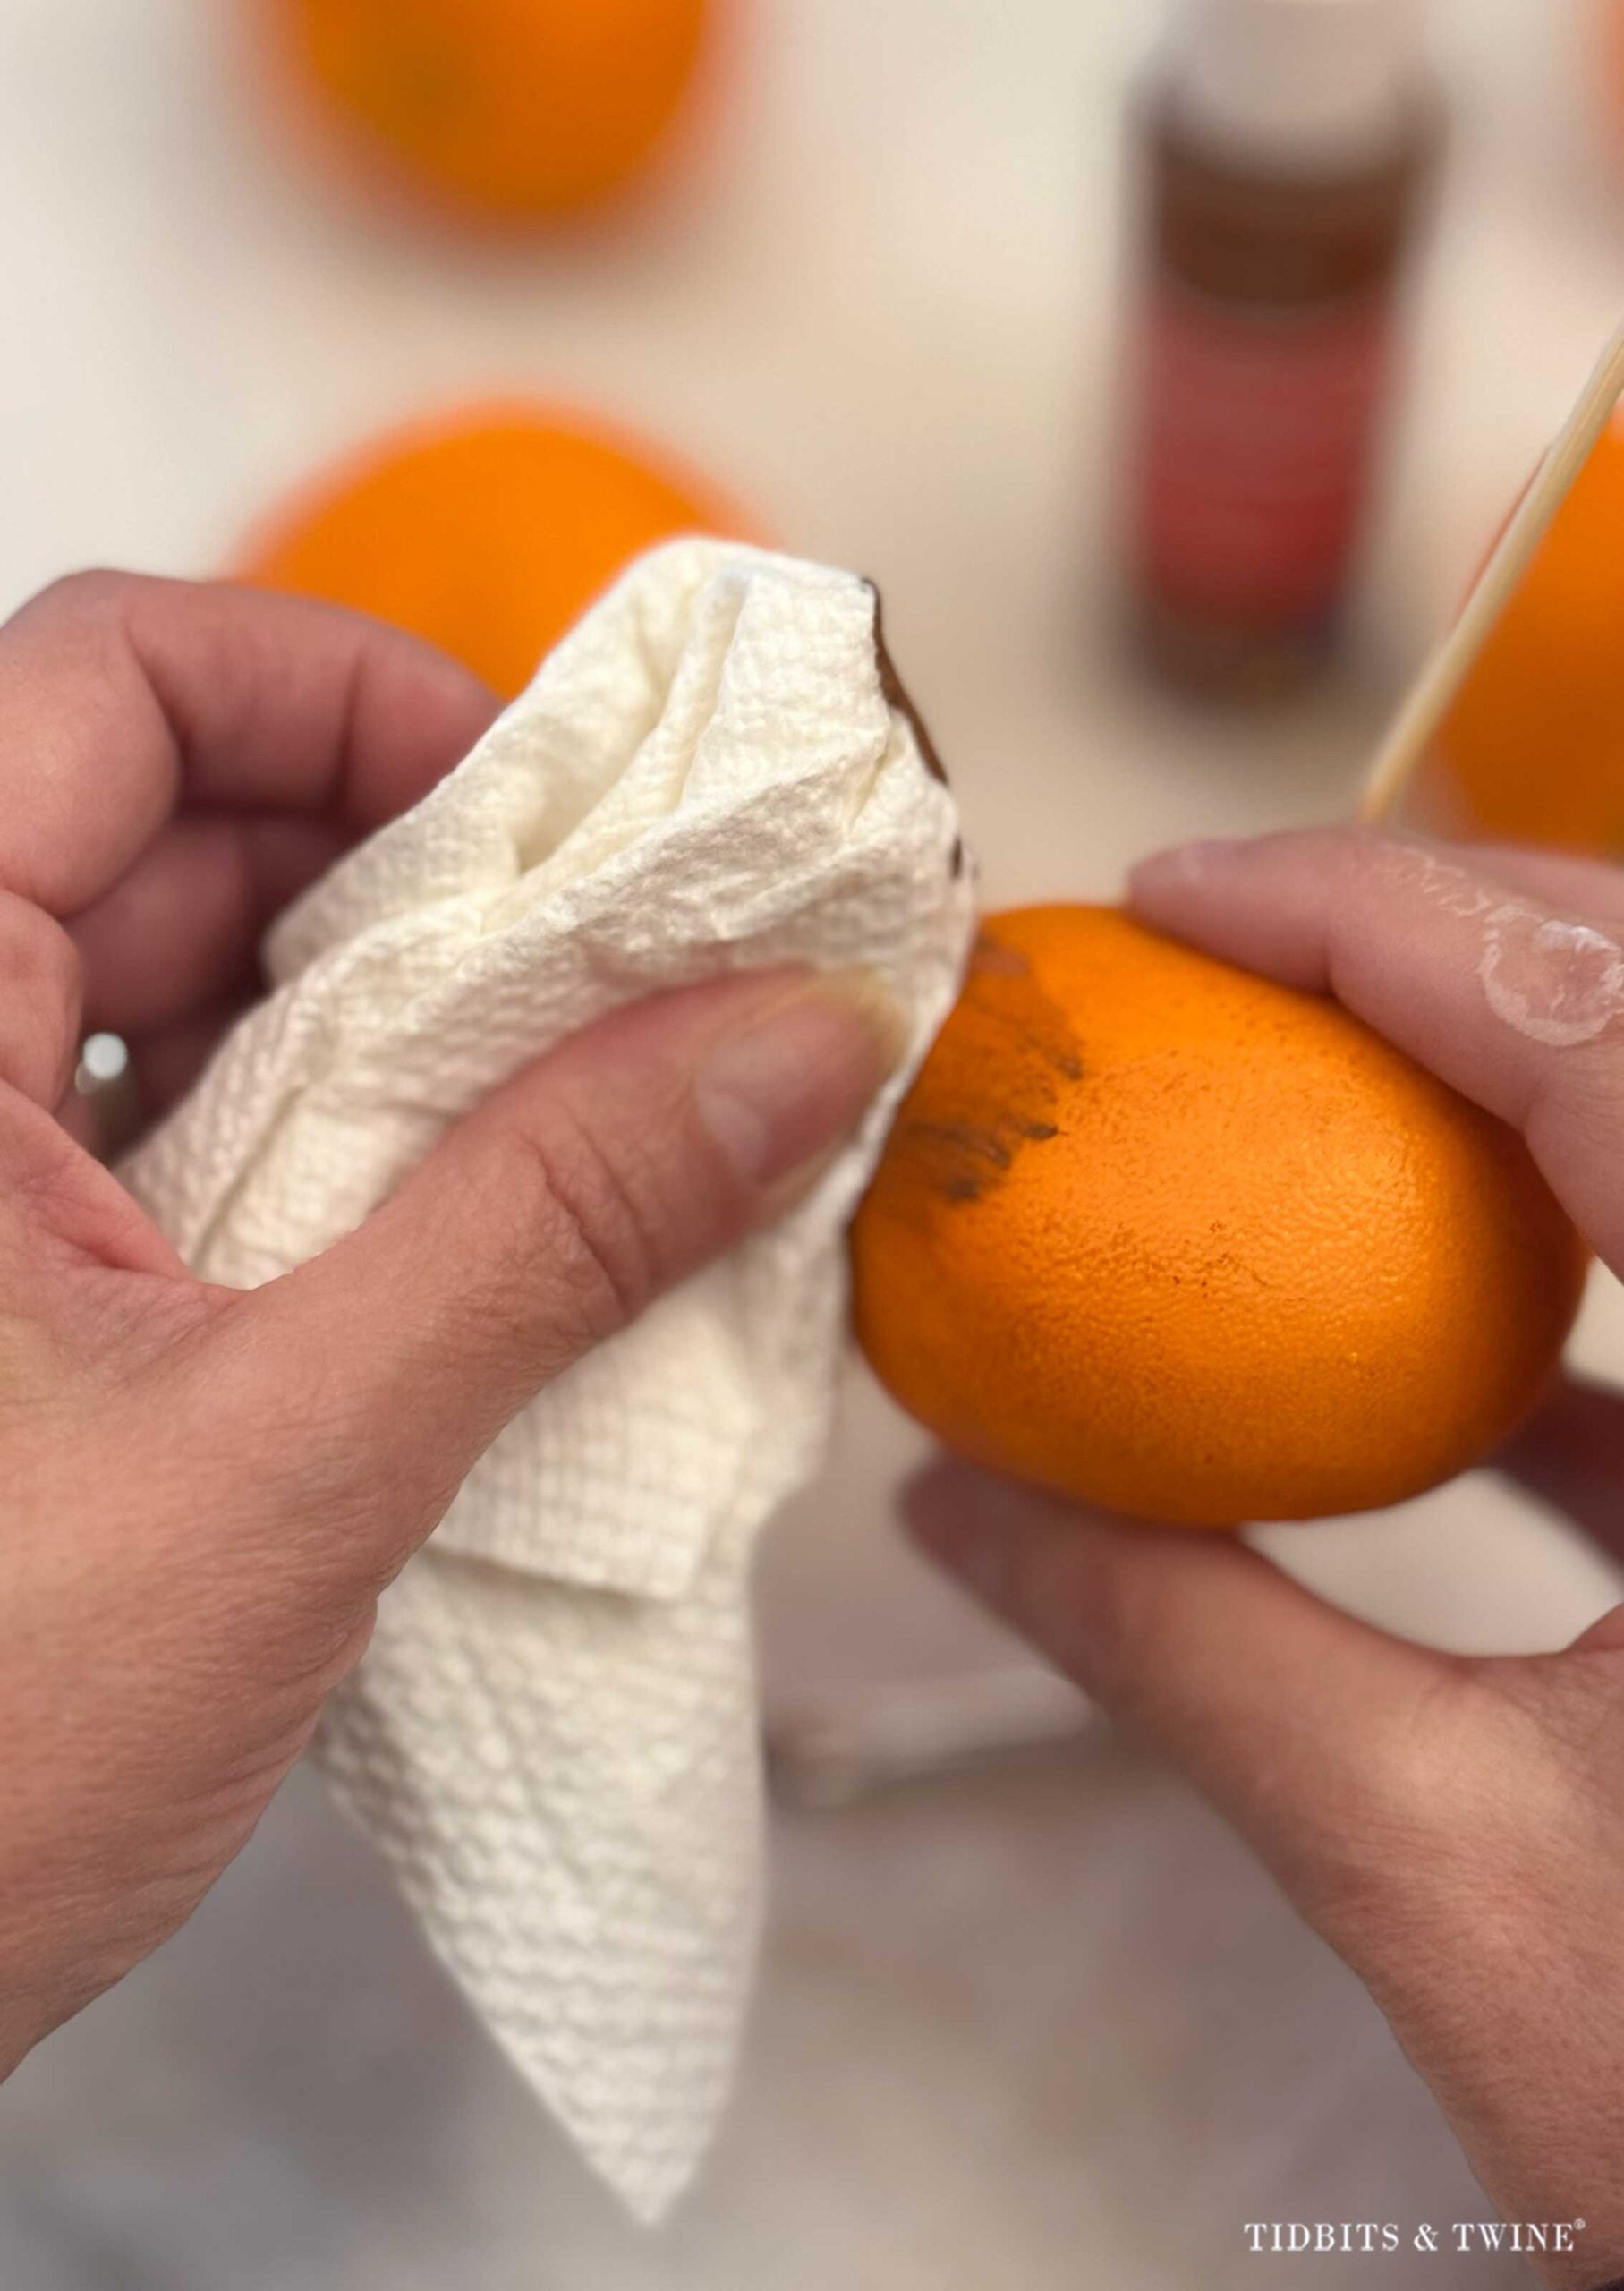
I started by adding brown craft paint to my artificial tangerines to soften the bright orange color and make them look a little more realistic.
I wasn’t trying to turn them brown. I just wanted to add some depth and variation so they wouldn’t look quite so much like bright orange plastic.
I wiped back the paint to leave a subtle amount of brown shading.
Of course, I eventually covered the fruit with so much Epsom salt that I’m not entirely sure how much of that brown paint shows through!
My tip: If you want more of the painted shading to remain visible, use a lighter coating of salt or choose translucent glass microbeads.
Allow the paint to dry completely before moving on.
Step 2: Apply Mod Podge
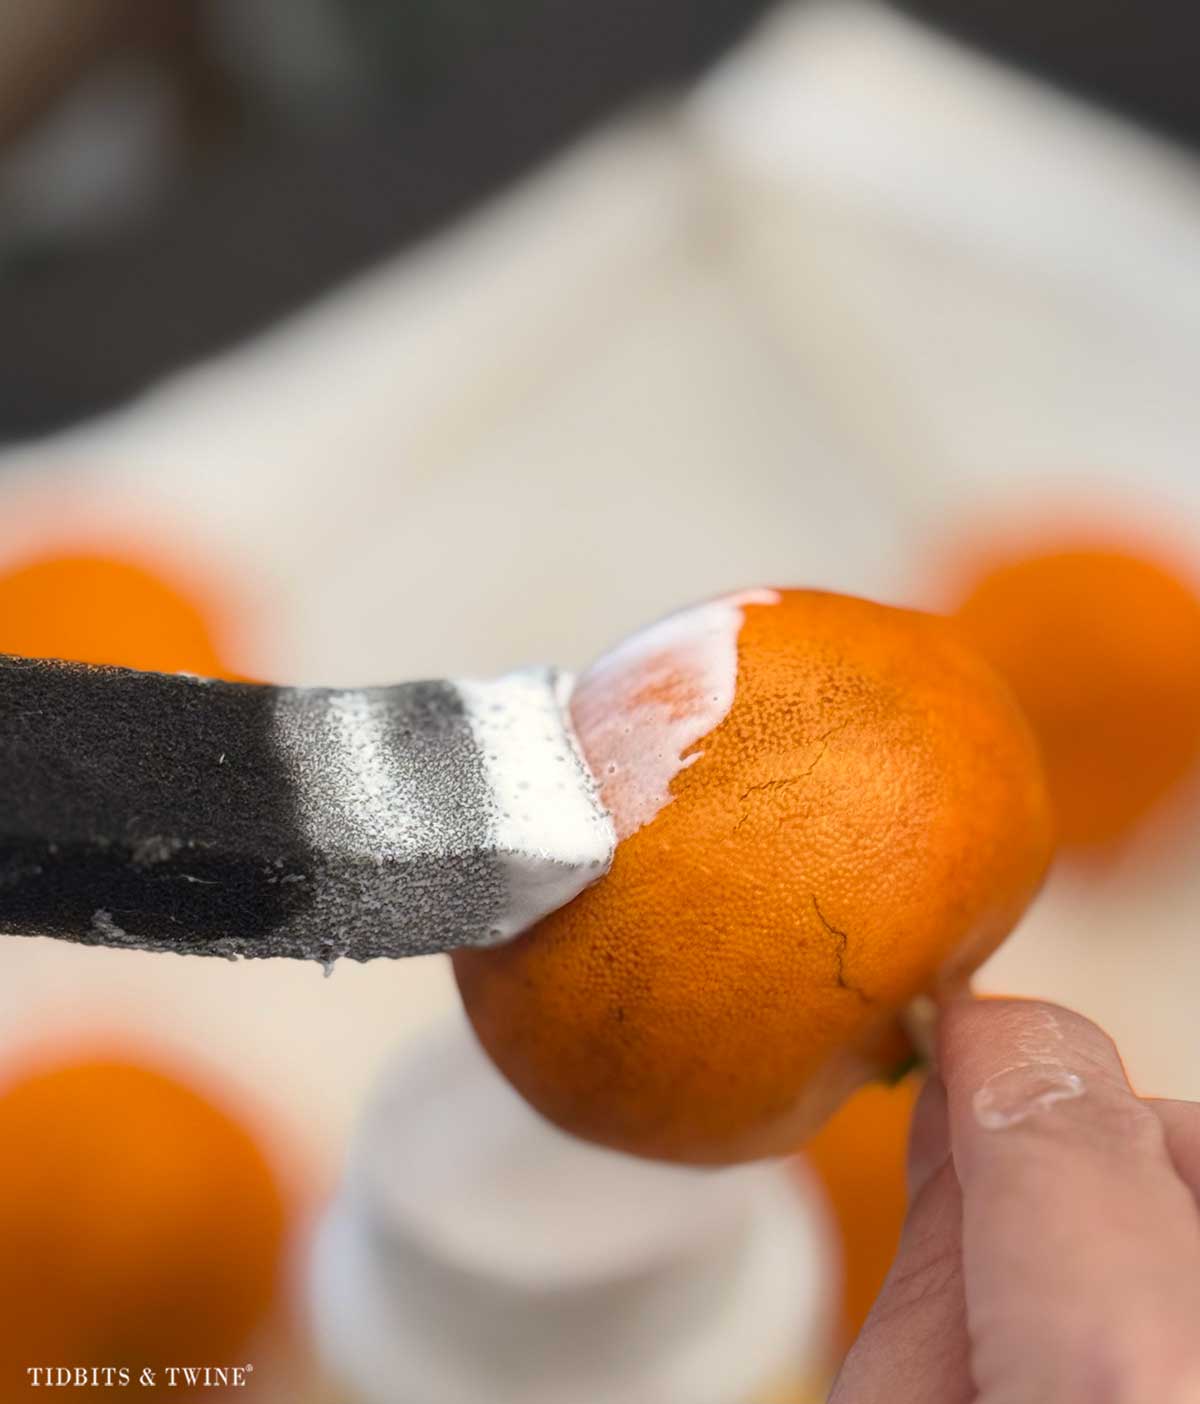
Insert a wooden skewer into the back of each tangerine. This gives you something to hold while applying the adhesive and salt without getting your fingers in the way.
Using a paintbrush, apply a thin, even layer of Mod Podge over the surface of the fruit.
You want enough adhesive for the salt to stick, but not so much that it pools or becomes thick and uneven.
Step 3: Sift Epsom Salt Over the Tangerines
While the Mod Podge is still wet, coat the tangerines with Epsom salt.
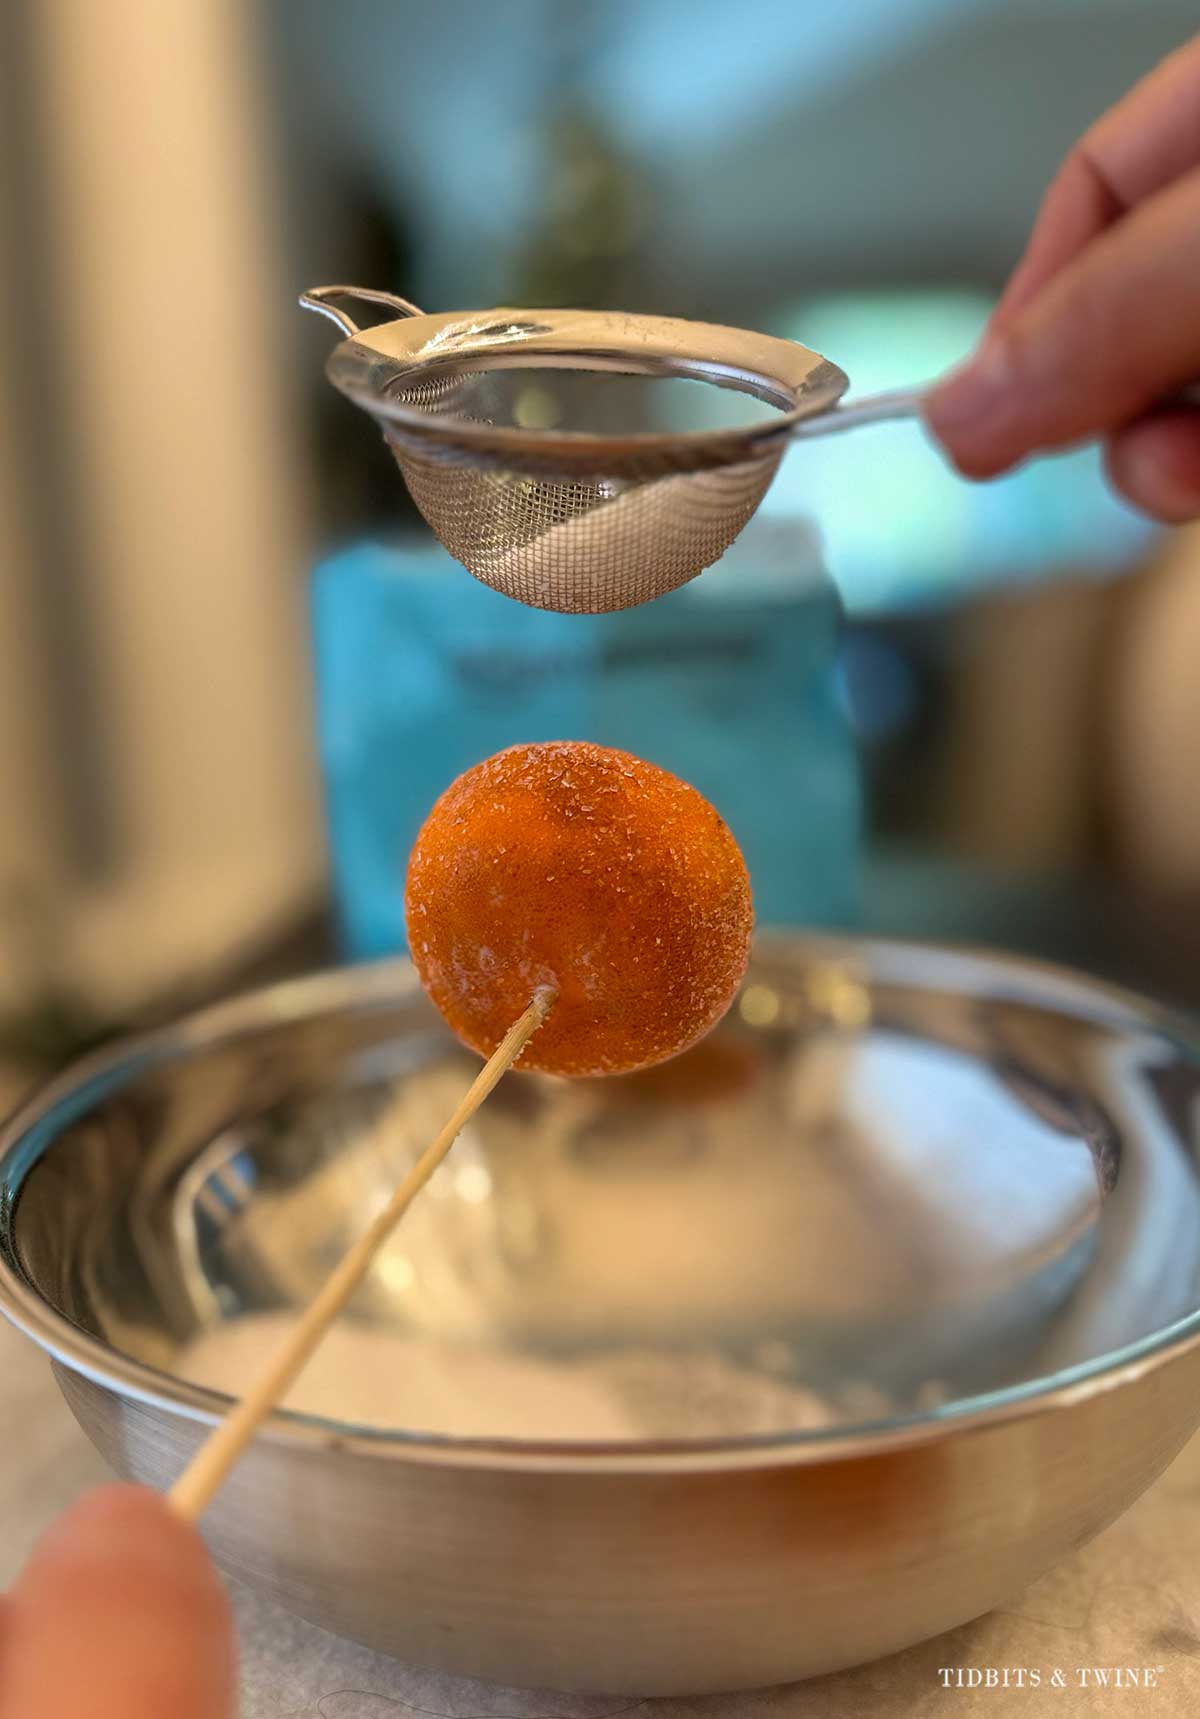
Here’s a trick that made a difference: Use a small fine-mesh strainer to sift the salt over the fruit.
Unlike the uniform glass microbeads, Epsom salt crystals vary in size. Some pieces are noticeably larger than others.
Sifting the salt helps filter out the larger pieces and creates a finer, more even coating.
I held each tangerine by its skewer and sifted the salt over it, rotating the fruit to coat the surface.
Work over a bowl or tray to catch the excess salt.
Once the tangerine is coated, gently tap off any loose crystals and allow it to dry completely.
I love the matte, frosted appearance this created. The orange still shows through, but the salt softens the color and gives the fruit that old-fashioned sugared look.
Step 4: Prepare the Foam Cone
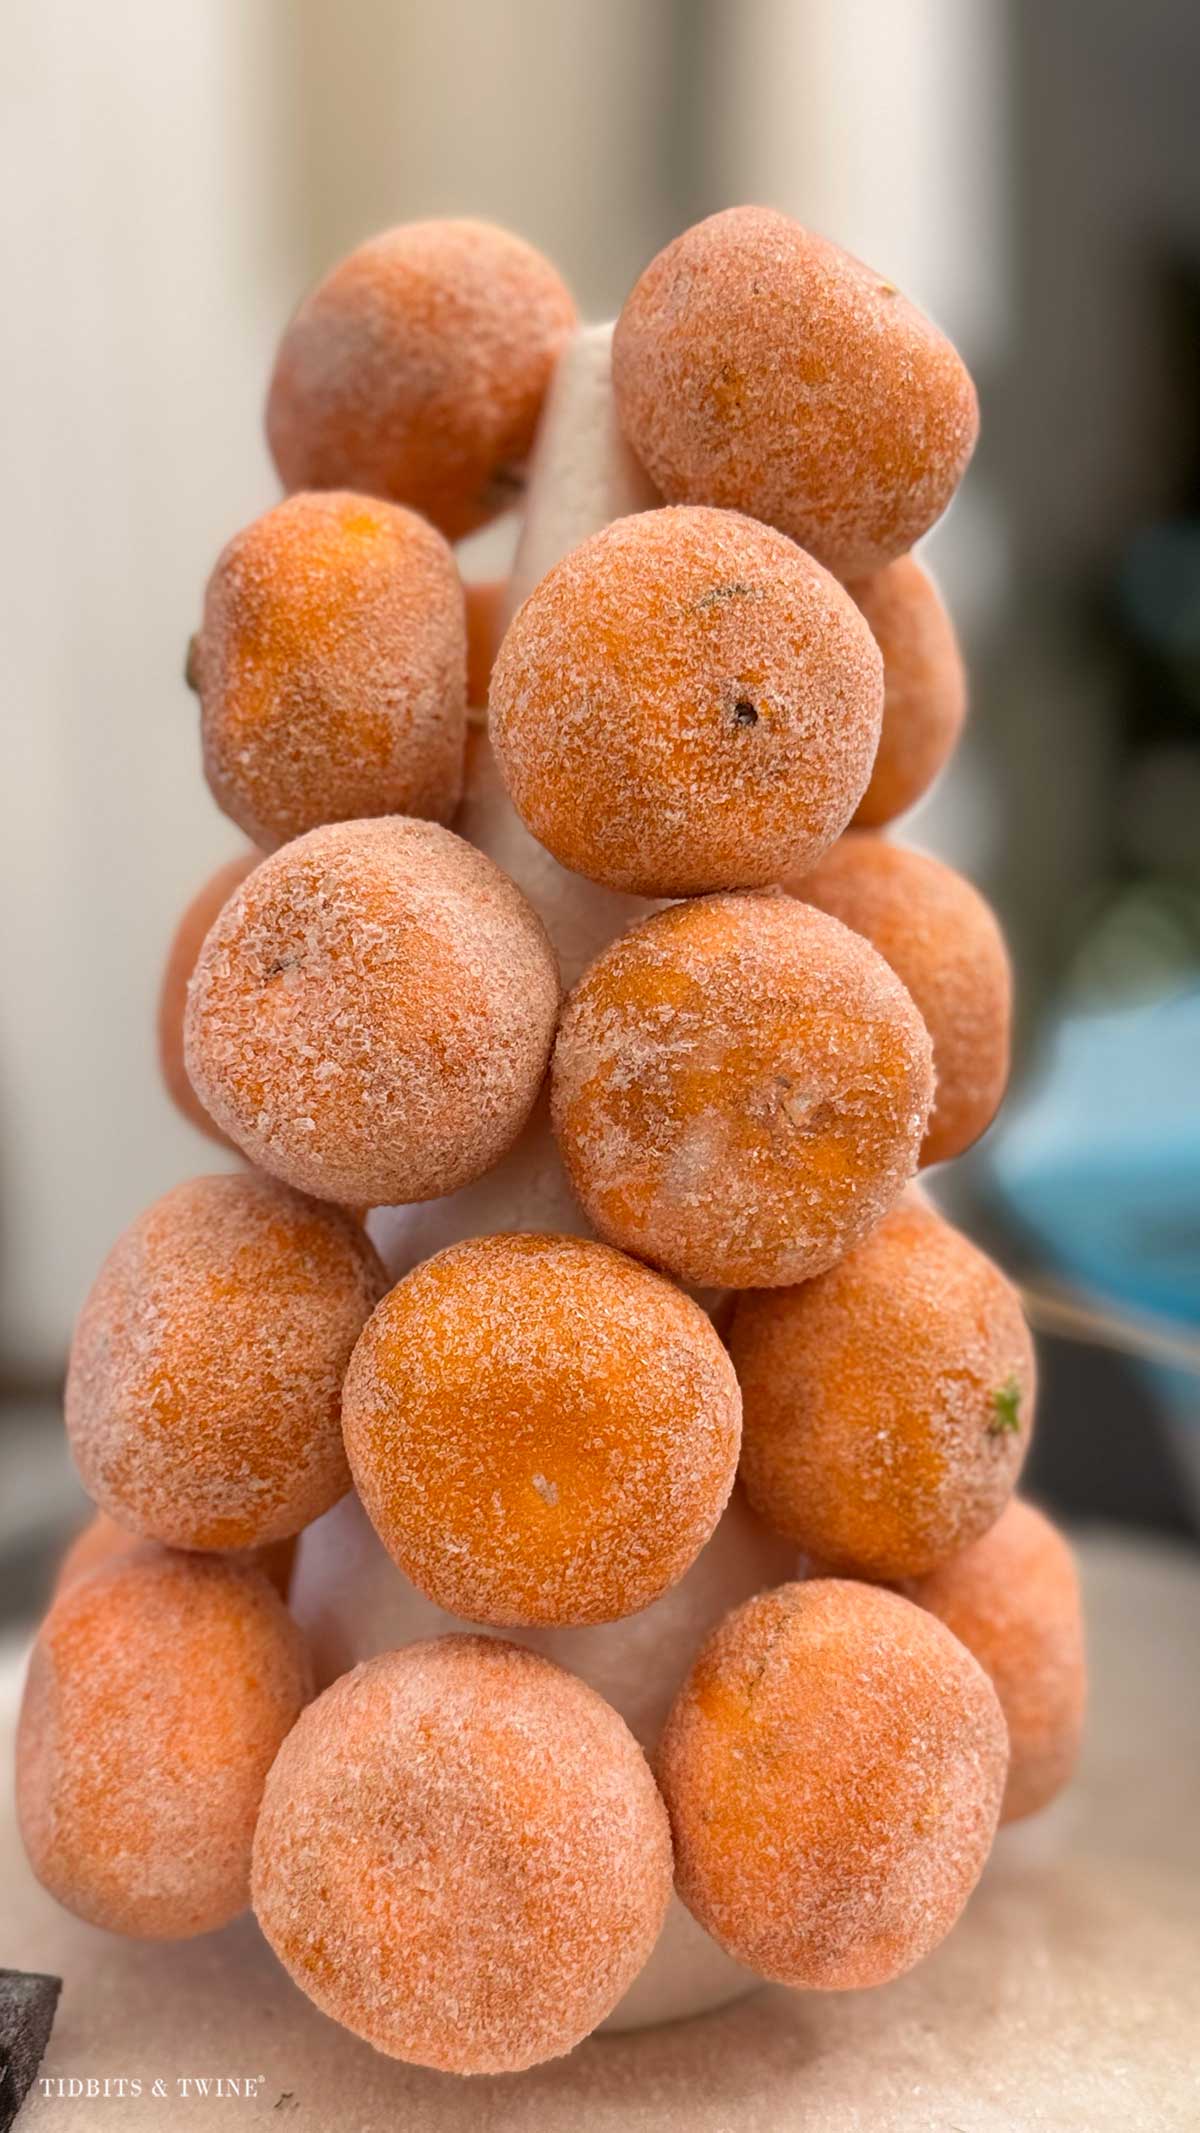
Here’s something I wish I’d done differently! Because the tangerines are round, you’ll inevitably end up with little gaps between them. If your foam cone is white, those spaces can be surprisingly noticeable.
I didn’t paint or cover my cone beforehand, so I had quite a bit of white foam showing through during assembly.
Next time, I’d use a green cone like this one instead of white styrofoam.
It would make the entire process easier and help disguise any gaps.
Step 5: Attach the Tangerines to the Cone
Once the tangerines are dry, it’s time to assemble the topiary.
I reused the wooden skewers that I’d inserted into the fruit for applying the Mod Podge and salt. I simply cut them shorter before inserting them into the foam cone.
This worked, but I think toothpicks would have been easier to work with since they’re shorter and less cumbersome.
Start at the bottom of the cone and work your way upward, attaching the tangerines in staggered rows.
Position the green stem ends toward the cone, with the rounded orange sides facing outward. You’ll see, though, that I had some facing out and some facing in.
My artificial tangerines were slightly oval rather than perfectly round, so the orientation made a difference in their appearance.
Keep checking the overall shape as you work, adjusting the fruit to maintain a fairly even pyramid.
And here’s where I thought I’d made a terrible mistake.
Once I had all the tangerines attached, I was seriously questioning the entire project! The fruit looked awkward, the white foam was visible everywhere, and the whole thing was a far cry from the beautiful sugared topiary I’d imagined.
Thankfully, I wasn’t finished yet.
Step 6: Fill the Gaps with Moss
It’s amazing what a little moss can do!
I started by tucking moss into the gaps between the tangerines to hide the exposed white foam. I simply used a wooden skewer to push small pieces of moss into the bare spots.
This immediately made the arrangement look more finished and helped disguise the cone underneath.
And if your topiary looks terrible before this step, don’t panic. Mine did, too!
Step 7: Add the Decorative Finishing Touches
This was the part that really brought everything together.
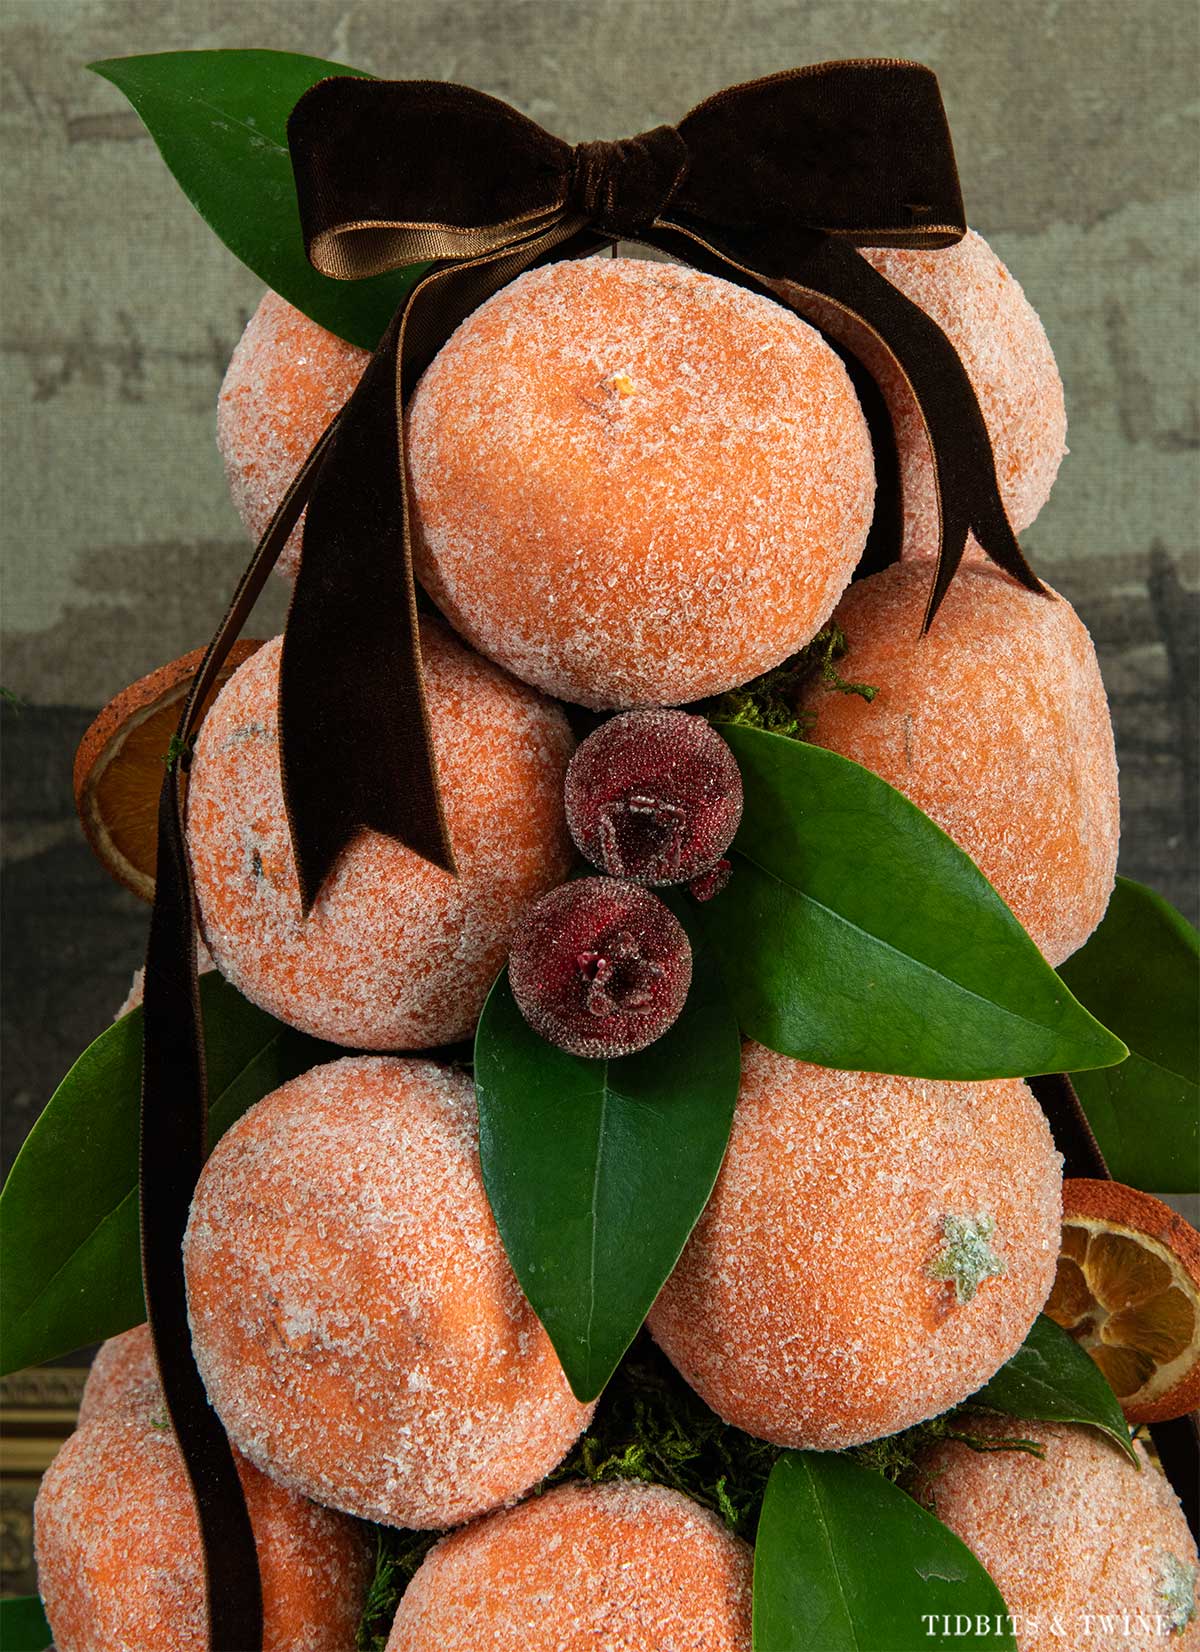
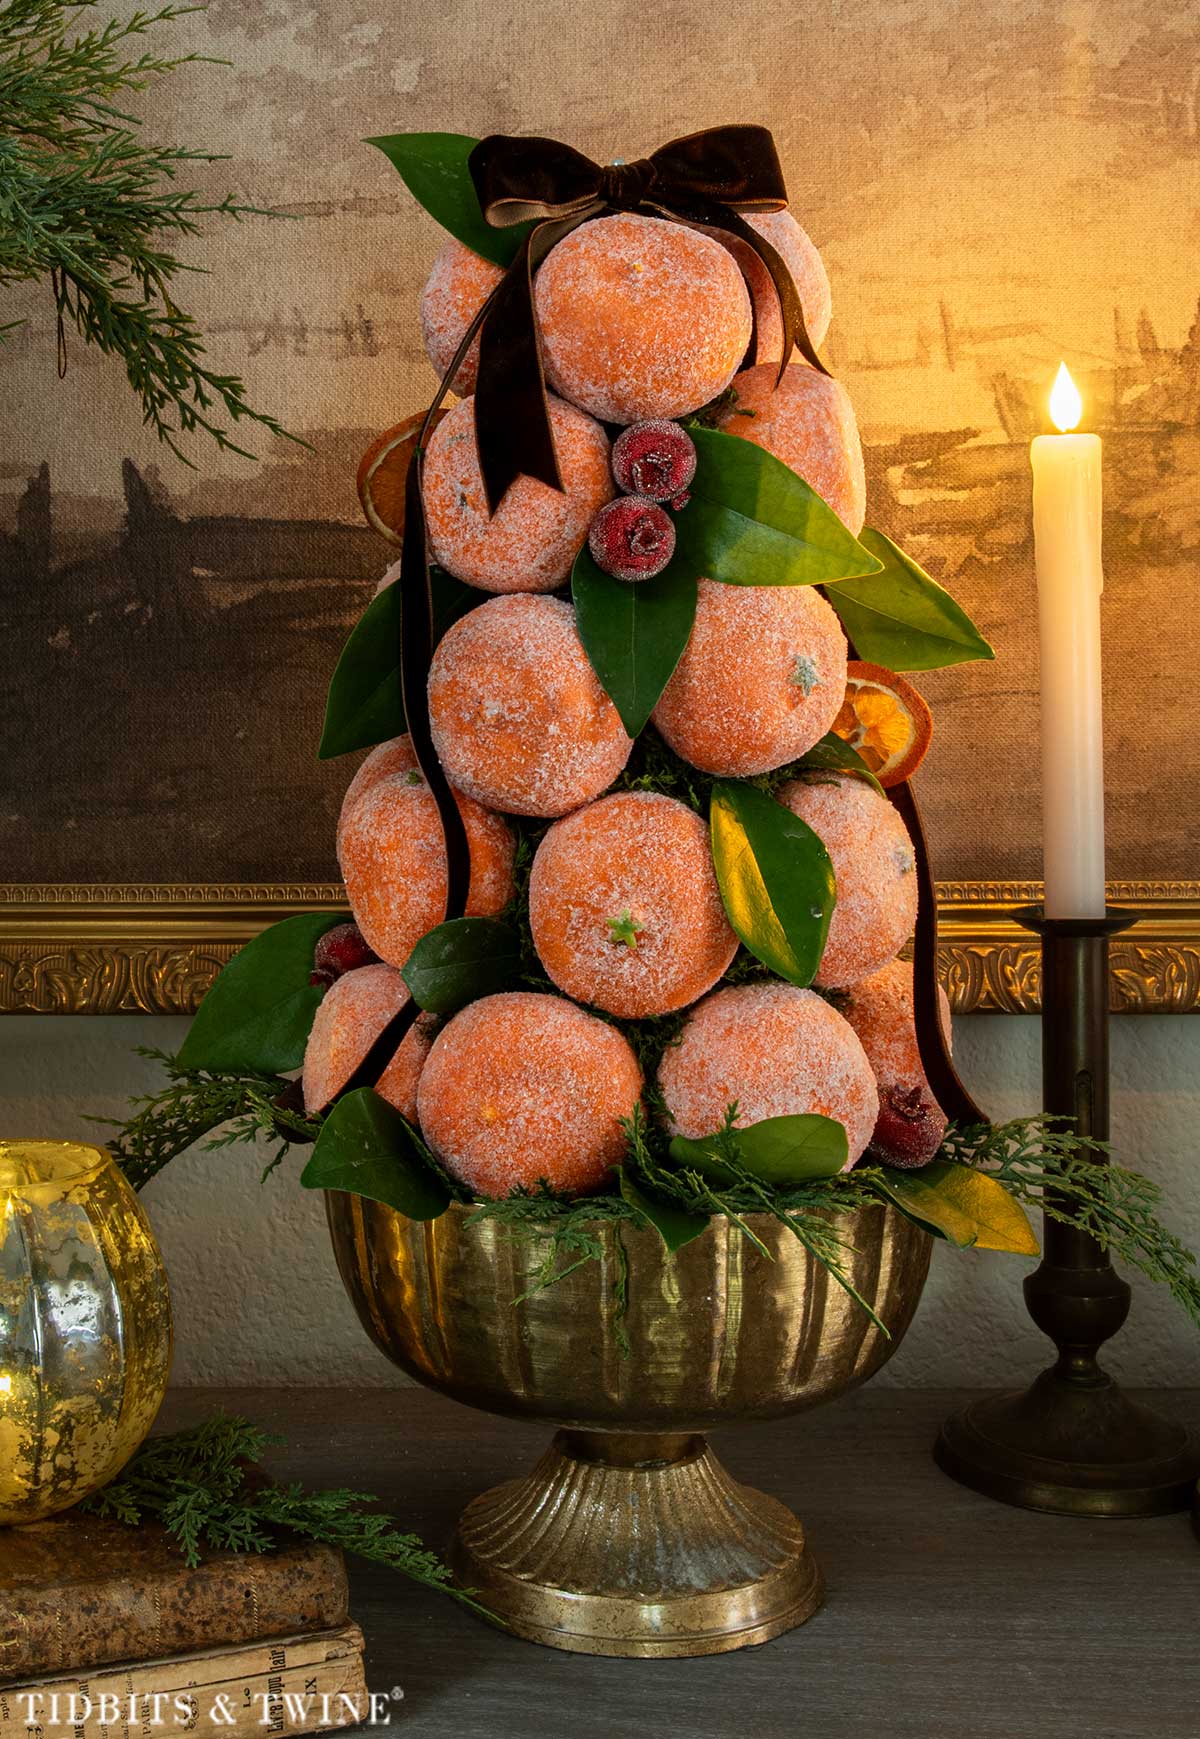
I added real waxleaf privet leaves from my yard between the tangerines because I liked their broad shape and glossy, deep green color. They reminded me of citrus foliage and looked more natural against the fruit than the cedar sprigs I initially tried.
I also tucked in a few sugared berries and dried orange slices for additional color and texture.
Finally, I added a dark brown velvet bow near the top, letting the ribbon tails fall down the sides.
The ribbon helps break up all that orange and gives the topiary a more finished, traditional appearance.
Step 8: Display the Topiary in a Decorative Container
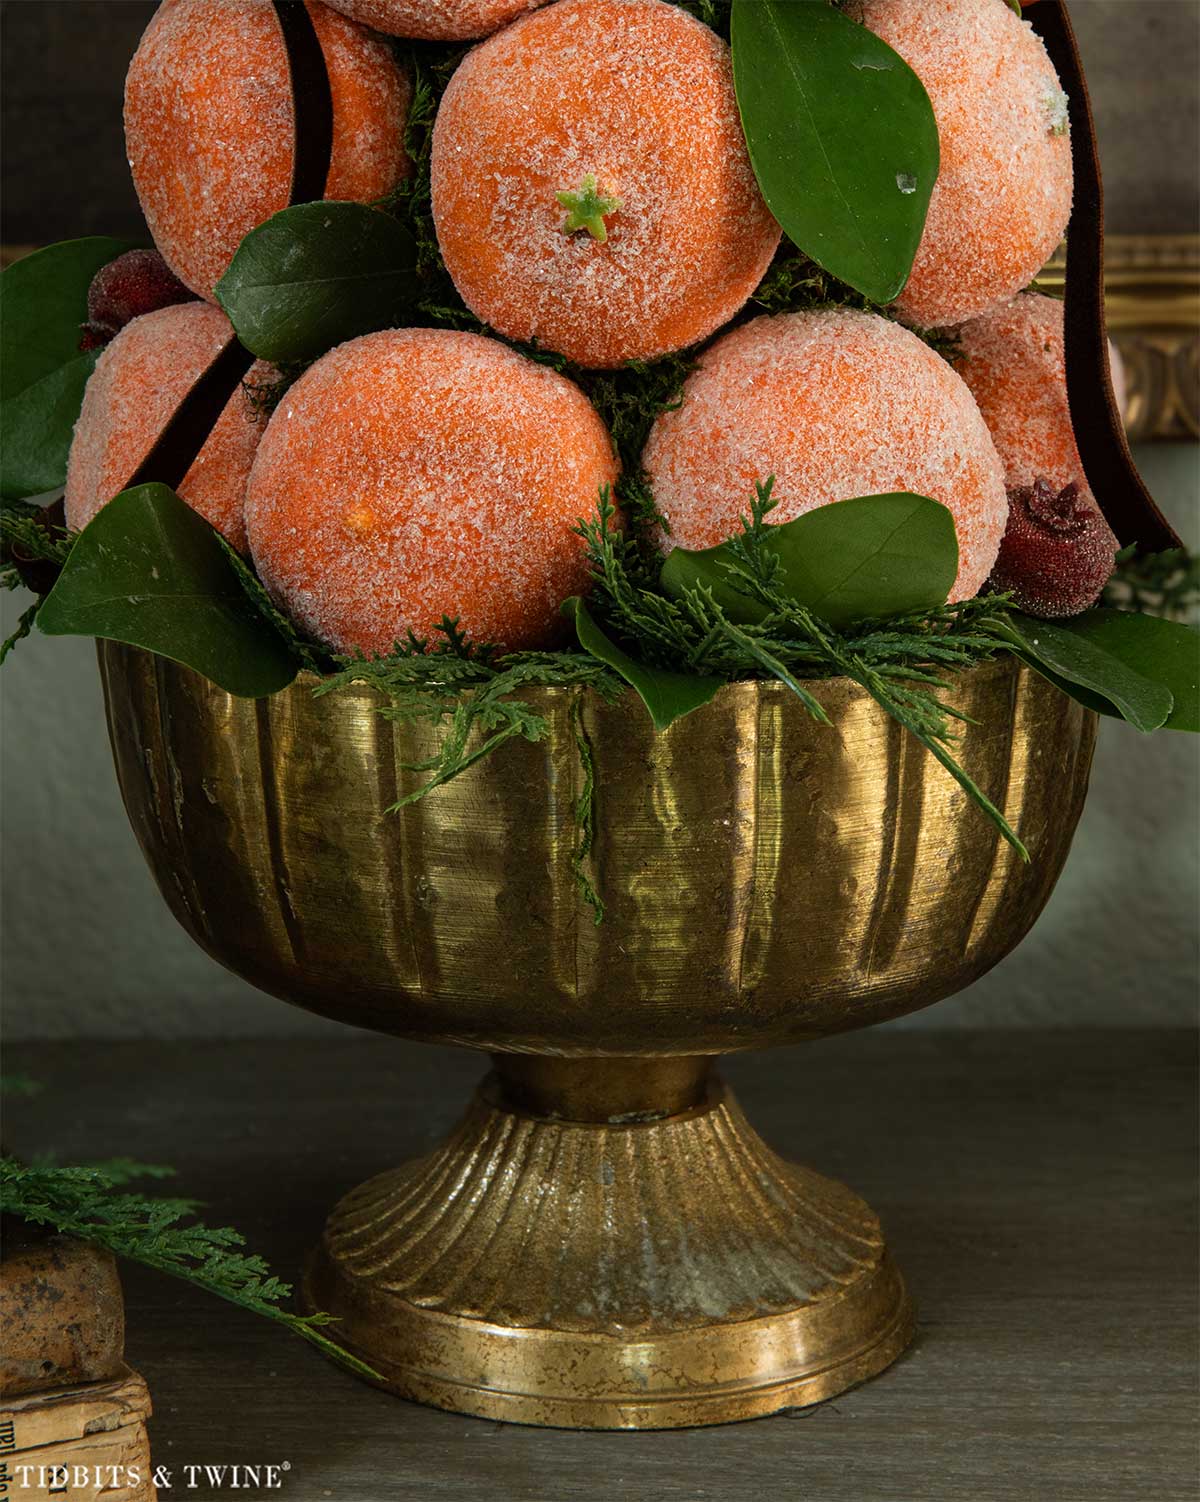
To finish my topiary, I placed it in a brass-colored compote.
The warm color looks beautiful against the frosted tangerines and gives the arrangement a more substantial base.
I added small evergreen sprigs around the rim to soften the transition between the fruit and the container.
You could also use an urn, pedestal bowl, or decorative planter.
Just make sure the finished arrangement is stable.
Other Fruits You Can Use to Make a Topiary
While I chose tangerines for my Christmas topiary, this same technique could work with several different types of artificial fruit.
- Miniature apples: Red apples would be beautiful for Christmas, while green apples would create a softer, more traditional look.
- Lemons: A charming choice for French country decorating, especially in a kitchen.
- Limes: Their deep green color would look beautiful alongside greenery and antique brass.
- Small pears: Perfect for a European-inspired arrangement, although their elongated shape requires a little more planning.
- Kumquats: Their small size would work particularly well for petite topiaries.
- Figs: Deep purple figs could make a beautiful arrangement for fall or Christmas.
You could even combine two types of fruit for a more varied appearance, although I’d try to keep their sizes relatively similar.
And remember, you don’t have to sugar the fruit! The same construction method works with plain artificial fruit, too.
Ways to Decorate with a Sugared Fruit Topiary
One of the things I like about fruit topiaries is how easily they work with traditional Christmas decorations. They add color and texture without requiring an entirely new decorating scheme.
On a Dining Room Sideboard
This is how I’m using my topiary this year! I paired it with antique brass candlesticks, greenery, and vintage books to create a traditional Christmas arrangement without making the space feel overly decorated.
One decorating tip: Consider the color of your fruit alongside the rest of your decorations. I originally planned to display my topiary on the kitchen island, but the bright orange was a bit much for that space. I ended up preferring it against a darker wood cabinet with a muted landscape painting, where the surrounding colors and aged finishes help balance the orange.
As a Christmas Centerpiece
A smaller topiary would make a lovely Christmas centerpiece, especially displayed in a footed compote and surrounded by evergreen branches, taper candles, or a few pieces of decorative fruit. Just be mindful of the height so guests can still see one another across the table.
On an Entryway Table
A fruit topiary adds a festive touch to an entryway without needing lots of additional decorations. I’d pair one with an antique landscape, a stack of books, or a simple collection of candlesticks.
In a Kitchen
Citrus arrangements are particularly charming in kitchens, where a lemon or green apple topiary would look beautiful alongside wooden cutting boards, copper accessories, or a small vase of greenery.
On a Christmas Mantel
Use a topiary at one end of a mantel to add height and color, or make a matching pair for a more symmetrical arrangement. A smaller version could also be tucked into a bookshelf or cabinet for an unexpected bit of Christmas decorating.
What I’d Do Differently Next Time
As with most DIY projects, there were a few things I learned along the way.
1. Prepare the foam cone first.
I’d definitely paint the cone dark green or cover it with moss before attaching the tangerines. It would make concealing the gaps much easier. Actually, buying a green cone would have helped tremendously! Lol!
2. Use toothpicks instead of long skewers.
Reusing my shortened skewers worked, but toothpicks would have been easier to insert into the foam cone.
3. Pay more attention to the finished size.
The foam cone might look relatively small, but once you add several layers of fruit, the topiary becomes considerably larger.
Next time, I’d probably make a smaller version, especially if I planned to use it on a kitchen counter or dining table.
4. Consider the fruit color before starting.
I love the finished appearance of the frosted tangerines, but orange is a strong color. If I wanted something softer, I’d consider green apples, pears, or another less vibrant fruit.
5. Experiment with a lighter coating.
I like the heavily frosted appearance of the Epsom salt, but next time I might use a lighter dusting so more of the brown paint shows through.
I’d also be interested in trying the translucent glass microbeads for a slightly shimmering finish.
Frequently Asked Questions
Can you use real fruit to make a topiary?
Yes, traditional fruit pyramids were made with real fruit. However, this particular method is designed for artificial fruit so the decoration can be reused year after year.
If you’re using real fruit that you plan to eat, don’t use Mod Podge or other craft adhesives. Instead, use an edible coating, such as pasteurized egg whites or a food-safe sugar syrup, to help the sugar adhere.
What’s the best material for making fake sugared fruit?
I prefer Epsom salt for a matte, frosted appearance. Fine glass microbeads are a good alternative if you want a slightly shimmering finish similar to commercially made sugared fruit.
Can you make a fruit topiary without a foam cone?
You need some type of structure to support the fruit. A foam cone is convenient for artificial fruit because you can insert skewers or toothpicks directly into it.
How do you store a sugared fruit topiary?
Store the topiary upright in a roomy box where the fruit won’t rub against other decorations.
Keep it somewhere dry, since moisture can affect the salt coating.
If you’ve used fresh greenery, remove it before storing the arrangement and replace it the following year.
Is the sugared fruit edible?
No. This project uses artificial fruit, craft adhesive, and decorative materials. It’s intended for display only. Keep loose salt and small craft materials away from children and pets.
Final Thoughts
I’m really happy with how my sugared tangerine topiary turned out, especially considering how questionable it looked halfway through!
The Epsom salt gave me the matte finish I wanted, and adding the moss, privet leaves, berries, and velvet ribbon made all the difference.
And while there are a few things I’d do differently next time, that’s part of the fun of making something yourself. I’m already thinking a topiary made with brown pears might be my next project!
More Decorating Tips
- How to Make a Beautiful Dried Orange Wreath for Christmas
- Beautiful Christmas Vignettes for Every Corner of Your Home
- French Christmas Decorating Ideas: 8 Ways to Get the Look

DECORATING MADE EASY
Get my free 5-day decorating course and learn how to define your style, make better decisions, and create a home that feels like you.
After the course, you’ll receive my latest decorating tips, antique finds, and new posts.