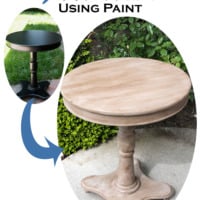
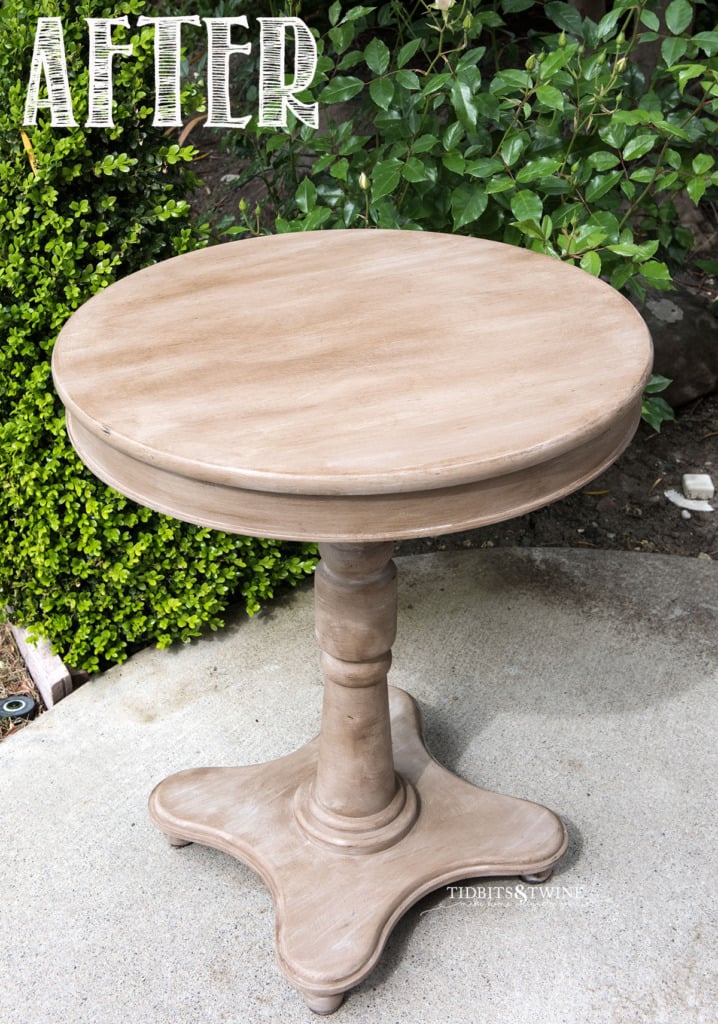
I *love* how this table turned out and am so excited to share this super easy chalk paint tutorial with you! If you want to give something a faux wood finish with a whitewashed or bleached feel, this is it!
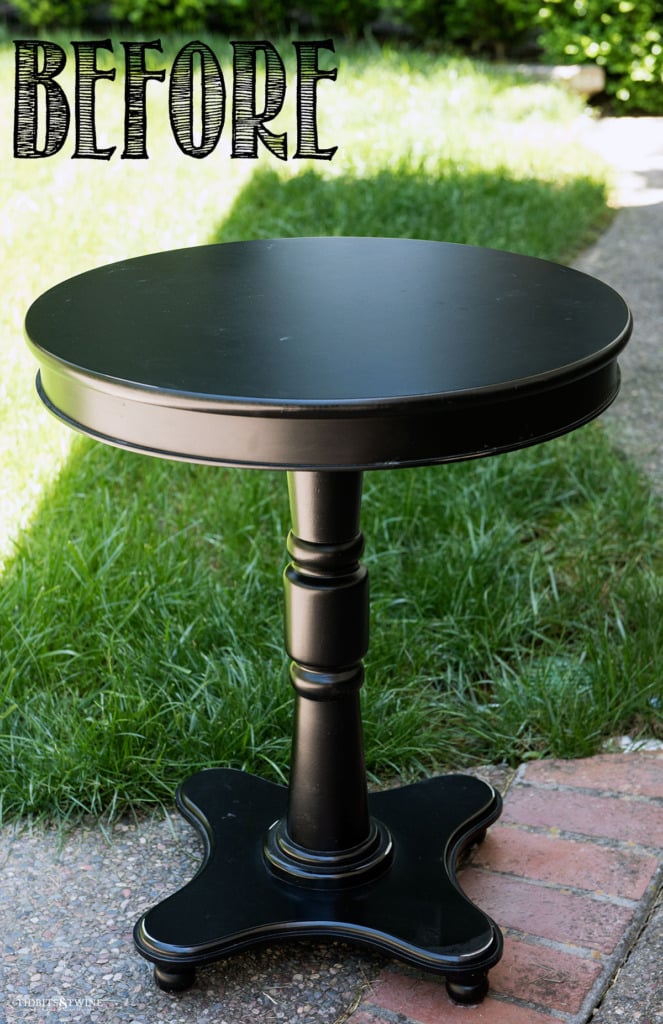
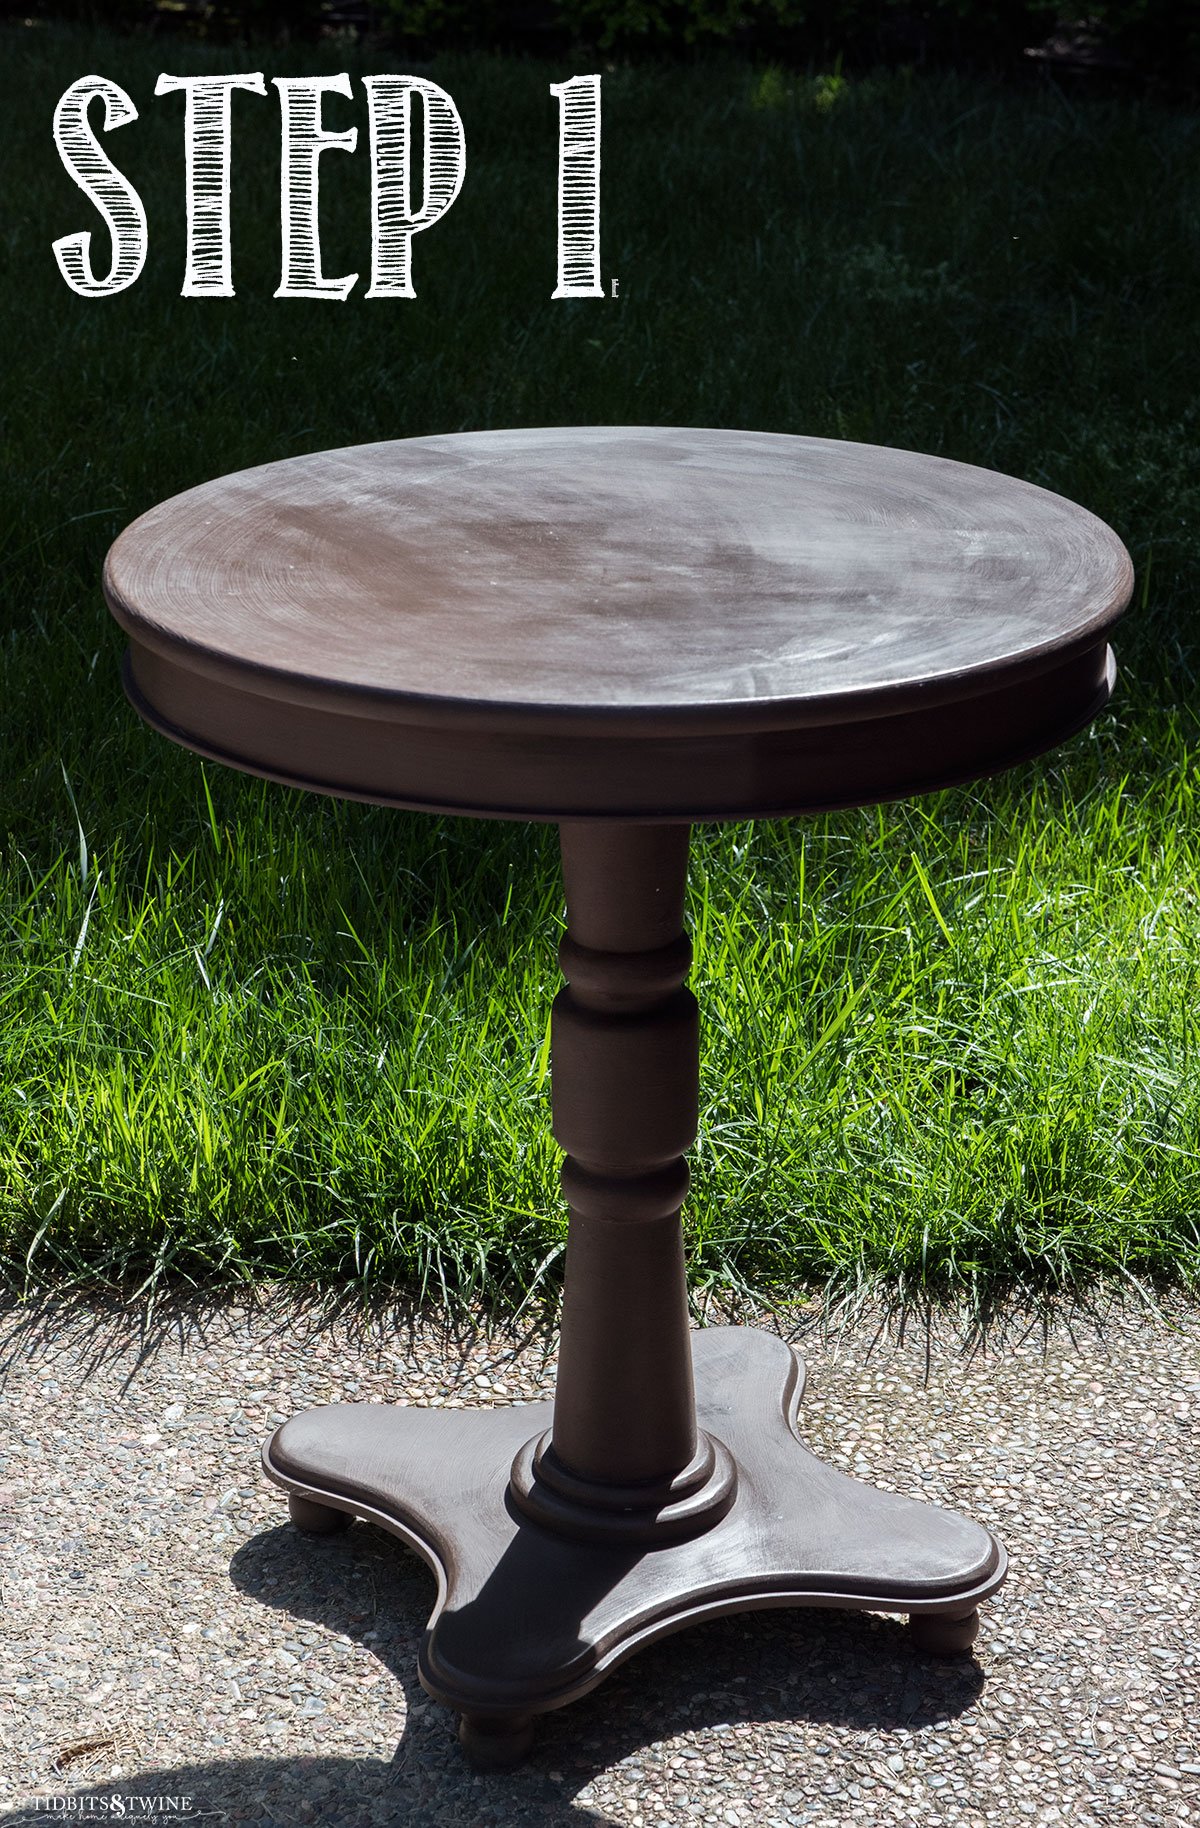
I’ve had this glossy black side table for years now. It used to sit in my living room between my two wingback chairs.
Then I moved it to my family room with some bentwood side chairs that I had. But now that my home doesn’t really have a lot of black any more, I decided it was time to give this gal a makeover!
Supplies
- Annie Sloan Chalk Paint Coco
- Liming Wax
- Annie Sloan Clear Wax
- Annie Sloan Dark Wax
- 2 Stiff Bristle Brushes for Waxing
- Sanding Sponge
- Lint-free Rags
How to Create a Whitewash Wood Finish Using Chalk Paint
A super easy tutorial to create a whitewashed finish!
- Optional – Paint a Base Coat
In my case, I knew I wanted to do some distressing but didn’t want the black to show through so I painted a base coat of brown using Cece Caldwell’s Texas Tea. I then used Clear Wax to seal it so that I would be less likely to accidentally wear through the brown down to the original black. If your piece starts with a color you like, or if you don’t plan to distress, you can skip this step completely.
- Paint Entire Piece Coco
This is the main “wood” color. Annie Sloan Coco is a warm taupe but if you want something with more grey, try using Annie Sloan French Linen instead. I painted two coats of Coco with light sanding in between just to help knock down some of the brush marks.
- Lightly Sand
This step is key! After the second coat of Coco, lightly sand the piece in the direction of the wood grain. If you’re painting something that doesn’t actually have any wood grain, pick a direction and sand only in that direction to mimic wood grain. This step not only smooths out some of the brush marks, but also creates different shades of Coco that will become more apparent once you apply the wax.
I used a 220 grit sanding sponge because that’s what I had on hand, but I would have preferred to use something a little bit finer. For objects that have rounded edges, a sanding sponge is better than a folded piece of sand paper because it helps to keep the soft edges.
If you look closely at the photo below, you can see light and dark lines running through the table top as a result of the sanding.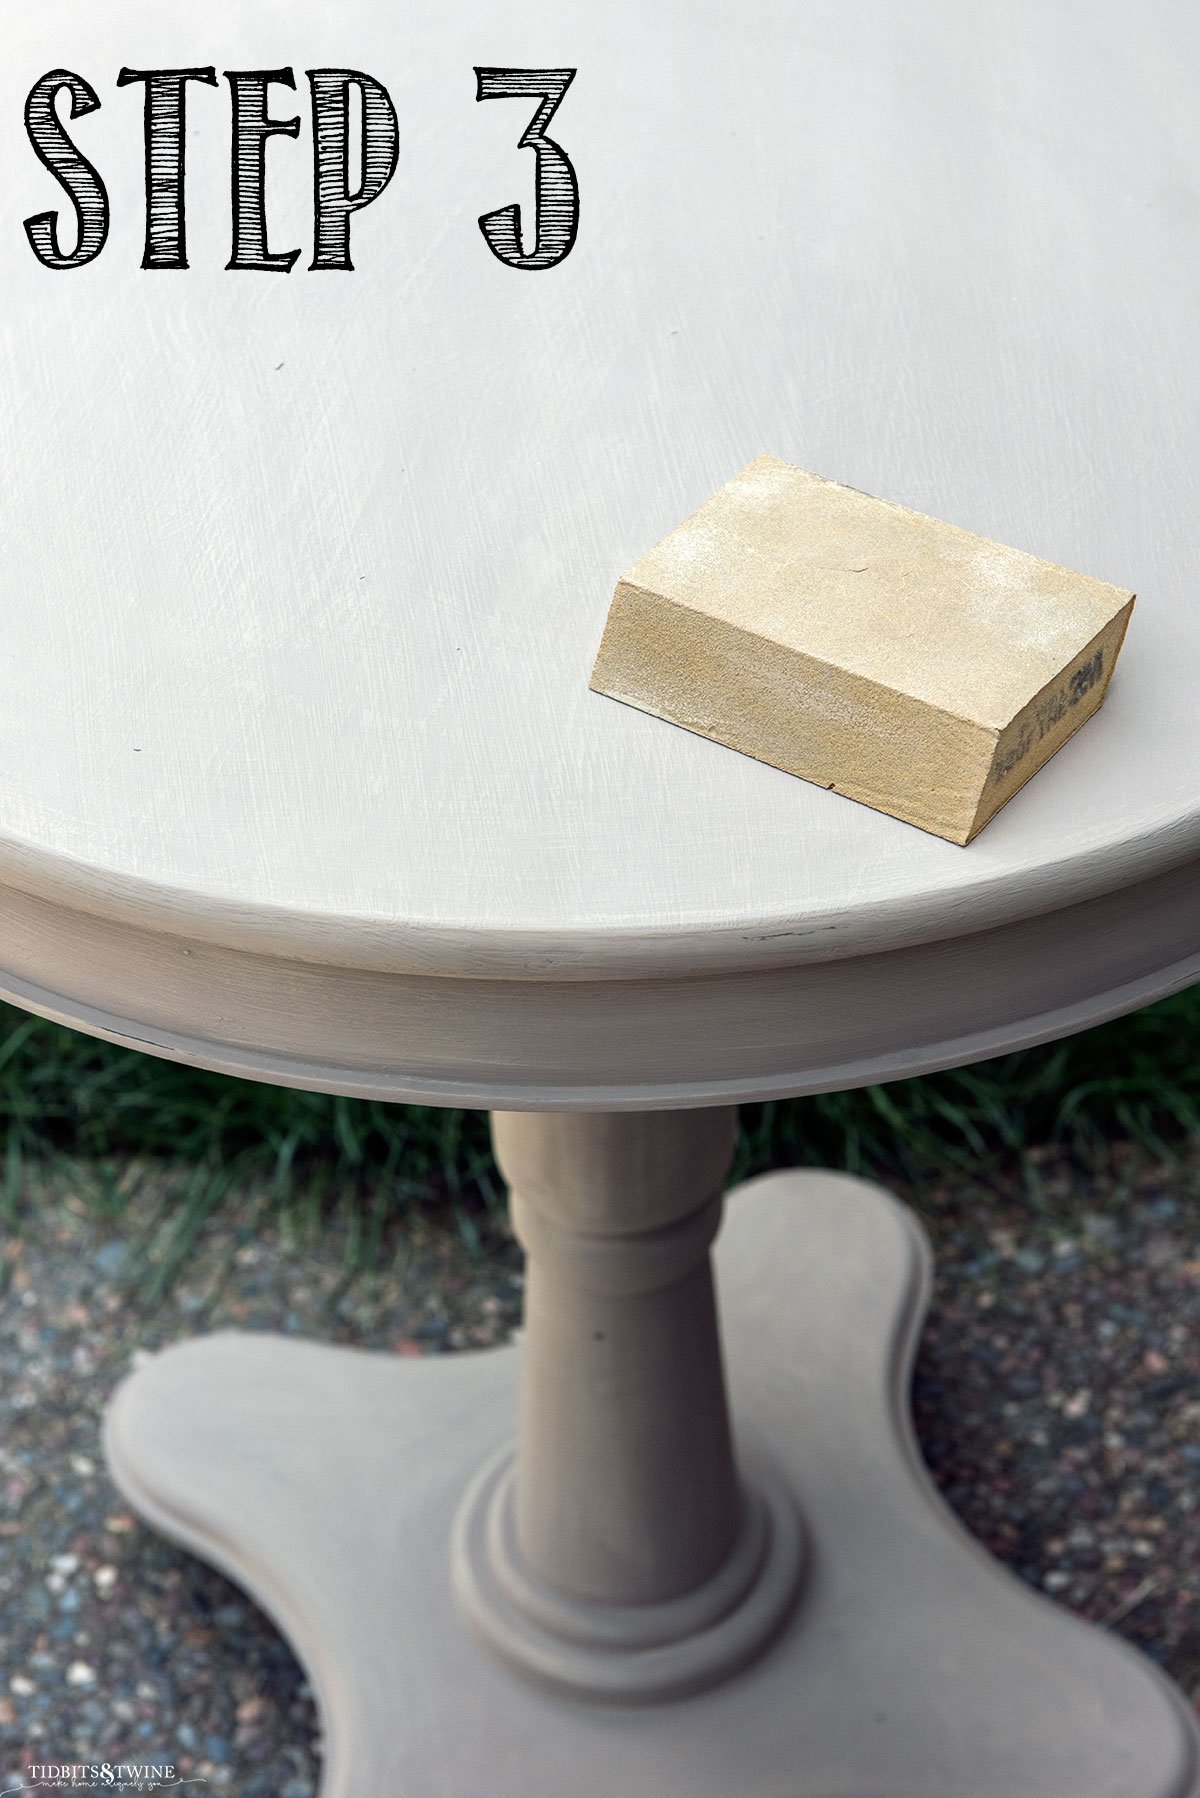
- Apply Liming Wax
Liming Wax is a product that can help give things a white-washed appearance. If you’ve never used this product before, practice on a scrap piece before applying directly to your piece because you need a lot less than you probably think! It’s also pretty stinky, so use in a well-ventilated area.
I used an angled brush for this step to barely touch the bristles into the can of Liming Wax. Then, blot the bristles onto a dry rag to really ensure that you don’t have too much on your brush.
Lightly brush the surface of your piece IN THE SAME DIRECTION as your wood grain/sanding. You are NOT trying to cover the piece, but just create some lines throughout.
Once applied, take a dry cloth and rub the Liming Wax in ONE direction {as opposed to back and forth} of the grain so soften the look.
The picture below makes the paint appear darker only because I took it in the shade. The Liming Wax doesn’t actually change the color of the paint in any way.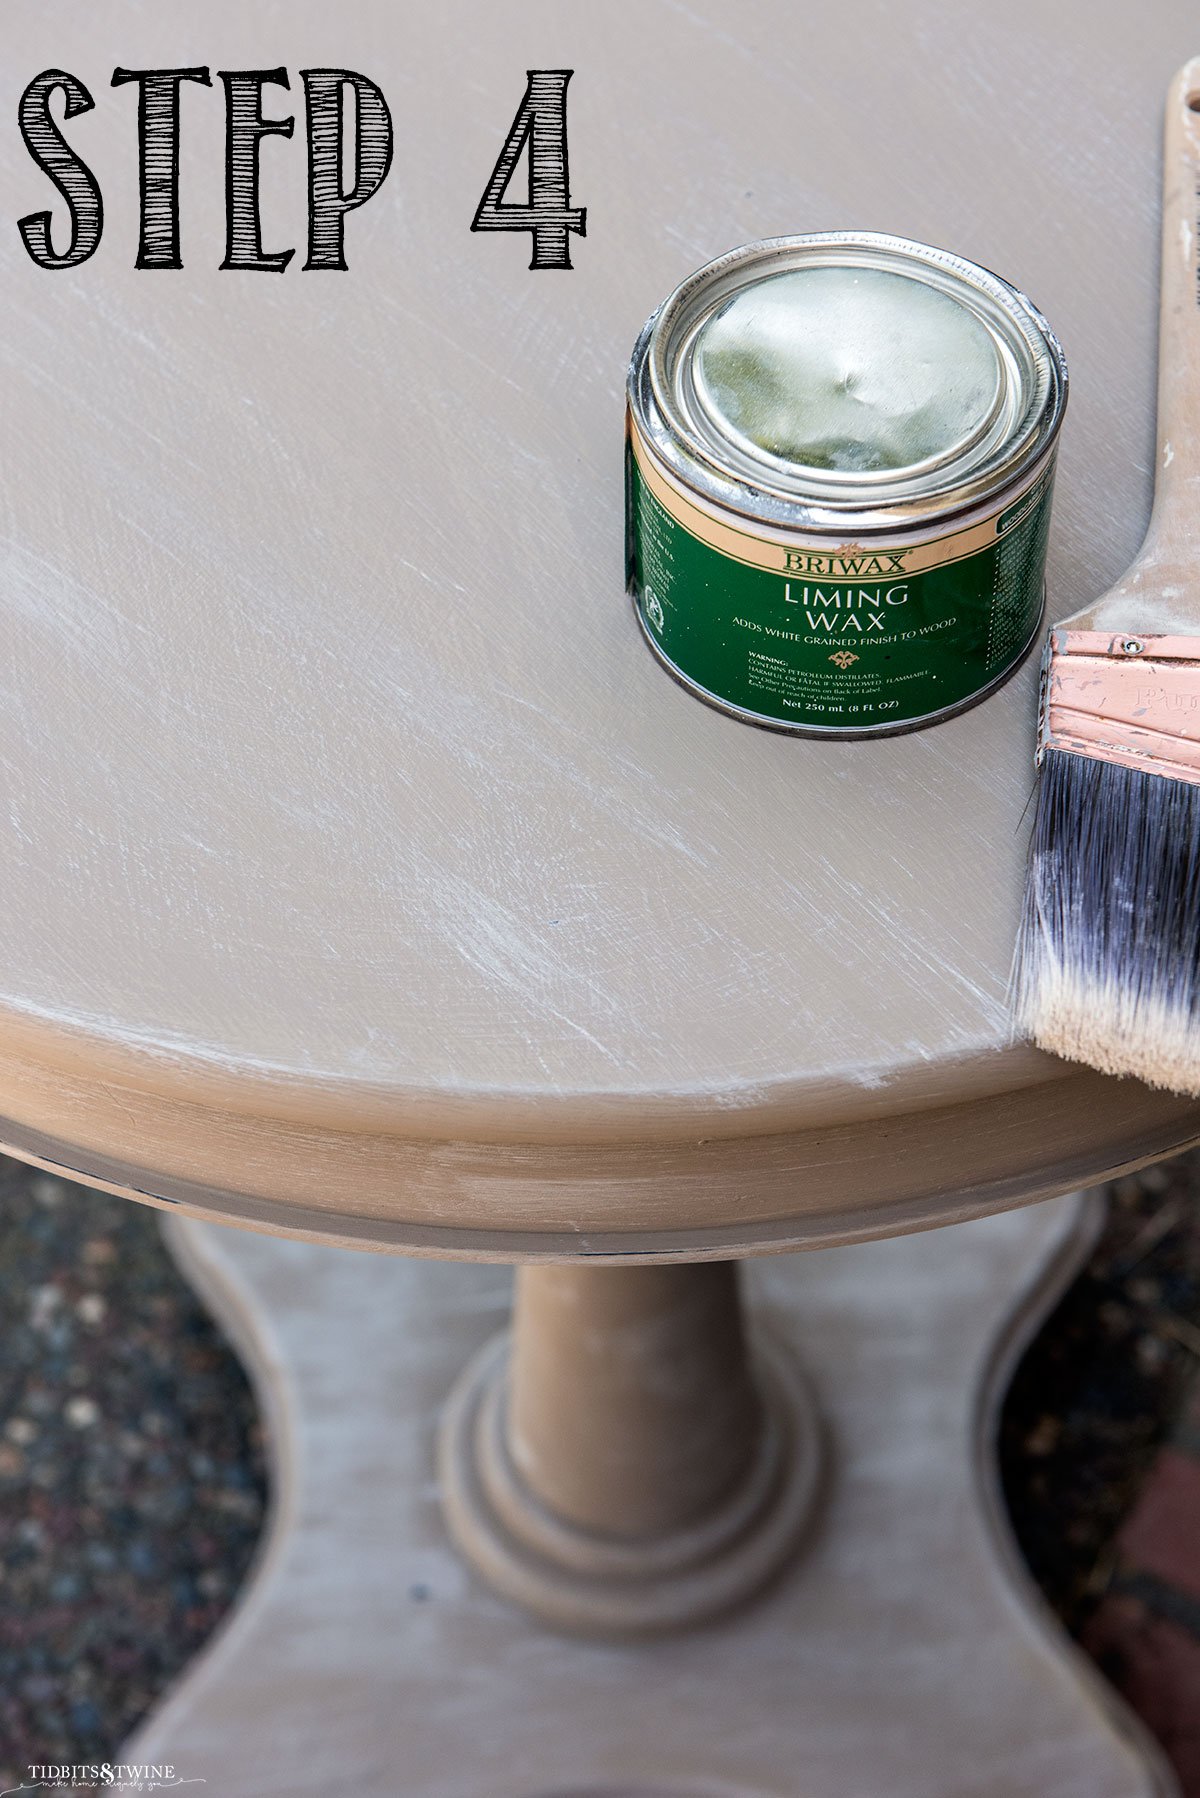
- Clear Wax & Dark Wax
This is where the magic happens!
First, apply a light coat of Clear Wax to the entire piece using a stiff brush. If you see any bits of wax or build-up, just use a clean, dry cloth to wipe the excess away.
Once covered in Clear Wax and BEFORE the wax dries, apply Dark Wax. Using a different stiff brush, lightly dip the brush into the Dark Wax and then blot off excess on a dry rag. Brushing in the SAME direction as the grain/Liming Wax, apply the Dark Wax to the piece. You can rub the Dark Wax in a little or as much as you want to give the desired effect. If you feel you have too much, use a dry rag to wipe away excess. But remember, it’s always better to use too little and add more than to try and remove excess.
What you’ll see now if that the Dark Wax adheres differently to the Coco in the areas where it’s been sanded, giving it two different shades. You’ll have a third shade from the Liming Wax and then you’ll have areas with more Dark Wax for a fourth. All of these colors come together to give a lot of depth and richness to the piece.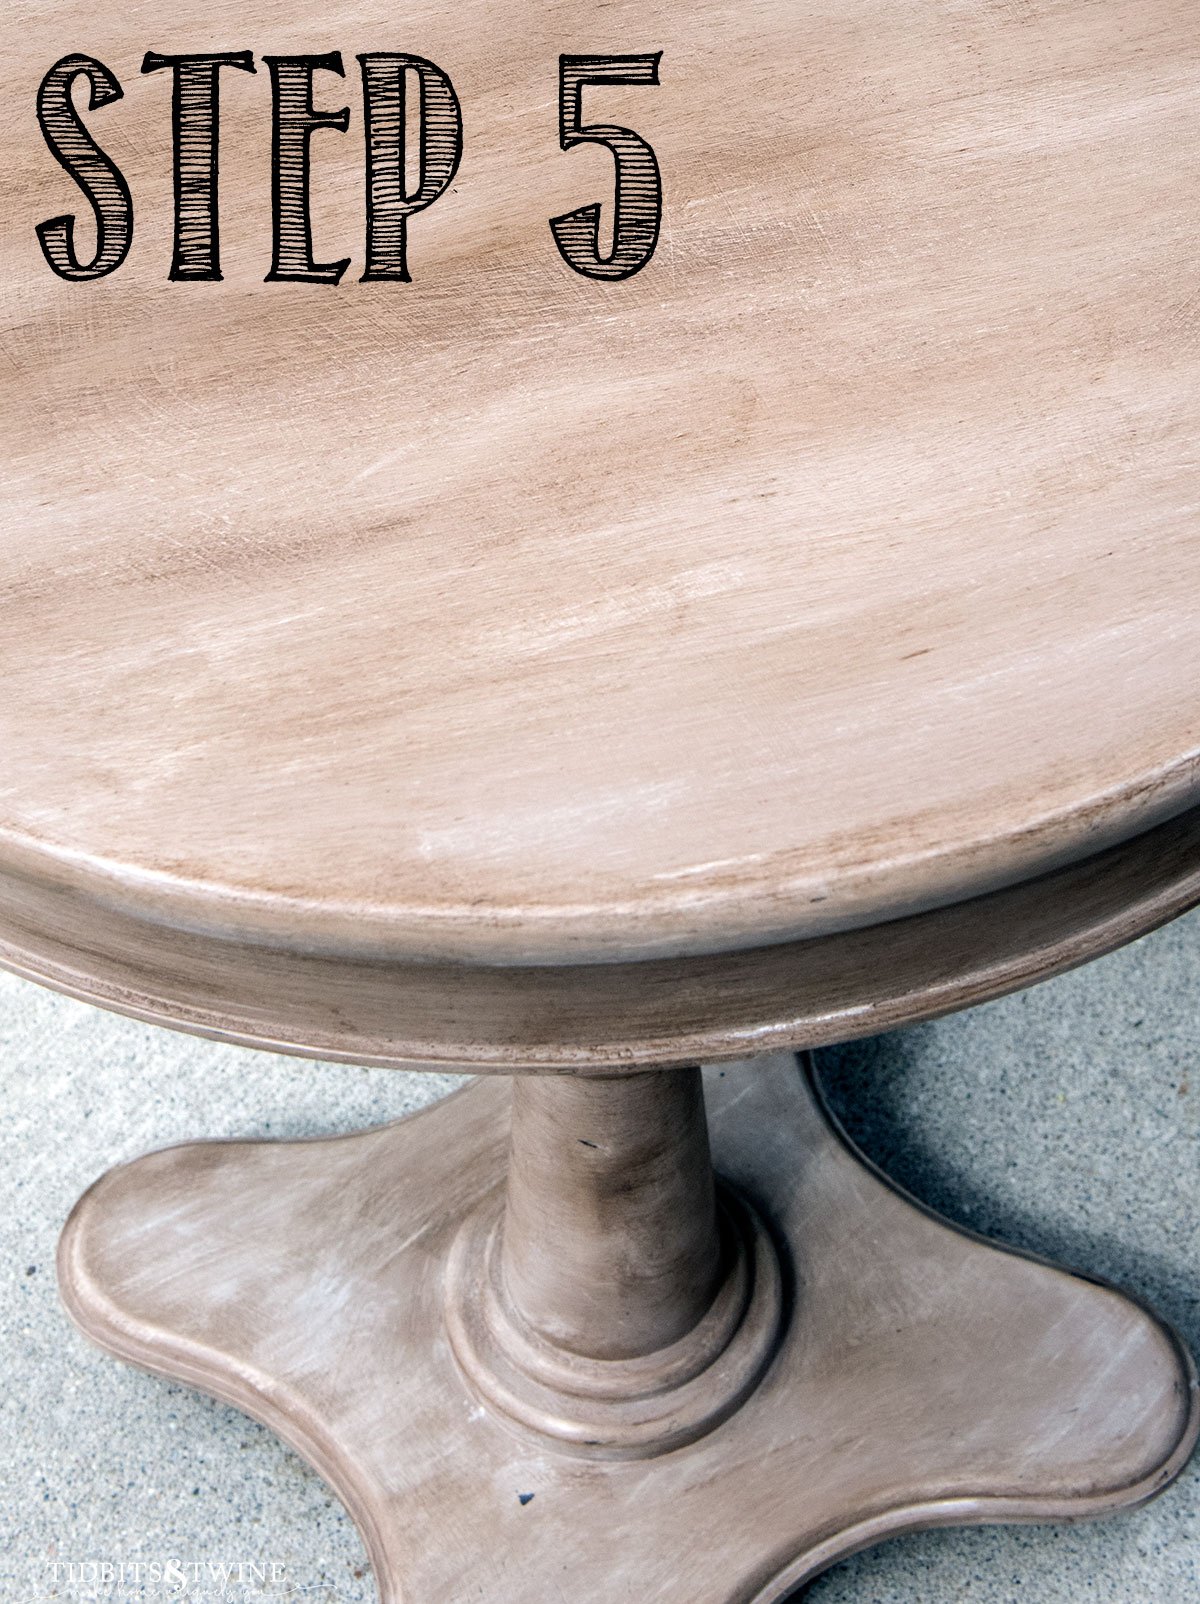
- Optional Liming Wax
At your discretion, you can go back and add some more Liming Wax for pops of white. Once you apply the Dark Wax, the Liming Wax turns a light beige, so if you want to highlight areas or lighten the piece up a bit, go back and add more Liming Wax.
The table I painted doesn’t really have any detail and I was happy with the color, so I skipped this step. For a piece that has carved details, though, I would definitely go back with another round of Liming Wax.
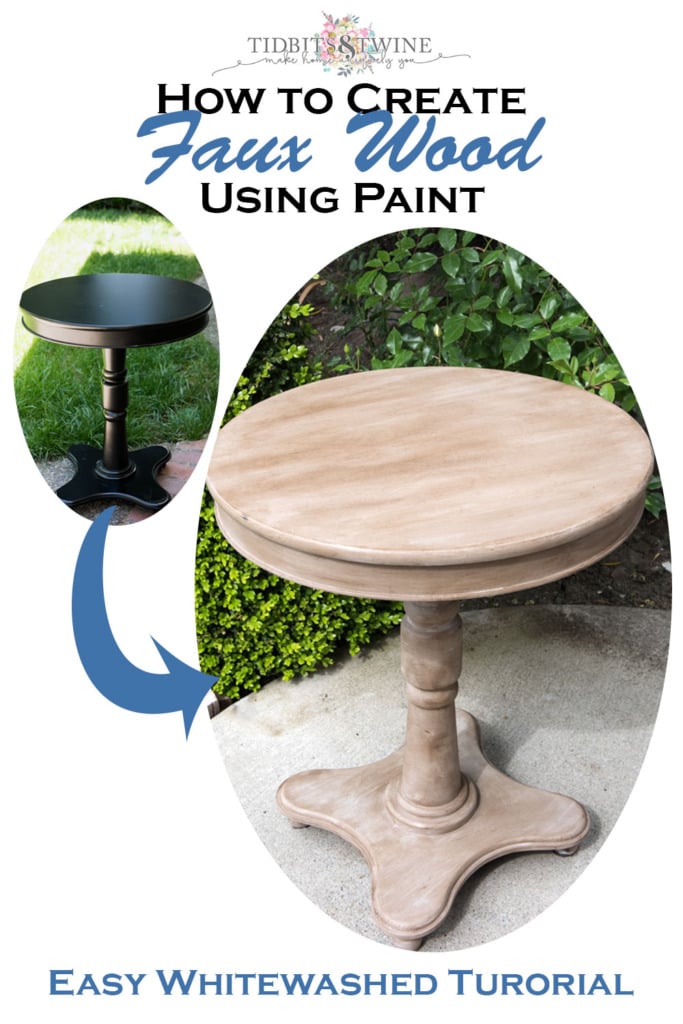
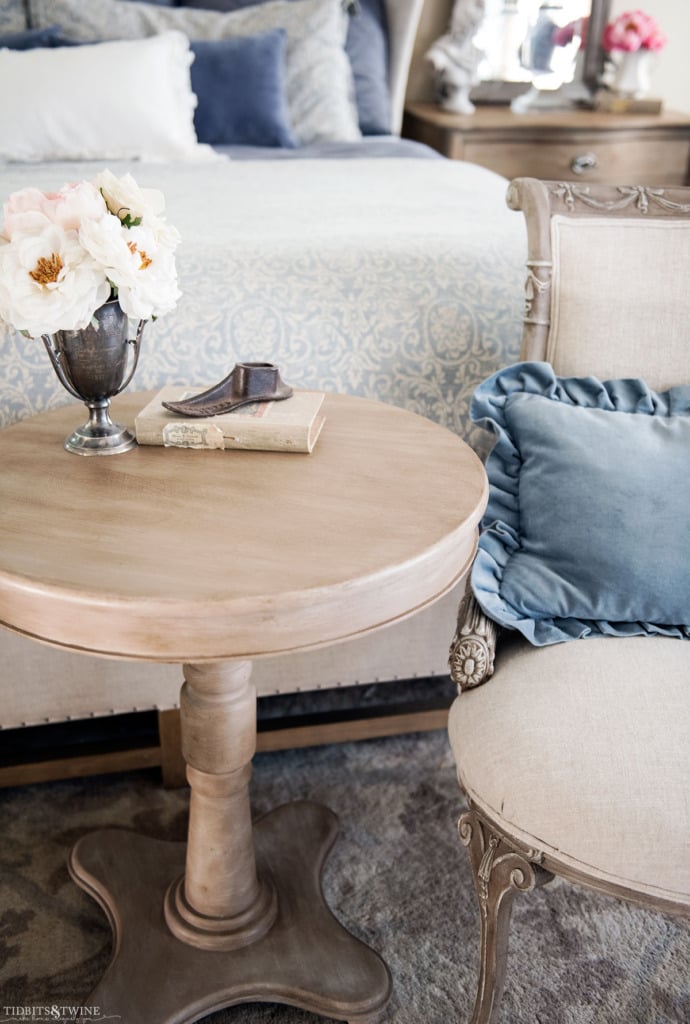
Here’s a look at my newly painted side table at the end of my bed, next to the gorgeous antique chairs restored by Art of Salvage.

You might also enjoy THIS tutorial:
Join the Community
Let’s keep in touch! Get exclusive artwork plus the latest news delivered directly to your Inbox!
I’m wanting to try this technique on a dresser I have, your final piece came out exactly how I want mine to look! Question, do you apply the dark wax all over the piece, or just in spots you want to be darker? Thanks!
Hi Jenna! I applied the dark wax all over because I like the depth that it gives, but I used it VERY lightly except in the areas that I wanted darker. I hope that helps!