



Anyone who has ever purchased an artificial Christmas tree knows this feeling: what comes out of the box does NOT look like the tree you thought you purchased!
Even a beautiful artificial tree can look surprisingly sparse when it’s first assembled. The branches are flattened from shipping or storage, the center can look dark and empty, and sometimes the tree simply isn’t as full as it looked online or in the store.
The good news is that almost every artificial tree needs a little work before it starts looking the way you imagined. And if one of those incredibly full, expensive trees isn’t in the budget, there are plenty of ways to create a fuller look with the tree you already have.
If you’re still shopping, or wondering whether your current tree is worth working with, I also put together my guide to the best artificial Christmas trees with favorites at a range of price points.
If you’re still shopping, or wondering whether your current tree is worth working with, I also put together my guide to the best artificial Christmas trees with favorites at a range of price points.
But before we get into the four tricks I use, here’s why adding fullness can make such a difference.
Why Make an Artificial Christmas Tree Look Fuller?
Not every tree needs more fullness, but these tricks are especially helpful if your tree looks thinner than you expected, you’re working with a more affordable tree, or an older tree has started to lose some of its shape.
They’re also useful if you simply prefer a lush, layered look and want to get more from the tree you already own instead of replacing it.
The goal isn’t to stuff every open space. It’s to make the tree look more substantial, balanced, and finished while still keeping a natural shape.

1. Fluff Every Branch, Working From the Inside Out
This is easily the most important step, and unfortunately, there really isn’t a shortcut. Artificial tree branches are compressed tightly for shipping and storage, so when you first assemble the tree, many of the tips are flattened and pointing in the same direction.
Start at the bottom of the tree and work your way up, fluffing one branch at a time. Begin near the trunk and separate each tip as you work outward. This helps fill the spaces between branches instead of simply arranging the parts you can see from the front.

DECORATING TIP: Fluff each section as you assemble the tree. It’s much easier to reach and see all of the branches before the next section is added.
As you work, angle branches in different directions instead of leaving them perfectly horizontal. Turn some outward, some slightly upward, and others to the sides to create a fuller, more natural shape.
I also like to gently bend and curve some of the individual branch tips. Real trees aren’t perfectly straight or symmetrical, and a little variation keeps an artificial tree from looking stiff while helping fill those small spaces between branches.


Don’t Ignore the Interior Branches
It’s easy to focus on the prettier outer branches, but the branches closest to the trunk are what help hide the center pole and fill those dark spaces inside the tree.
If you have a PE/PVC tree, the more realistic molded PE tips are often concentrated toward the outside, while softer PVC branches fill the interior. They may not be the part of the tree you notice first, but they do a lot of the work when it comes to creating fullness.
Before moving on, spread those interior branches apart and angle them into any visible gaps around the trunk. A well-fluffed center makes the entire tree look denser before you add a single decoration.
TIP: Wear gardening gloves while you fluff. Artificial branches can scratch up your hands surprisingly fast.
2. Add Filler Stems and Branches
Sometimes fluffing just isn’t enough. Maybe there’s a big hole between branches, the tree looks a little skimpy from one angle, or you simply want it to feel more substantial.
This is where filler can completely change the look of an artificial tree. And filler doesn’t have to mean more faux pine.
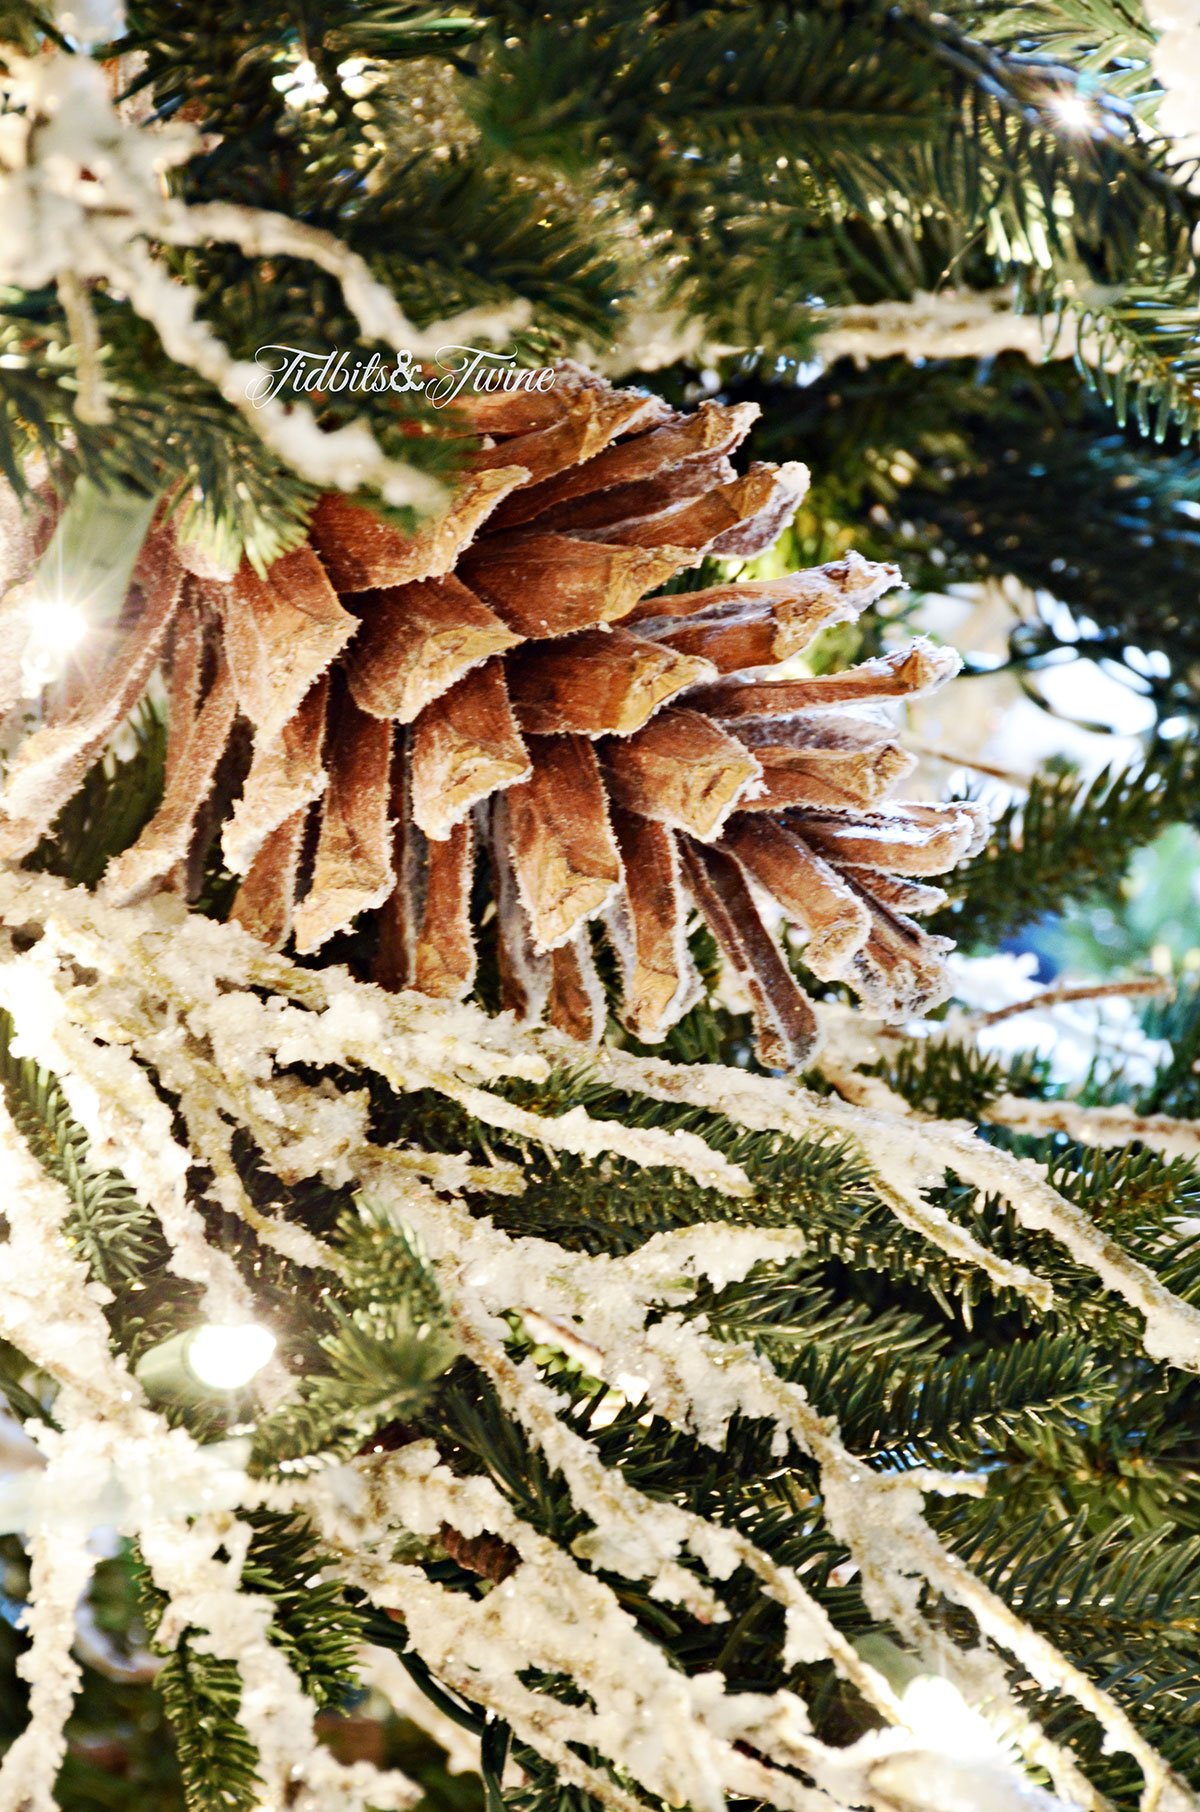
Over the years, I’ve used all sorts of things depending on the tree. On one tree, I added snow-covered branches throughout the greenery to make it look fuller while also giving it a faux-flocked look. On another, I tucked in oversized velvet flower heads to fill larger openings and add more visual weight.
Some of my favorite options include:
- Evergreen picks for filling small holes
- Snow-covered or flocked branches for fullness plus a frosted look
- Twiggy branches for height and a more natural outline
- Large faux flowers for filling bigger spaces quickly
- Berry stems for fullness, color, and texture
- Pinecone or seed-pod stems for a more natural look
- Decorative branches when you want the filler to become part of the design
- Faux garland for adding density around the trunk or filling larger openings
An old faux garland can be especially useful for adding bulk near the center of the tree. Tuck or wire sections around the trunk where you need more coverage rather than buying individual picks for every gap.
Whatever you use, tuck it deep into the tree and angle it along the existing branches rather than laying it across the surface.
You don’t need filler everywhere. A few well-placed stems can fix the spots that make the whole tree look sparse.

3. Decorate at Different Depths
Once the tree is fluffed and any filler is in place, decorating can add another layer of fullness. Instead of hanging everything from the outermost tips, place decorations at different depths throughout the tree.
Place Larger Ornaments Deeper Inside
Tuck some of your larger ornaments farther inside the tree to fill dark spaces and disguise gaps between branches. I like to use simpler ball ornaments here and save the prettier or more detailed ornaments for the outer branches where they’ll actually be seen.
For a larger opening, you can also group several ornaments together to create one larger cluster. Some people simply hang two or three ornaments close together, while others zip-tie several ornaments together first and then tuck the entire cluster into the tree.
This works especially well with inexpensive ball ornaments because one oversized cluster can fill much more visual space than several small ornaments scattered around individually.
This is also a great place to use inexpensive ornaments that you might not want front and center.

Use Ribbon to Add Volume
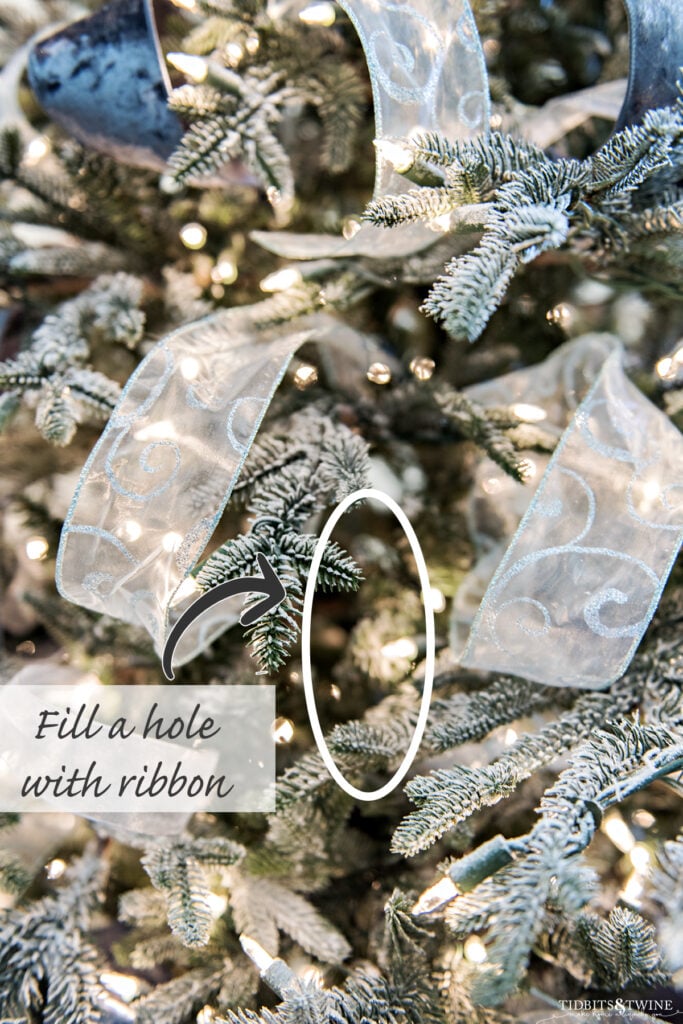
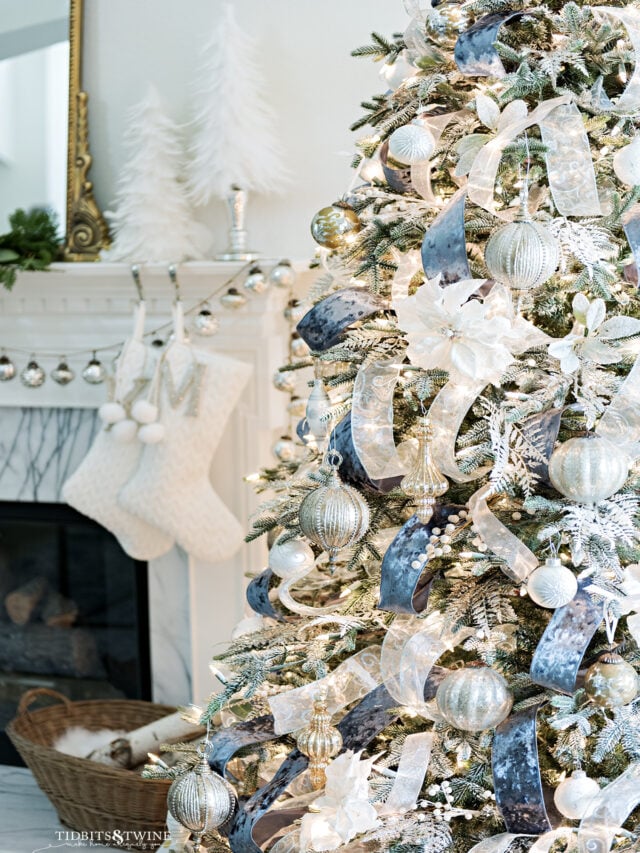
Ribbon is especially helpful when you have larger open areas because wide wired ribbon can fill visual gaps and add volume without adding more greenery.
Rather than wrapping ribbon tightly around the outside of the tree, tuck sections deeper into the branches and let them loop back out. This creates depth and helps bridge the space between branches.
Wired ribbon works particularly well because you can shape the loops and adjust them until they fill exactly the areas that need help.
And sometimes there really is one awkward hole that no amount of fluffing will fix. That’s when you put a ribbon on it.
If you want step-by-step instructions, I have a full tutorial on how to add ribbon loops to a Christmas tree.

4. Step Back and Fix the Shape
Once the tree is fluffed, filled, and decorated, step back and look at the whole thing. Sometimes a tree doesn’t need more stuff. It just needs a few branches repositioned to fix the overall shape.
Look for places where the outline dips inward, one side looks flatter than the other, or a section suddenly feels thinner. Pull nearby branches outward, bend a few tips, or add one strategic filler stem until the silhouette feels more balanced.
Pay special attention to the top and bottom. Near the top, spread the branches outward and slightly upward so the tree narrows gradually instead of ending in one skinny stem. If it still looks thin, a small branch or pick can help build out the shape before you add the topper.
At the bottom, fan the lowest branches outward and slightly forward to create a fuller base. A strong base makes the whole tree feel more substantial and helps hide the trunk and stand.

A Few Extra Tips & Tidbits
Don’t Try to Fill Every Gap
A fuller tree doesn’t necessarily mean eliminating every bit of open space. Some space between the branches can actually make a tree look more natural and give your ornaments room to hang, especially on trees with a looser, more organic shape.
This tree is a good example. There’s plenty of visible space between the branches, but once it’s decorated, it still looks substantial and finished.

Put the Worst Side Toward the Wall
Sometimes one side of a tree just refuses to cooperate. If your tree will be viewed mostly from the front, rotate the thinnest or least attractive side toward the wall before you start decorating.
There’s no reason to spend an hour fixing branches no one is ever going to see!
Be Careful Adding Lights to a Pre-Lit Tree
Lights tucked deeper inside the branches can create more depth, but adding lights to a pre-lit tree only works if you can closely match the existing color and brightness.
Even strands labeled “warm white” can look surprisingly different from one another. Test any additional lights next to the ones already on your tree before wrapping them throughout the branches. If they don’t match, I’d skip them and use filler, ornaments, or ribbon instead.
Take a Photo Before You Call It Done
Sometimes it’s easier to spot an uneven area in a photo than it is when you’re standing right in front of the tree. Take a quick picture with your phone and look for dips in the silhouette, dark holes, or areas that suddenly look thinner than the rest.
Final Thoughts
If your artificial Christmas tree looks a little disappointing when you first put it together, don’t decide too quickly that you bought the wrong one. A tree can look completely different once the branches are properly fluffed, the obvious gaps are filled, and the overall shape is balanced.
And if you’re working with a more affordable tree, these tricks can make an even bigger difference. You don’t necessarily need a more expensive tree to get a fuller look. Sometimes you just need to know where to add the fullness.
More Decorating Tips
- How to Add Ribbon Loops to a Christmas Tree
- How to Flock a Christmas Tree the Easy Way
- How to Upgrade Clip-On Christmas Tree Candles
- Creative & Elegant Christmas Garland Ideas

DECORATING MADE EASY
Get my free 5-day decorating course and learn how to define your style, make better decisions, and create a home that feels like you.
After the course, you’ll receive my latest decorating tips, antique finds, and new posts.