

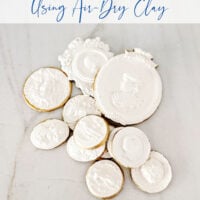
Follow my easy tutorial to make and your own DIY intaglios using silicone molds and air-dry clay. Then I’ll show you how to mount and frame them for the perfect wall art.
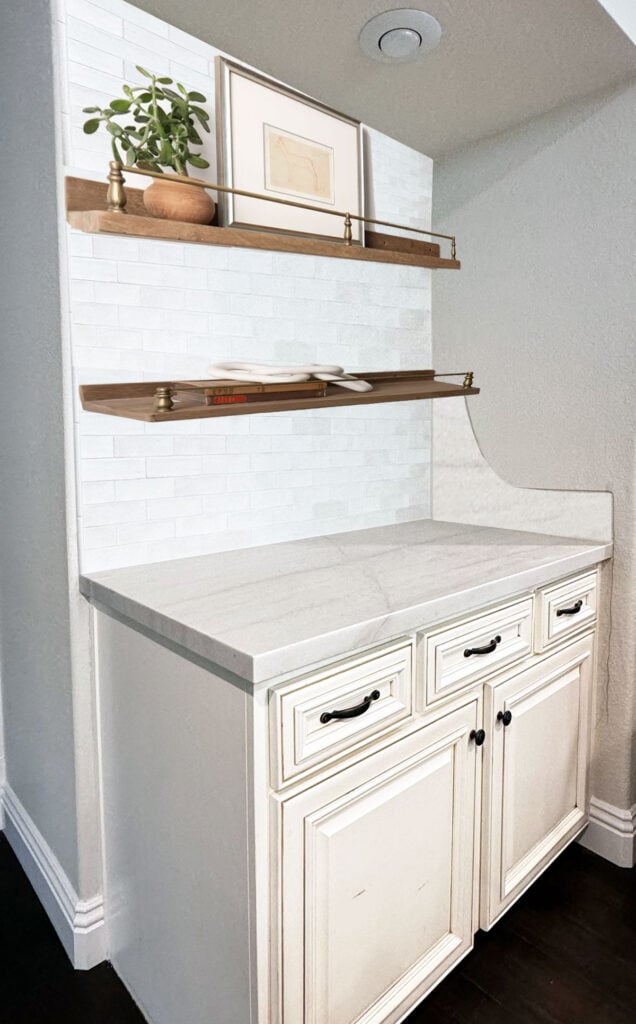
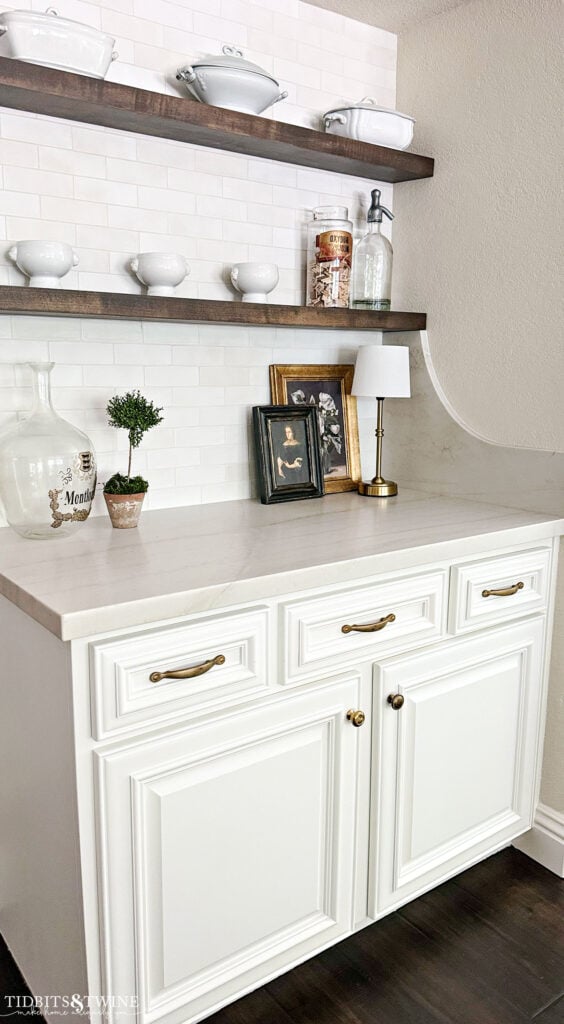
Do you remember the wet bar that in my family room that I updated along with our kitchen remodel? Well, I love how it turned out (pic below!). What I didn’t love was the large media console and mirror on the wall next to it. I felt those pieces were distracting from my newly remodeled bar area!
Time for them to go! Lol!
So, of course I wanted an Intaglio gallery wall…until I saw the price of Intaglios. Yikes!
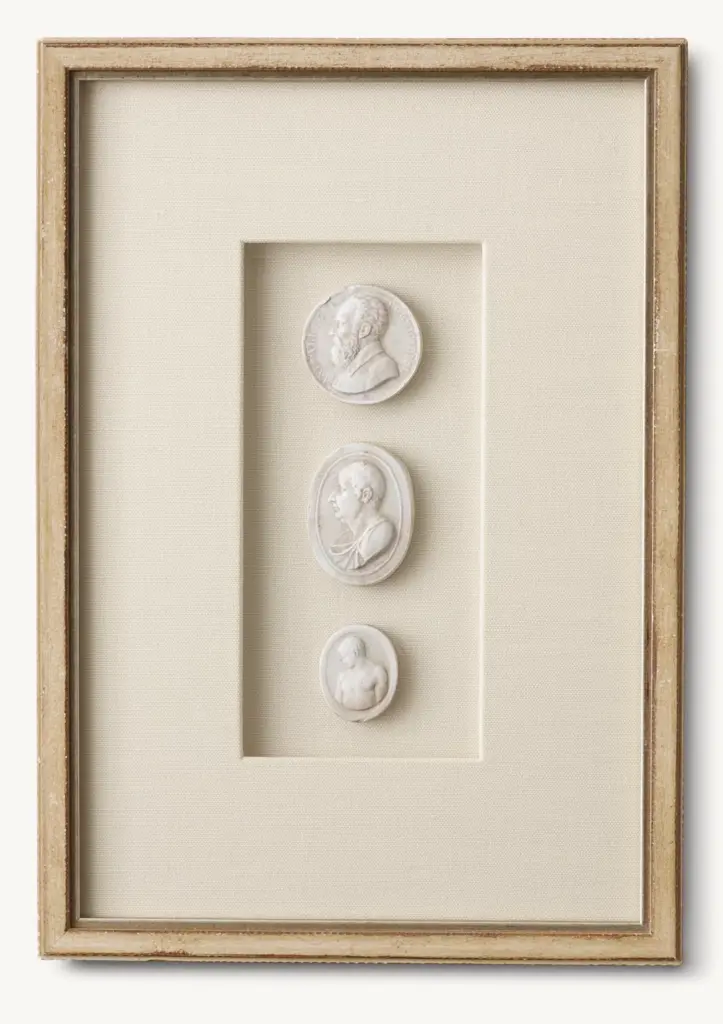
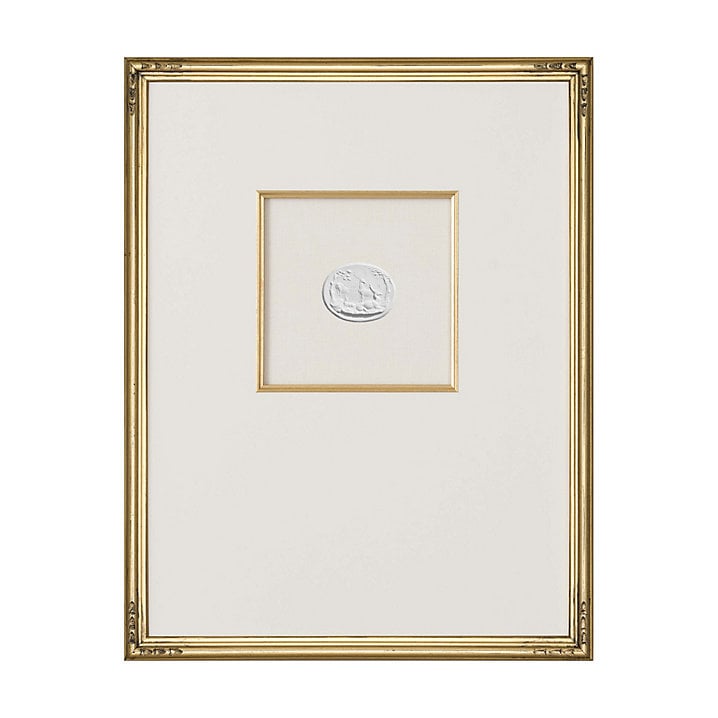
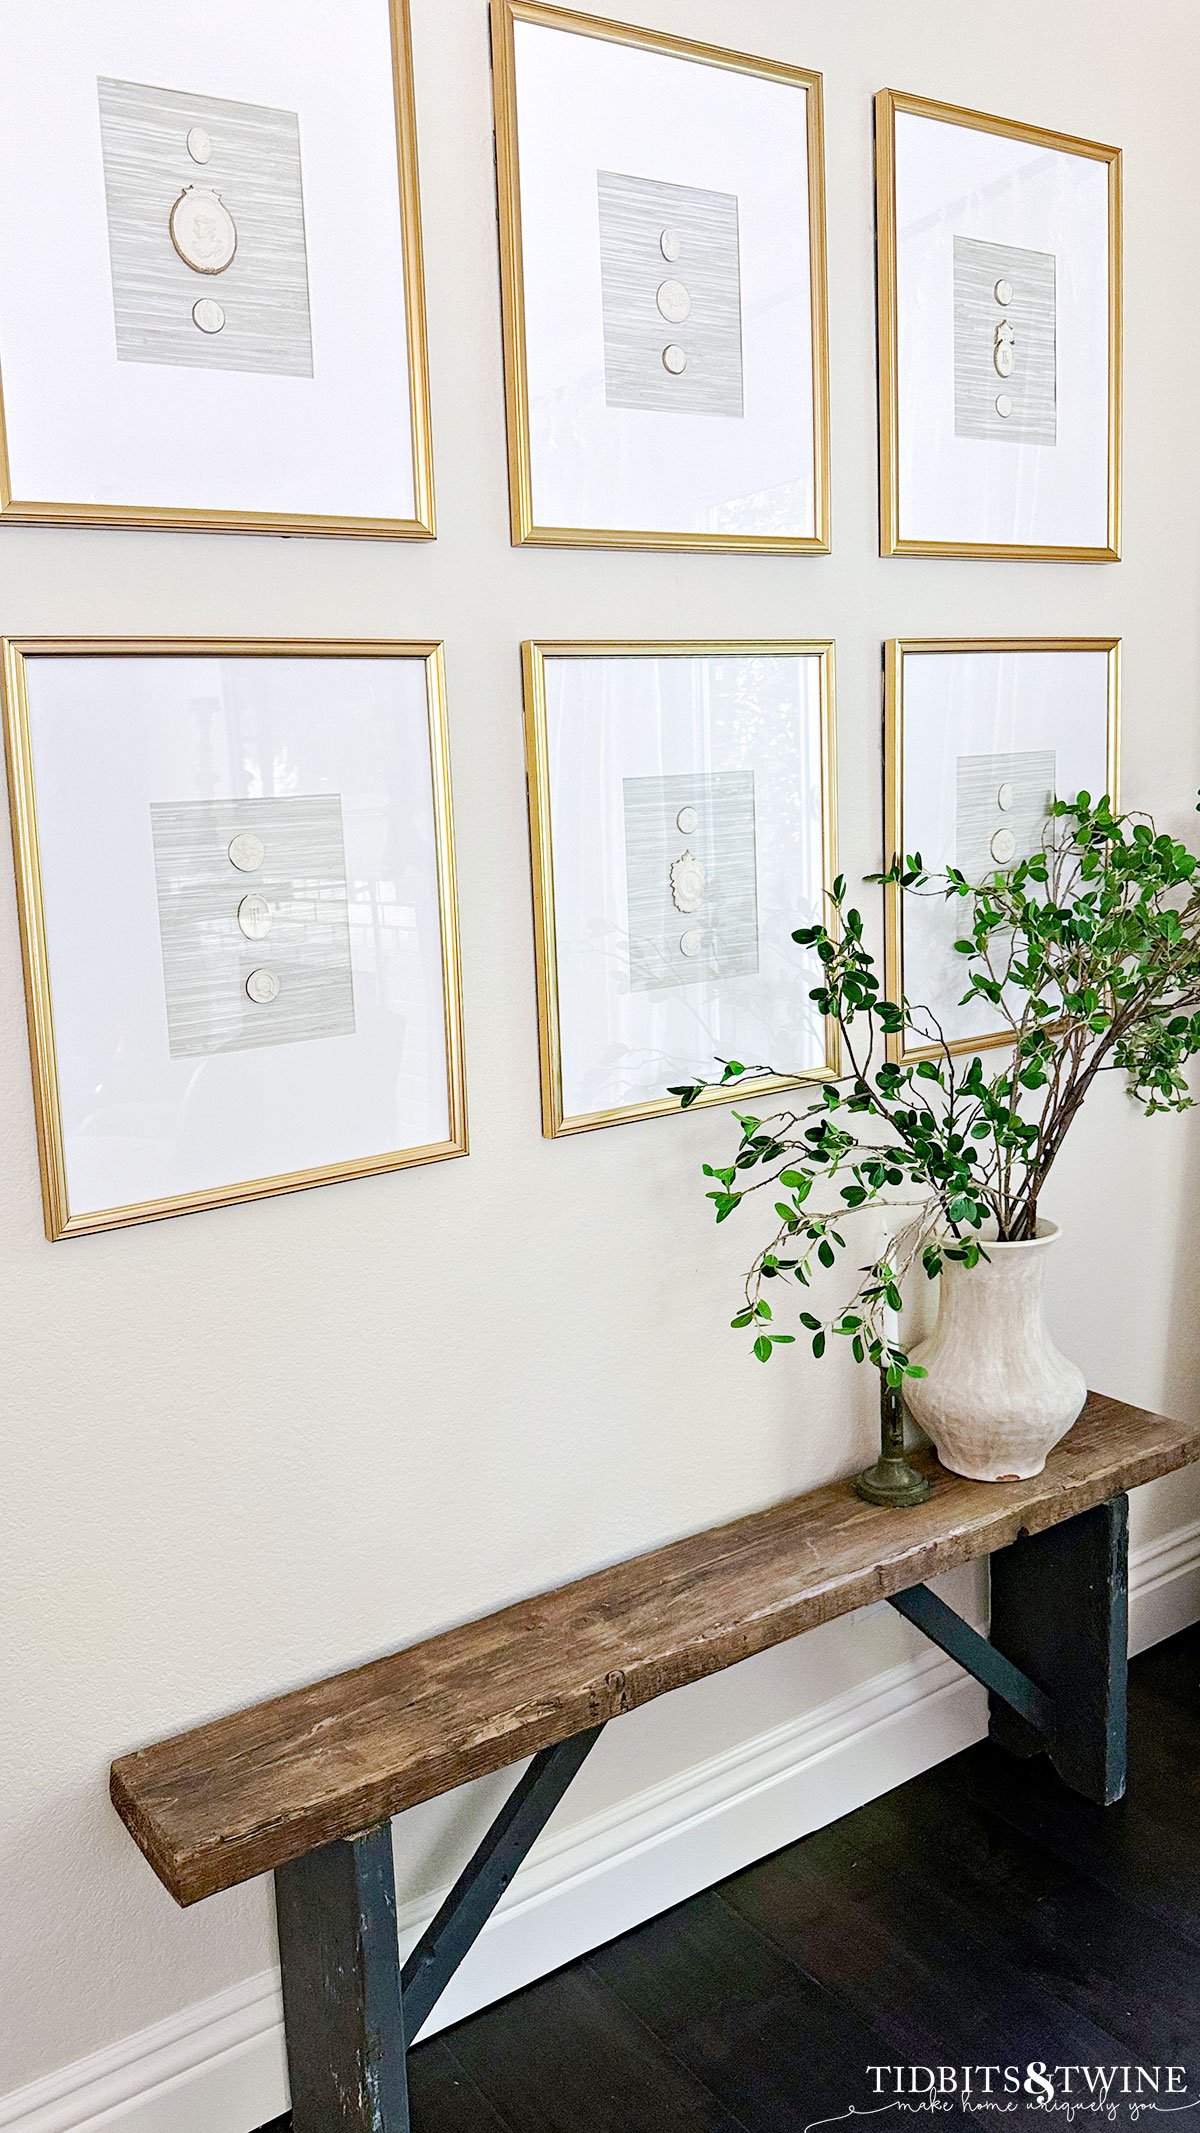
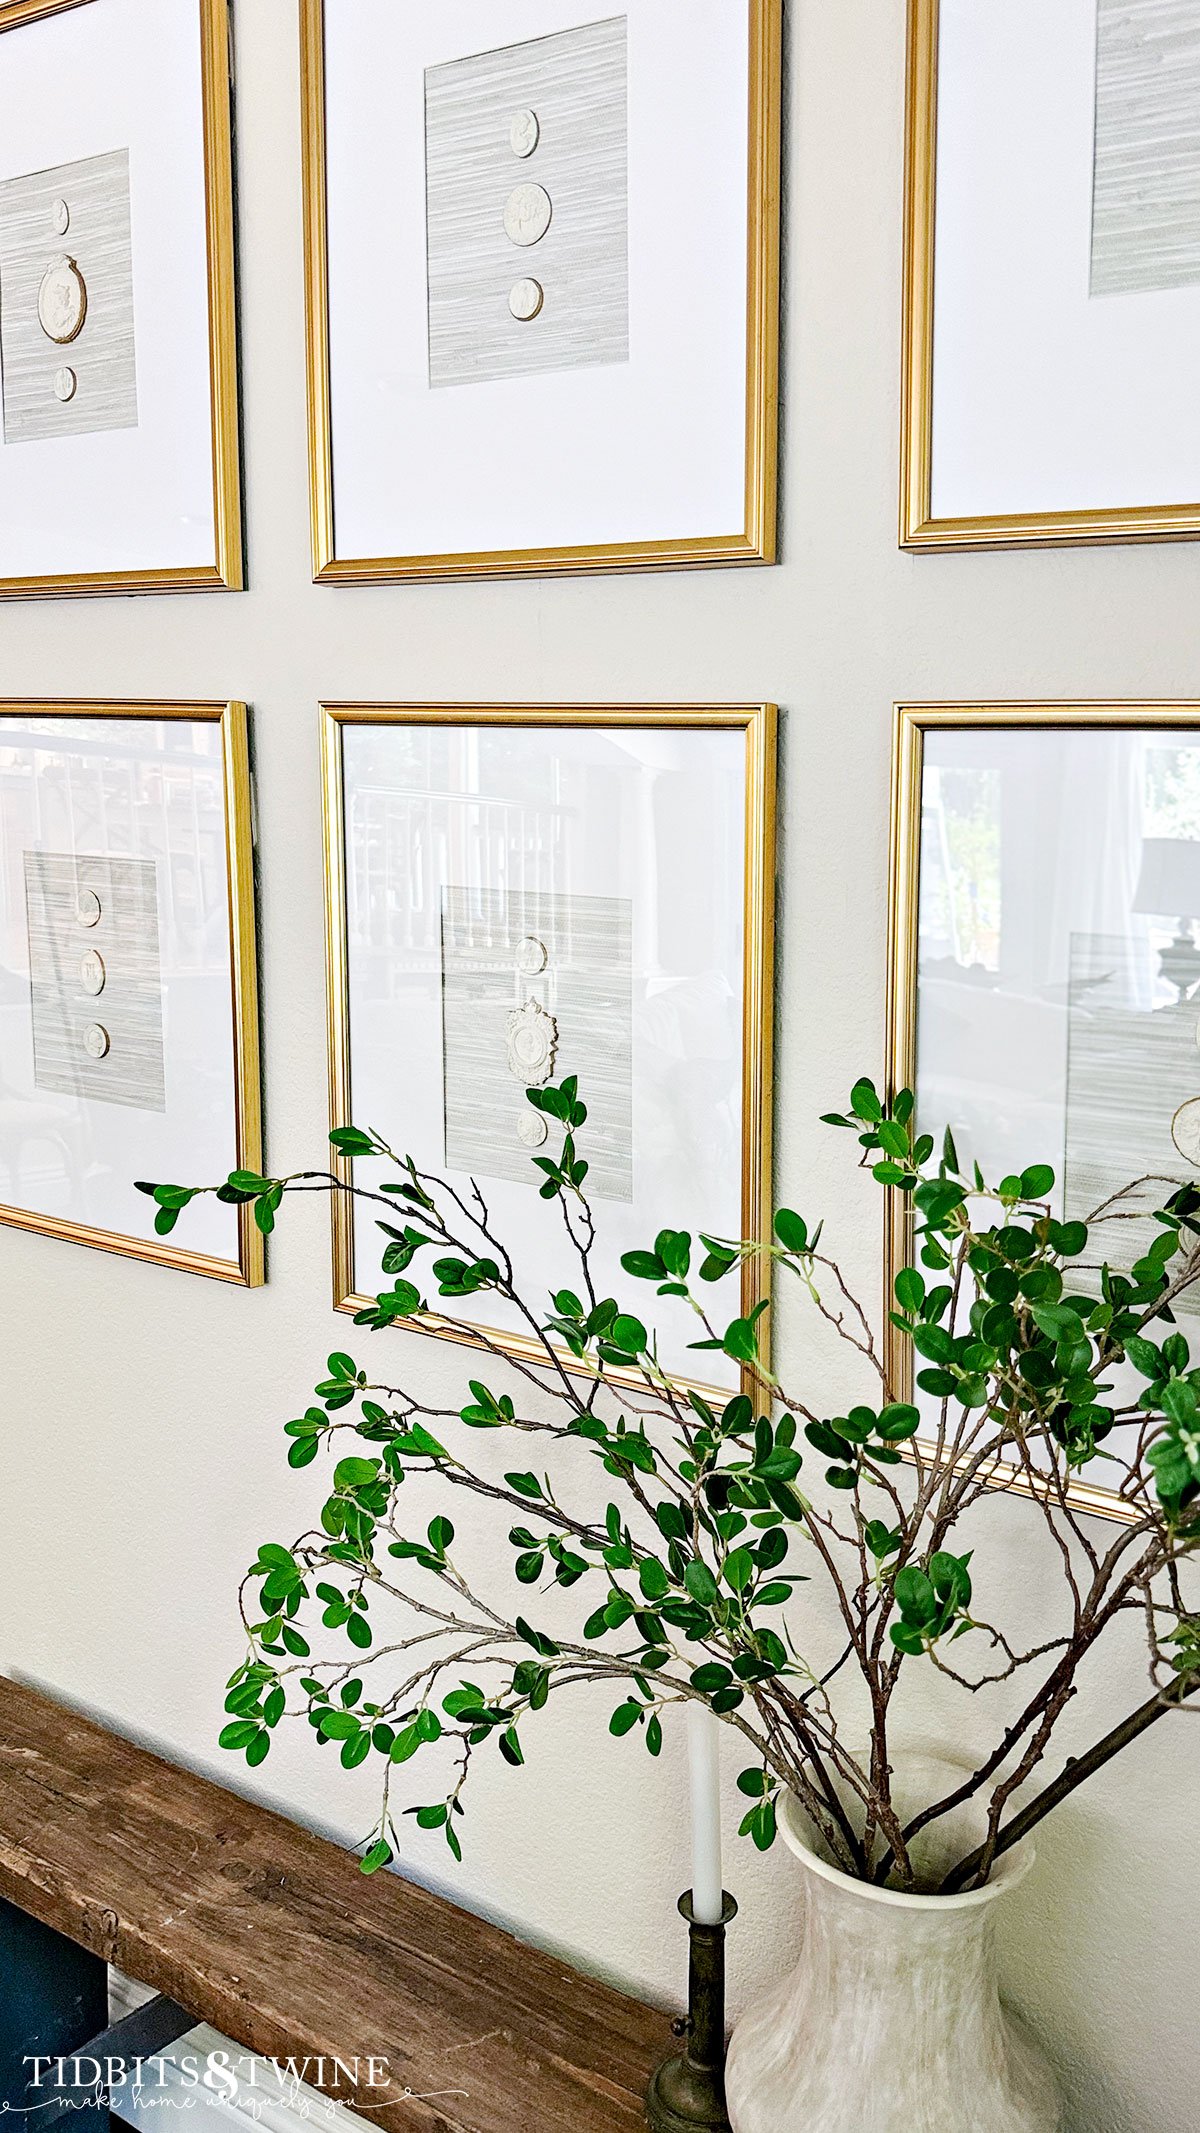
There are some absolutely gorgeous Intaglios available at RH and Ballard Designs. You can even find ones on Etsy! But I ordered large 16″x20″ frames with an 8″x10″ opening, meaning that I need 3 Intaglios per frame. And that really starts to add up!
A framed set of 3 from Restoration Hardware costs $735. Ballard Designs sells one framed intaglio for $359. Even if I bought intaglios on Etsy and framed them myself, the cost would have been about $45 plus shipping for just one set and then I’d still have to purchase the frame.
In the end, I decided to make my own Intaglios using silicone molds and air dry clay! I made my own for just $35.66, including the frame (and I still have supplies left over).

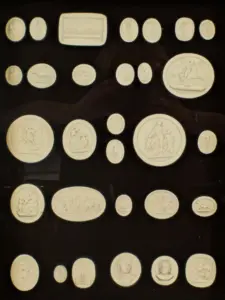
What is an Intaglio
These are small works of art carved in plaster to commemorate historical figures, architecture, and places. Before photography, people would collect Intaglios as keepsakes of their travels.
During the 18th century, plaster intaglios became fashionable souvenirs for those embarking on the Grand Tour, a European journey emphasizing art and history. Upper-class travelers collected intaglios and cameos as keepsakes to showcase in their homes. Due to their popularity, artisans started creating plaster reproductions for travelers to buy. These casts were frequently mounted in books or cases for display upon the travelers’ return home.
How to Make Intaglios
DIY Intaglios
Follow my easy tutorial to make and your own DIY intaglios using silicone molds and air-dry clay. Then I'll show you how to mount and frame them for the perfect wall art.
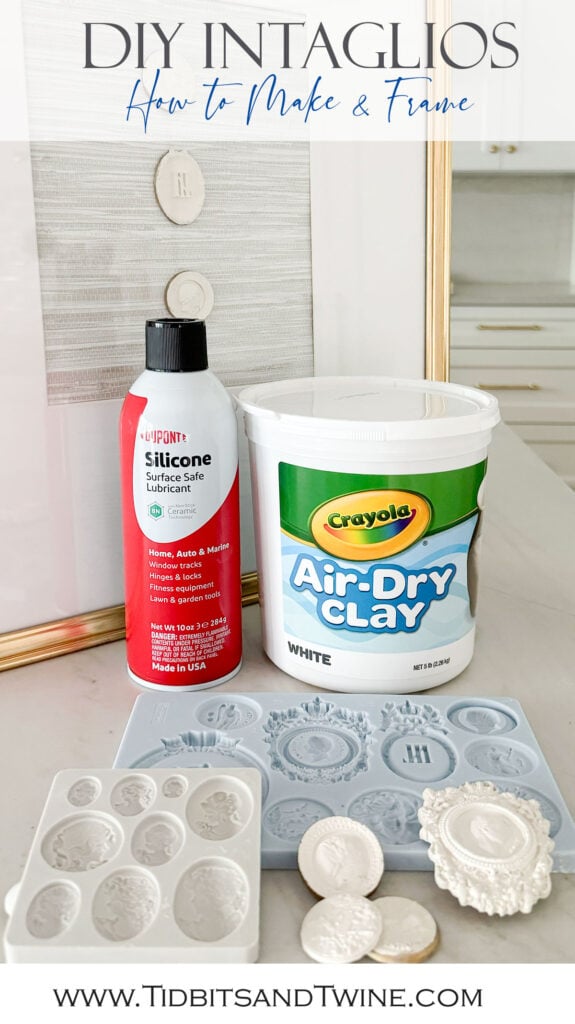
Materials
- Silicone Molds (I used two: Ancient Findings and Cameos)
- Silicone Spray (optional)
- Air Dray Clay (I used Crayola but 5lbs was too much!)
- Rub n Buff (optional)
- Intaglio backdrop for frame (I used Grasscloth Wallpaper)
- Gold Frames
- Super Glue
Tools
- Small artist brush or Q-Tip
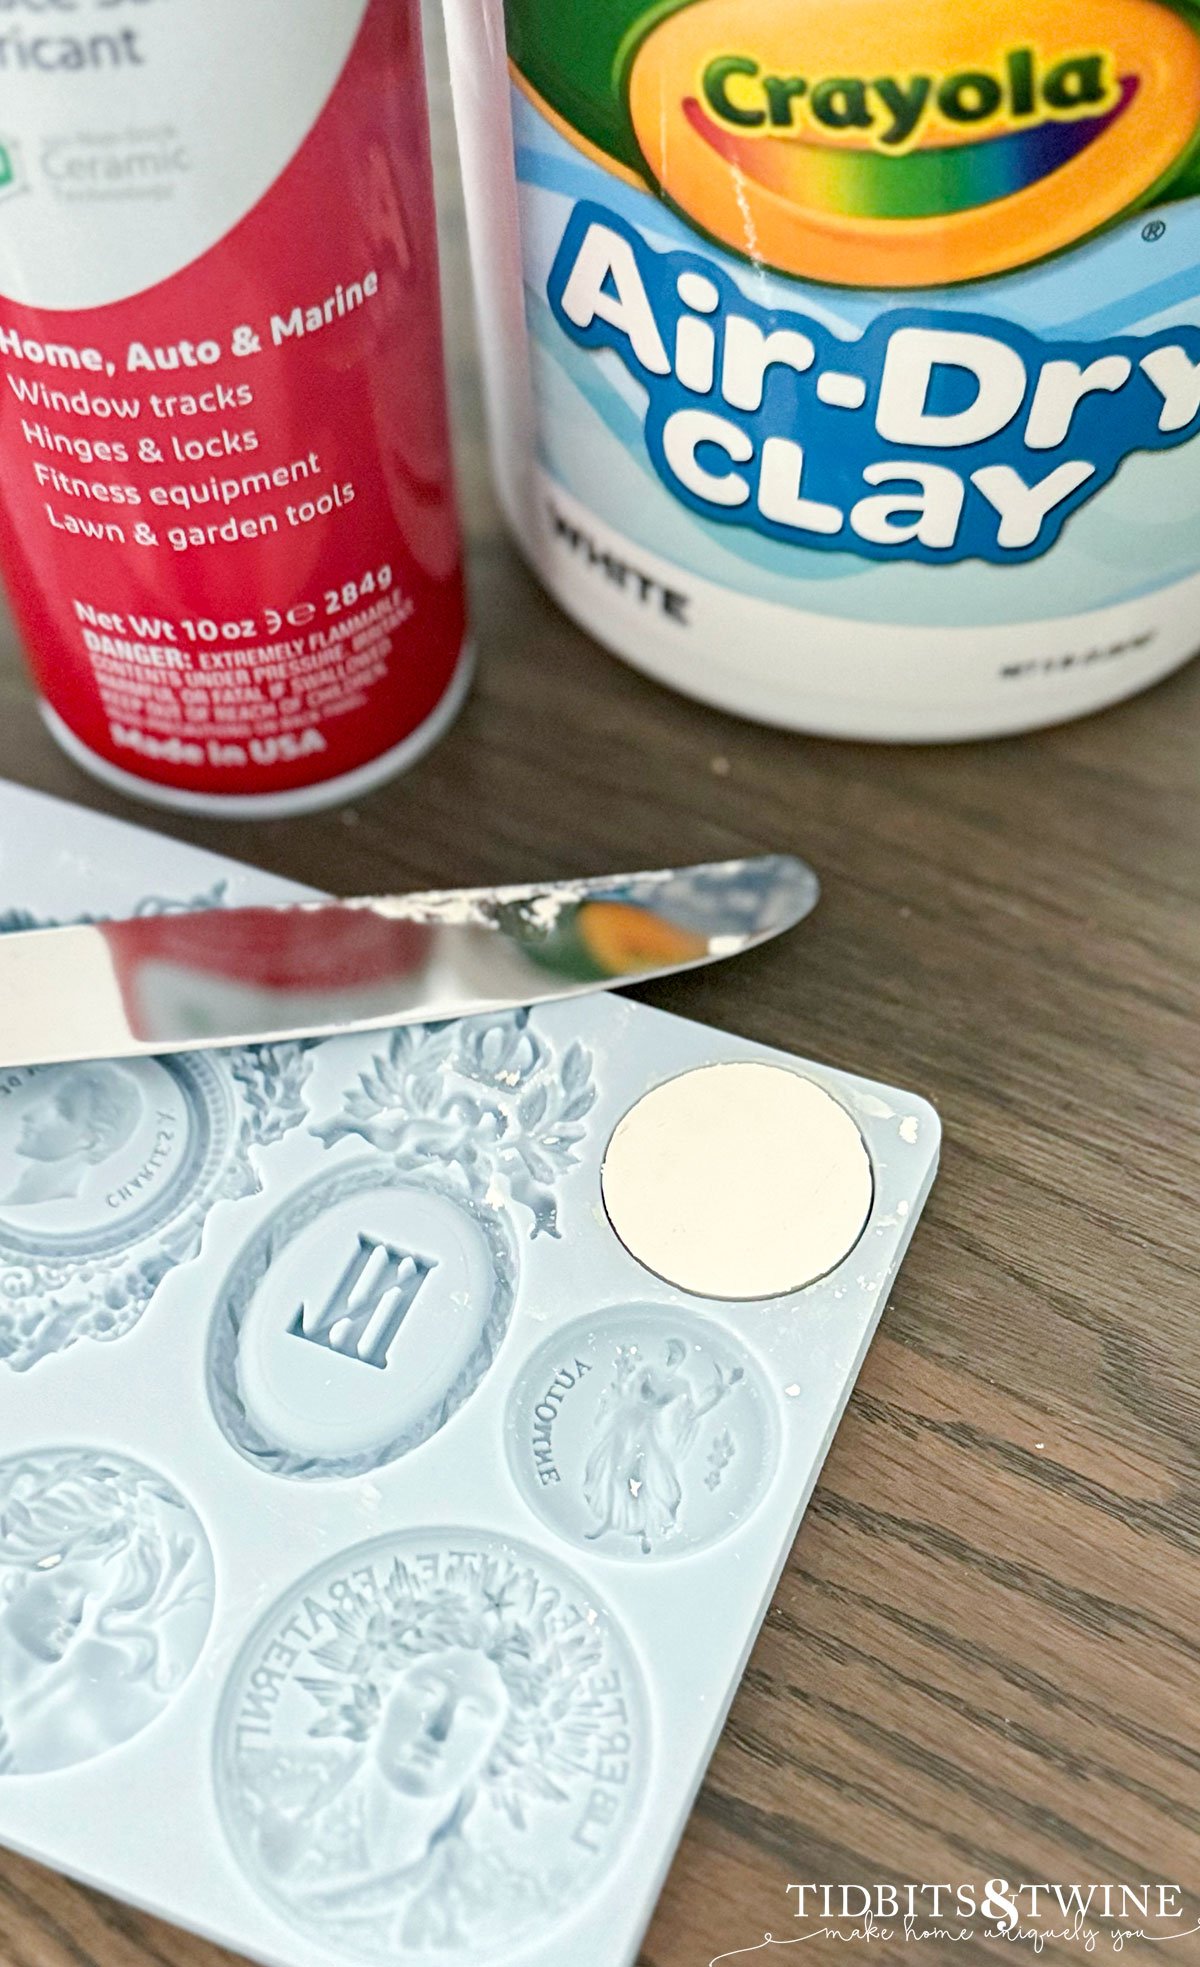
- Knife of similar flat edge
Instructions
Step 1:
Lightly spray your silicone mold with silicone spray to help your clay easily release from the mold once dry. I have read that corn starch also works, but I can't confirm.
Step 2:
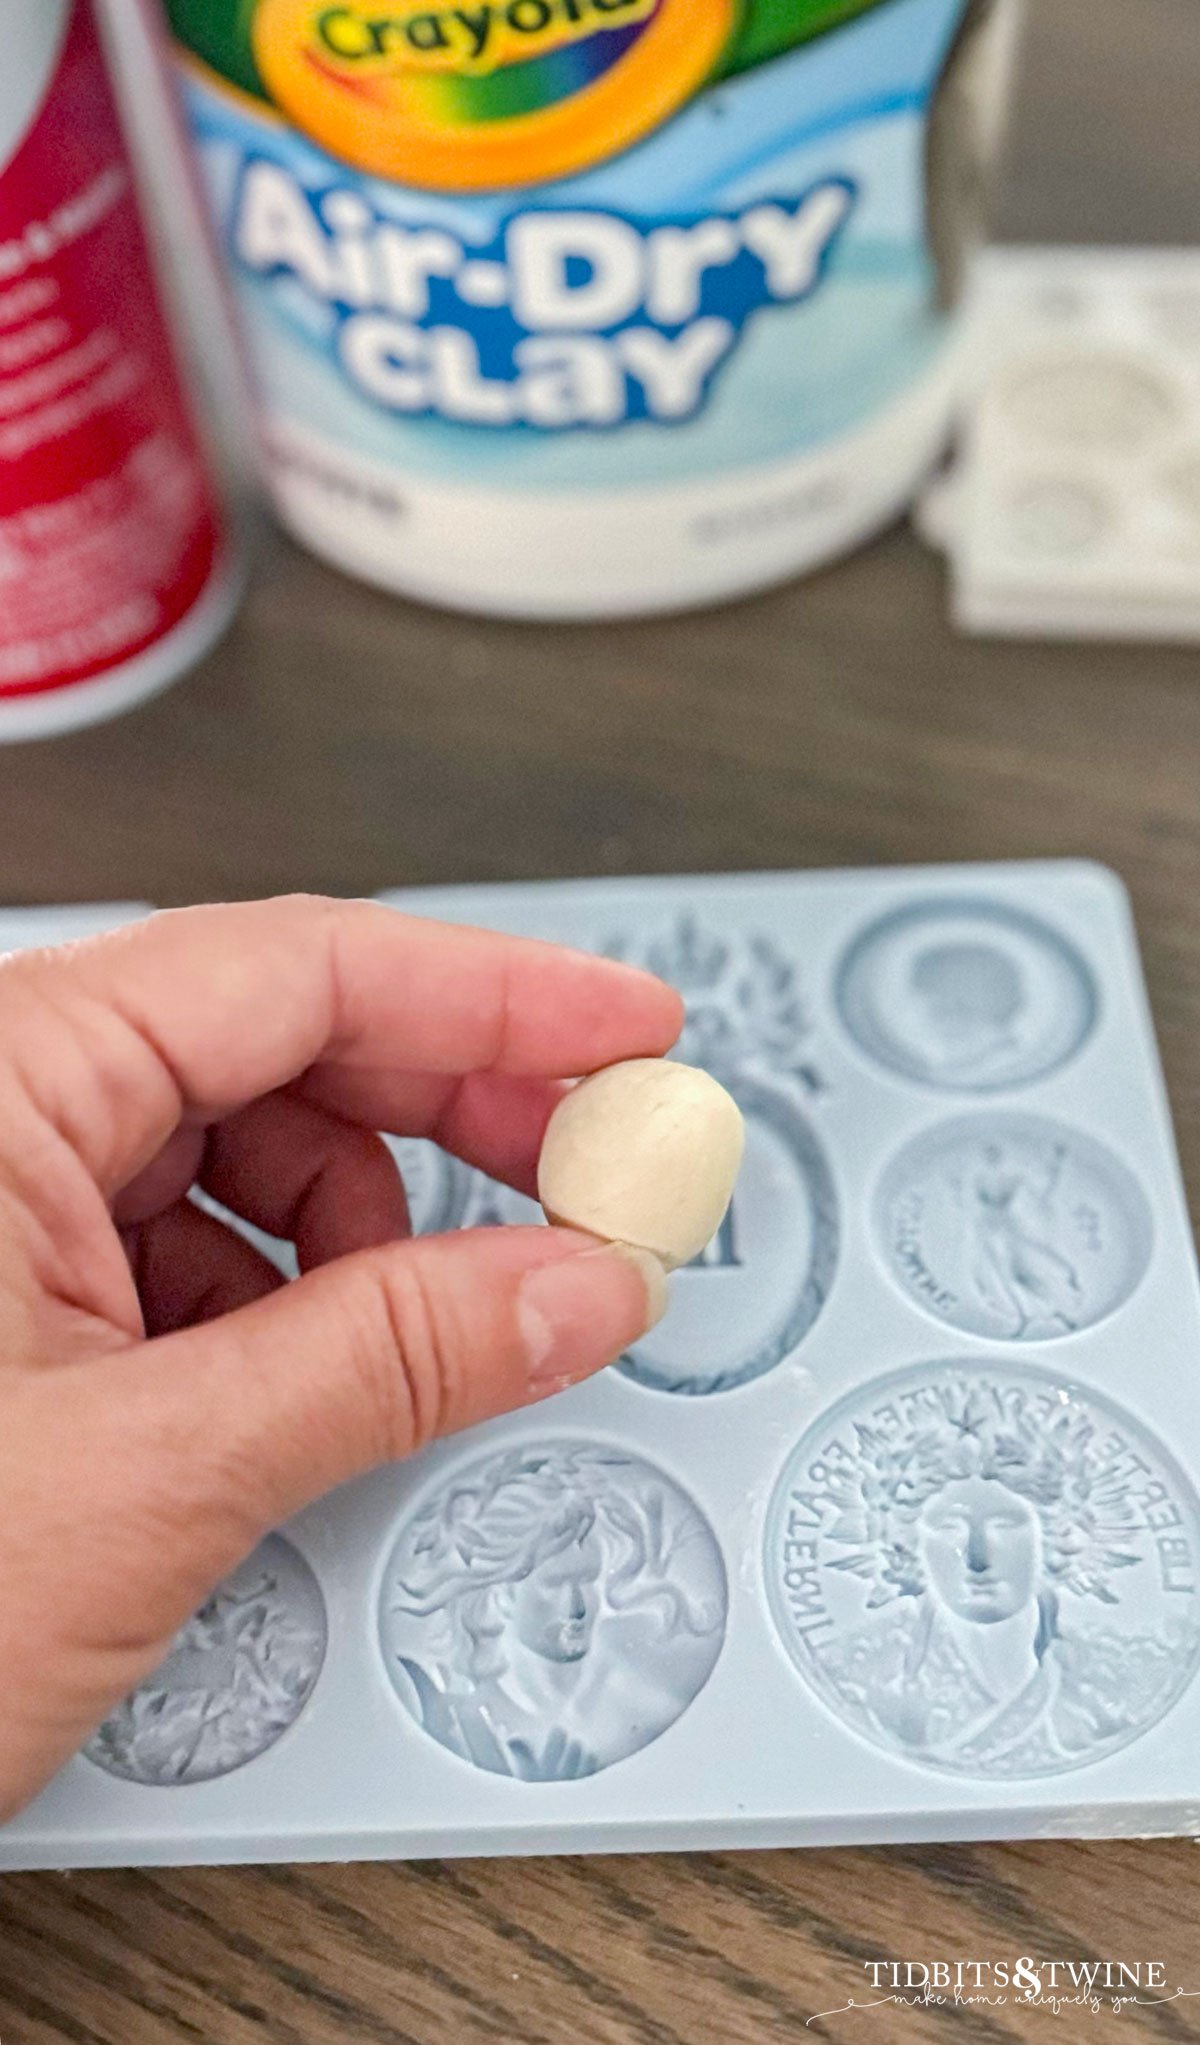
Take a small bit of clay and roll it into a smooth ball. Then press the ball down into your silicone mold. Press firmly and evenly.
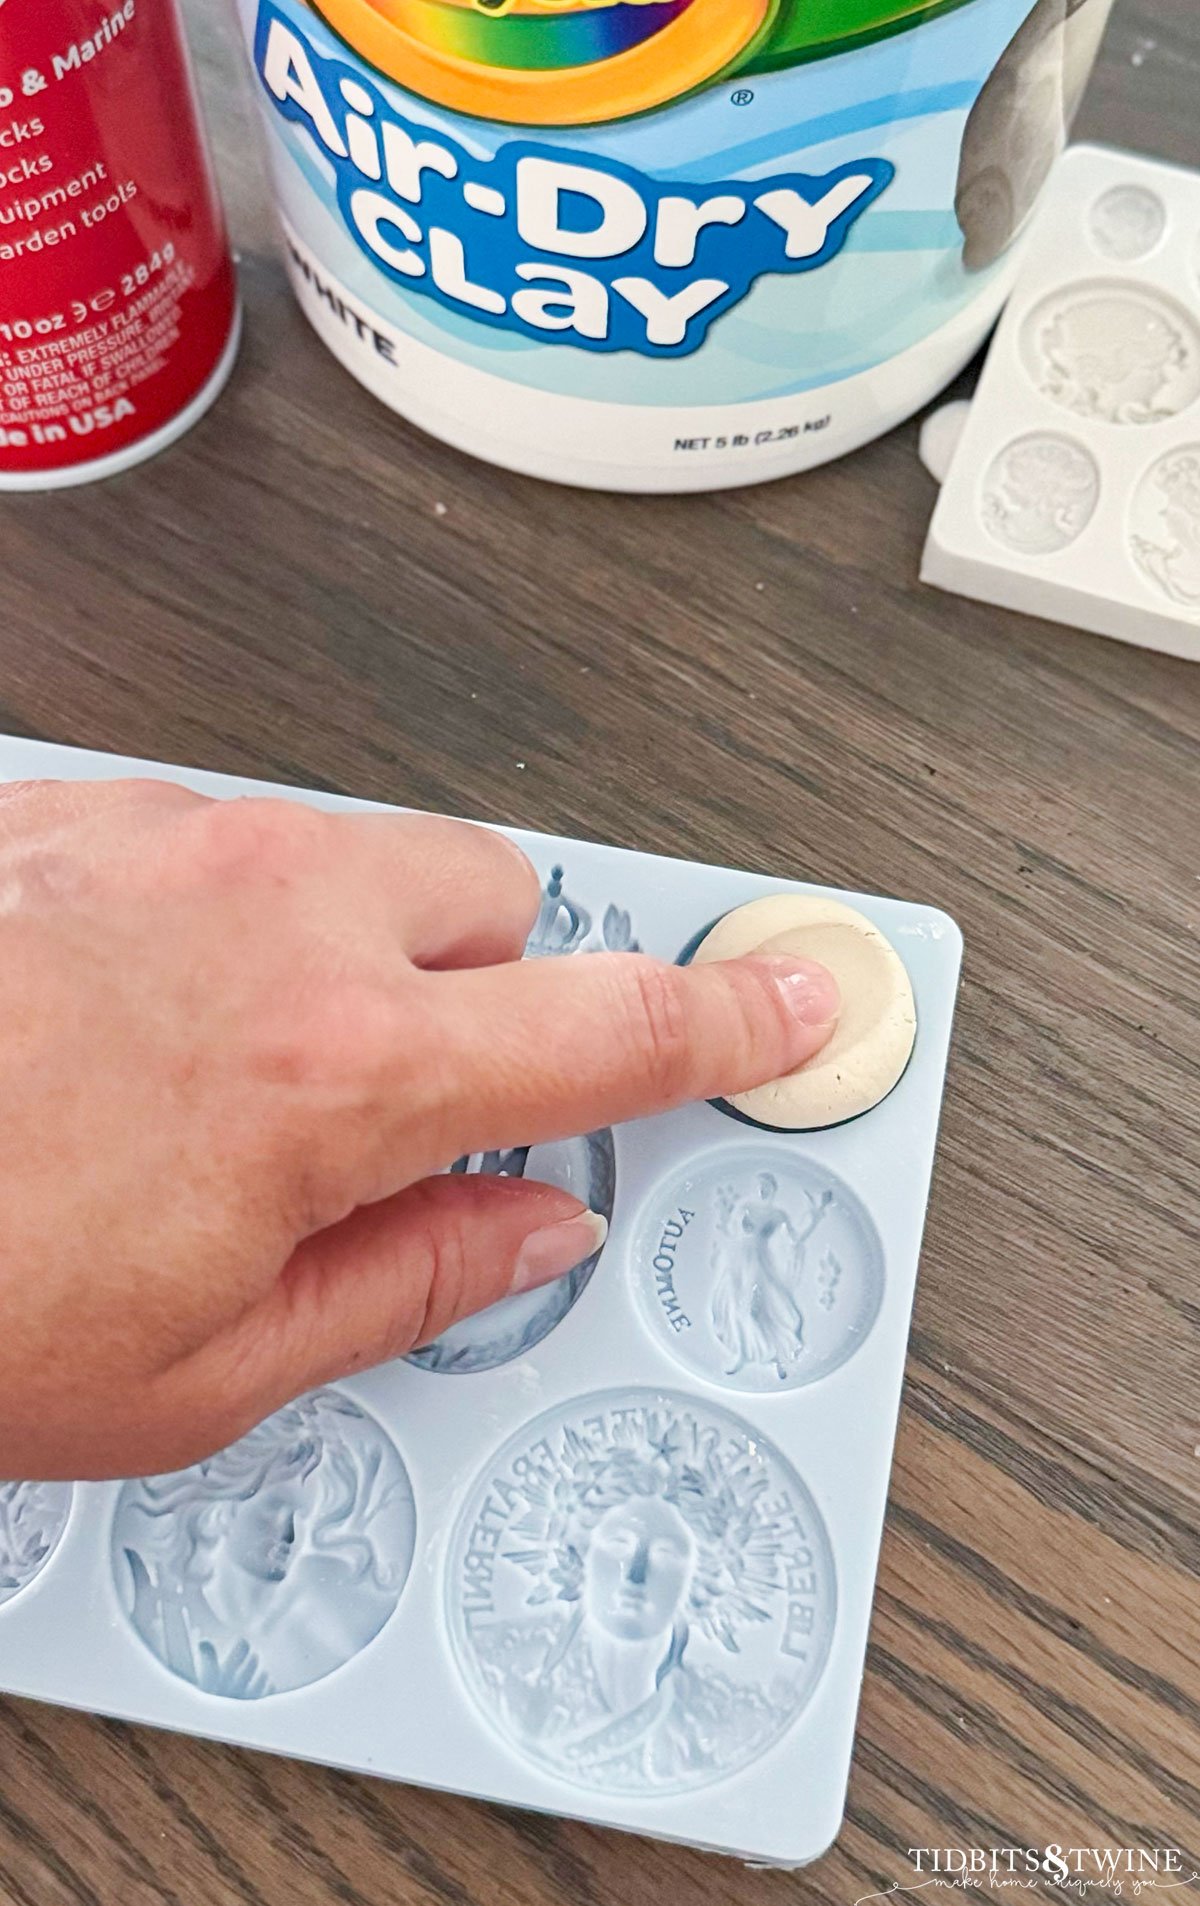
Step 3:
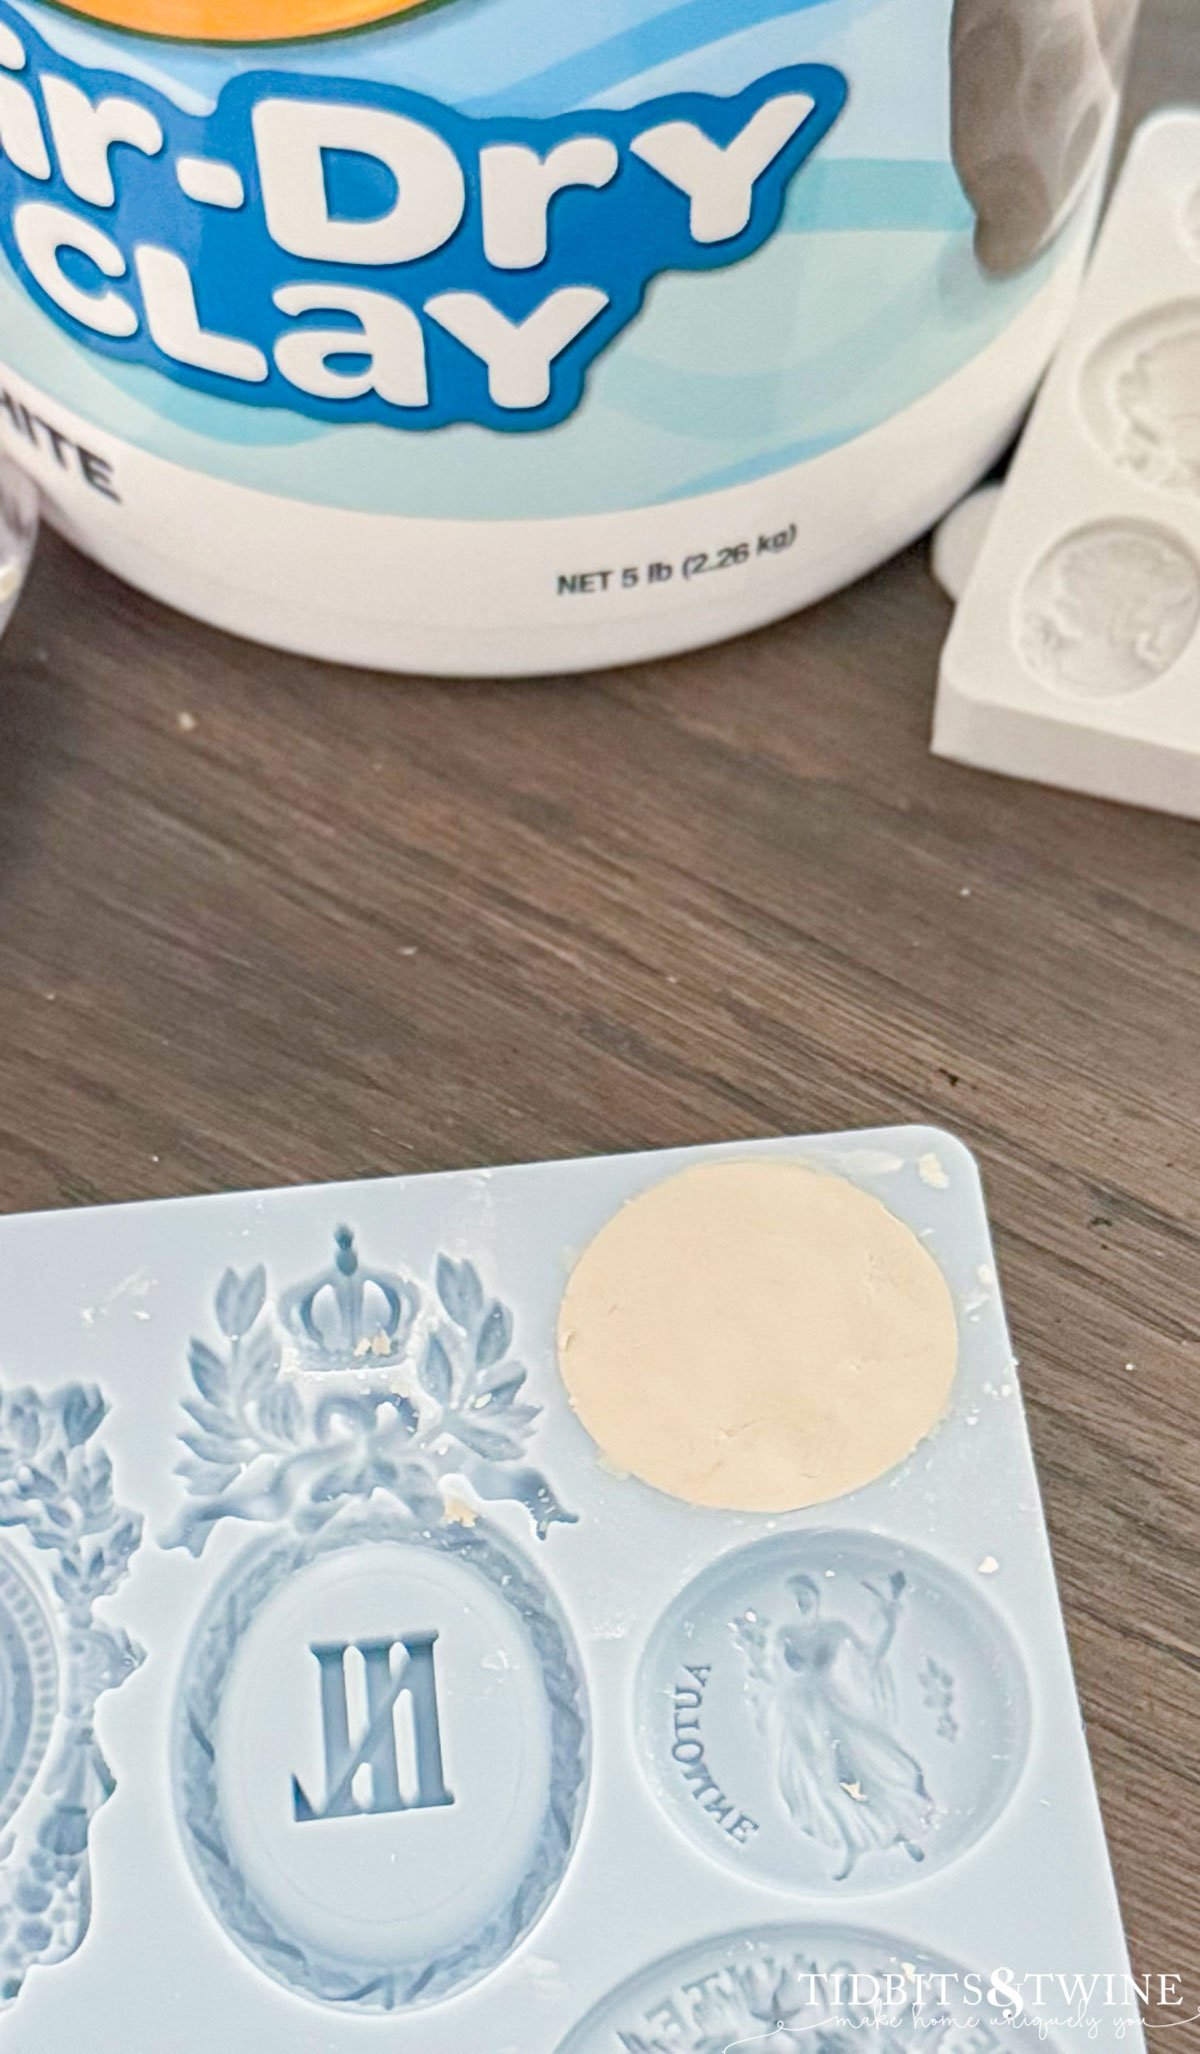
If you have too much clay and it's spilling out of the mold, first try to remove some by just pinching it out and saving it for later use. Once you've removed as much as you can, take the flat side of a dinner knife or any other sort of straight edge, and scrape off the excess so that you have clean edges.

Step 4:
Once you have a clean edge around your clay and all of the clay is within the mold shape, press firmly and evenly one last time to ensure everything is in place. Then just let it dry!
Step 5:
Once dry, the clay shrinks just a bit and you'll notice that it's popping up out of the mold. Mine only took about a day, but one of the larger, deeper ones took 2 days. Once dry, carefully pop your intaglio out of the silicone mold.
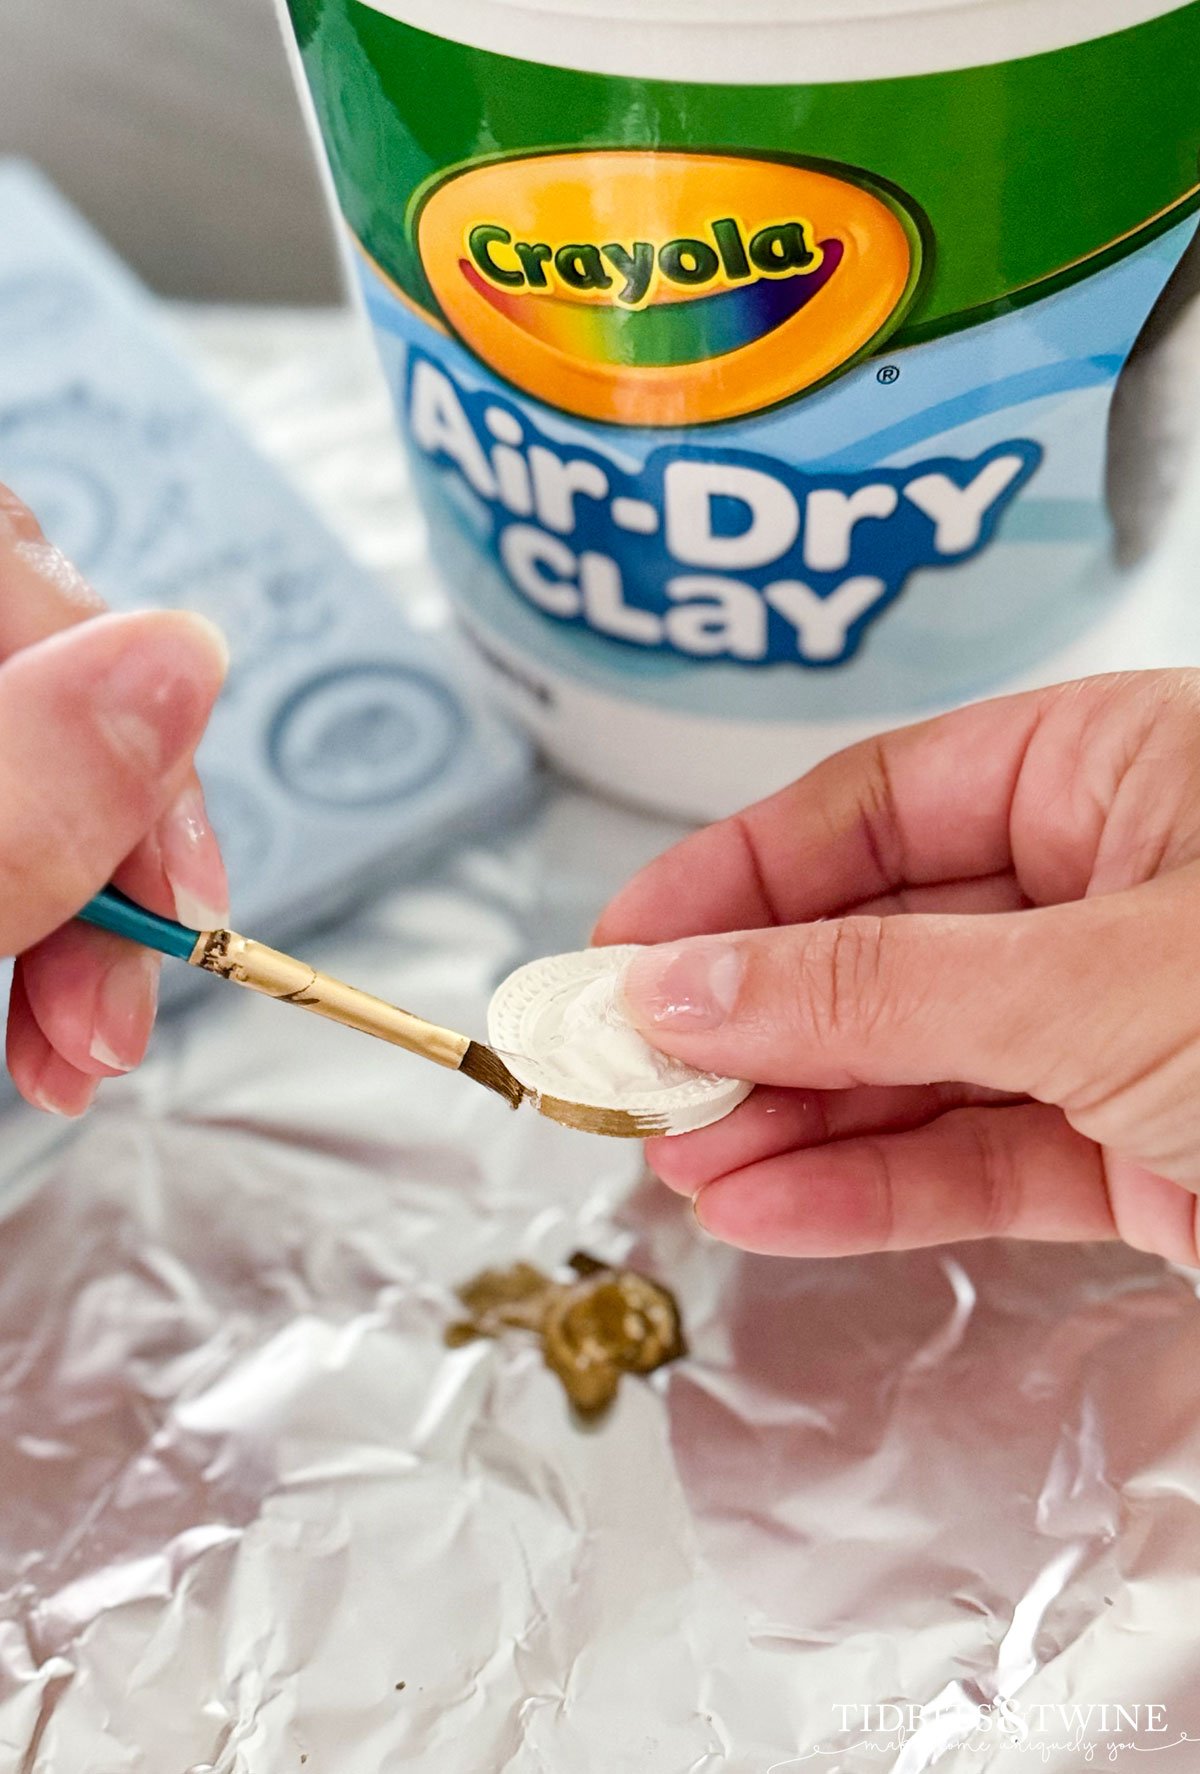
Step 6 (Optional):
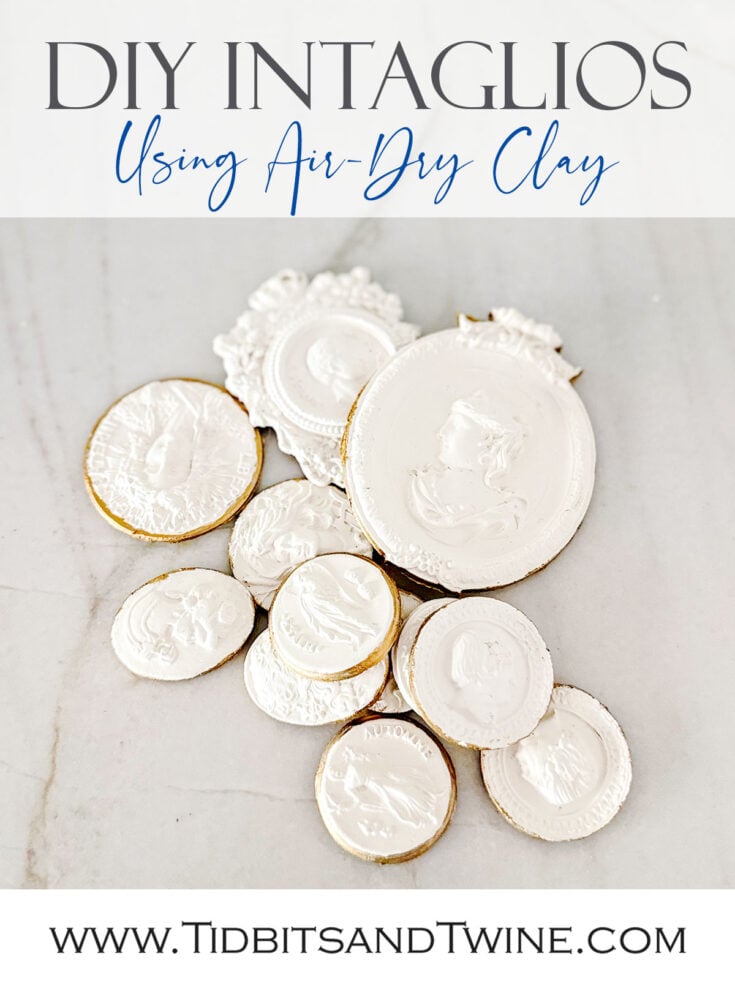
If you want gold edges like mine, you'll need some Rub N Buff in Gold Leaf and a small brush or Q-tip. Simply go around the edge of your intaglio with a bit of the gold and allow it to dry.
Step 7:
I had leftover wallpaper from my cabinet project, so I used wallpaper since it looks like grasscloth. Colored cardstock, fabric, wallpaper, and more would make a good backdrop for your intaglios.
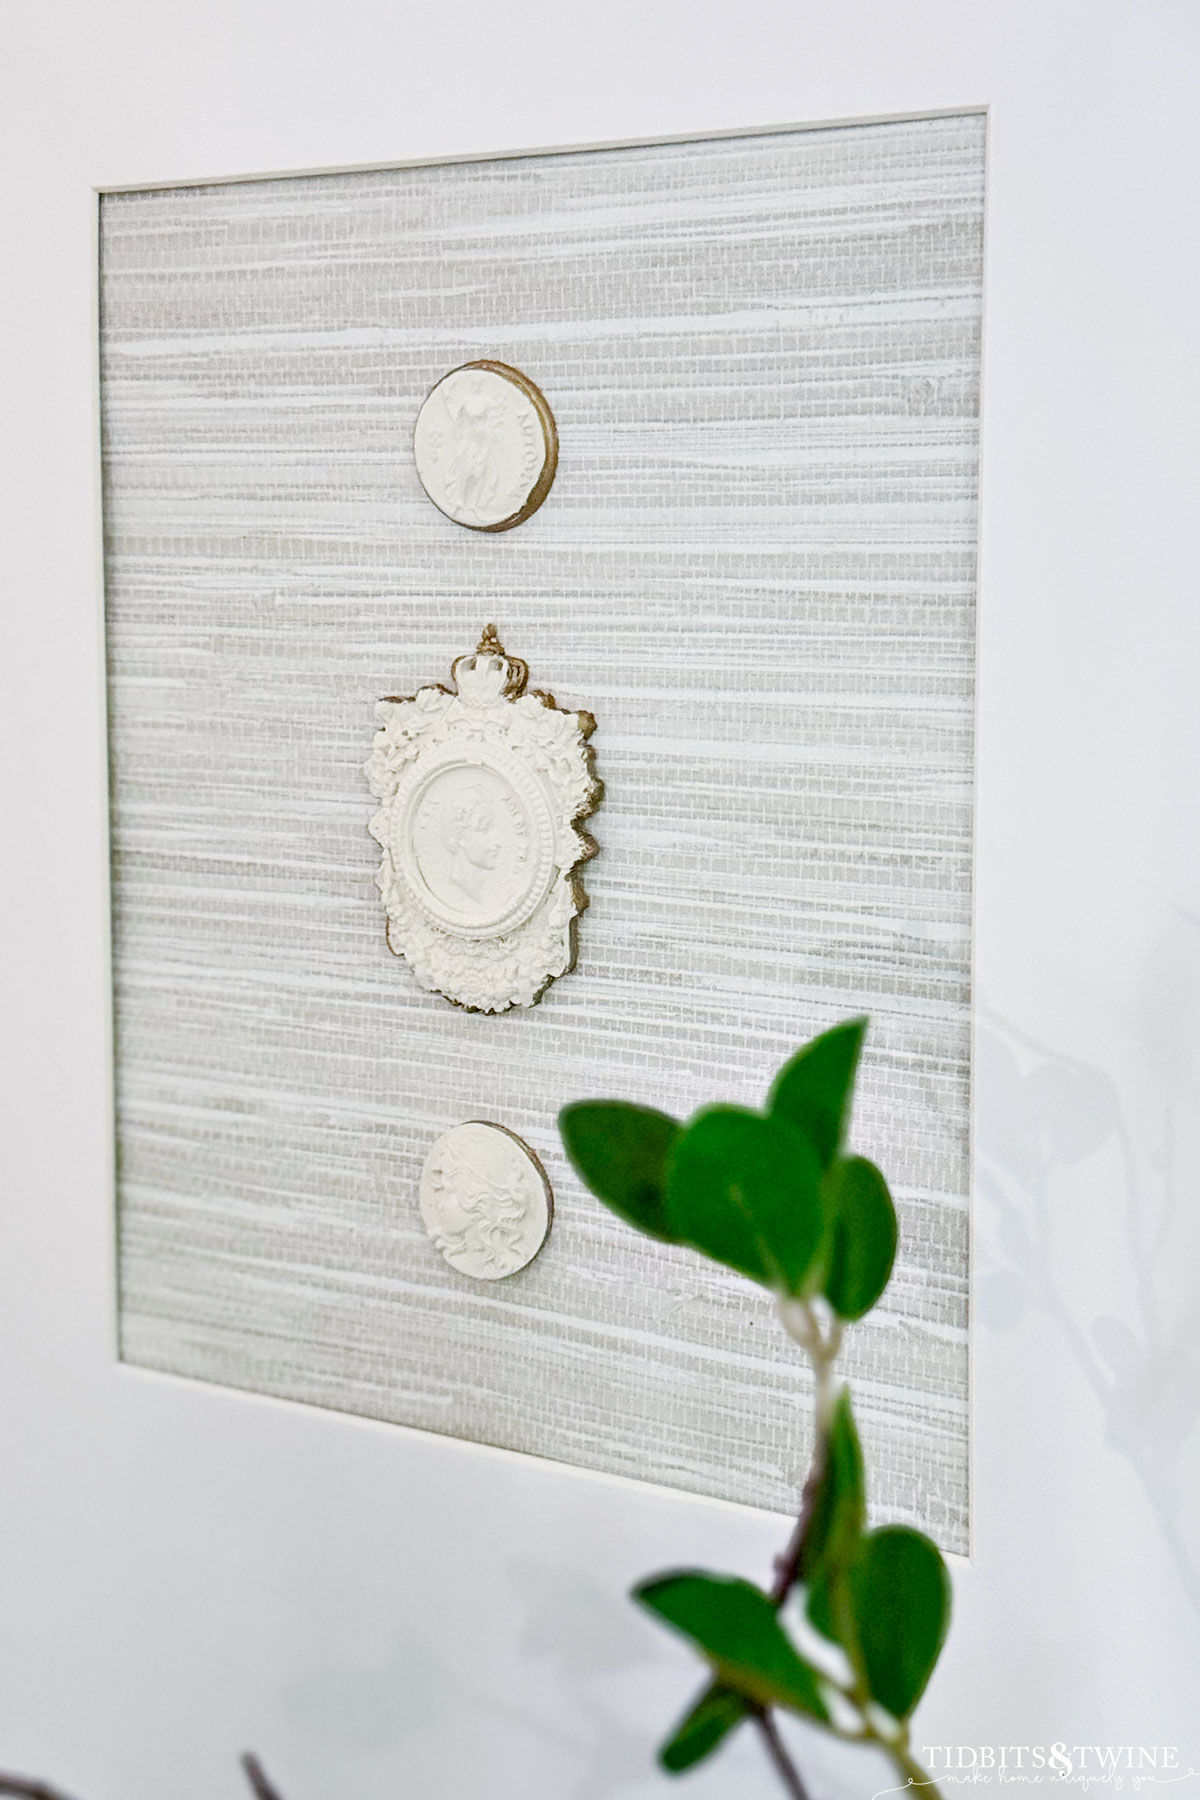
I cut my wallpaper slightly larger than my mat opening and taped it into place directly on the paper insert that came with the frames.
Step 8:
Glue your intaglios into place. I used Gorilla Glue but any type of fast-drying glue should work (not Elmers). Do NOT press them down because they will crack. Instead just let the weight of the intaglio hold it in place until the glue dries.
That's it! Then you're ready to hang.
Notes
1. If your mold has very narrow parts or small openings, you might want to leave extra clay on the backside; otherwise, when the clay dries and shrinks, these small connects get very delicate and are almost impossible to keep from breaking!
2. Try to make the back as flat and smooth as possible so that your intaglio sits flat in the frame.
3. Don't worry if they aren't perfect! They're supposed to look old anyway, right?!
4. I varied my gold edging: some stayed only on the outer edge and some I had come up over the face just a bit. I liked the variety and some of the molds didn't have as thick of an edge as others so it was hard for me to stay on the edge.
5. Crayola Air-Dray clay says that it's white, but it's really more off-white
6. I found that it was easiest to scrape from the middle outward, rather than top to bottom or side to side. If your clay pulls away from the mold, simply press it back into place.
7. Rolling the clay into a ball helps to ensure that the surface is perfectly smooth when it takes shape in the mold. If you press bits of clay down one at a time, you'll end up with a cracked-looking surface once dried.
Recommended Products
As an Amazon Associate and member of other affiliate programs, I earn from qualifying purchases.
-
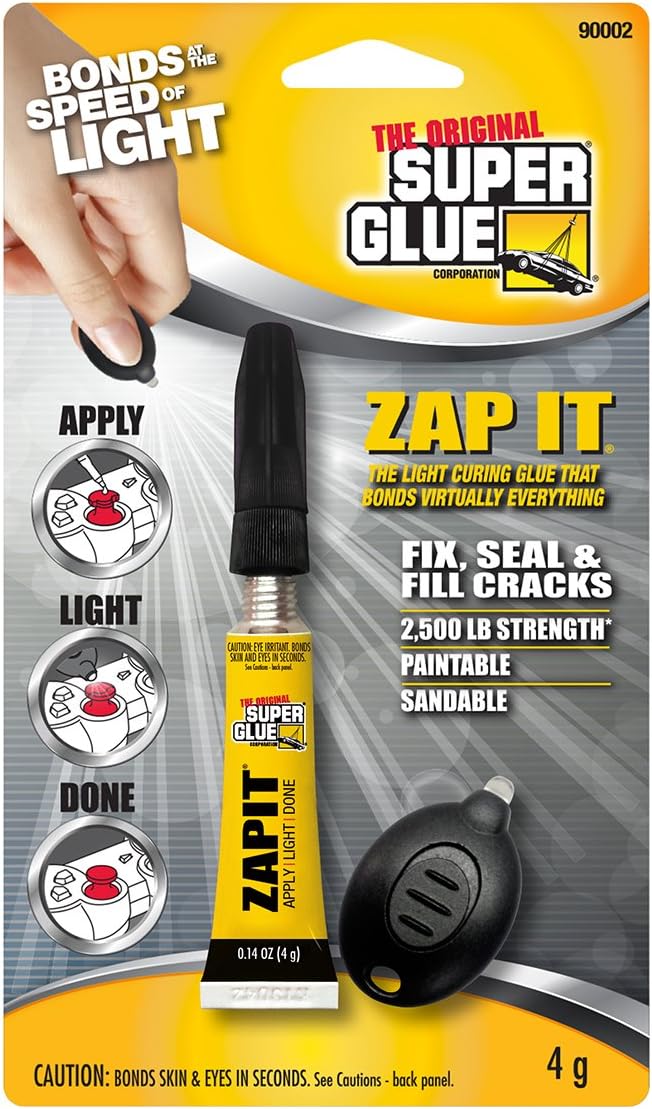 Super Glue - ZAPIT - Light Curing Adhesive - 4 Gram Tube
 -
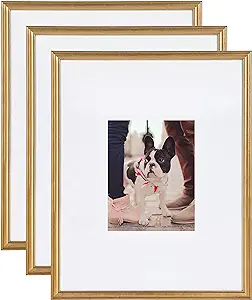 Kate and Laurel Adlynn Wall Picture Frame Set, 16" x 20" matted to 8" x 10", Gold, Set of 3
 -
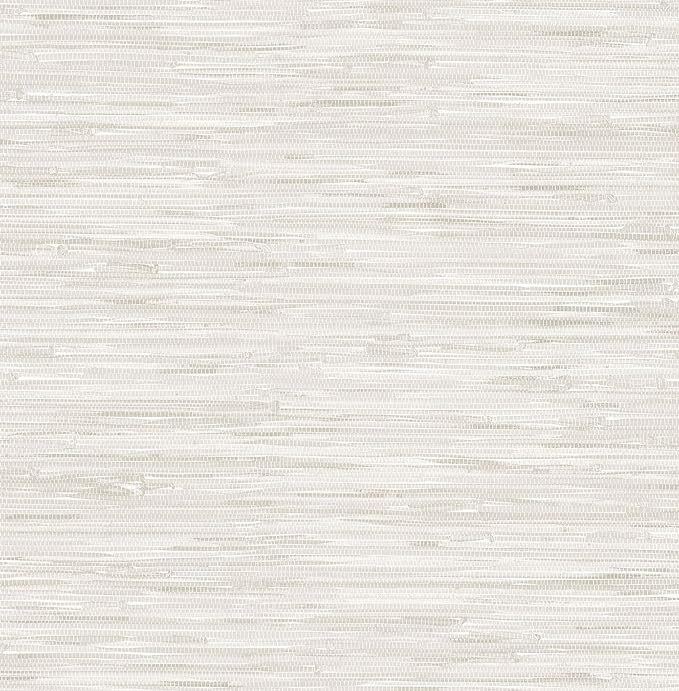 NuWallpaper NUS2875 Cream Grassweave Peel & Stick Wallpaper, Neutral
 -
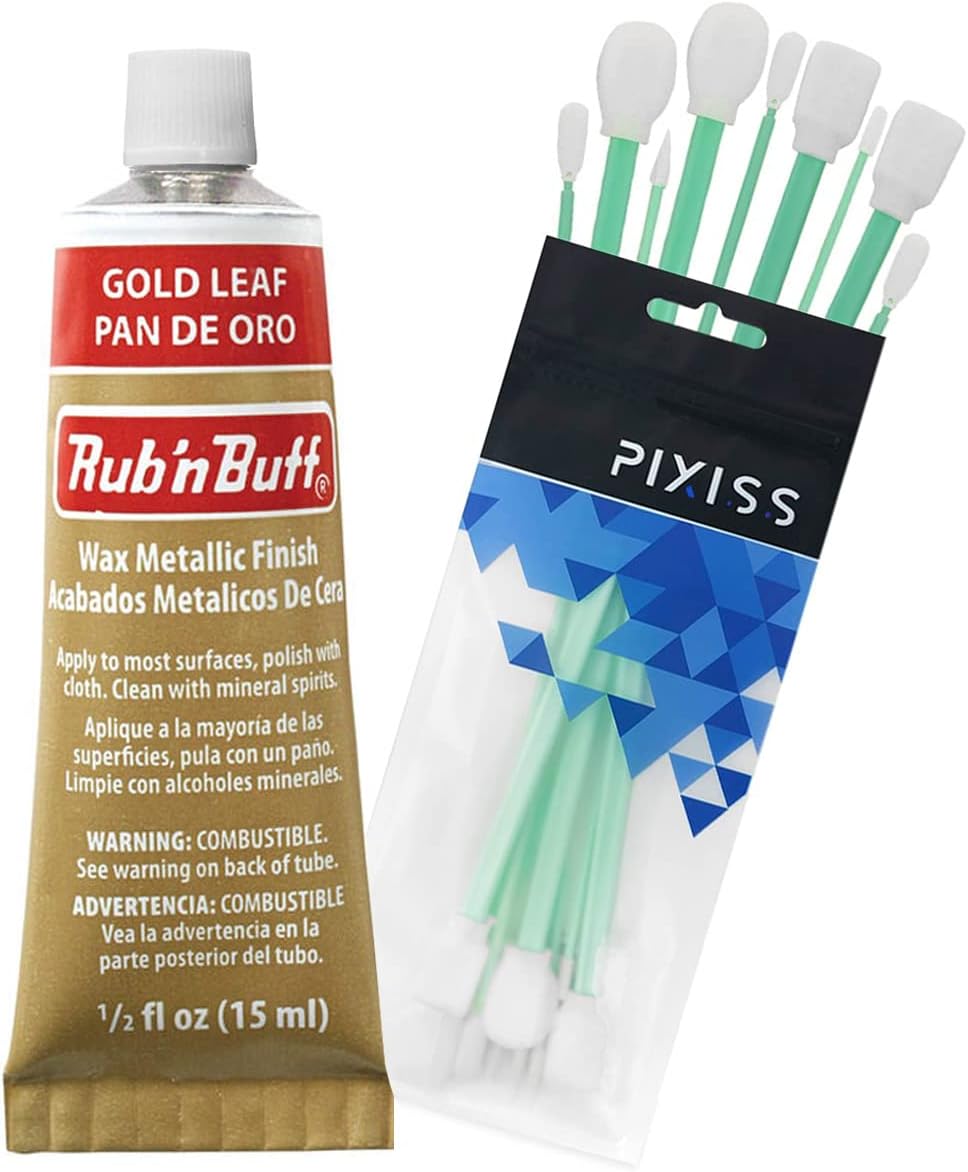 Rub and Buff FinishWax Metallic Gold Leaf, 0.5-Fluid Ounce, Pixiss Blending and Application Tools...
 -
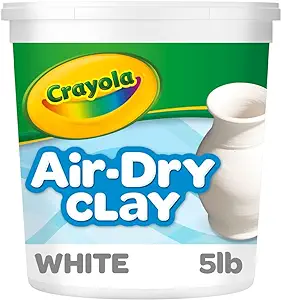 Crayola Air Dry Clay (5lb Bucket), Natural White Modeling Clay for Kids, Sculpting Material, Craf...
 -
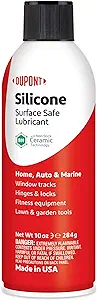 DuPont Silicone Lubricant with Teflon Fluoro Polymer
 -
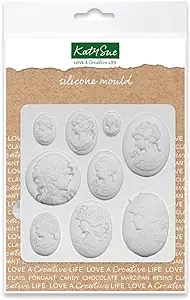 Katy Sue Cameo Collection Silicone Mold for Cake Decorating & Craft - Makes 9 Cameo Face Silhouet...
 -
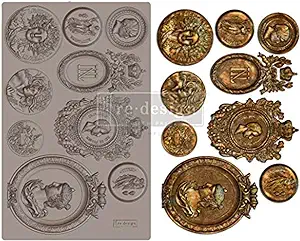 Prima Marketing Redesign Mould 5X8 FI, Ancient Findings
And if you’re wondering how the bar area came out, here’s my mockup (on the left) compared to what I have now! You can see I’m still testing out hardware for the cabinets and I don’t have the gallery rails for the shelves, but it’s getting there!
More Decorating Ideas
- Designer Secret: European Gold Rub n Buff – The Look of Antique Brass
- 7 HomeGoods Secrets Only Expert Shoppers Know & 1 Thing They NEVER Do
- Best Traditional Brass Wall Sconces
- The Best Fandeliers to Beat the Heat (And Still Look Beautiful)

Join the Community
Let’s keep in touch! Get exclusive artwork plus the latest news delivered directly to your Inbox!
These are very beautiful but one suggestion is to be more upfront about the costs. You said you made these for less than $40 but your picture frames alone would’ve cost you $120 based on the products you linked.
These turned out GREAT!! I’m always into “ the look for less”!!