Looking to create a chippy, antique paint finish? Here’s a full tutorial to create an aged paint look, including pictures and videos.
Ever since I first bought my 200+ year old Mora clock, I’ve had in the back of my mind that someday, I might paint it. Well, that day has come.
Was it a good idea to paint a valuable antique?
Well, that depends on who you ask I suppose.
For me and my home, it was a great idea! Although admittedly, I had a few “what have I done?!” moments. But I’m happy with how it turned out so it’s all good now.
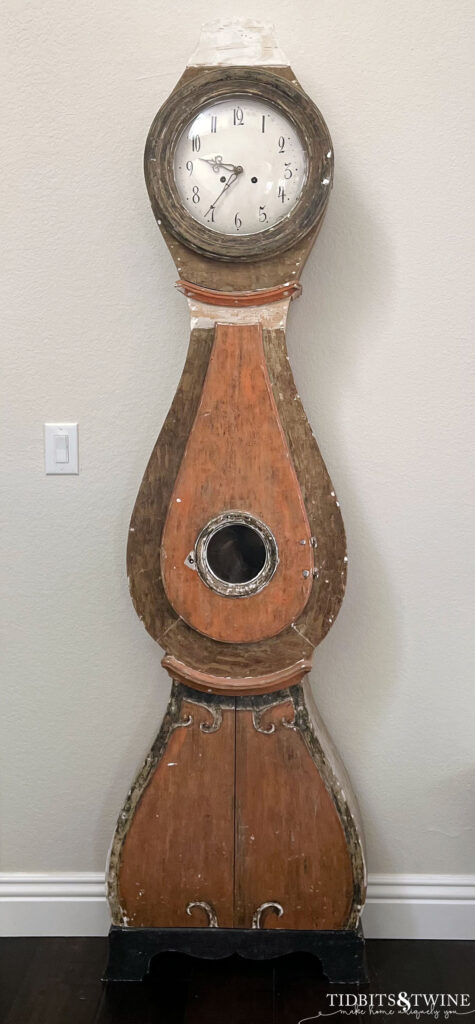
If you’re not sure what a Mora clock is, you can read all about them in my Guide to Mora Clocks. I found this one at Alameda Point being sold by Marina Natalia. I was in love with the shape! But the orange color? Well, not so much.

I went back and forth many times about what color to paint over the orange. A soft gray-blue was at the top of my list for a long time, but ultimately, I played it safe and decided to stick with neutrals.
But wait! There’s more!
Choosing My Paint
I was originally going to just use a combination of waxes to age the look of the new paint I was going to apply. But I later decided that I should try to give it a chippy finish to match the rest of the clock.
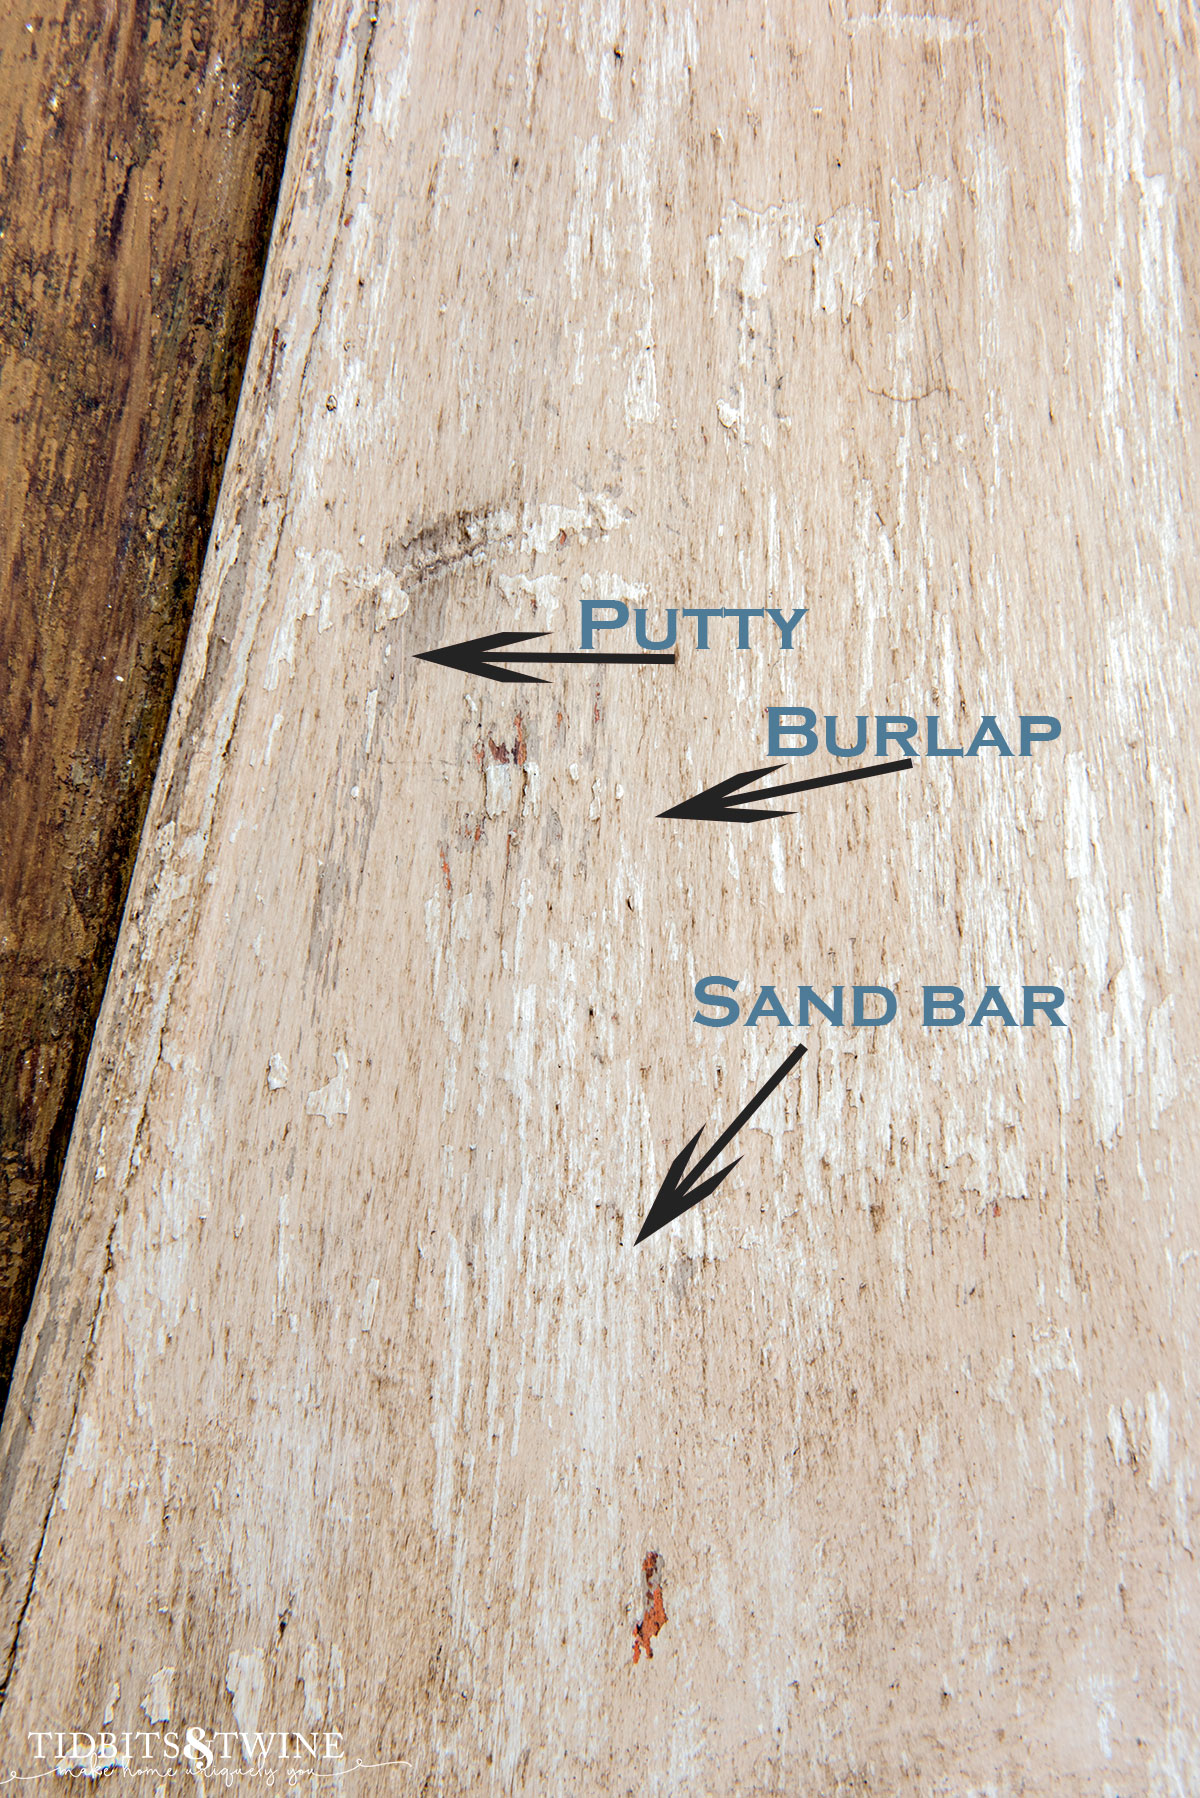
Every brand of chalk paint I’ve used can be wet distressed. But so far, I’ve only found that Dixie Belle distresses in a way that looks like a chippy finish. So, I decided to choose from only the Dixie Belle color palette for this project.
Now admittedly, this looks like a big project and there are a lot of steps. But don’t be discouraged! Each step takes just minutes so it’s actually easy-peasey!
Before & After
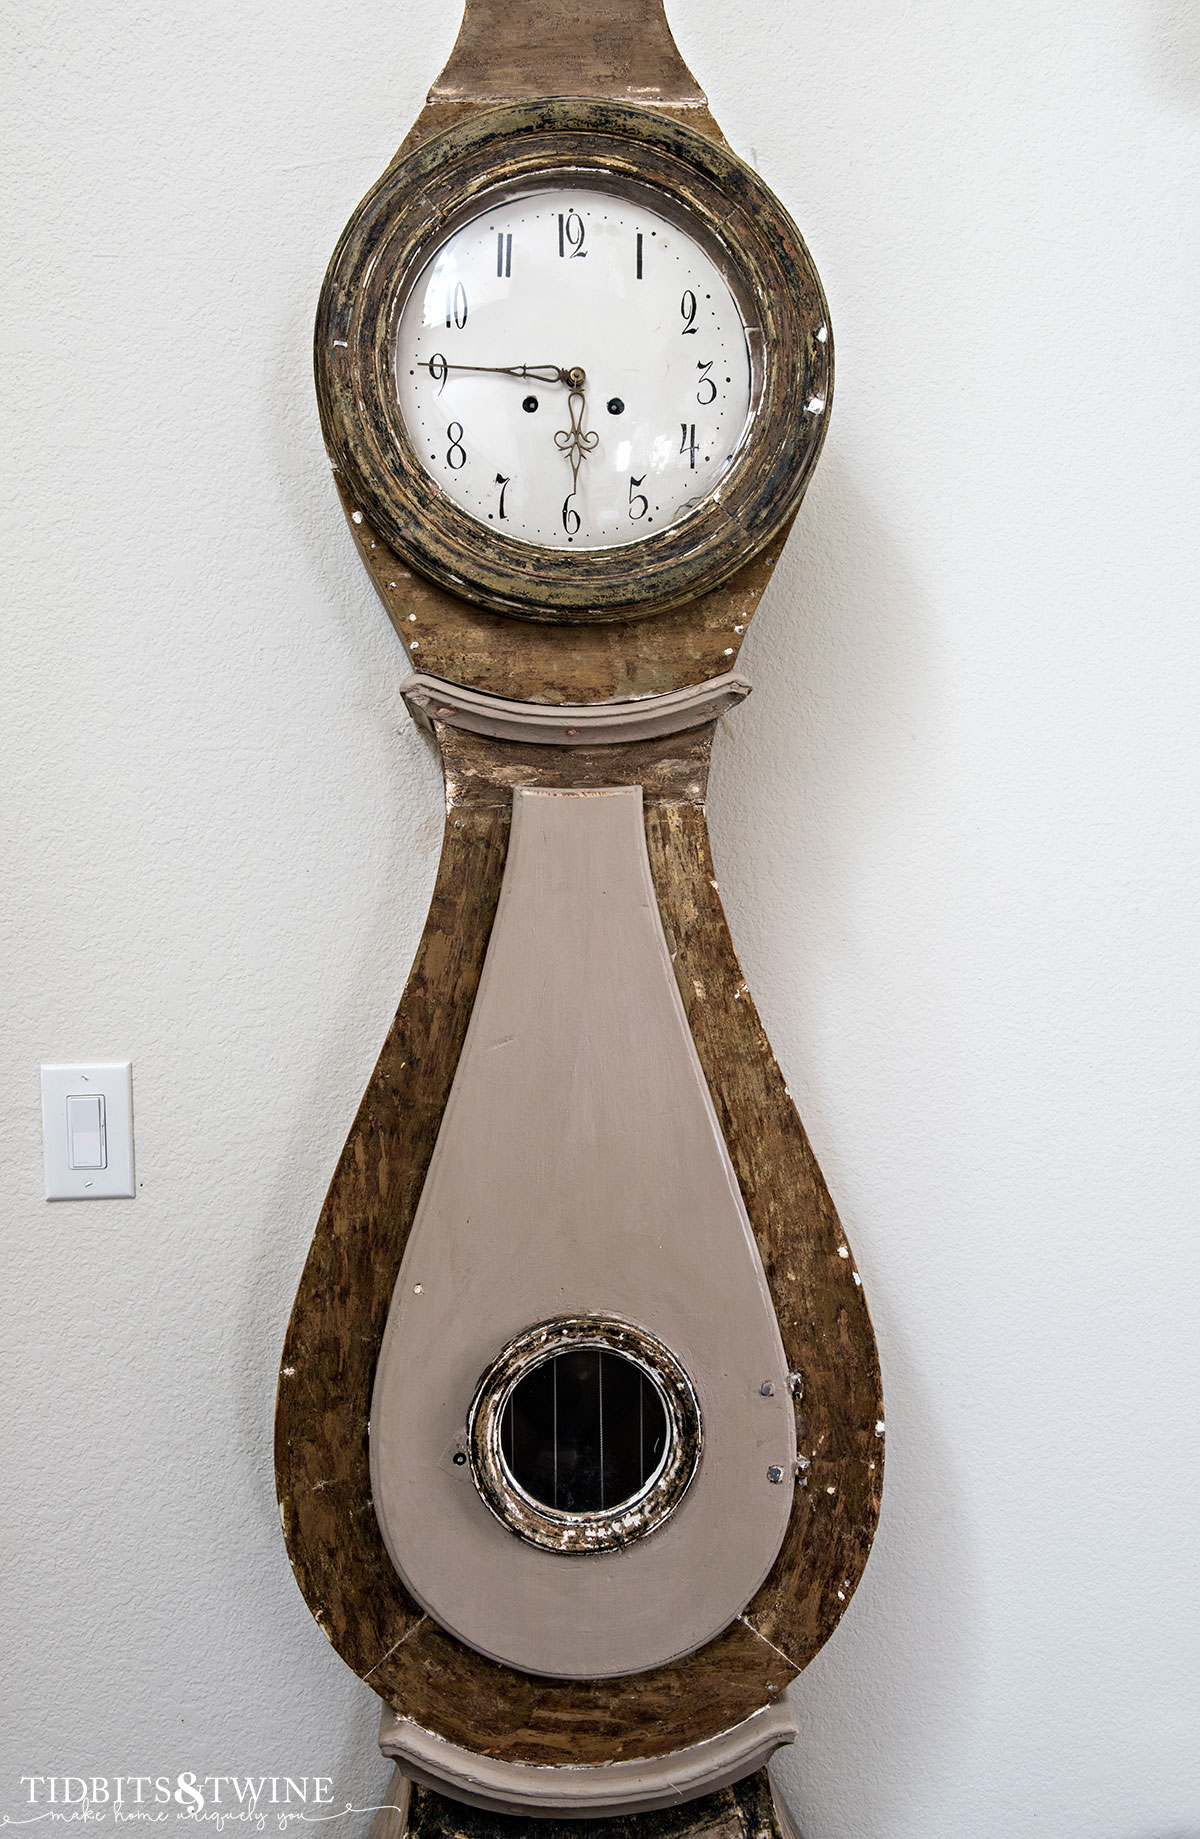
Here’s a side-by-side comparison of the Before and After. Originally, it had orange accents and one section that was missing paint. The top was also white and didn’t appear to be original.
Supplies
You can see my color choices below, but you can choose any 3 shades you want, for example, light gray to dark gray or various shades of blue. I stuck with neutrals.
- Lint-free cloths (mine are similar to these)
- Dixie Belle Putty
- Dixie Belle Burlap
- Dixie Belle Sandbar
- Annie Sloan Clear Wax (I purchase mine online from The Purple Painted Lady)
- Annie Sloan Clear Wax
- Annie Sloan Black Wax
- Wax Brushes
- Paint Brushes (I used foam brushes out of convenience)
Step 1
Apply Clear Wax over the area that you want to paint. This is not necessary unless you want to help protect your original surface.
In the case of my Mora clock, I wanted to try and preserve the value of the original paint and so tried my best to protect the orange before painting it in case my paint job ever needed to be removed. (Although in all honesty, I’m not entirely sure the orange paint was original to the clock…)
Allow the wax to dry before proceeding to Step 2.
Step 3
Seal the first color with a coat of Clear Wax. This step is to try and keep the distressing in future steps from going all the way through to the orange. The wax sort-of acts as a barrier.
Step 4
Apply a single coat of Dixie Belle Burlap.
Step 7
Before the Clear Wax dries, add Dark Wax to the piece. A little goes a long way so after putting Dark Wax on your brush, always blot on a clean cloth before applying! You can always add more, but it’s hard to remove once applied.
Step 8
If desired, add a bit of Black Wax. Because my Mora clock already had areas with black paint, I thought a few areas of Black Wax worked. Unlike the Dark Wax which I used to cover the entire painted area, I only applied the Black Wax in select areas.
Step 9
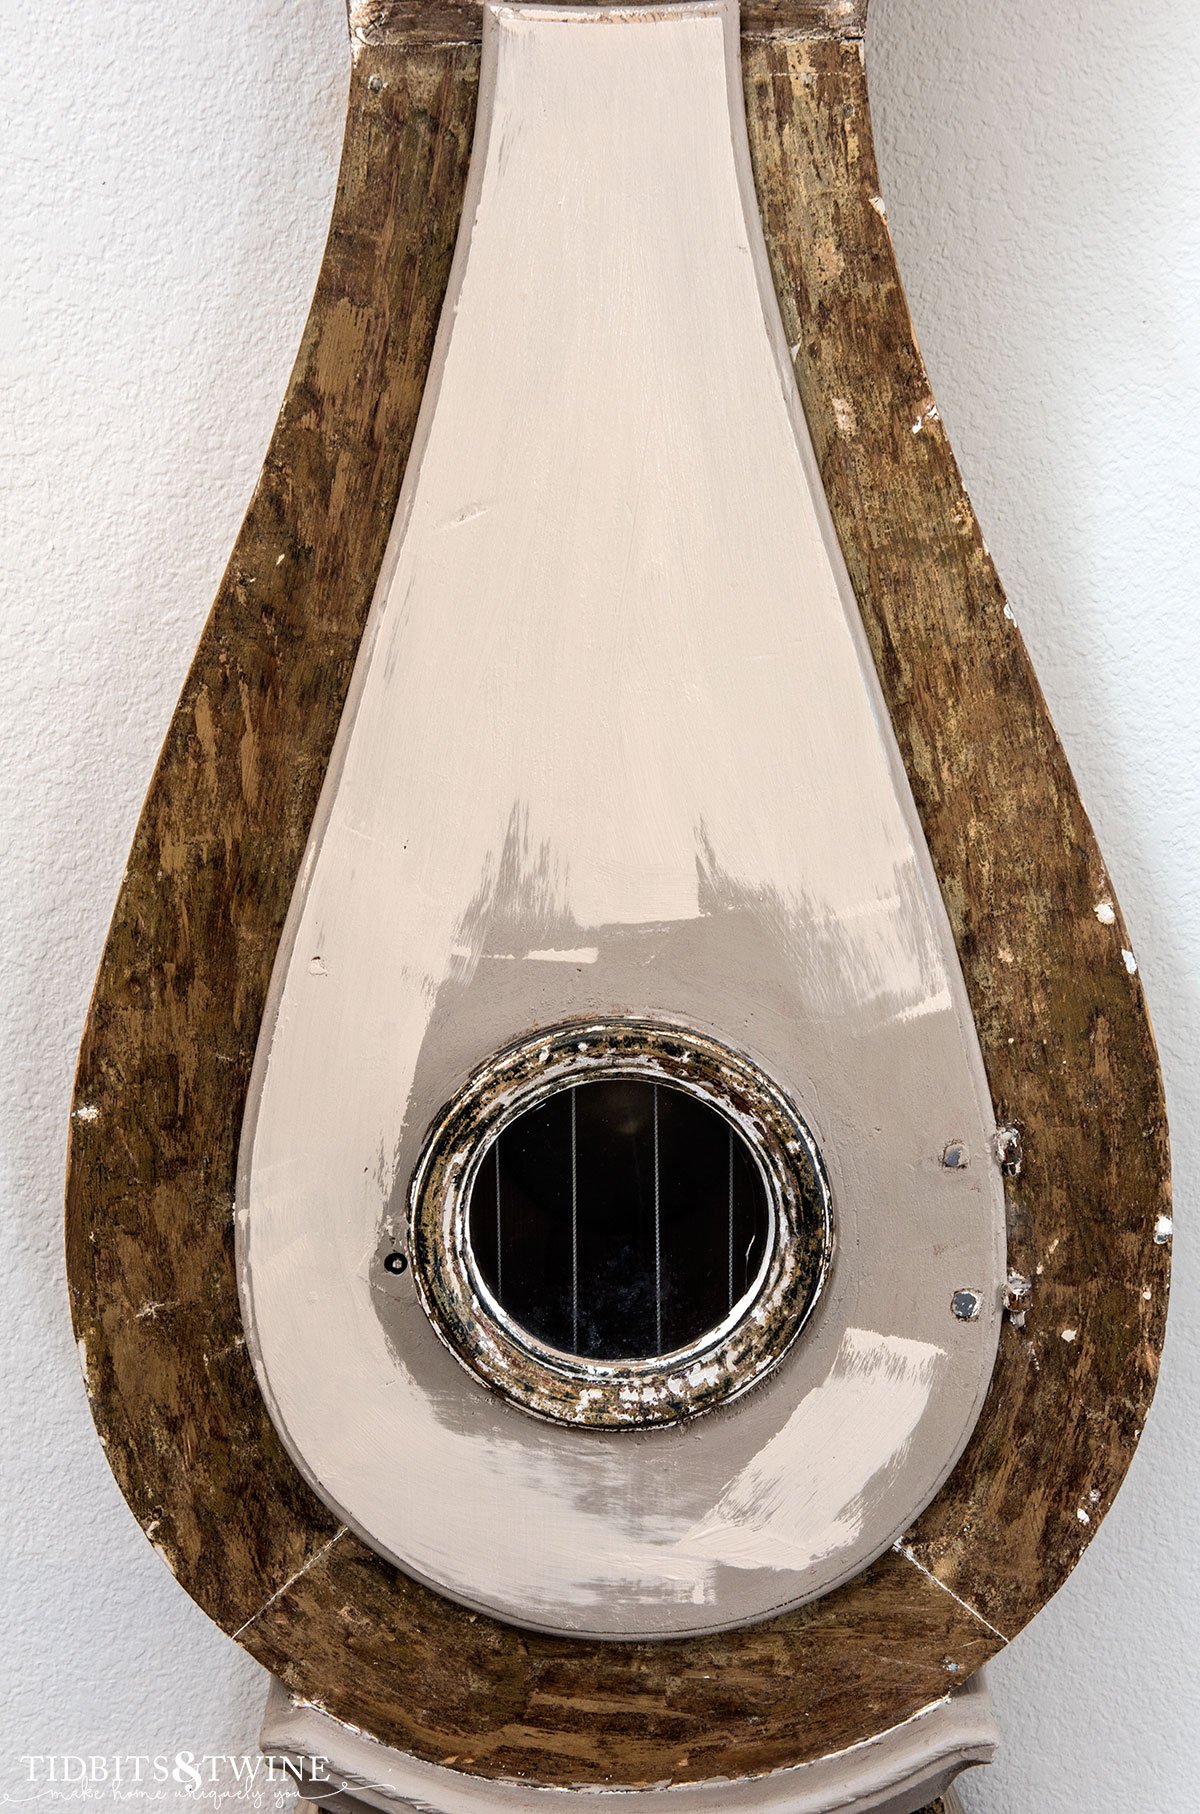
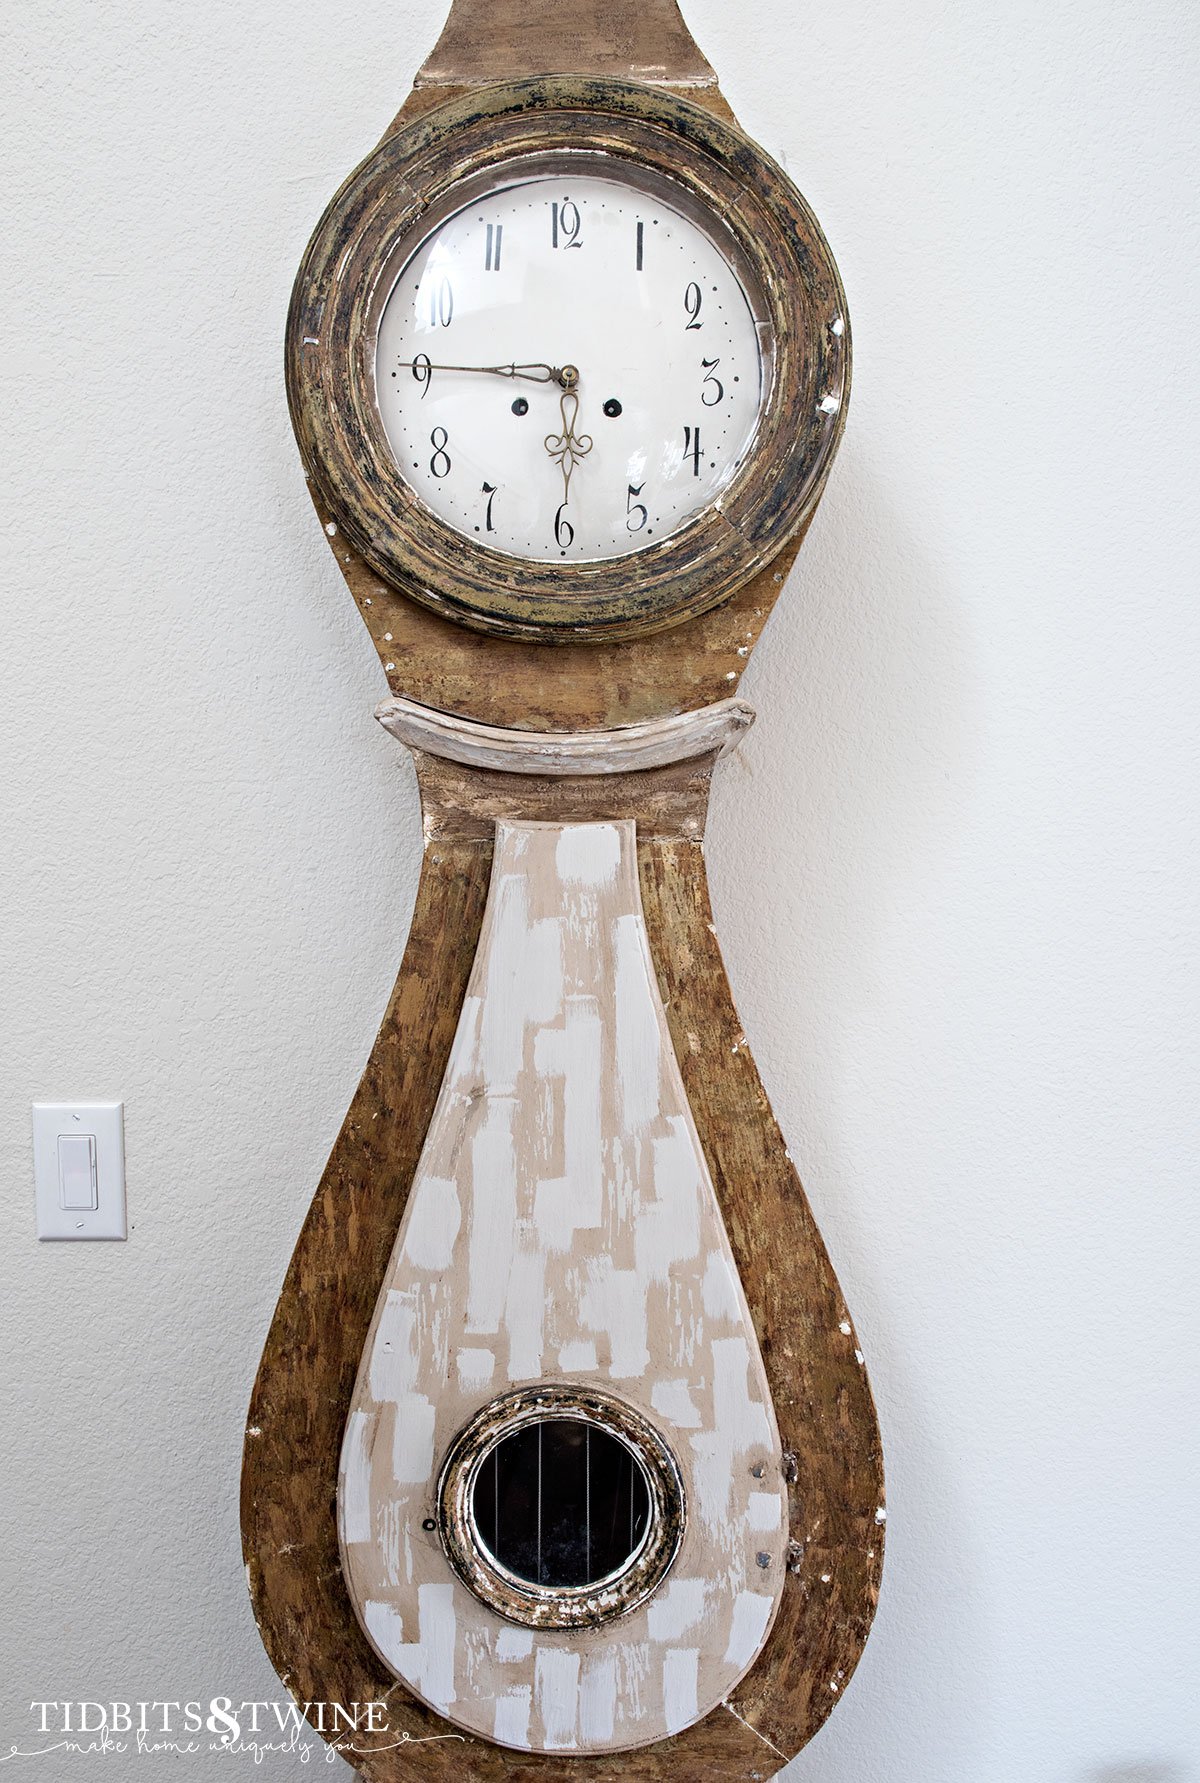
This is the scary part. Now that you’ve distressed and waxed your piece, cover it with your lightest color paint, Dixie Belle Sandbar in my case! I didn’t cover everything, but probably 90%. Apply in the direction of the woodgrain, or what you’d imagine the grain to be if your piece isn’t made of wood. I applied the paint vertically so that it went on the same way that I’m going to take it off in the next step.
If your paint application is somewhat thin, you won’t quite get the chippy finish required for this look. Maybe sure that your paint application is solid, not translucent.
Step 10
If you wait a couple of hours and then wet distress, the paint will smear off. I did that in a couple of spots to use as highlights. But for the majority, give the paint at least a day to dry.
Once dry, take your damp rag and rub vertically. The light color will start to sort-of peel off. Because you’ve waxed the surfaces below, most areas won’t distress further than one layer.
Depending how thick your top layer of paint is, though, you might have to press pretty hard to wear away your top layer of paint. In those cases, you might wear back to other layers. I was completely fine with that and even allowed the distressing to go back to the original orange in a few spots!
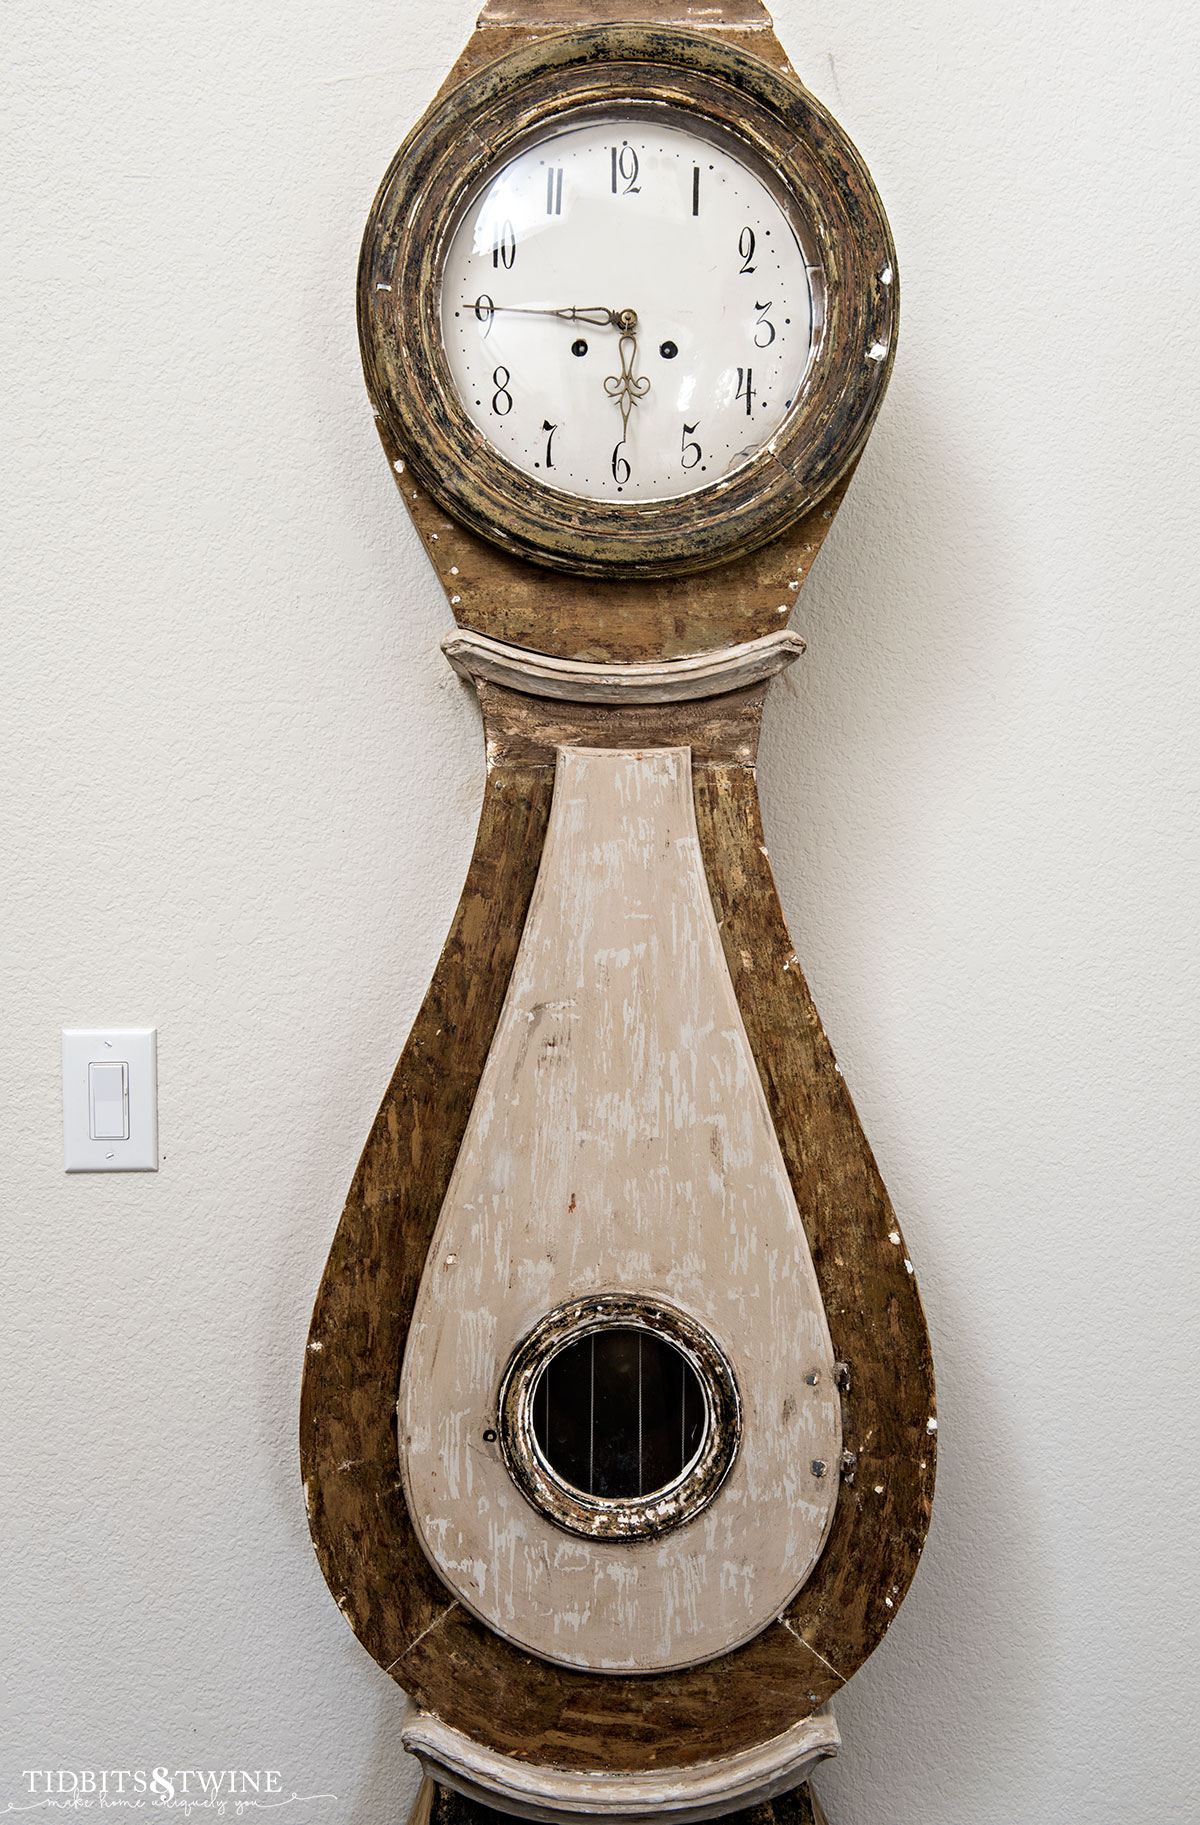
Here’s a short video showing how to wet distress to create the chippy layered paint look!
Step 11
Time to wax again! Apply a layer of Clear Wax to seal your latest creation. Do not let it dry entirely before proceeding to Step 12.
Step 12
Apply Dark Wax
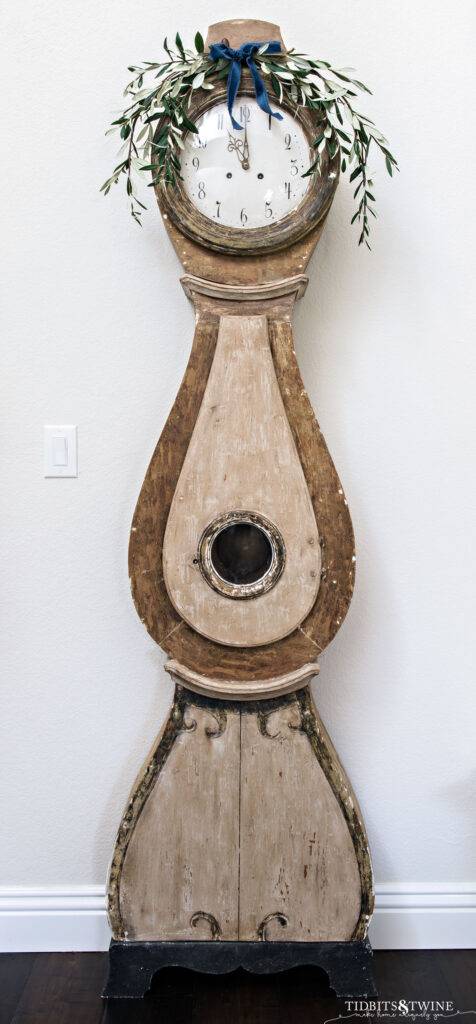
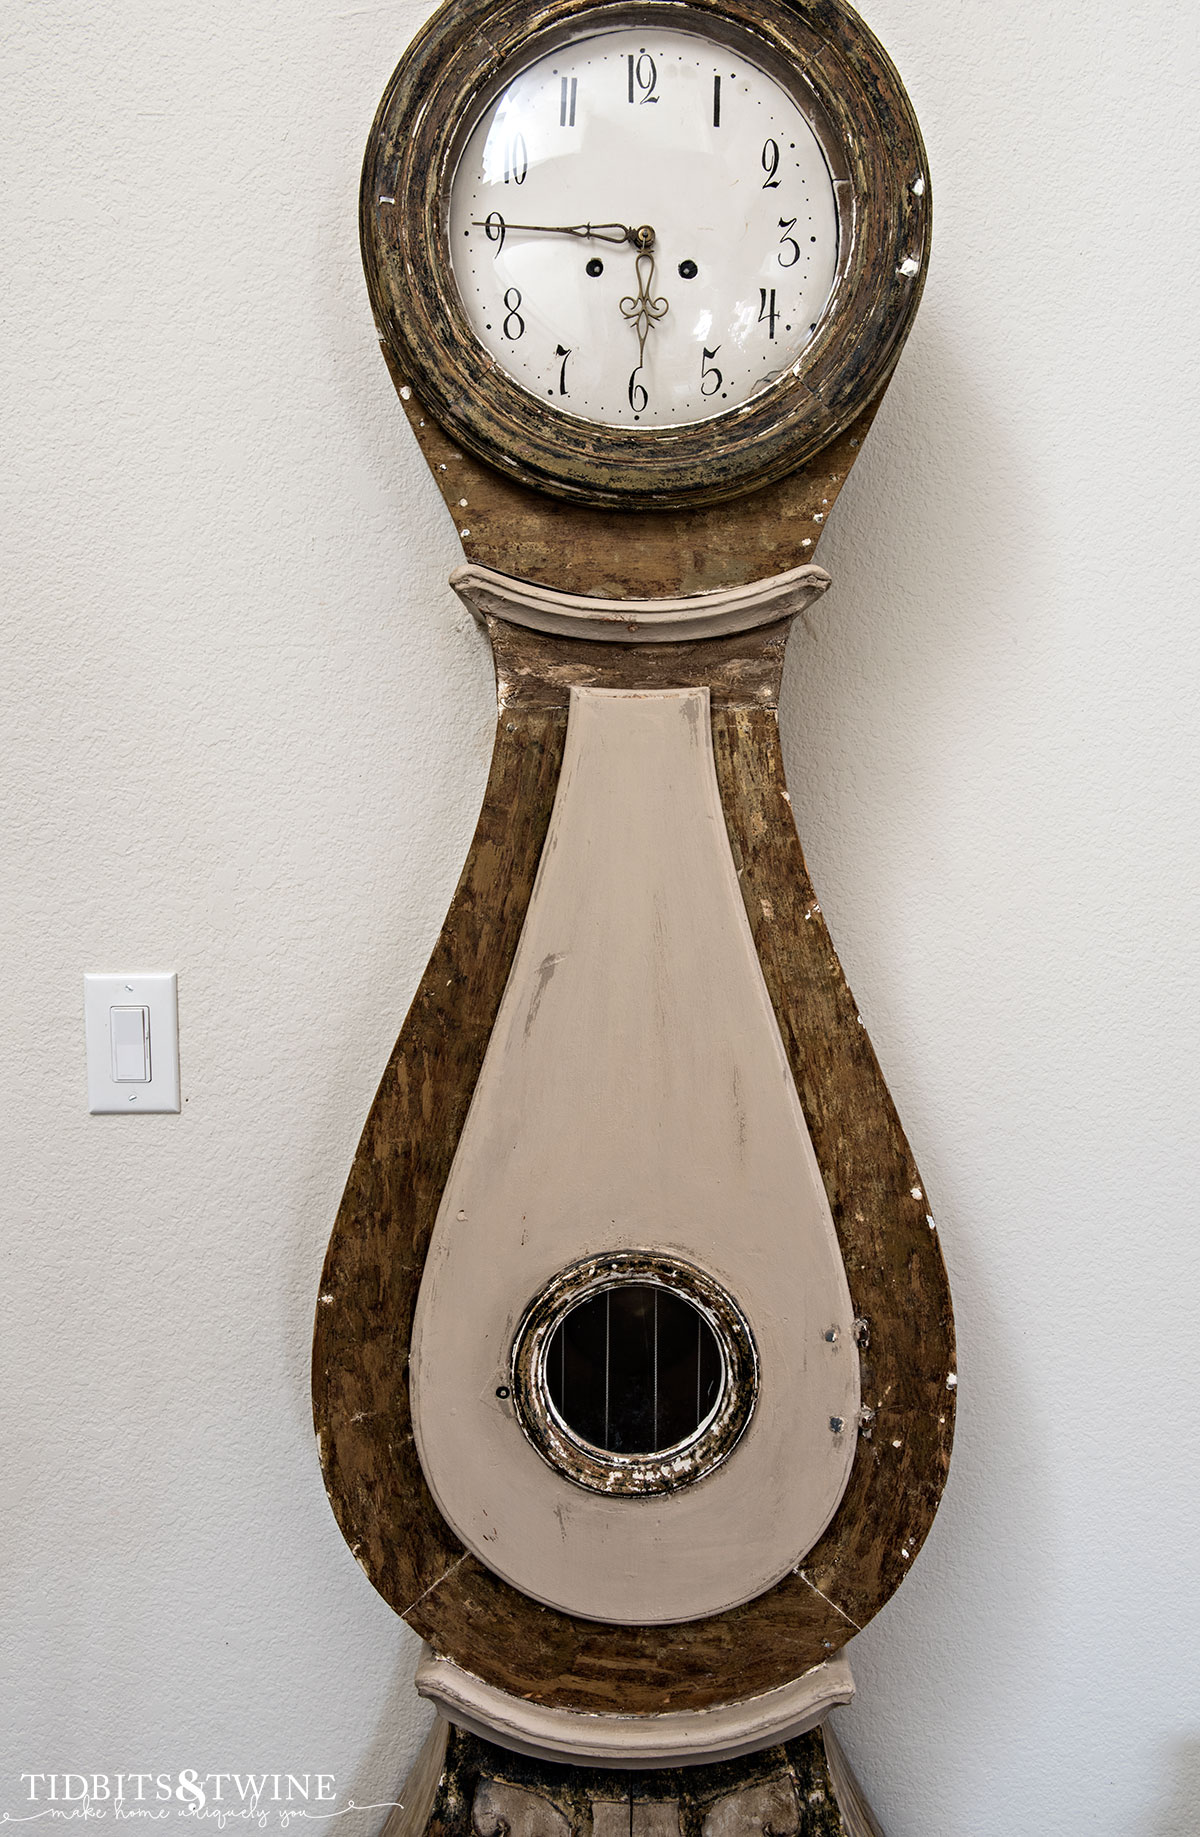
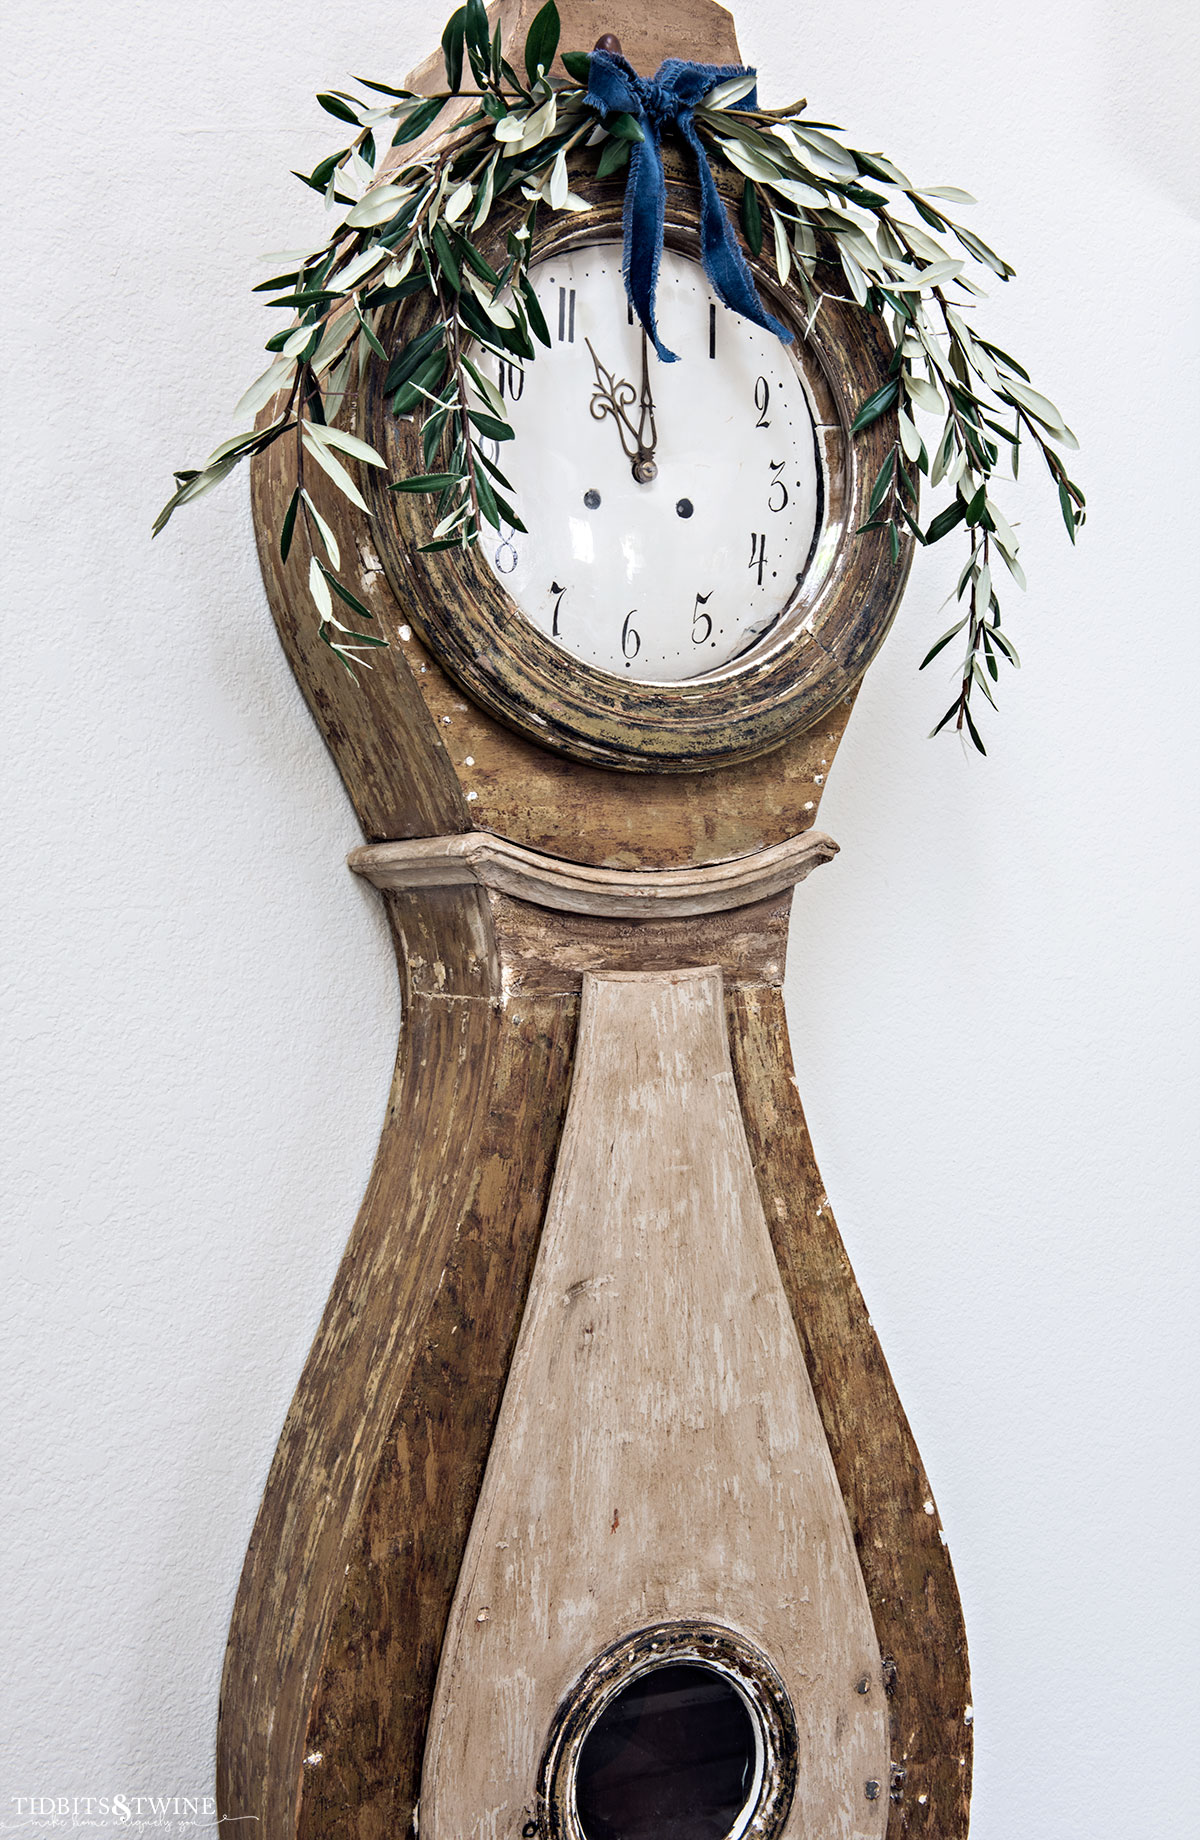
My new and improved antique mora clock
I’m happier with this color scheme than the original orange so that makes this project worth it for me. While I hadn’t originally planned to use multiple colors, I’m glad I did because this chippy finish now matches the rest of the clock better!
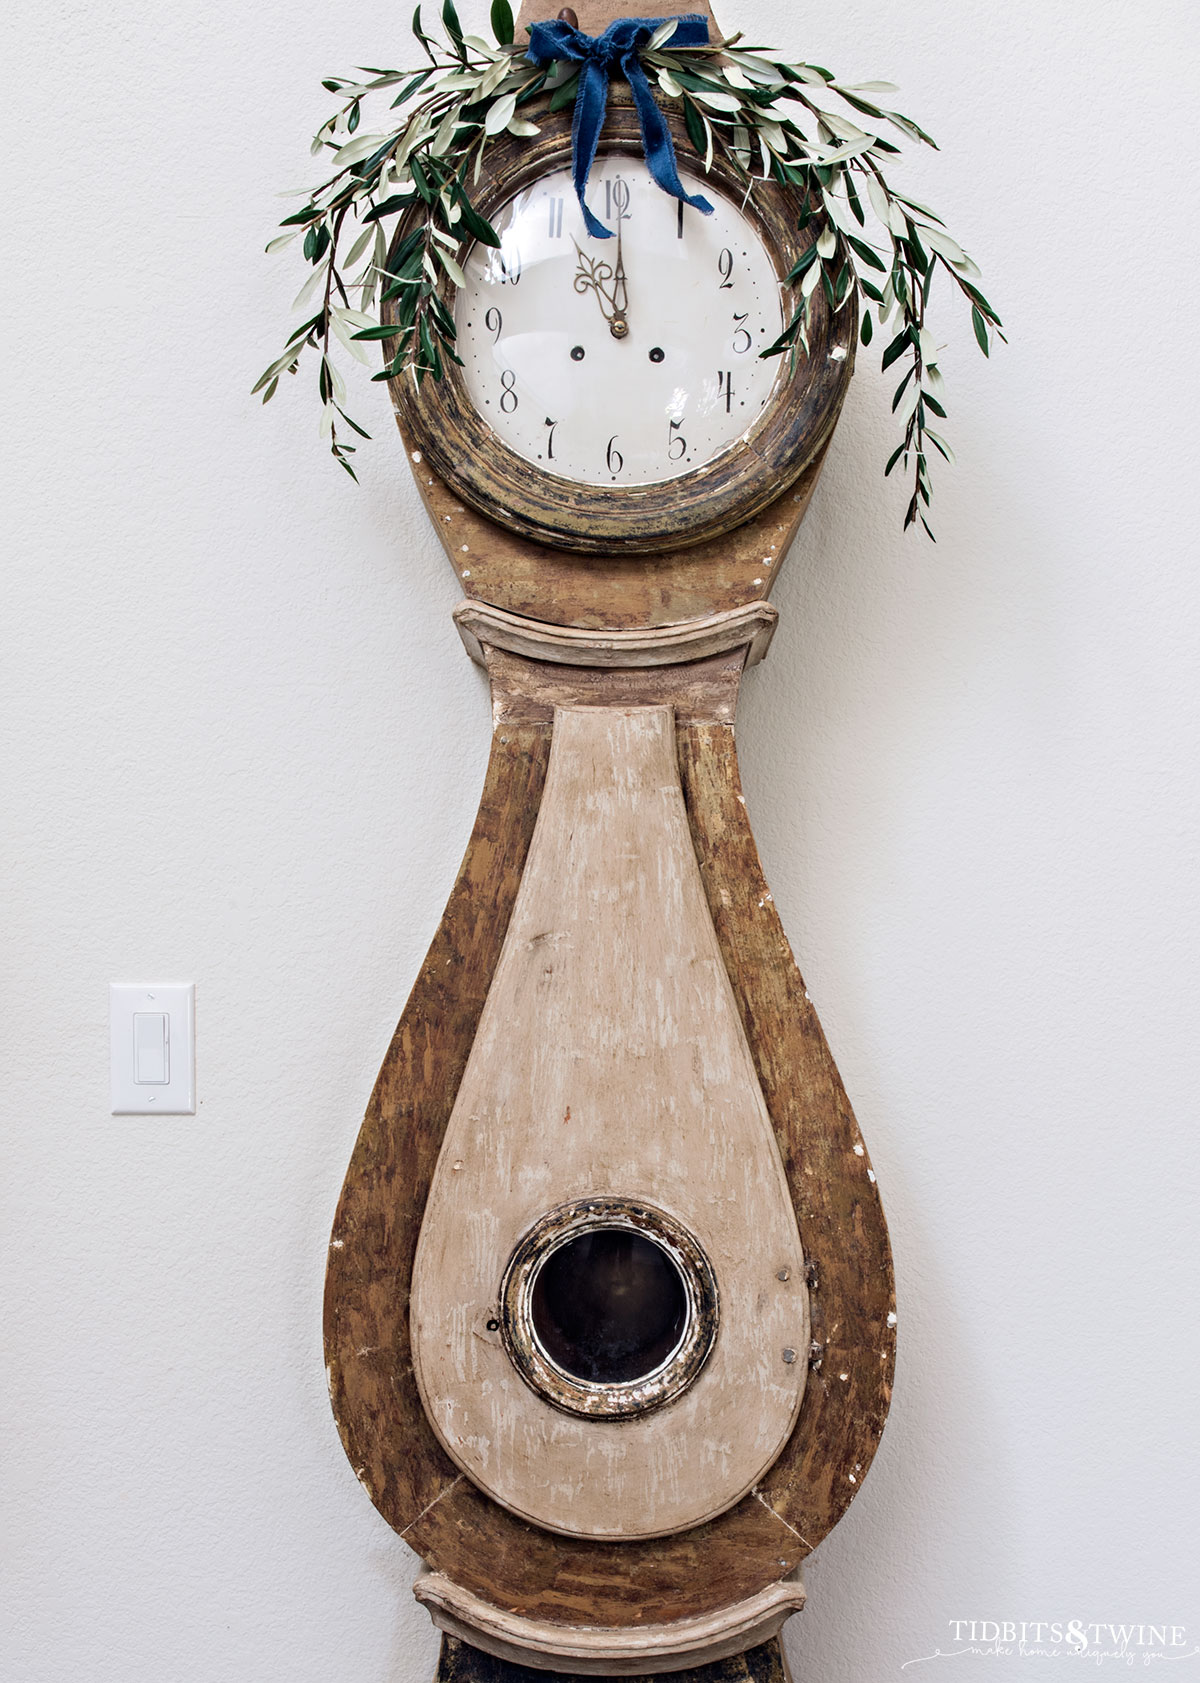
I added a swag of faux olives to the top just for some interest. Perhaps I’ll change it seasonally…

Join the Community
Let’s keep in touch! Get exclusive artwork plus the latest news delivered directly to your Inbox!
It is funny/sad how we stress out over decisions like this. I do it all the time, lol. You rescued this piece and gave it loving care and a new home. It isn’t rotting in the back corner of a shop or in a landfill. It gives you joy. Actually, your story of saving it and loving it, gave me joy, so thank you!
It does bring me joy! And more now that it’s not orange anymore, lol!
I agree! You preserved the original look beautifully! I stress over paint or refinish or leave as well but you made it look wonderful! Great job.
Thank you so much, Sherry!
I think it looks beautiful! You did a wonderful job of painting it while staying true to the original look of the clock. Honestly, we spend so much stressing about changing from the original look of antiques, but rarely would you be able to retire on what you could sell it for if it still had the original finish. It’s gorgeous and you’ll enjoy it for many years to come!
Lol! I giggled at your comment because I know my kids don’t want to inherit the clock and you’re right, I can’t retire off of it! I should have painted it years ago!
I love the new colors of your Mora clock… you will enjoy its new look when you are relaxing in your den…
Thank you, Teri!