Learn how to make a paper mache bowl – the hottest trend for 2022! All the details you need for this easy and inexpensive project.
Do you recall the Trends for 2022 that I shared with you earlier this year? Well, one of them was texture, and that trend just keeps on coming!
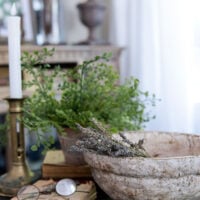
Rustic, textural decor is very “in” right now. It seems that every brand is featuring rustic decor of some sort. Literally, every store seems to have their version of a paper mache bowl right now. It’s like the little black dress of home decor.
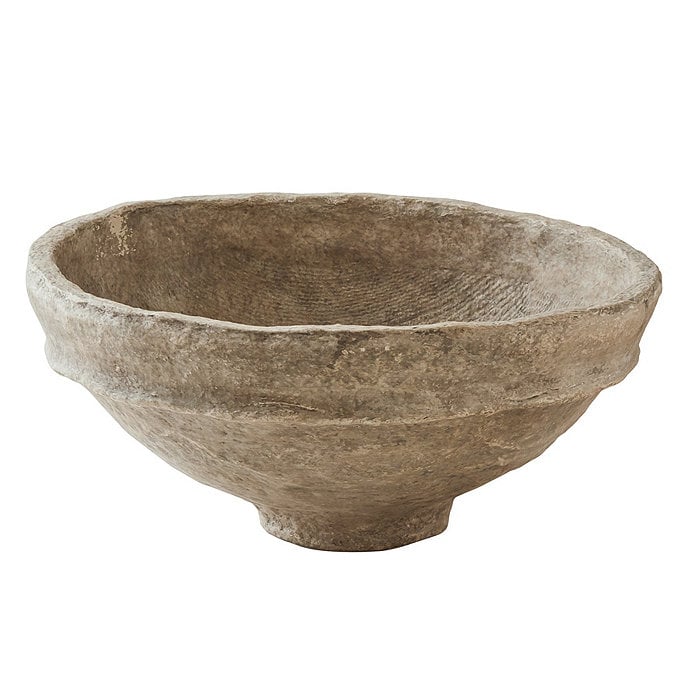
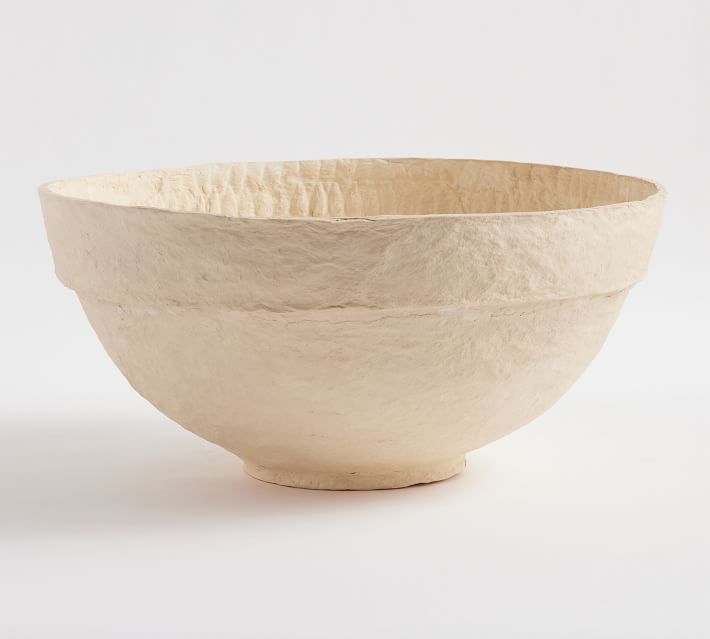
Pottery Barn is promoting their version quite a bit. It’s a simple large, white paper mache bowl for almost $40. Restoration Hardware has a more rustic version sold in a set of 3 for $330!
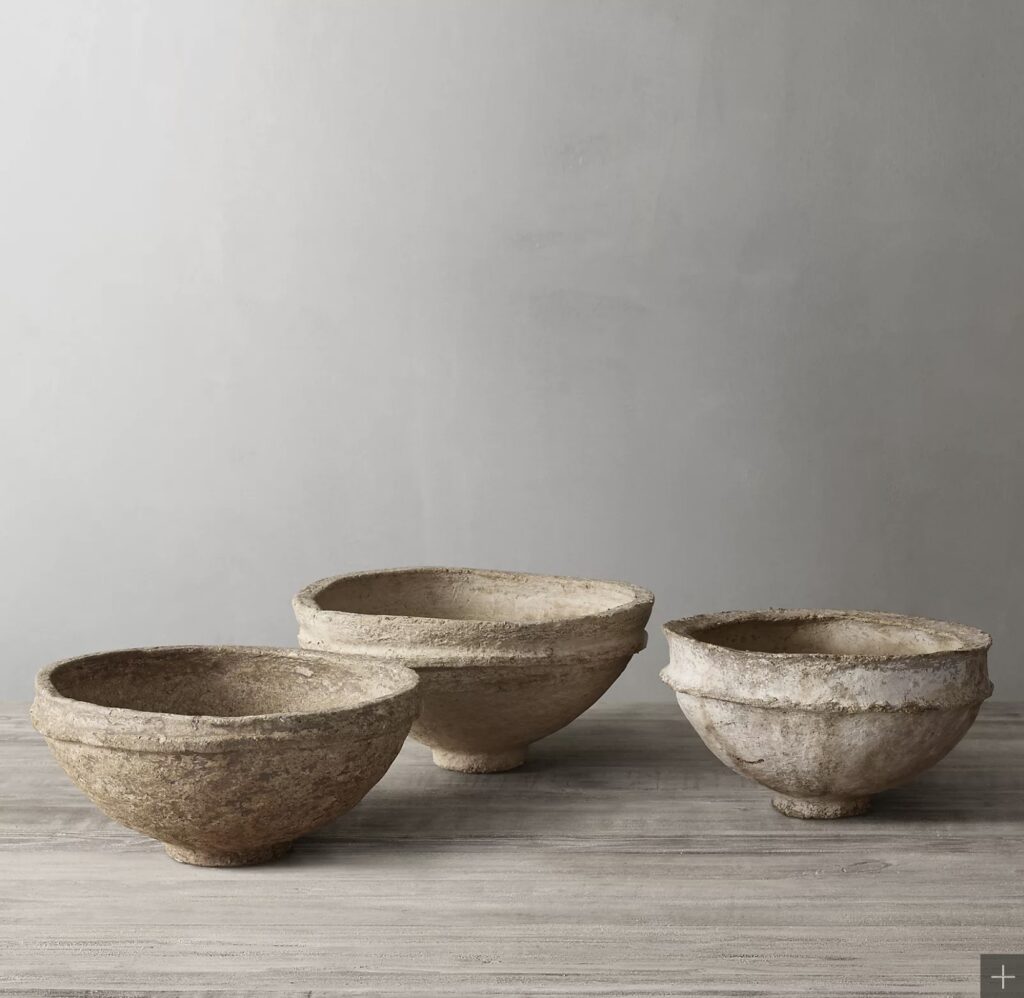
Each retailer’s bowl varies slightly but the one thing they all have in common is that they’re expensive! Especially when you remember that they are just paper mache!
DIY Paper Mache Bowl
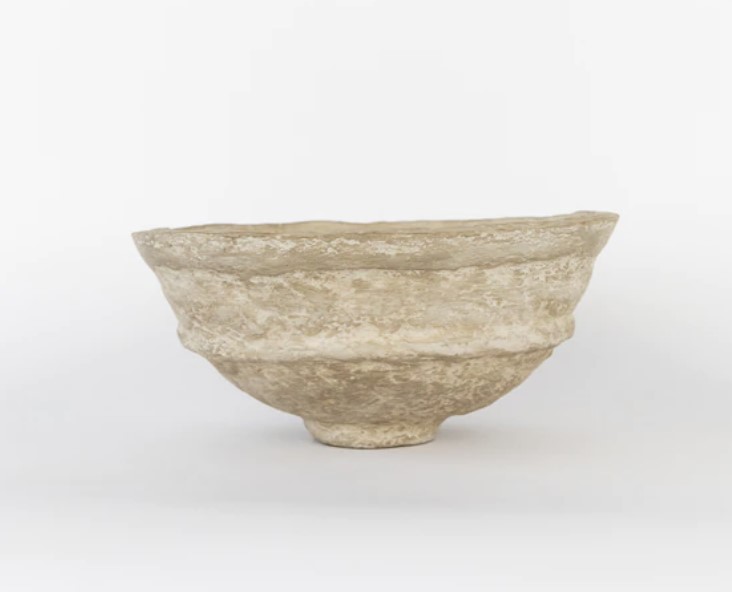
Since it’s been a while since I had a craft project so I decided to DIY a paper mache bowl! I haven’t used paper mache since the 1980s so beginner was my skill level going into this.
I ended up making two because I broke my first one, but I learned from my mistake and am sharing my learnings to save you the headache!
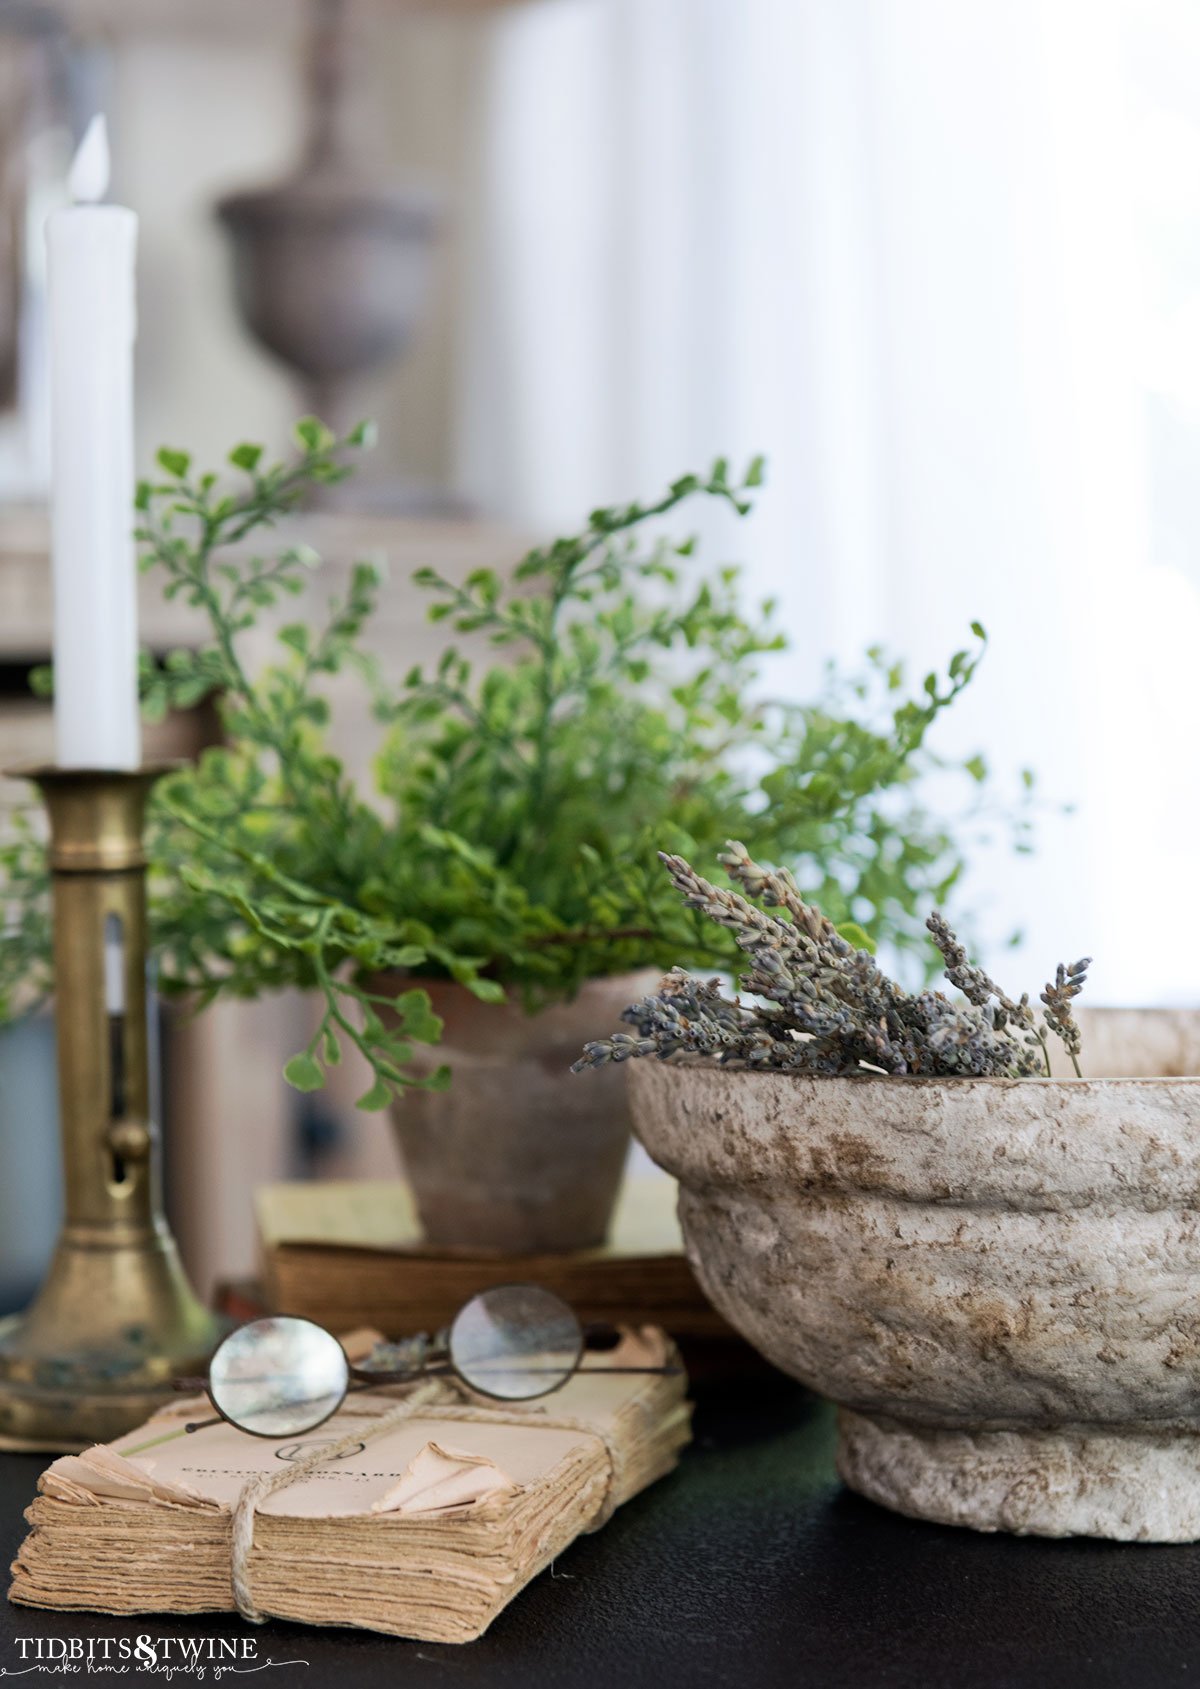
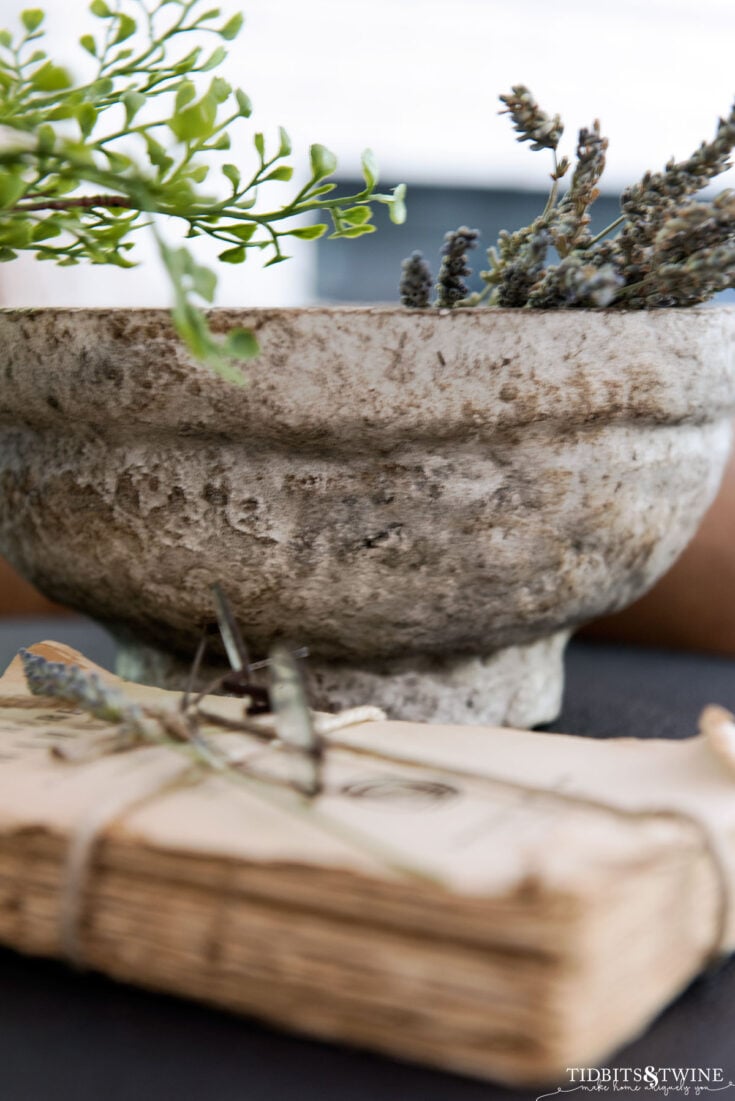
Is my bowl perfect? No! But it’s paper mache and is supposed to have a rustic look, so I consider its imperfections as part of its character.
Supplies
- Bowl to use as a form
- Plastic wrap
- Cooking spray
- Face mask
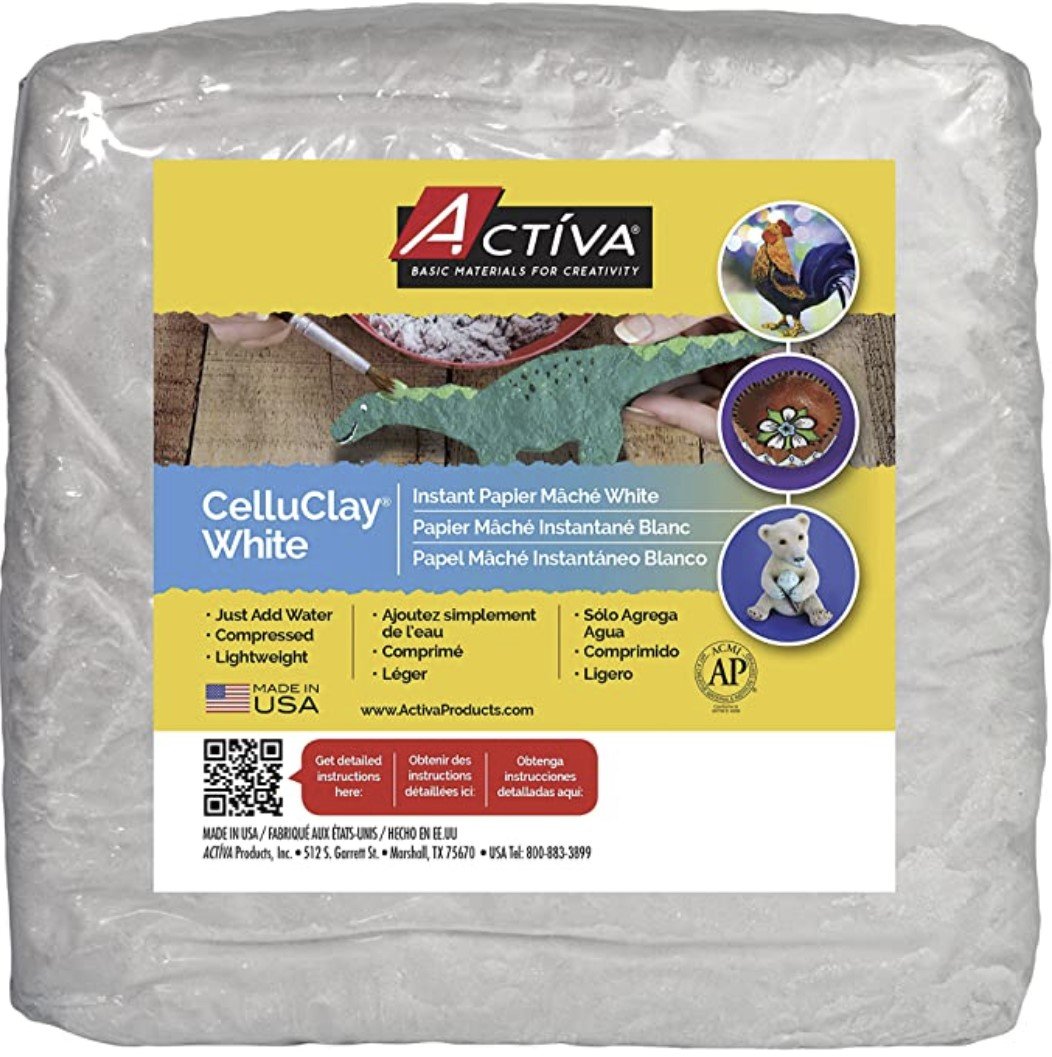
- Paper mache (mix or make your own)
- Mixing bowl
- Misting bottle or spray bottle
- 150 grit sandpaper
- Paint or stain (optional)
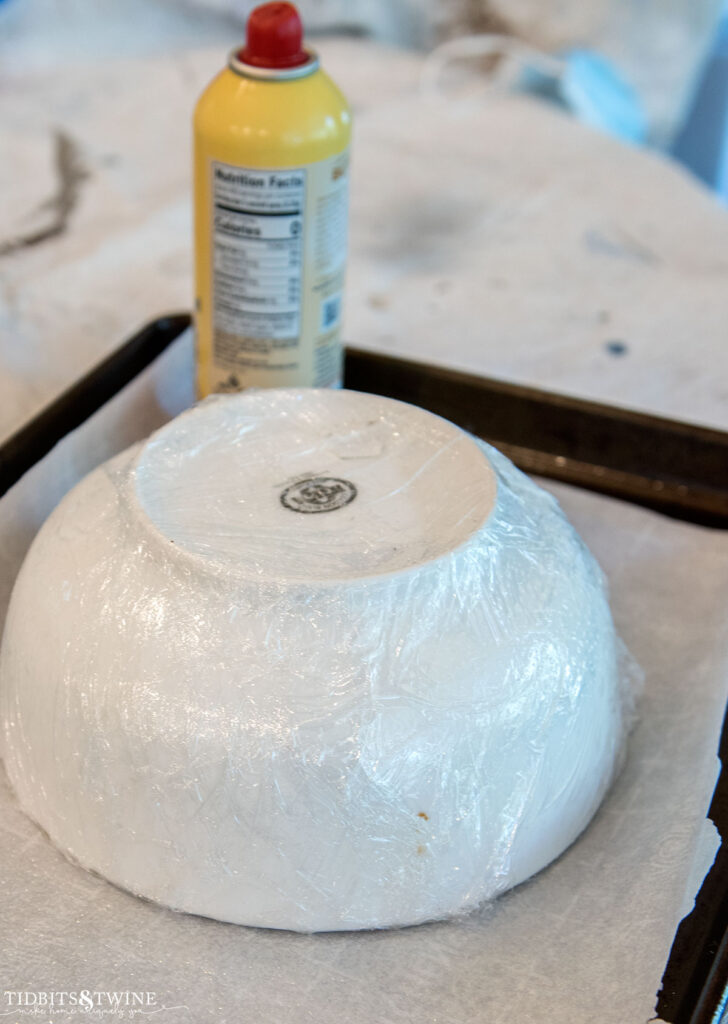
Step 1: Prepare Your Bowl
- Cover your bowl in plastic wrap to help prevent the paper mache from sticking.
2. Once covered, give it a light spray of cooking oil and then blot the plastic wrap with a paper towel so that you have just a thin layer of cooking spray left.
- I didn’t use the cooking spray on my first bowl and despite the plastic wrap, my paper mache stuck and broke when I tried to remove it.
- I used cooking spray the second time but had too much and the paper mache kept slipping off.
- The goldilocks method is to add the cooking spray and then wipe most of it away.
3. Set your prepared bowl on a baking sheet so that you can turn the baking sheet around to reach all sides of the bowl. When the paper mache is wet, you won’t be able to lift or turn the bowl itself, which is why the tray is important.
step 2: Make Paper Mache
You can use strips of paper and soak it using a traditional method. Or you can just buy the mix like I did!
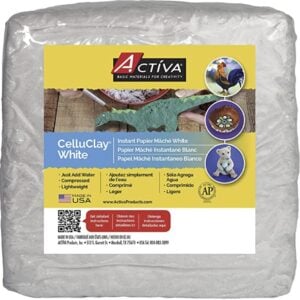
My bowl has a 9.25″ diameter and I used 1/2 of a pound. The mix comes in two, 1 lb bags.
Add water according to the directions. Be sure to wear a mask while mixing because the powder is very lightweight and goes airborne. I mixed mine outdoors and then brought the mixed paste inside to work on my project.
step 3: Form Your Bowl
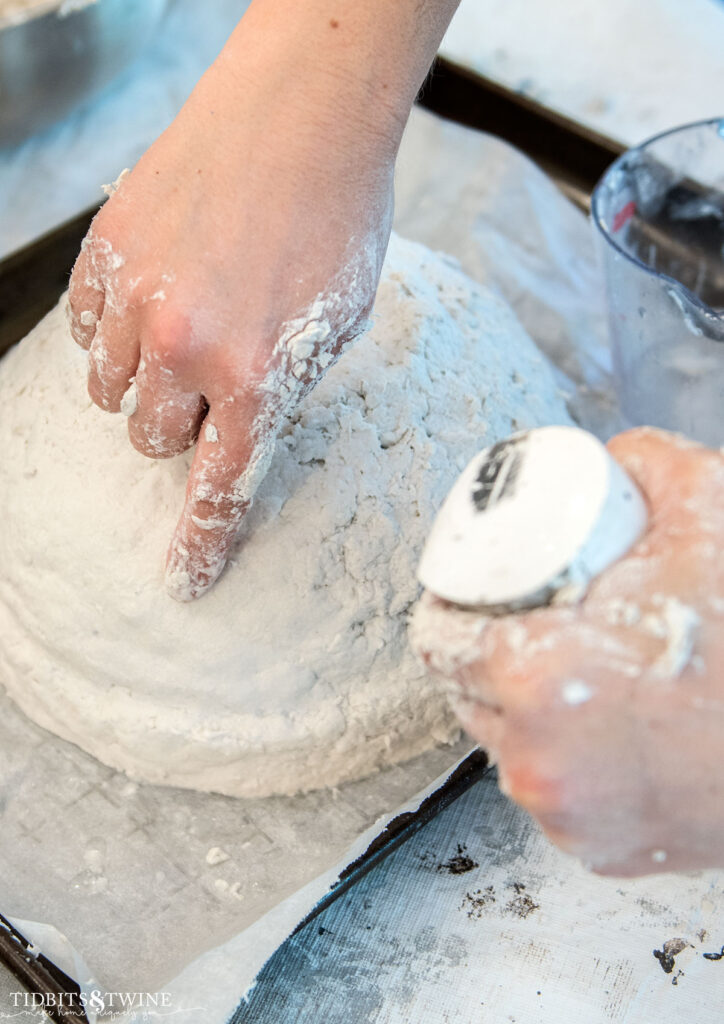
- Add paper mache around your form, trying to make the thickness as even as possible.
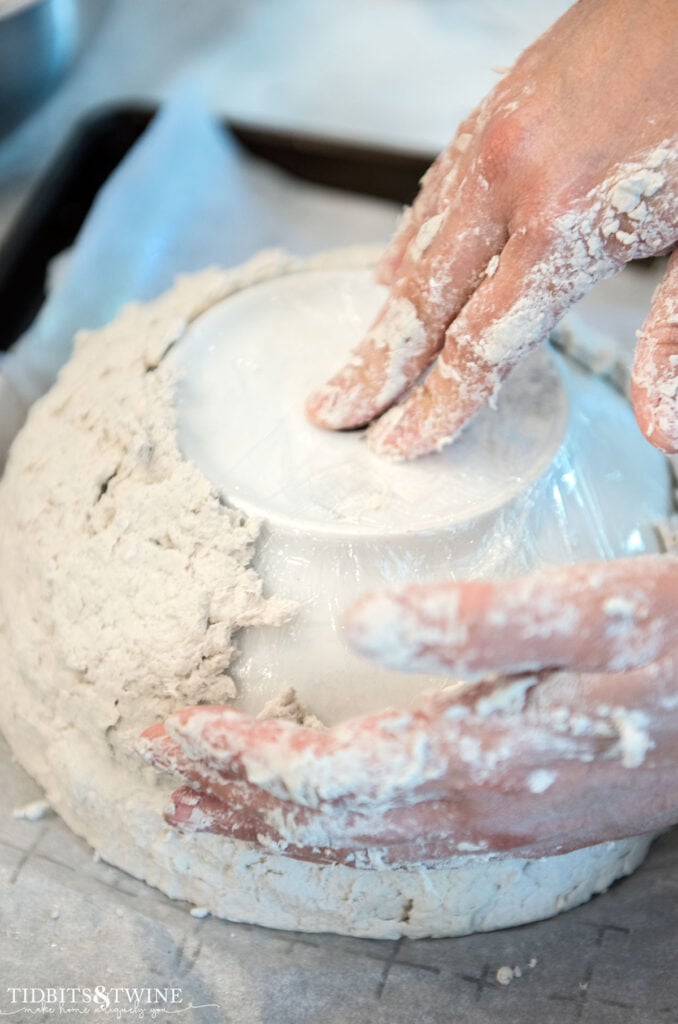
- Use your fingers to create indentations if you want the look of a rim at the top of your bowl.
- For the base, add a ring at the bottom so that your bowl has a short pedestal.
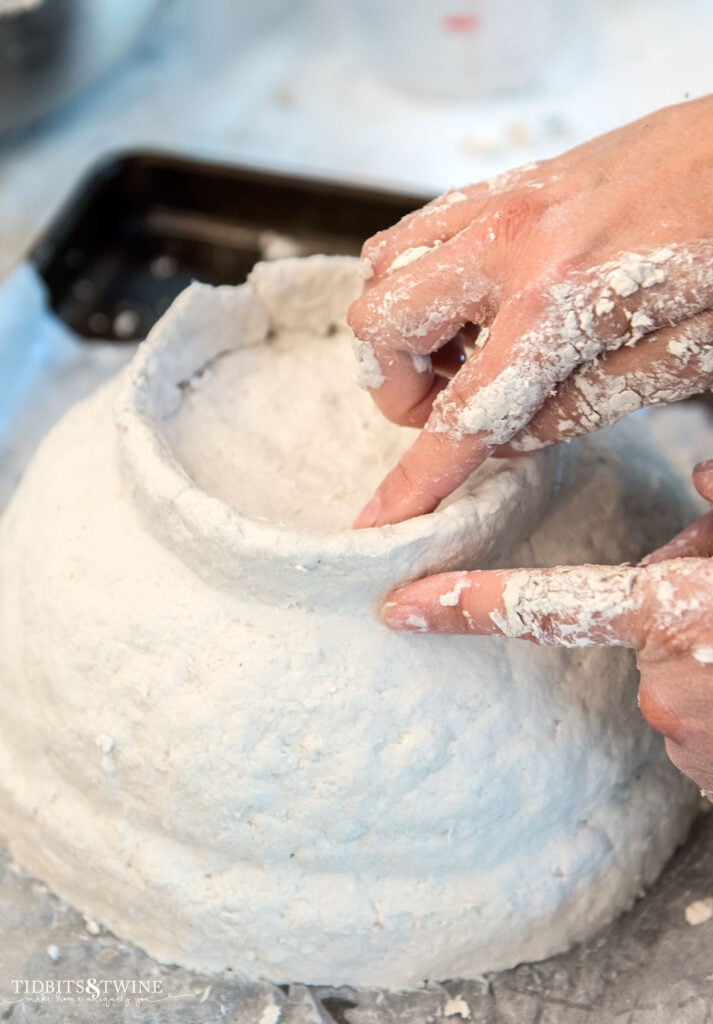
step 4: Smooth Your Bowl
The paper mache mix isn’t super smooth, so your bowl will be super textured unless you smooth it out yourself.
I used a misting bottle to mist the area I was working on. You can then simply run your fingers across your form to smooth the surface a bit. In hindsight, I wish I had smoothed mine out more. It looked fairly smooth when white but once the wax was applied (see below), the texture popped a bit more.
step 5: Let Your Bowl Dry
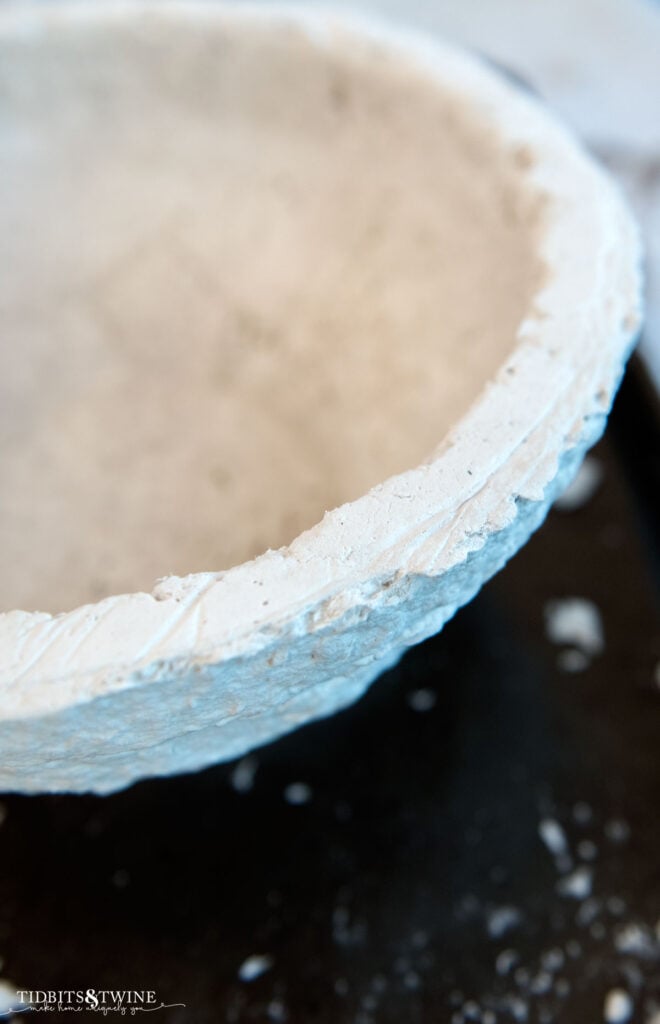
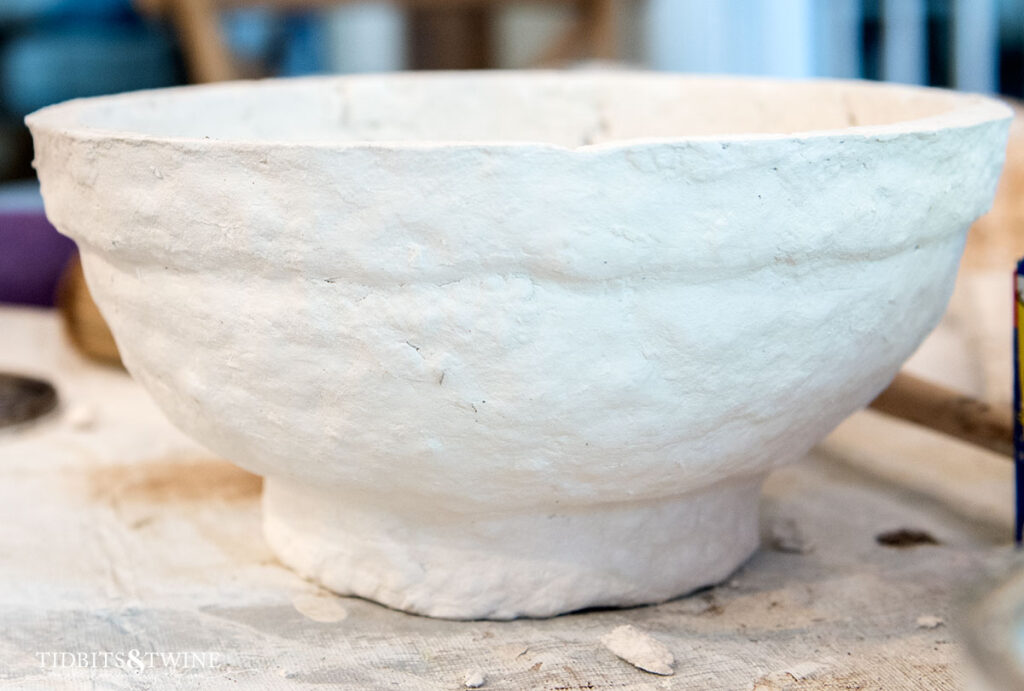
It’s important that you allow your bowl to dry completely before trying to remove it from the mold. As it dries, the paper mache mix turns white.
I placed mine outside in the sun to speed the drying process.
step 6: Sand the Edges
Once dried and removed from the mold, you’ll want to sand any rough spots off of the rim of your bowl. I found that 150 grit sandpaper worked best.
step 7: Paint or Stain for Color (Optional)
If you like the look of the white paper mache, then at this point, you’re done!
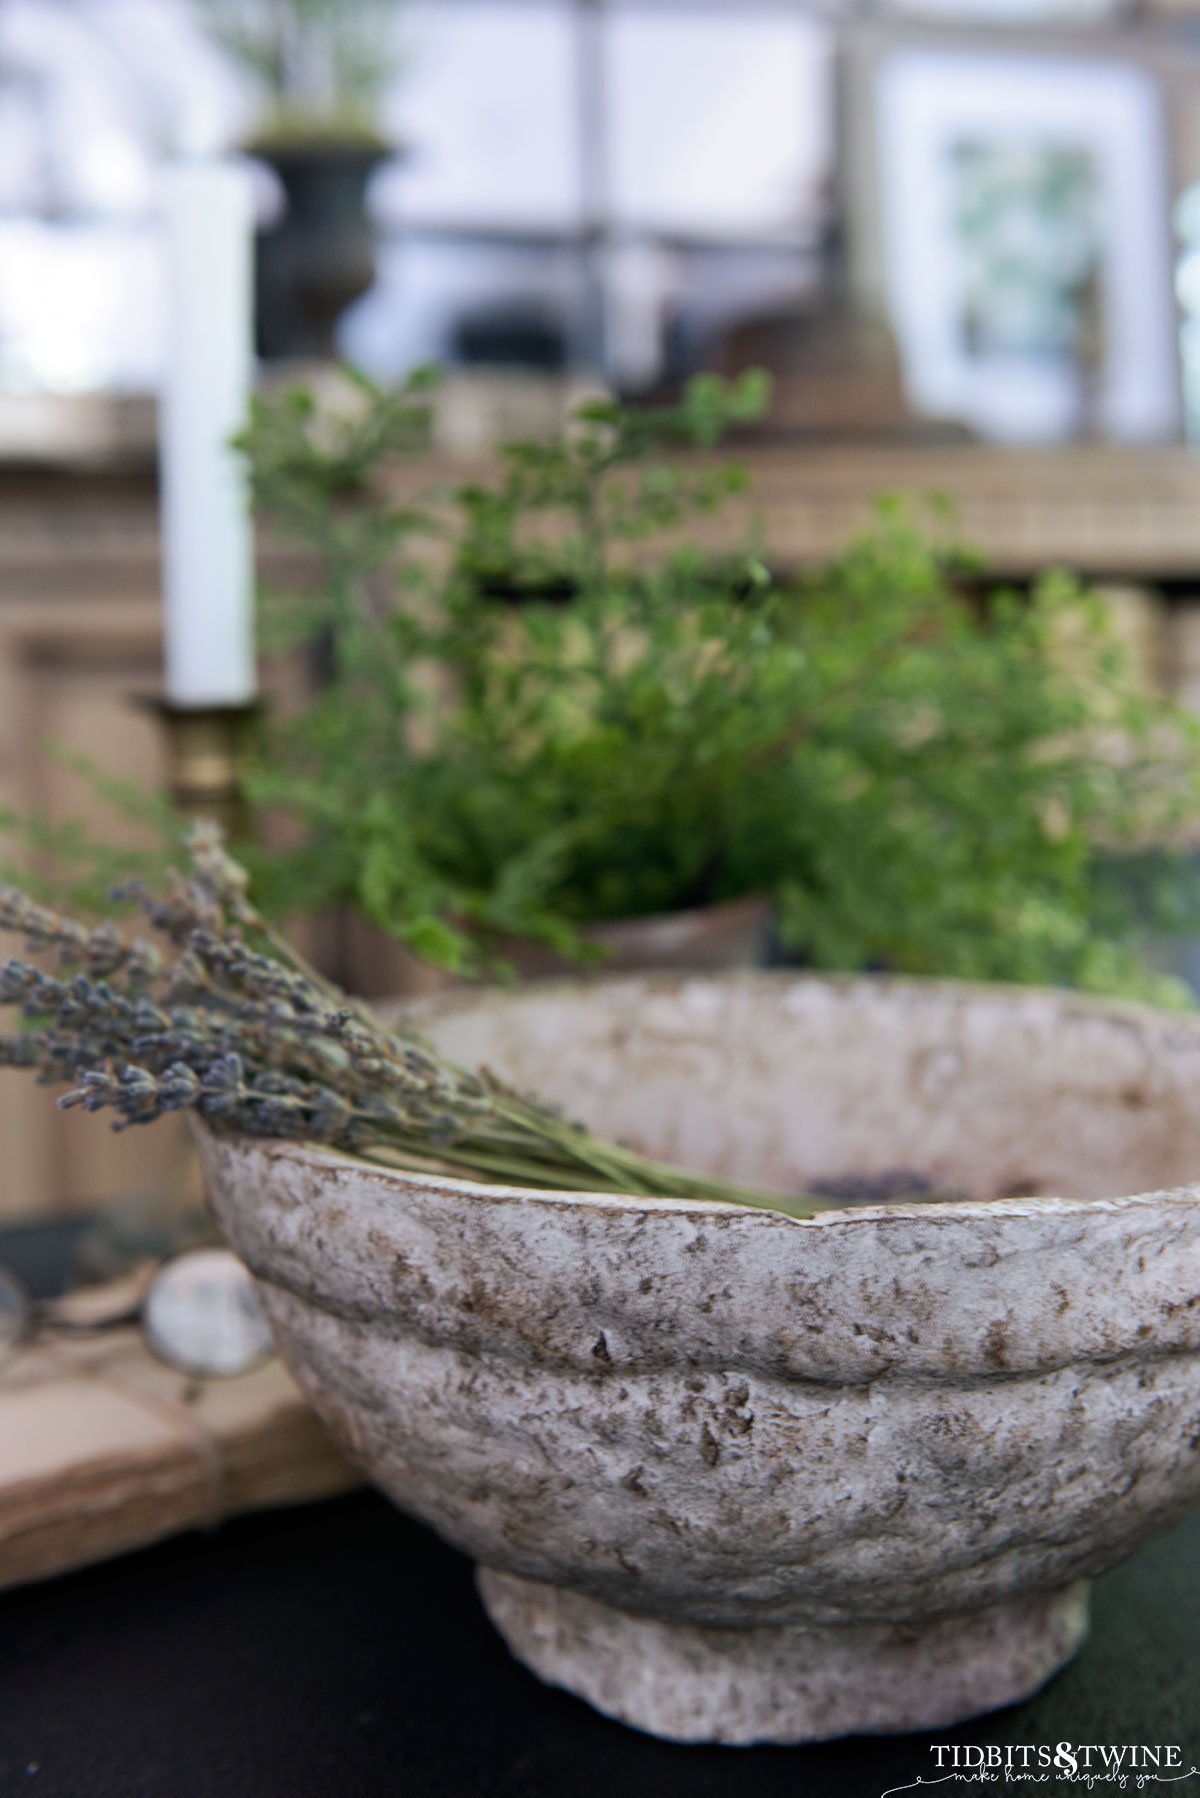
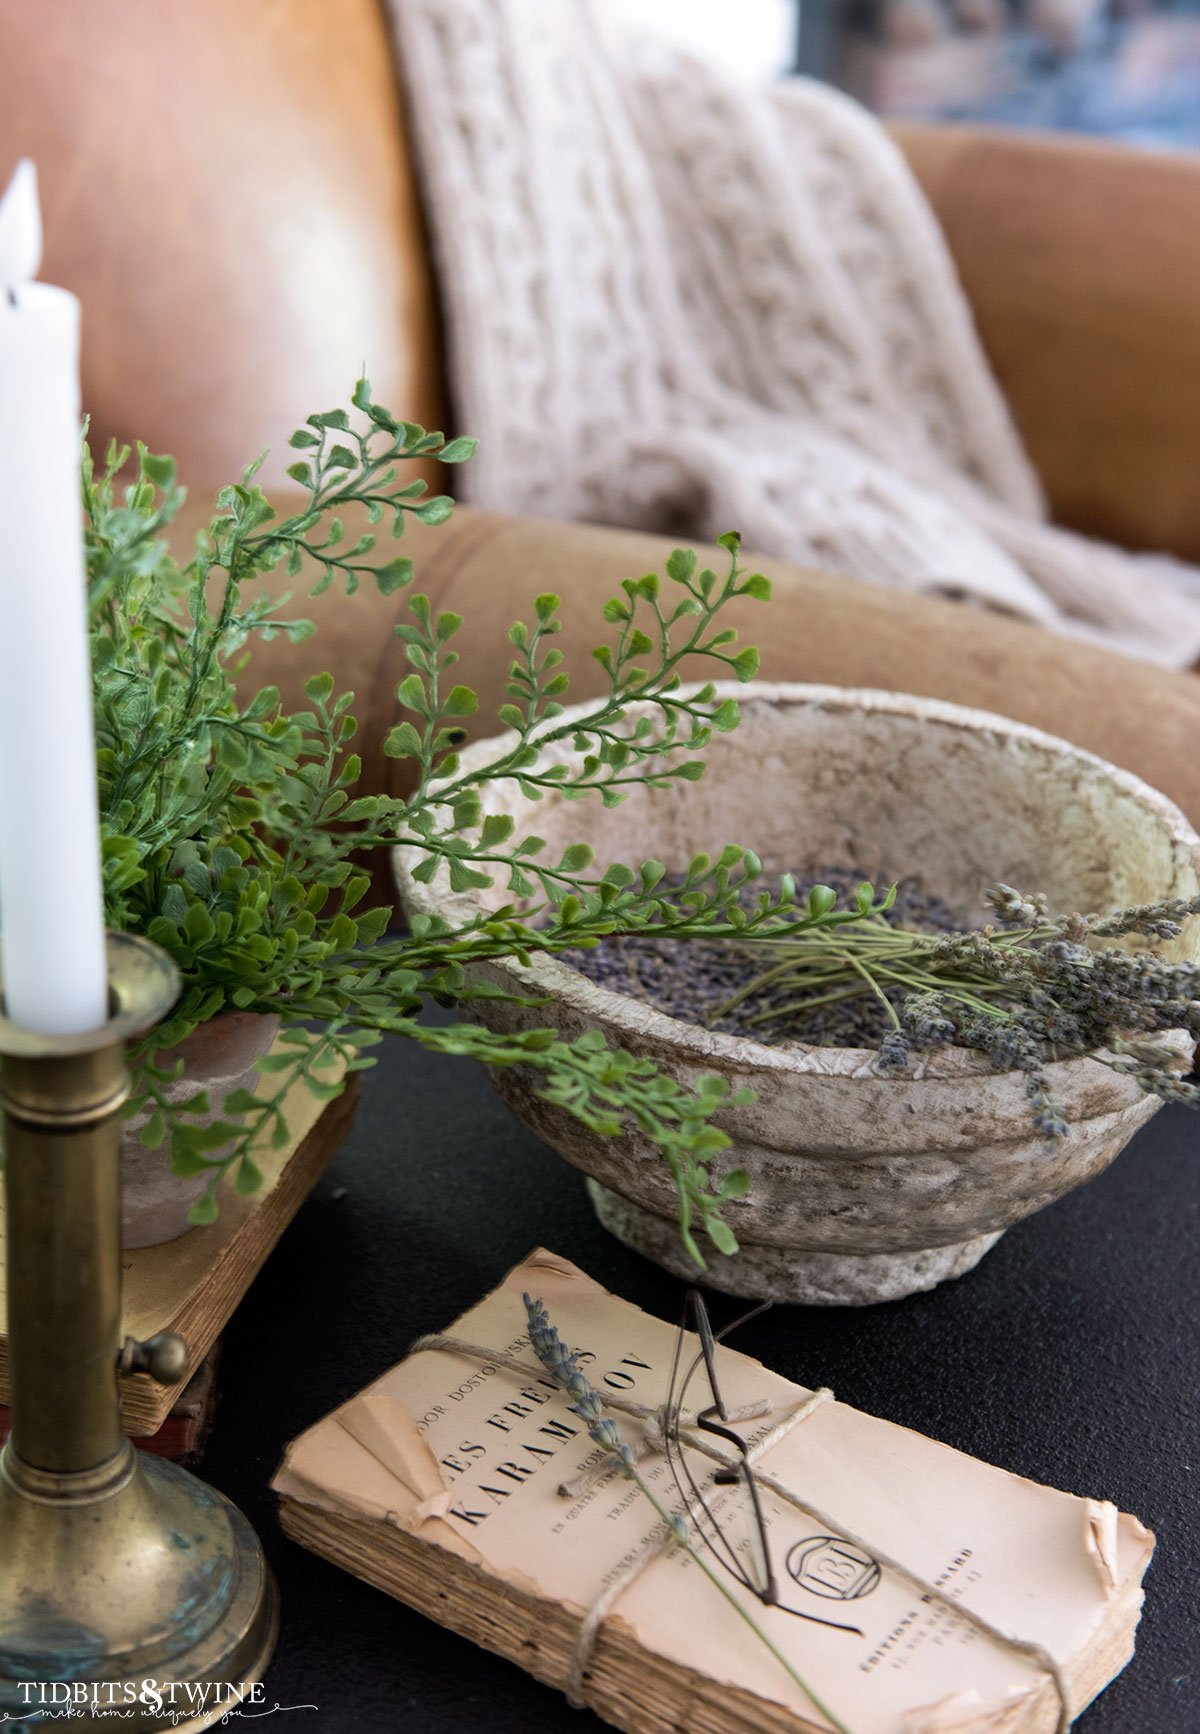
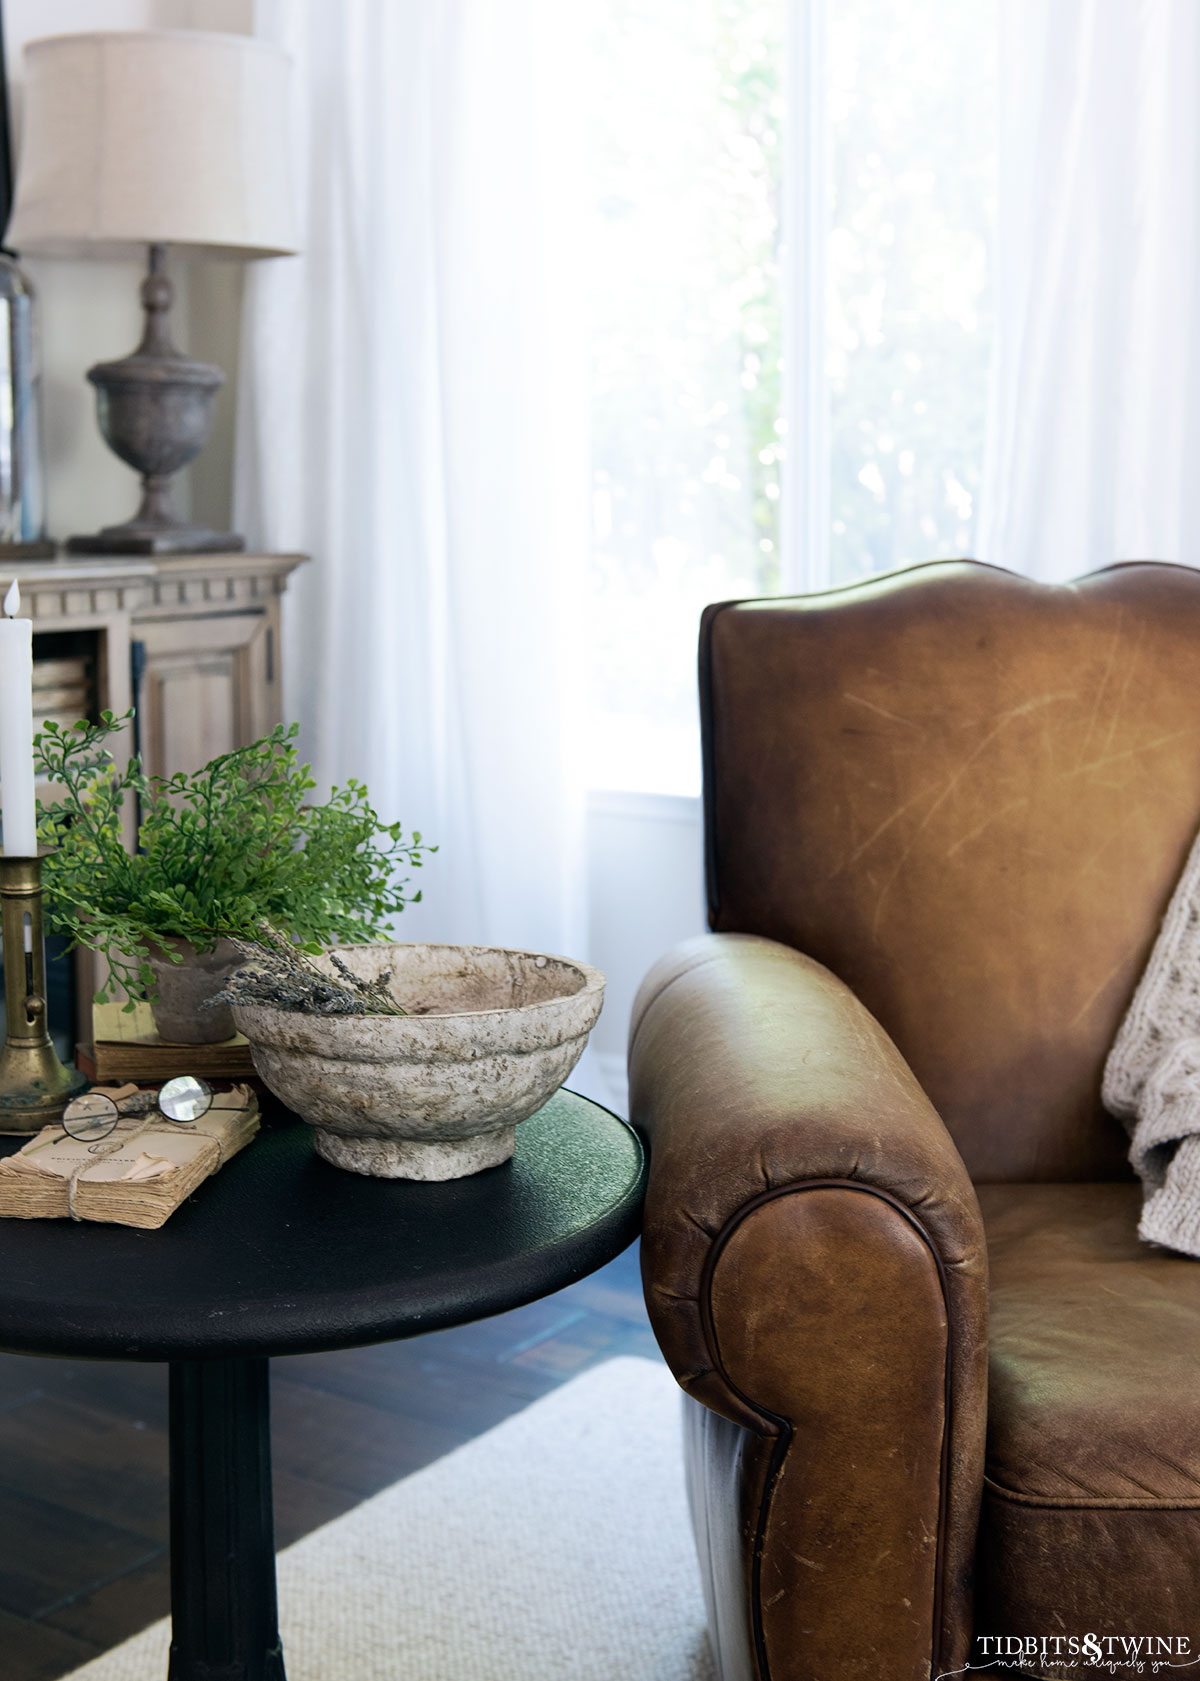
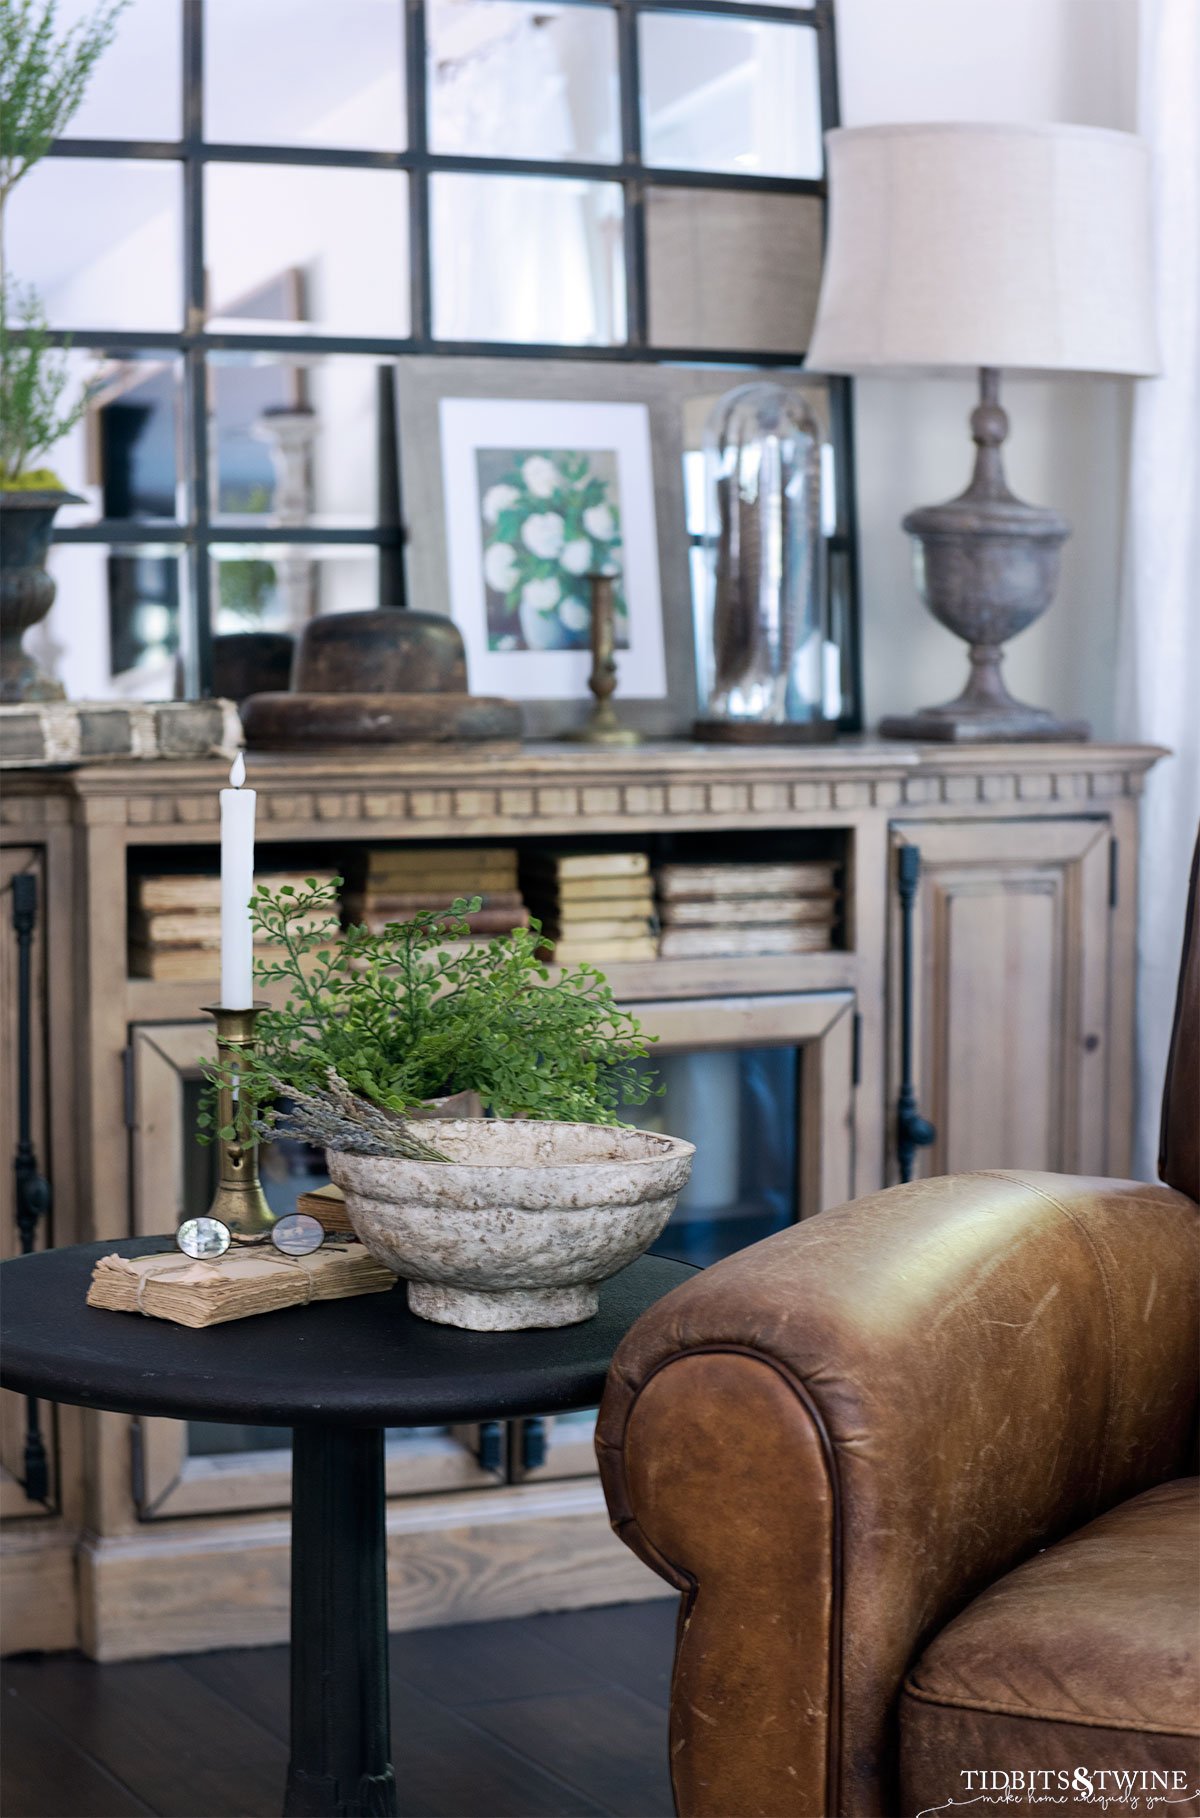
I wanted my bowl to look a bit closer to the RH style, so I decided to add a bit of color. While I could have used paint, I chose to use a mix of Annie Sloan Dark Wax and Black Wax. I just applied the wax using a bristle brush in various places to give the bowl a mottled look.
If you do end up using wax, know that it’ll sit on the high spots and give a lot of contrast.

This is actually a fun project and something you could do with kids. If you use a mix like I did, you can work on a bowl and they can make their own project!
/
How to Make a Paper Mache Bowl
Learn how to make a paper mache bowl – the hottest trend for 2022! All the details you need for this easy and inexpensive project.
Materials
- Bowl to use as a form
- Plastic wrap
- Cooking spray
- Face mask
- Paper mache (mix or make your own)
- Mixing bowl
- Misting bottle or spray bottle
- 150 grit sandpaper
- Paint or stain (optional)
Instructions
- Cover your bowl in plastic wrap to help prevent the paper mache from sticking.
- Once covered, give it a light spray of cooking oil and then blot the plastic wrap with a paper towel so that you have just a thin layer of cooking spray left.
- Add paper mache around your form, trying to make the thickness as even as possible.
- Use your fingers to create indentations if you want the look of a rim at the top of your bowl.
- For the base, add a ring at the bottom so that your bowl has a short pedestal.
- Smooth your bowl. I used a misting bottle to mist the area I was working on. You can then simply run your fingers across your form to smooth the surface a bit.
- It’s important that you allow your bowl to dry completely before trying to remove it from the mold. As it dries, the paper mache mix turns white.
- Once dried and removed from the mold, you’ll want to sand any rough spots off of the rim of your bowl. I found that 150 grit sandpaper worked best.
- Optional - paint or stain your bowl. I wanted my bowl to look a bit closer to the RH style, so I decided to add a bit of color. While I could have used paint, I chose to use a mix of Annie Sloan Dark Wax and Black Wax.
Set your prepared bowl on a baking sheet so that you can turn the baking sheet around to reach all sides of the bowl.
Make paper mache or use the mix and add water per the package instructions
Recommended Products
As an Amazon Associate and member of other affiliate programs, I earn from qualifying purchases.
Ideas for Decorating with a Paper Mache Bowl
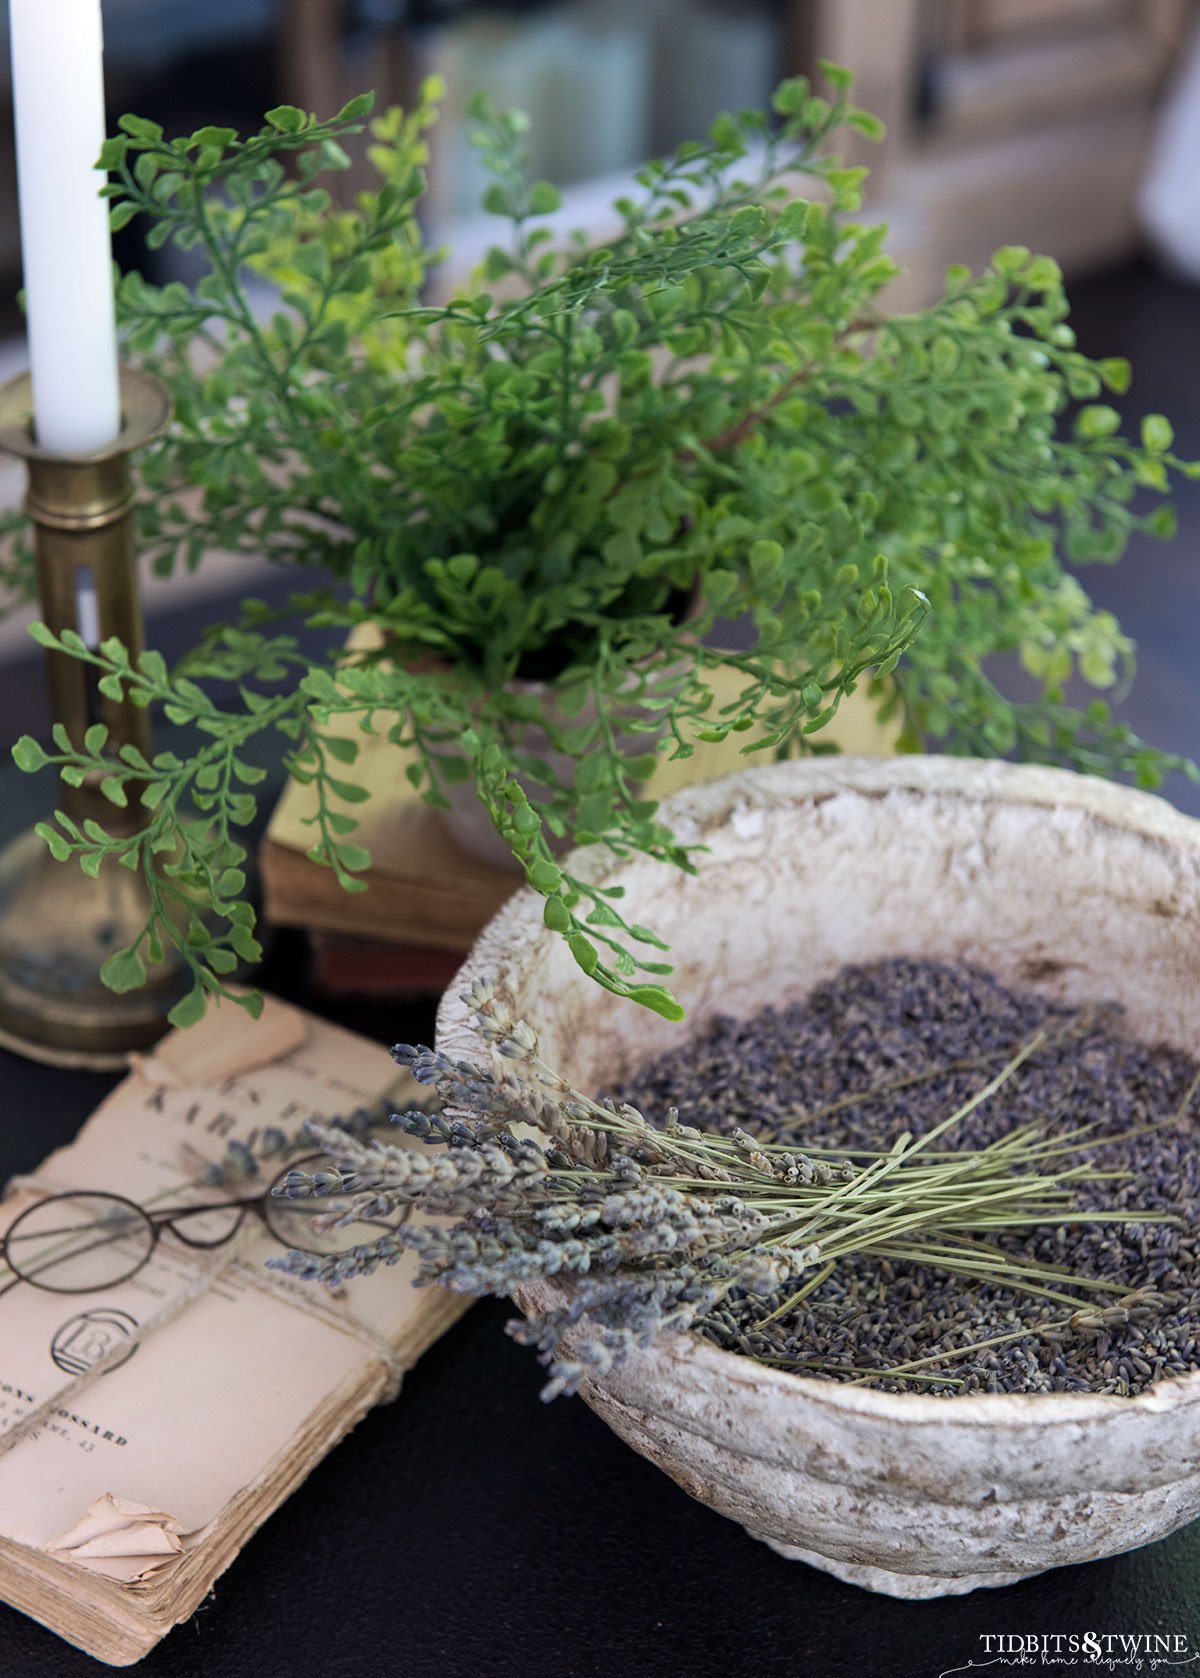
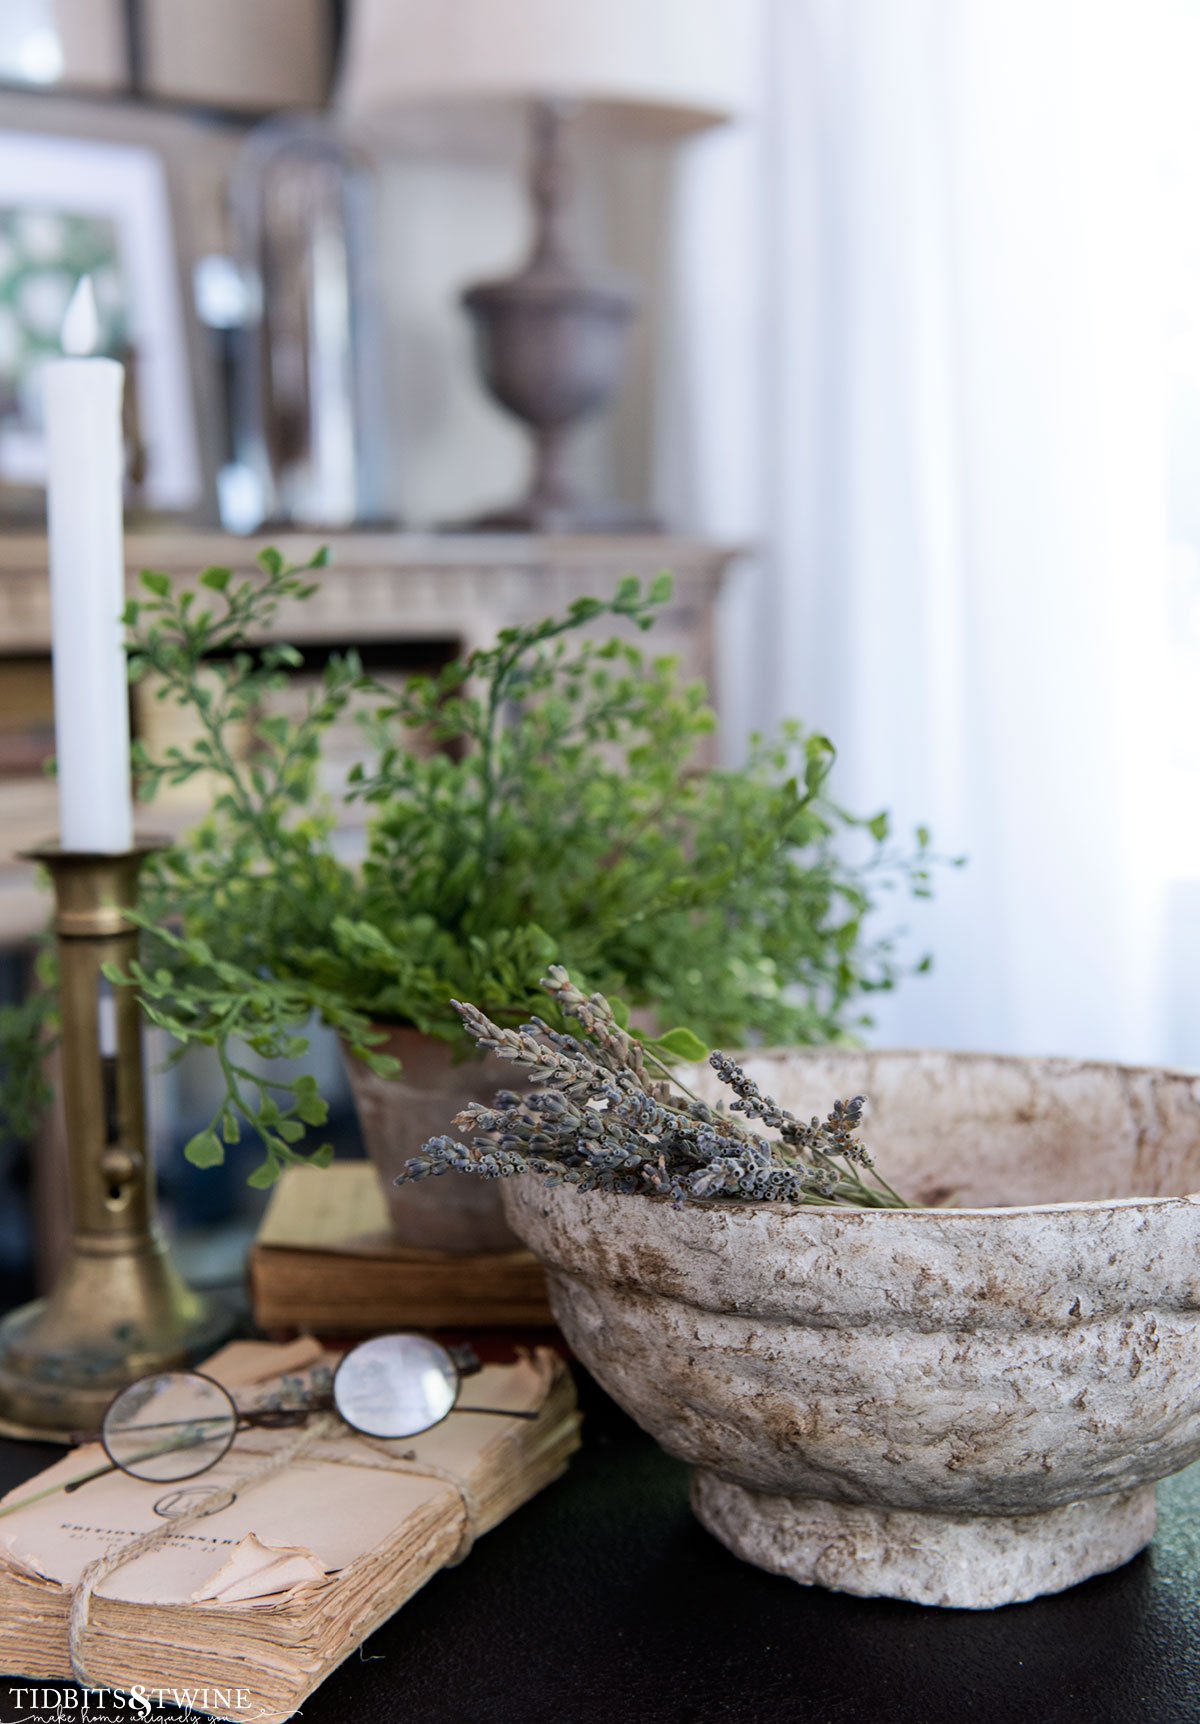
The simplicity of a paper mache bowl allows it to beautifully stand on its own, or highlight objects it holds. Whether you antique yours or leave it plain, it’ll have a unique shape that creates a decorative display.
Paper mache bowls are for indoor use only and shouldn’t be used for anything that holds moisture. If you do put a plant in the bowl, ensure to put a trade inside the bowl first.
These bowls are great on coffee tables or console tables to hold remotes, beads, pinecones, moss, and more. Or you could use it to display a collection of feathers, marbles, scrabble tiles, ornaments, etc.
But again, they look good all by themselves, so you don’t even have to put anything in your bowl!
I currently have lavender buds in my bowl, but I’ve also used it for moss and scrabble tiles.
More Decorating Ideas
- DIY “Restoration Hardware” Look Using Paint
- 25+ Beautiful Ideas for Decorating with Dough Bowls
- Coffee Table Styling – 6 Design Approaches
- French Country Coffee Table Makeover

Join the Community
Let’s keep in touch! Get exclusive artwork plus the latest news delivered directly to your Inbox!